UPDATE: The Sewtionary is now a real published book!
Read the announcement post for more info, or order a copy of the Sewtionary from our shop here!
____________
I’m building a Sewing Dictionary (Sewtionary!) to answer all of your burning sewing questions, from A to Z! I started the Sewtionary in October 2010 and will keep on updating it, the more I sew…
As I post on different sewing techniques, I’ll add a link to this page here. This way, they won’t get buried in the archives! This is an easy place to check for information to solve your sewing mysteries.
Click on any of the links to read more!
 ALTERATIONS
Fitting changes made to the pattern before cutting, or to a finished garment to get a better fit. Alterations and fittings are one of the hardest things to master when sewing, but a great-fitting garment is one of the top reasons to sew! Where else can you get custom-fit clothing to your unique body?
Here’s a post I wrote about lengthening or shortening a dress bodice: Altering the Dress Bodice: Lengthen or Shorten Here!
Redrawing A Neckline – Shirt Alterations: Part of the fitting for men series, where I made a men’s dress shirt. Read how to transfer changes from your muslin to the pattern tissue!
Correcting the Collar and Hemline – Shirt Alterations: Just what it sounds like! After changing the neckline, the collar pattern pieces need to be altered to fit. Also, we wanted to change the shape of the hemline slightly, so I explained how to alter the hem as well.
Pendrell Sew-Along #4: Shortening the Blouse Length: How to shorten a blouse from the hemline upwards, demonstrated on the Pendrell Blouse.
Pendrell Sew-Along #6: Princess-Seam FBA (Full Bust Adjustment): How to adjust a Princess-Seam garment for a full bust. I’ll show you the steps involved to add for a fuller bustline, using the Fit for Real People method.
Lonsdale Sew-Along #4: FBA for a Dartless Bodice and Loads of FBA Links. Just what it sounds like! I demonstrate how to make a full bust adjustment on the Lonsdale dress, and list several FBA links to other blogs for reference.
Fitting The O Dress: The muslin for this dress was too, too long! I show you how to shorten the dress from the muslin and make the changes to your pattern pieces.
How to Fix Pooling Fabric at Lower Back: Do you have extra fabric bunching or pooling at your lower back? As if there is too much fabric there, and it needs to be pinched out? I had the same problem – and I outlined the steps I took to fix this fitting issue.
 BUTTONS and BUTTONHOLES
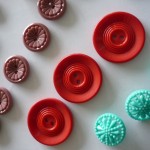
Buttons and buttonholes – you know what these are! Buttons can be made of all kinds of materials, and come in a variety of shapes even though the standard shape is round. Buttonholes can be machine-sewn, hand-worked or bound with fabric strips!
How to mark buttons and buttonholes: A quick and easy way to mark buttonhole and button placement on your finished garment.
How to sew on a button: Step-by-step tutorial showing how to sew on a button, including marking buttonhole placement, sewing on buttons, and making a thread shank.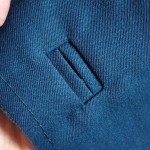
Bound Buttonholes: My Favourite Method. I demonstrate my favourite bound-buttonhole method with lots of photos and instructions. Bound buttonholes are made using fabric strips. You can use matching fabric so they blend in with your project, or use contrast fabric so they’re a focal point.
Never fear the bound buttonhole! It’s a tidy, professional way to make buttonholes in your projects. Perfect for coats and jackets, or tailored dresses and blouses.
Do Buttons Have to Button? I bought a pattern that features decorative buttons, and wondered how everyone feels about non-functional buttons on their sewing projects! Take a look at the comments section to find out.
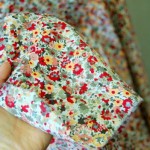 CHOOSING FABRIC
How do you choose fabric for a project? That’s a really good question! On the back of the pattern envelope, there will usually be fabric recommendations listed. Sometimes they’re very specific (ie. Silk Dupioni) and sometimes they’re a little more vague (ie. Medium Weight Woven Fabrics.) Use these recommendations as a guideline to choose a fabric for your project! Think about the drape of your fabric, the weight, and how close you want yours to look like the photo on the front of the envelope.
Lonsdale Sew-Along #2: Fabric Recommendations. For the Lonsdale Sew-Along, I talk about the recommended fabrics on the back of the envelope, and add in my own thoughts and reasons behind each possible fabric option.
Crescent Sew-Along #2: Choosing Your Fabric. Same thing, but for the Crescent Skirt!
For Beginners: Fabric Suggestions for the Pendrell Blouse. The fabrics recommended for the Pendrell blouse are the tricky ones – charmeuse and other slippery fabrics! I came up with a few easier fabric ideas for the blouse.
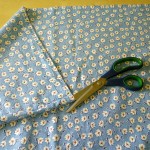 CROSSWISE FOLD
What is a crosswise fold? It’s when your fabric is folded with the raw edges touching, instead of with the selvedges together. If the cutting layouts in your pattern ask for a crosswise fold layout, there’s usually a reason! Often it’s because the pattern pieces are very large, and too wide to fit on your fabric if it was folded the usual way.
Cutting Fabric Using a Crosswise Fold Layout. A quick demo using small pieces of fabric, explaining how to fold your fabric using a crosswise fold instead of the usual lengthwise fold.
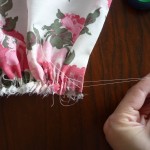 GATHERING
Gathering is fullness created by pulling up threads. The first thing I picture when I think of gathers is a full, puffy skirt or dress but gathers can be used many different ways! Gathers can be used in place of darts for a more relaxed look. Seamlines can be gathered as a design detail – often one seamline is gathered to a straight edge. They’re easy to do, too!
Gathering an Edge Using Machine Stitches: A beginner-friendly guide to sewing gathering stitches by machine, with step-by-step photos.
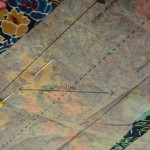 GRAINLINE
What is a grainline? Grainline refers to the lengthwise grain of the fabric. Threads are woven together to form fabric, and the grainline follows the lengthwise woven threads of the fabric. You can find the grainline by measuring from the selvages. Grainlines run parallel to the selvage. The grainline is indicated with an arrow on your pattern pieces, showing you which way to orient the pattern piece when cutting it out. Plaids and stripes, where the stripe and plaid lines are woven into the fabric, not printed on top, show the grainlines easily. Picture a plaid fabric – the lines running up and down the length of the fabric show you where the grainlines are.
Grainlines, and when can you ignore them? A reader asked about when you can ignore the grainlines marked on the pattern pieces. Read the comments to see the answers!
 HEMMING
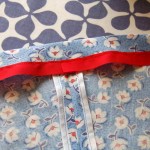
Hemming describes the edge finish at the end of our garments. It could be on the lower edge of a skirt, on the cuff of a sleeve, or at the bottom of your pants. All of these are hems! There are many ways to sew a hem.You can sew it by hand or with a sewing machine, and apply a wide variety of trims to add interest to your hemlines!
Hemming with seam binding is one way to hem your sewing projects. As part of the Lonsdale Sew-Along, I hemmed my dress using contrasting seam binding. Learn how to hem your projects using seam binding!
 LACE
LACE
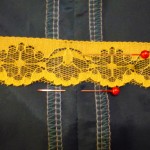
Lace is a decorative trim used on garments. Lace can be made from cotton, nylon or polyester, with an open-weave design. Floral motifs are common for lace.
Lace-Trimmed Lining: A Pretty Touch: Add lace trim to the lining of your next dress project! It’s easy to do, and adds a fun peek of femininity when your skirt moves.
Pendrell Sew-Along #8: Bonus Post! Cutting Scalloped-Edge Lace: How to cut the Pendrell Blouse, using scalloped-edge lace. The same theory can be applied to any garment cut from scalloped edge lace.
 MEASURING
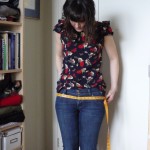
Measuring yourself is an important first step in sewing! If you measure correctly, you’ll choose the right size for your pattern, and be able to make the adjustments for your body.
Measuring and Choosing Your Size: Part of the Pendrell Sew-Along, I demonstrate how and where to measure yourself for a blouse, with photos for each measurement. Plus, lots and lots of reader questions and answers!
 MUSLIN
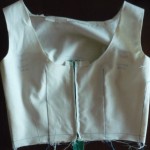
Muslin is a natural cotton fabric used for making test garments. Or, muslin is a word referring to a test garment used to check the fit and design lines before cutting into the real project.
How to make a muslin for a dress bodice: I walk through the steps of muslin-ing just the bodice part of a dress.
Why you should make a muslin: My pro-muslin post, plus some very interesting comments and debate on whether making a muslin is worth it or not. What do you think?
Muslin-ing a Man’s Shirt: The first post on my men’s shirt project muslin. For more, check out Muslin-ing a Man’s Shirt Part Two.
 PEAR-SHAPED
Pear-shaped bodies have small waists and wide hips – similar to the shape of a pear! Pear shapes are different from hourglass figures in that pear shapes are smaller on top as well. Hourglass figures are busty as well as curvy on the bottom – lucky girls!
Is there a better term than Pear Shaped? I asked the question, and you answered! Some of you love your pear shaped bodies and some of you dress to hide it. I’m definitely on the pear-shaped side, myself!
 PLAID
PLAID
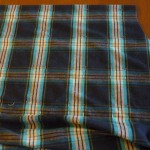
Plaids are like stripes, but with directional lines running up AND down the fabric, crossing to form a plaid. Plaids are also called tartans, especially when made of wool! Plaids and tartans are mostly used for Fall and Winter clothing, but there are also lightweight, summery plaids made of cottons and linens.
Matching Plaids: A Step-by-Step Guide: Exactly what it sounds like – a step by step, photo-illustrated guide to matching plaids and cutting plaid fabrics. Watch me match the plaid and cut the pattern pieces for a vintage tartan cape!
 PRE-WASHING
Pre-washing is basically washing your fabric before you start sewing. That’s all there is to it! Prewash your fabric to clean it and remove any finishing chemicals, and to make sure all of the shrinkage happens before you start sewing. Prewash your fabric like you would the finished garment, some people recommend prewashing your fabric under tougher conditions than you normally would to prevent any surprises in the laundry!
Pre-washing your fabric: Read my post on pre-washing fabric here! It’s part of the Pendrell Sew-Along, but the same rules apply to any project. Read specific tips and suggestions for different types of fabric, as well as the always-helpful reader comments!
 PRINTS
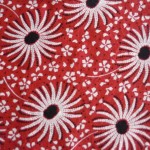
A print is any pattern or design on fabric. It could be printed on top or woven into the fabric. Florals, stripes, and polka dots are all examples of prints.
Matching prints along seams: check out my post on matching large prints along a seamline! This method also works for prints and plaids.
 ROLLED HEM
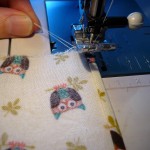
A rolled hem gives you a tiny, neatly-finished edge. You can do a rolled hem by hand, by machine or even by using your serger! I used a machine-stitched rolled hem to finish the edges of my reusable fabric napkins.
Make your own reusable fabric napkins: Read about how to make a rolled hem on your sewing machine, as well as make your own fabric napkins too!
 SAVING FABRIC
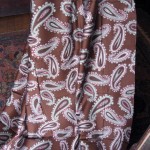
Do you have expensive taste in fabric? Or do you buy lovely pieces of fabric before you know what you’ll do with them? I can say yes to both of those, so I’ve put together a few posts on how to save fabric!
Ways to Save Fabric on the Pendrell Blouse. If you’re making the Pendrell Blouse, here are a couple of tips to save fabric!
Ways to Save Fabric on the Lonsdale Dress. More tips and tricks to saving fabric for the Lonsdale Dress!
 SEAM FINISHES
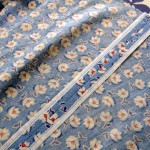
After sewing a seam, it’s a good idea to finish the edges so your projects last longer. Finishing your edges makes your projects look as nice on the inside as they do on the outside! Plus, adding seam finishes will help your projects hold up better after washing and wearing.
There are many different ways to finish your seams. I’ve written a few tutorials on finishing your seams, using your sewing machine! No need for a fancy serger to get a professional finish – although a serger does finish your edges quickly and easily.
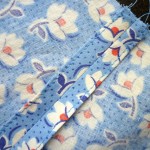 Seam Finishes: Turned and Stitched. Another tidy, clean way to finish your seam allowances without a serger! This looks much harder than it is to sew, it’s really very easy!
This finish works best on crisp fabrics that press well, such as cotton. My demonstration is done using a lightweight cotton fabric, as part of the Lonsdale Sew-Along.
Seam Finishes: Bound Edges. Use seam binding to finish your edges in a crisp, tidy way! I used this seam finish as part of the Lonsdale Sew-Along, as one option for those who don’t have a serger.
You can use contrast seam binding for a fun pop of colour, or stick with a matching shade for a subtle look. This is a great seam finish for all kinds of fabrics, as long as they’re not too thick or bulky.
 SEWING FOR MEN
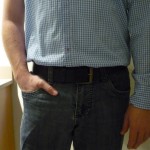
Sewing for men is very different from sewing for women! Fitting a man’s body is a whole new challenge. And men generally have simpler, more subtle tastes in fabric and colours as well.
Fitting A Men’s Dress Shirt: Fitting my first men’s dress shirt on my man. This is the result of our first fitting of the gingham muslin.
 SILK
SILK
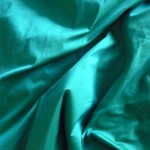
Silk is a beautiful fabric, made from silkworms. Silk is lustrous, strong, and it keeps you warm in the winter and cool in the summer. I made a lovely silk party dress for a Christmas Party in December of 2010, in the prettiest shade of teal.
Tips on Sewing with Silk: My tips on sewing with silk, plus lots of reader tips as well!
 SLIPSTITCHING
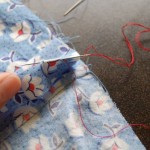
Slipstitching is a type of hand-sewing stitch, used to secure a folded edge invisibly in place. You may see slipstitching at hemlines, at zipper openings, or to secure linings in place. To slipstitch, you’ll need a hand-sewing needle and thread. Slipstitching can be replaced by stitching in the ditch, or topstitching for a visible row of stitching instead of an invisible look.
How to Slipstitch: a step-by-step demo with photos, showing how to slipstitch! In the demo, we’re slipstitching the inner waistband of the Lonsdale Dress in place.
 STAY TAPE
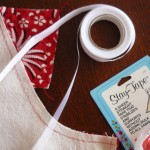
Stay tape is used to avoid stretching. For woven fabrics, it’s a non-stretch tape of nylon, or cotton, or even the selvages of your fabric!
Using Stay Tape on Necklines and Seams. How and where to apply stay tape, and a few helpful tips! I used stay tape for the first time on the Twin Spruce Dress – it’s an invisible detail that adds extra quality to your garments!
Lonsdale Sew-Along #8: Optional! Adding Stay Tape. How to add stay tape to the upper edge of the Lonsdale dress, so the edge is reinforced and stronger for wearing and washing! With the knotted neckline, this dress will keep its shape longer with stay tape applied to the top edge.
 STRAIGHTENING YOUR FABRIC ENDS
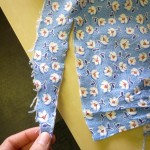
Sometimes when you buy fabric, the salesperson will cut the ends crookedly! Or maybe you bought a piece of old fabric, or you’re using a piece of fabric that has already been cut at one end for a previous project. For cottons and other tear-able fabrics, there’s a quick way to straighten up those ends of the fabric.
Straightening the Ends of Your Fabric. My cotton fabric was super crooked on the ends! Read how I quickly fixed up the ends of my fabric so the raw edges would meet when it was folded.
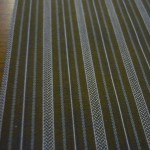 STRIPES
Striped fabric has vertical or horizontal lines, either printed onto the fabric or woven with different coloured yarns. Stripes can be used to create the illusion of slimness when used vertically. Or, use them horizontally to add width and dimension! You can create dramatic effects by using bold stripes, or cutting them in an interesting way. Stripes can also be all in one colour, using texture to create the striped effect.
Tips on Cutting Striped Fabric: How to cut fabric with a stripe pattern! This was part of the men’s shirt project, where I finally cut out the real striped fabric for the shirt.
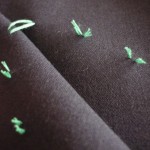 TAILOR’S TACKS
Tailor’s tacks are a way of marking your fabric, by using thread loops. They take a bit of extra time to do, but are accurate and easy to remove. Plus, they won’t stain or mark your fabric. You can also tell which is the right side and the wrong side of your fabric when you use tailor’s tacks, as all of the tufts are on the right side and the non-tufted ends are on the wrong side.
Tailor’s Tacks vs. Pin Marking: A comparison of two methods of marking, plus readers chime in with their usual marking methods and tips!
 TIPS
TIPS
Looking for general sewing-related tips? Browse the other posts in the Sewtionary, or check out the Tips posts below!
Tips for Productive Sewing: Read my top tips for productive sewing. Keep reading to the bottom of the comments to hear the wonderful reader suggestions as well!
Tip for Using Up Old Spools of Thread: Plus lots of reader suggestions on using up leftover sewing supplies!
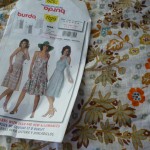 UFO
UFO
UFO stands for UnFinished Object, a cute term for our embarassing half-finished projects, the ones that end up stuffed in a drawer or buried under a heap of new and exciting fabric.
UFO confessions: I listed out a few of my UFO’s and explained their reason for being a UFO.. and a ton of readers shared their own UFO stories! Some people have UFOs lingering for years even. Read through the comments and see who has the oldest UFO!
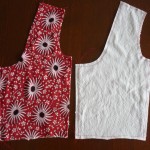 UNDERLINING
Underlining is fabric applied underneath the main garment fabric to add support, structure or modesty (think sheer fabrics!) It’s different from lining in the way it’s constructed, but often linings and underlinings are made from similar fabrics.
How to Underline a Dress Bodice: Step-by-step guide with photos!
Underlining and Marking the O Dress: I underlined a vintage wool dress with cotton batiste, and shared a few tips and tricks along the way!
Underlining the Lonsdale Dress. How to underline the Lonsdale dress. I’ve explained which pieces to cut out of underlining, and how to create a lining for the skirt too.
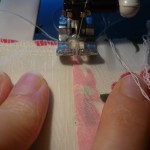 UNDERSTITCHING
Understitching is a row of stitching on the inside edge of your garment. It’s most often used to secure facings or linings and keep them from rolling to the right side of your garment. Understitching stays in (unlike basting) but if it’s done right, never shows on the right side of your project! This seems like a step you could skip, but you will get better, more professional results if you take the time to understitch. Bonus: it makes pressing easier, too!
Understitching: A Step-by-Step Demo: Exactly as described, a guide to understitching with photo demonstrations.
Lonsdale Sew-Along #9: Understitching the Bodice. Understitching on the Lonsdale Dress with photos showing exactly how it’s done, on this specific dress pattern!
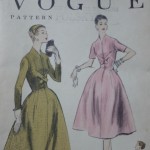 VINTAGE PATTERNS
Vintage patterns are a delight to the home seamstress! Many hobby sewers love to collect, thrift and sew with vintage patterns. Vintage patterns are classified as over 30 years old, but can date all the way back to the 1920’s and 1930’s!
Because the patterns are delicate, rare, and often irreplaceable (and very valuable!), I recommend tracing off a copy when you want to make the pattern. This preserves the original pattern, so a piece of history is saved! Plus that way you can write all over the tracings and make alterations, too.
Sometimes these patterns are printed, sometimes they come completely blank, with perforated holes in the tissue and nothing else!
Tracing an Unprinted Vintage Pattern: A step-by-step tutorial on how to trace an unprinted vintage pattern, plus lots of comments on tracing tips and storage tips!
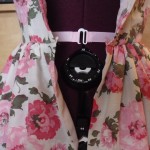 WAIST STAY
A waist stay is a piece of ribbon, usually grosgrain ribbon, that hooks around the waistline. Waist stays are used to help support the weight of a full skirt, and reduce strain on the zipper. You’ll see them in vintage or couture dresses, but you can easily add them to your own sewing projects!
Sewing a Waist Stay in a Full-Skirted Dress: A tutorial on making a waist stay for a full-skirted dress. Watch me add a waist stay to my vintage 1950’s dress and learn to add one yourself!
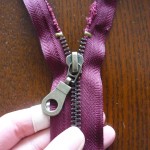 ZIPPERS
Zippers, or ‘slide fasteners’ as some of the vintage patterns call them, are one way of closing a garment. Zippers can be made from plastic coils, plastic teeth (called Vislon), metal teeth, or invisible!
Replacing the zipper on a leather jacket: How to rescue a thrifted leather jacket and replace a broken metal zipper. Includes how to shorten a metal zipper.
Inserting a hand-picked zipper: This technique is easier than it sounds! Hand-picking a zipper is a beautiful couture-style method (or vintage-style, if you prefer) for adding a regular zipper into a dress or skirt.
The Sewtionary was last updated on August 17, 2011.
