 Today we’ll do a quick sewing step: stitch in the ditch of our collar and neckline seam. I remember mentioning stitch-in-the-ditch a while back and it was a new term to many of you! Have you heard the term ‘stitch in the ditch’ before? It’s not that common in sewing patterns, which tend to favor hand-stitching instead.
If you wanted, you could hand-stitch the seam allowances together, rather than stitch in the ditch. Or, you could edgestitch along the collar seam, catching through both layers, instead of stitching in the ditch. It depends on your fabric – thread will ‘sink’ into thicker fabrics but be visible on thinner fabrics.
Want to catch up on previous Sew-Along posts? Click the links below to read more:
- Minoru Sew-Along #1: Let’s Get Started!
- Minoru Sew-Along #2: Sewing Sleeves and Topstitching Tips
- Minoru Sew-Along #3: Gathering!
- Minoru Sew-Along #4: Sewing the Hood
- Minoru Sew-Along #5: The Secret Hood Zipper
- Minoru Sew-Along #6: Sewing the Hood to the Collar (Quick Post!)
- Minoru Sew-Along #7: We Finally Get to Pull the Gathers!
- Adding Pockets to the Minoru Jacket: Amy’s Awesome Tutorial
- Minoru Sew-Along #8: Front Plackets, Front Zipper
- Minoru Sew-Along #9: All About Cuffs
- Minoru Sew-Along #10: Little Hidden Pockets
- Minoru Sew-Along #11: A Useful Hanging Loop
- Minoru Sew-Along #12: Sewing the Lining
- Minoru Sew-Along #13: Putting It All Together
- Minoru Sew-Along #14: An Alternative to Slipstitching Cuffs
A good place to start is to explain why we’re doing this step. I like to know why we do certain things, it helps me to understand their importance! And it also helps me think of alternatives and different approaches to solve the problem. Often with sewing, there are multiple ways to achieve the same result! There isn’t always one single correct way.
So why do we need to stitch in the ditch?
To keep the hood out of our lining. If we leave this neck seam open, our hood can fall down in between our jacket back and lining. It’ll be harder to reach for in a rainstorm that way!
To support the collar. By stitching the collars together at the neck seam, it keeps them aligned and stops the inner collar from rolling to the inside.
To hide the insides of our jackets. If we don’t stitch this seam closed, we’ll be able to peek all the way down our jackets from the zipper opening.
To support the hanging loop. Without the ‘stitch in the ditch’ we would be hanging up the jacket by the loop, but pulling the lining out of the jacket in the process. This way, when we hang the jacket, both layers are hanging together.
Have you ever had a jacket that needs ‘rearranging’ of the inner and outer layers because they’re not sewn together well? Or that comes completely separated in the wash? This will help our jackets hold their shape.
Now that we’ve covered the why, the actual sewing is very straightforward. Line up the neckline seams of your jacket, feeling through both layers so they’re aligned.
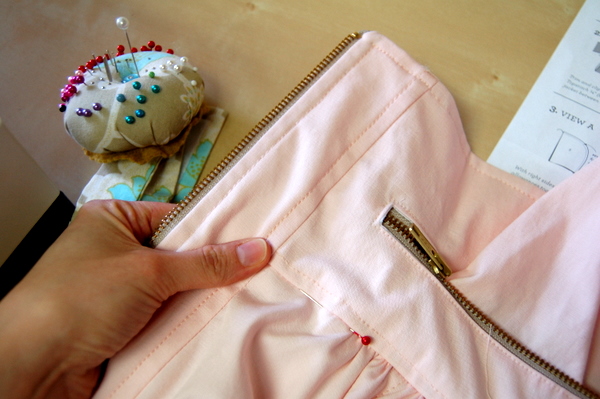
See where the pin is? That’s the ‘ditch’ we’ll be sewing in. Pin all along the neckline seam, feeling underneath to make sure the under collar is lined up.
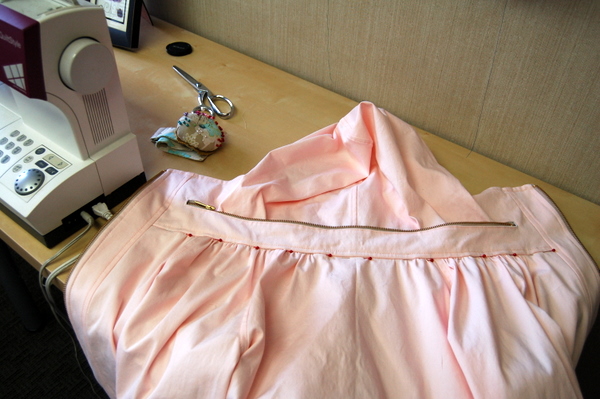
When we go to sew in the ditch, you’ll want to sew as close to the fold as possible, without jumping over the fold onto the collar piece. Poke the needle into the ditch before lowering the presser foot, to be sure it’s lined up correctly.
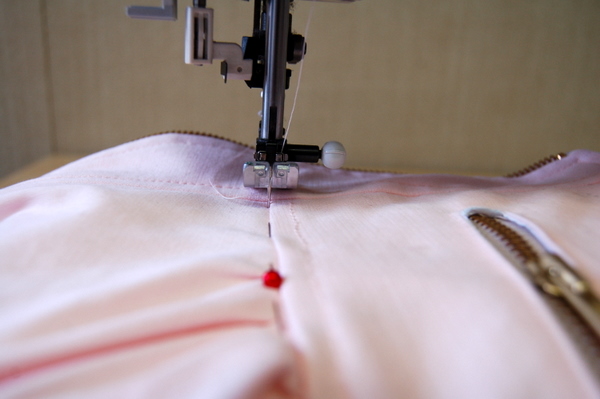
Stitch in the ditch, stopping when you reach the placket on the other side. You can see in the photo below what the ditch-stitching looks like. My thread matches well, so it’s hard to see, but you can just barely see the line of stitches in the ditch. (Note: if you’re using contrast topstitching everywhere, this is one place where you’ll want to match the thread to the fabric.)
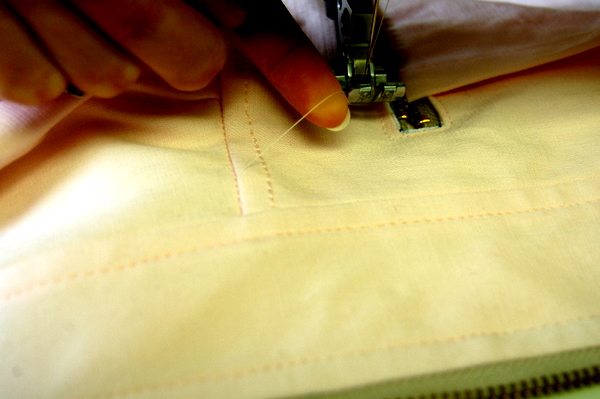
Here’s our collar so far. It looks pretty good – and most importantly, it will sit nicely around our necks, staying in place and not falling down inside the jacket.
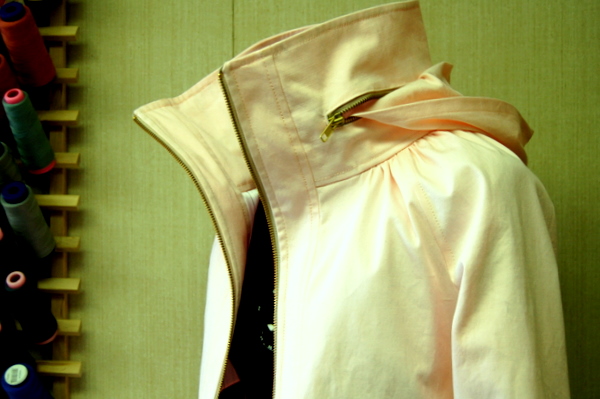
Just a few more steps left, and our jackets will be finished!

Thanks for adding in this step! I was wondering if there was a good way to keep the lining from being visible through the collar zip. I do have a question though. Since the seam allowances have been pressed up toward the collar and top stitched down, they will still show even when we stitch in the ditch (unless I’m getting this wrong). Is there a way to hide those or should we trim them as neatly as possible? Mine are a bit messy…
I trimmed mine as neatly as possible, like you mentioned. You’re right, they do show a little if you peek inside the collar. Other ways to get around that would be to finish the seam allowances before topstitching, or to trim them, then topstitch above the trimmed seam allowances so they don’t show. Or sew a second row of topstitching to hide them.
Hope that helps!
This was the biggest struggle for me as I couldn’t get the stitching to line up on both sides of the collar! If it’s in the ditch on one side, it’s a bit wobbly on the other…
I think it my have been something to do with the thickness of my fabric – six layers of canvas (collar, seam allowance, seam allowance from jacket body, hood, outer collar and outer collar seam allowance) plus three layers of lining made it quite bulky. So bulky in fact that I couldn’t hand stitch it either as after about 2″ my fingers hurt from trying to push and pull the needle through! (I should probably invest in a thimble…)
Thankfully, my wonky stitching isnt obvious on the inner collar as the thread disappears into the fabric due to its thickness and that the thread is a good match.
I have to admit that your patterns are the only ones where I have ever seen an instruction to stitch in the ditch and I can certainly see the point for the Minoru.
Mine too – mine is in the ditch on the right side, but a little on-and-off on the inside.
I thought of this later on, but if you wanted them to be absolutely exact, you could hand-baste where you’re going to ditch-stitch, which is more exact than pinning.
I don’t use a thimble, either! I probably should give it a try for hand-work one day…
Another method would be to go in between the lining and jacket, and hand-sew the seam allowances together. That’s easier if we’ve pressed them open, rather than up and topstitched, but that’s something I’ve done on more tailored jackets.
I think I’ll do the allowances between the shell and lining on version two! Brilliant idea, I hadn’t thought of that. And it’s reassuring to know that yours is a little wobbly on the inside too (but still probably way neater than mine!).
I tried ditching it, but had trouble lining it up. I ended up doing it by hand because it was faster than making lots of mistakes. :)
That works too! It all depends on the fabric and how visible the stitching is going to be. I agree, sometimes slow and steady is better than fast with the potential to unpick and start again. :)
Stitch in the ditch is quite common when finishing waistbands for skirts and trousers. You flip done the inside of the waistband, pin or baste in place then stitch in the ditch on the outside to finish.
I always use my machines edge joining foot for stitch inthe ditch and top stitching along a seam line – so easy to keep things lined up and straight that way!
That’s a great idea, Sarah! Thanks for sharing!
I had *no idea* what stitch in the ditch was– I’m so glad I waited for your instructions for this step, Tasia! I would probably have just sewn over the collar topstitching or something silly like that. Thank you so much for all your help getting this right. My jacket is looking fab and I can’t wait to wear it!
When I did this step, I used the blind stitch hem foot (foot g on Janome) to guide my stitching. I still got a couple of puckers but the stitching line is even.