 Happy Monday, everyone! And hello to all the Sew-Alongers! Are you ready to start cutting your fabric today? Excited to start sewing our Minoru Jackets? I know I am!
Today we’ll cut our fabric, talk a bit about marking, and that’s about it for the day. Cutting and marking will take some time! The time we take to properly mark our fabric pieces will save us time in the long run.
Like our previous Sew-Alongs, I’ll start off with links to all of the previous Sew-Along posts, in case there’s something you missed or want to re-read.
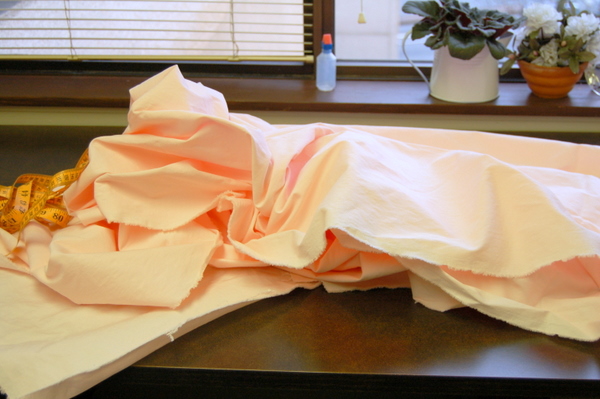
Ok! Let’s start! If you’re like me, and your fabric gets squished into boxes or piled under other fabrics, it’ll likely need a good press. Always press your fabric before cutting. Otherwise, you may cut it out with bumps in the pieces, and when you do press it, the bumps will flatten out and make the piece larger than intended.
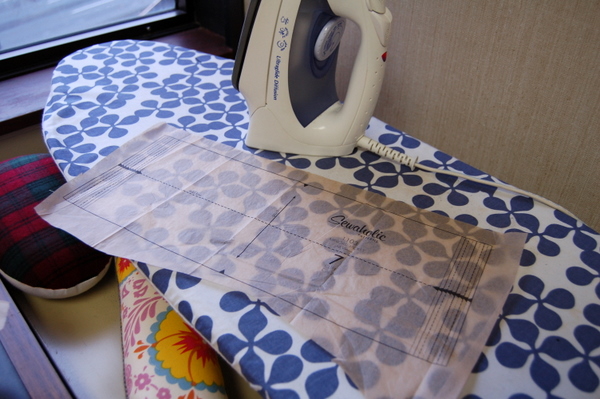
And, if you’ve unfolded your pattern tissue for the first time, give the pattern pieces a press, too! Use a cool, dry iron – no steam! Steam can distort the pattern pieces. Set your iron to the highest setting before the steam kicks in – around the polyester or synthetic setting. Or turn off the steam, if your iron has a separate steam button.
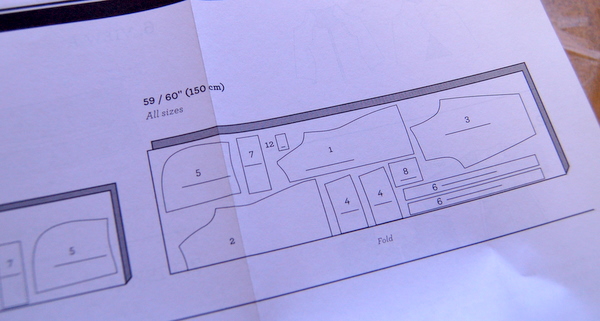
Now we can start pinning our pieces to the fabric. On the instruction sheet, find the cutting layout that matches the view you’re making (View A with the hood, View B without) and the width of your fabric (either 45″ or 60″ wide, 115cm or 150cm in metric). If your fabric falls in between 45″ and 60″ wide, follow the directions for 45″ wide fabric and adjust the pieces to best fit your fabric.
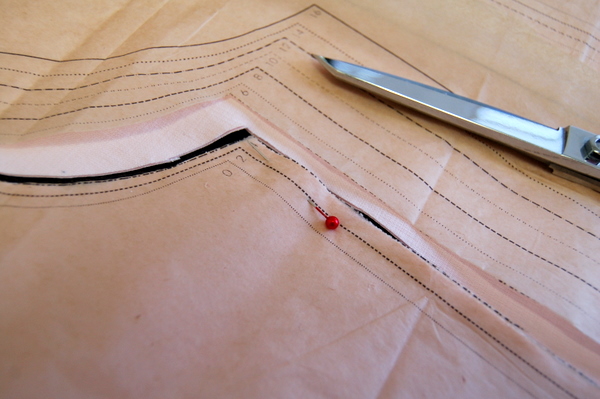
Carefully cut out your fabric and tissue, following the size line that matches the size you’re making.
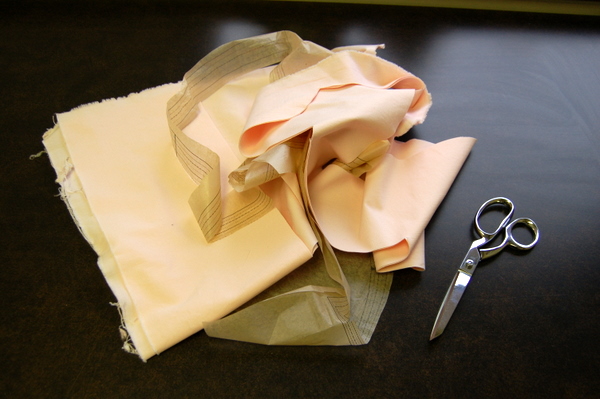
Save all of your fabric leftovers. You might want these later to recut small pieces, to test topstitching thread or interfacings. I always keep all of my scrap bits until a project is done!
Mark all markings on your fabric before putting away the pattern pieces. I like to clip my notches inwards, taking a 1/8″ to 1/4″ snip into the seam allowance.
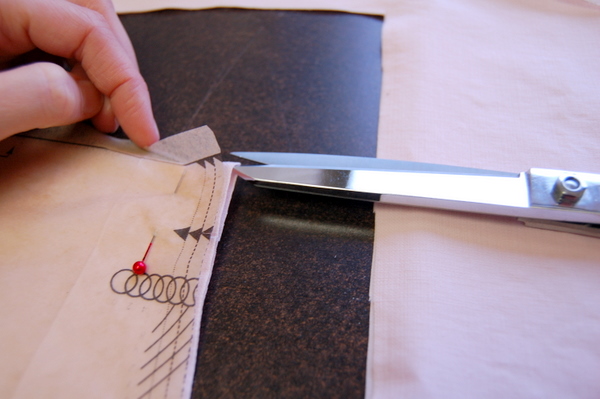
For circles, use tailor’s tacks, or chalk markers, or fade-away marking pens.
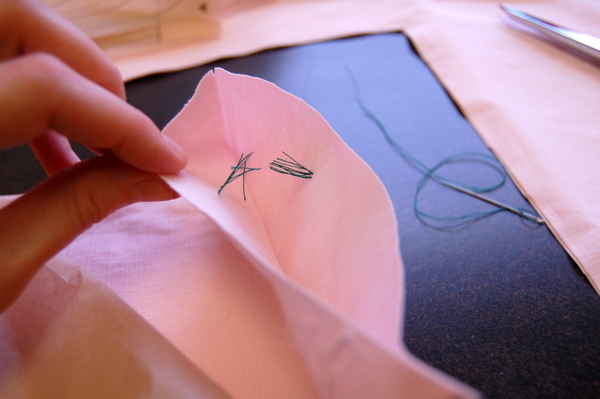
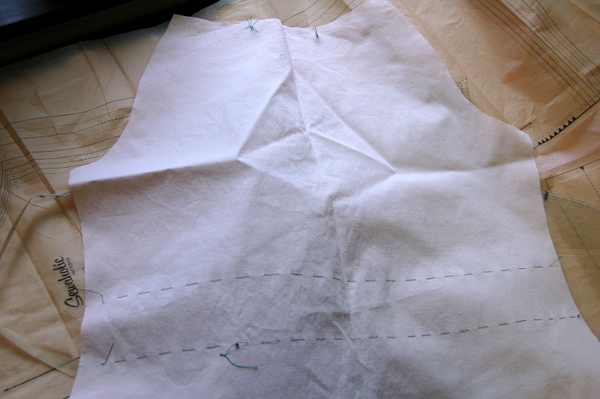
The waistline marking is important to mark accurately. You want these markings to be visible on the right side of your fabric. I used thread to trace the marking lines, using very long stitches and a hand-sewing needle.
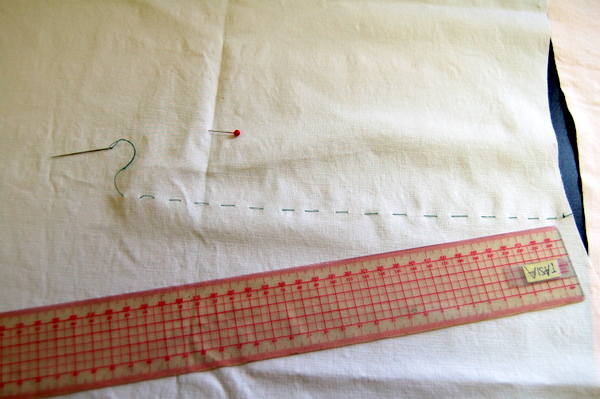
I’ll leave you to catch up on your cutting and marking! The thread-tracing is time-consuming, but you’ll be happy it’s there when we get to sewing the waist elastic. It’s much easier to mark now, while the fabric piece is flat, than later on when it’s sewn up!
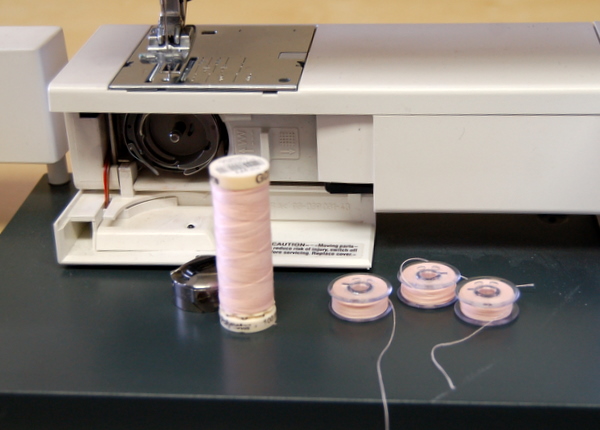
Have extra time and want to get a head start on the next step? Wind a bobbin or two in thread that matches your jacket fabric. I got carried away and wound three bobbins in my peach thread. I think of it this way – if I run out of top thread, I can always use a bobbin, but when I run out of bobbin thread it will be handy to have a bobbin wound and waiting!

I like the last tidbit about bobbins. I never thought about using a bobbin as top thread for when you run out – a genius idea! I will have to keep it in mind the next time I am insure of how many bobbins to wind.
*unsure
Yup! I can’t remember where I read the tip, but their suggestions was to wind two bobbins, and use one on top and one on the bottom. That way, both run out at the exact same time! (Or close enough.)
Hola como pudo conseguir la tall22
Hello Adela, I’ve translated your comment and it sounds like you’re looking for a larger size for this pattern? Right now it comes in sizes 0-16, but with measurements for pear-shaped women, larger on the bottom.
Here’s a link to the size chart:
http://sewaholic.net/wp-content/uploads/2011/11/1103_Sewaholic_Minoru_Envelope_Back.pdf
That will show you the measurements for each size. At the moment, those are the only sizes offered for the patterns. Sorry that I don’t have the size you are looking for! Thanks for the comment, it’s something for me to think about in the future for new patterns or reprints.
I did a very rough google-translate on my response for you, I hope it makes sense!
Hice una muy √°spera google-translate en mi respuesta para ti, espero que tenga sentido!
Hola Adela, que he traducido su comentario y parece que usted está buscando un mayor tamaño de este patrón? Ahora mismo está disponible en tallas 0-16, pero con las mediciones de forma de pera, las mujeres, más grande en la parte inferior.
Aquí hay un enlace a la tabla de medidas:
http://sewaholic.net/wp-content/uploads/2011/11/1103_Sewaholic_Minoru_Envelope_Back.pdf
Que le muestran las mediciones para cada tamaño. Por el momento, esos son los tamaños sólo se ofrece para los patrones. Lo siento que no tengo el tamaño que está buscando! Gracias por el comentario, es algo que para mí pensar en el futuro para los nuevos patrones o reimpresiones.
I’m not participating in the actual Sewalong but even participating in spirit by reading the posts is really helping me with learning to sew.
Great! I’m hoping to include tons of tips that are interesting even if you’re not sewing this jacket with us, glad to have you reading along!
Good one Jane!! I’m following in spirit too! I’m sure I’ll pick up lots of tips!
Good one Jane!! I’m following in spirit too! I’m sure I’ll pick up lots of tips!
Oops! Sorry! I hit the button twice!
Ha, that’s all right! Following in spirit, I love it!
I’m another “in spirit” follower.
Are you pinning your pattern to the fabric and cutting them both at the same time? This sounds like a real time saver, but I always heard that cutting the paper/tissue pattern with fabric scissors makes your blades dull.
If you do cut them at the same time, how do you handle checking the layout to be certain you have enough fabric or that that a patterned fabric falls in the correct place (e.g. no highlighting the “headlights”)?
Yes, I’m cutting them both out together, tissue and fabric. I don’t always do it this way, but sometimes I will!
To be sure I have enough fabric, I always lay out my pieces from start to finish first, and then go back and pin them in place properly. When I cut these pieces, I was low on space and low on pins, and wanted to have enough photos to put together this post, so I just did a couple of pieces first. (Normally, when I’m not documenting my sewing, I pin everything on at once, to be sure it fits and also to check for print placement, and only THEN start cutting.)
Print placement – when I’m really concerned about headlights (or on one unfortunate pair of printed pants, the placement of a large flower right in between the legs, oops) I’ll open out the fabric and cut it single-layer. That way I can pick exactly what my dress bodice will look like, or the collar or the waistband, whichever piece I’m most concerned with. Or all of them, even, depending on the fabric and pattern!
I have another project to work on right now, but will follow along and then come back to these posts again when I can make mine. I have some Shetland Wool set aside for the Minoru.
Oh, nice! A wool Minoru sounds wonderful and cosy on a snowy day like today. These posts will be here for you whenever you’re ready!
I chickened out & am going to cut a muslin today. I was going to just use my fabric, but thought better of it.
It’s a bit of extra time to make a muslin, but it does give you a chance to change things and get it exactly right! Especially for something like a jacket, where you’re going to wear it a lot. Sometimes I hope there’s something that needs changing, just so that the muslin feels worthwhile! Although I’ve never regretted making a muslin, it never feels like a waste to me..
I wish I be doing the sew along, but to buy the pattern is kind of expensive for me (I live in mexico) BUT I like to read your post because this way I learn interesting things.
I’m glad you’re enjoying reading the posts, even if you’re not sewing along!
Fantastic. I’m not sewing along yet but I’m reading along. My old Husqvarna’s bobbin is very narrow and so unfortunately I only have one!
That’s a good point, that tip only works if you have extra. I have about eight or ten bobbins, and lucky I had quite a few of them empty at one time!
Exciting! I’m another follower-in-spirit because I don’t feel like making a jacket in the middle of summer, and it’s hard to find the flannel lining I want at this time of year (I did, however, make my second Crescent skirt last week!).
Looking forward to reading through the posts, it’s much nicer to read about any ‘gotchas’ before you come across them :-) Like, I wouldn’t have thought to mark those elastic lines with thread. I was wondering how to mark them on the right side of my corduroy…
Ah, I know! The good thing about the thread-tracing is it lasts, unlike a fadeaway marker or chalk, and doesn’t ruin the surface of your fabric, even corduroy! I like to write the posts as I sew, as that’s how I think of the little tricks to mention.
It snowed over the weekend, so for us this jacket might not be warm enough! Rather than too warm as it would be for you.
Thanks for the link to the tailors’ tacks… that is a method I was unaware of.
As for cutting patterns, I don’t cut the original pattern ever. I retrace the size that I want on to craft paper and then cut from that. That way, I can make multiple sizes from the same pattern. (My weight fluctuates!)
My mother just tried on my muslin and the only alteration i need to make is to shorten the arm. I hope to cut fabric tomorrow!
No problem, glad it was useful! Personally I find them time-consuming and pesky, but they’re a good way to mark fabric that doesn’t fall out (like pins) or fade or brush off (like chalk).
I don’t often cut the pattern, but was in a hurry, and wanted it to look like it might for people sewing along at home. Smart to trace off your patterns instead of cutting them, for sure!
So glad your mother’s muslin worked, yay! The sleeves are a little long by design, so that makes sense that you may need to shorten them on a larger size.
I do have to say that I am so glad you wrote a muslin post – I have never made a muslin before and knowing that you would post about it pushed me over the edge to make one. Glad I did, too, becuase there were a few places in the directions that I really didn’t understand (I’m still new to sewing clothing) and having made the muslin I have a much better idea of what those steps mean now!
Thanks again!
I spent all weekend getting my muslin together. There are several alteration I need to do. There is a lot of fabric in the back, the sleeves are too long, cuff too loose and I need to move the waist elastic up and make it tighter. I think I suck at work with elastic.
I am thinking about shorten the length of the jacket and maybe the collar. When I got to class on Wednesday, I hope my teacher can help me with the alterations I need.
I do plan to post on my blog my process of making the jacket.
Oh and congrats on the new pattern, I heard about it via http://vickikatemakes.wordpress.com/.
The elastic on the real jacket will be much easier to do, I promise! You’ll be able to adjust it to fit, on the real thing. Sewing it to a single layer on the muslin is sloppy and hard to do evenly, even on mine!
On the Minoru, the sleeves are meant to be a bit long, and the cuffs are meant to be a bit looser, so the sleeves stay long when you bend your arms. Both of those are easy to fix – shorten the sleeve, pull the cuff elastic tighter for a snugger fit at the wrist.
The length of the jacket is also easy to fix, just shorten at the hemline and remember to shorten the back, front and placket by the same amount.
I hope that helps! And I’m glad you like the new pattern. Sneaky Vicki Kate, posting about the new pattern before I did!
hi, got your pattern but an undecided on size. I usually wear a 12 pattern & make it one inch longer in the bodice. Measurements are 34″ bust,28 waist ,39 hip; will the size 6 work? Using a waterproof
fabric. thanks,
Hi Nancy! It sounds like you’re in between a 6 and 8 according to the Sewaholic Patterns size chart.
6 – 33-27-39
8 – 34.5-28.5-40.5
If you make the 6, it may be a little small through the bust and waist (and shoulders, as they’re related to the bust size). If you make the 8, it might fit better through the top, and it’s easy to narrow in at the hips by an inch if needed. If you’re narrow in the shoulders and slim up top, I’d say use the 6. If you’re broader in the shoulders or feel that jackets are often tight in the shoulders and arms, or plan to wear lots of layers underneath, then go for the 8.
I hope this helps!
Just in case you want my two cents :) my #s are almost the same. I made the 8 for my Lonsdale (granted, the hip measurement is probably more forgiving than for a jacket) and it fits great so I am going to make an 8 for the Minoru. I didn’t muslin, but will look carefully at the fit through the hips when that area is finalized as I sew in case it needs to be taken in any.
I am so excited the sew-along is underway!
Thanks Tasia & LLBB. Am checking a RTW jacket I have & will compare it to the pattern.
I understand! I’m a 33 1/2″ bust, 28″ waist, and 36″ hip. For every Sewaholic pattern thus far, I’ve been able to cut a straight 6 and had no trouble at all – I muslined an 8 for the Crescent but it was way too big. A couple of times I’ve even had to bring in the side seams a few millimetres, but nothing major. (The Lonsdale was particularly perfect.) I haven’t even bothered to narrow in at the hips. When I do make the Minoru, I’m just going for the 6.
I decided to make a sweatshirt instead of a jacket, and I’m wondering if I should go down a couple of sizes. Is there extra ease in the pattern to compensate for the layers that go under jacket? Thanks!
Found some lining fabric in my stash! I am ready to go for cutting out pattern and fabric tonight. Woot! Woot!
I picked some lining fabric today and hope to keep up with the sew along. I have had great luck with the sewaholic patterns fitting me perfectly, so I think I am going to skip the muslin also. The one thing I need to check is my arm length. None of the patterns have had long sleeves yet, so I am not as sure about the fit in the arms. I love the look of this jacket and can’t wait to have it as a spring/ fall option.
It is nearly 9:30 pm here on the West Coast of the US and I have my jacket cut out and marked. I saved the lining and interfacing for tomorrow morning as my eyes are tired tonight. I sewed a muslin this weekend and was pleased with the fit once I added the plackets and raised the waistline a tad more. I also shortened the sleeves a bit-I wanted a neater length. I didn’t add on the cuffs-I can see that any other alterations can be made while sewing. Tasia, this jacket is loooong for petites :-)
I cut a size 10 with a little extra on the waist and hips. It may be too big, but I can adjust as I go. Also, I am hoping that the elastic will cover any extra fabric back there :-) I am between an 8 and 10-this jacket will be used for walking and horseback riding so a bit bigger is fine with me.
Sadly, I cannot make a hood. I bought my fabric at 2 different times and the dye lots were different and the fabric itself had a different texture/sheen (uncut corduroy). It’s all good though as the jacket is going to be super cute.
I expect to be making a contrast fabric for the hood. Not enough fabric in my main fabric either.
So I’m following along in spirit.
I have cut my fashion fabric and tonight I will do the lining. It is 37 degrees (Celsius!) here in Melbourne so it is odd sewing a jacket in such heat!! I have about 80cm leftover fabric even though i bought the right amount of 150cm wide. Oh well, I will make a skirt…
Thanks Tasia for a great first post. I am sewing along, but already falling behind, no matter I have a day off later in the week to catch up. I too am from Australia (Sydney) Leith it feels odd making a jacket now but Autumn is just around the corner and we will be wearing them soon enough.
thanks Tasia
SPAGNE
Woo hoo! One day behind but I’m a-cuttin’!
I’m a few days behind but I am going to play catch up this weekend…I don’t know what happened to me? I got sucked into the New Year vortex and am barely crawling out.
pretty neat idea about the bobbins. i hate having to stop and rewind my bobbin when it runs out. also i love that color.
I know I’m waay too late for this sewalong, but I’ve just started cutting out my Minoru and am really looking forward to sewing it up :D. The sewalong is so helpful!