Ok! More shirtmaking information today. The Shirtmaking book I’m referencing has a completely different approach to sewing the collar stand than usual methods. I like it because you get to place the collar into the stand, getting it right where you want it, rather than sewing the collar-stand unit to the shirt and hoping it was in the right place to begin with.
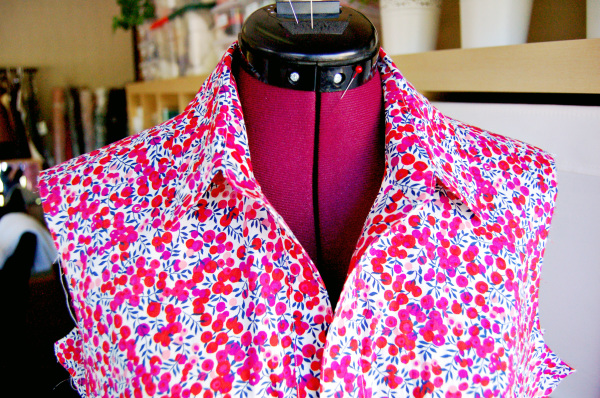
I never get sick of looking at this fabric! It’s so beautiful and bright and not too flowery.
Today I will show how I constructed the collar stand using the Shirtmaking method. It’s another long post but it’s nice to have a complete visual reference for this part!
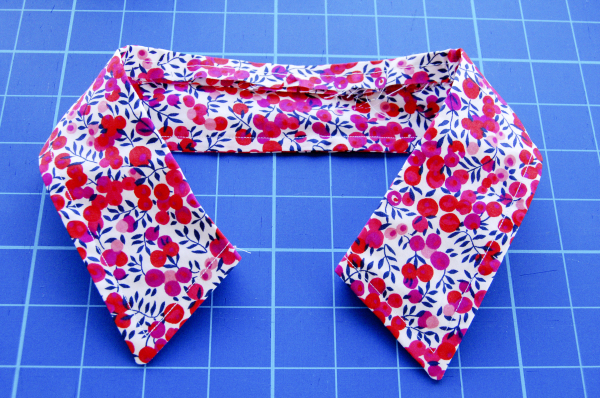
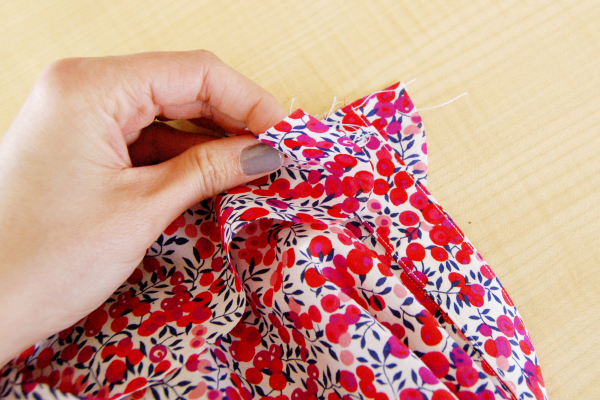
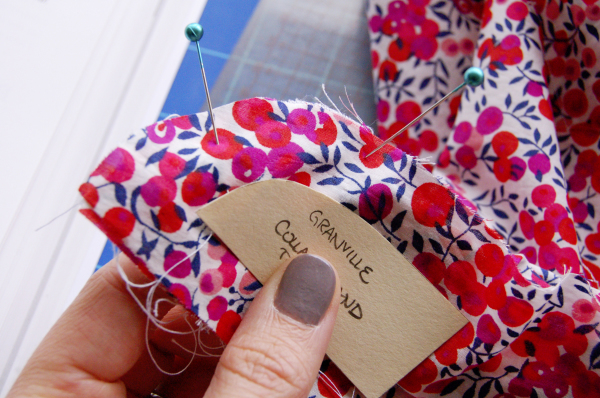
By now you’ve made your collar, and have set it aside for attaching later:
And your shirt needs to be constructed to the point where you can attach the collar stand: yoke sewn to front and back, front bands sewn to the centre front. Staystitch the neckline of your shirt and clip along the staystitching, making sure not to cut the staystitching thread.
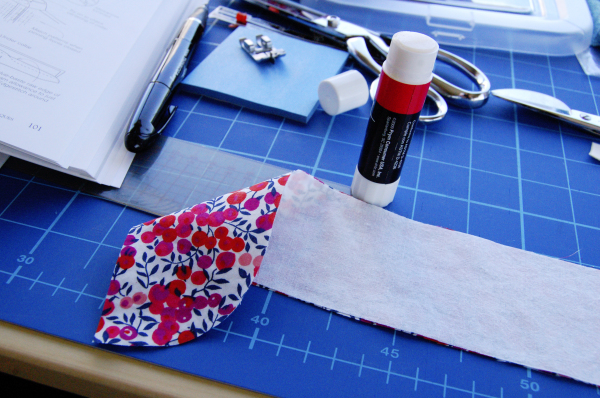
We’ll sew the stand to the shirt body, and then attach the collar to the stand. First, glue-baste interfacing to one of your collar stand pieces.
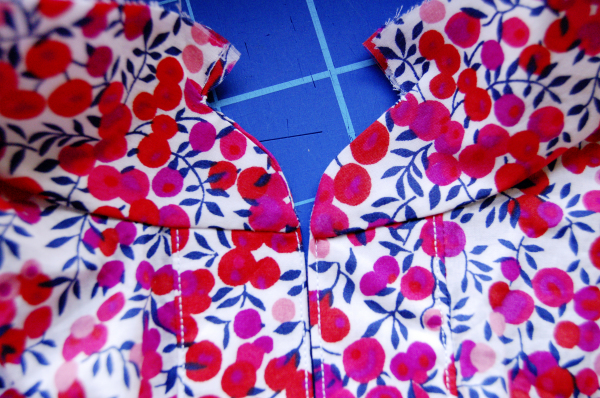
Now, pin the collar stand to the neckline of your shirt. You are pinning the right side of your collar stand to the right side of your shirt neckline. This is going to be the collar stand that sits on the outside of your neck, not the inside. (Good to know if you are using contrast fabrics for your shirt!)
Clip as much as you need to so the neckline can lay flat against the collar stand. Use lots of pins, too.
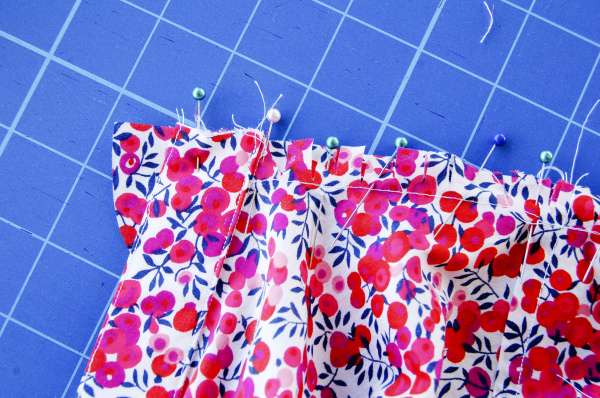
Now sew the collar stand to the neckline. I found it easiest to work with the clipped side up, so the clips didn’t flip backwards and get caught in the seamline. I started in the middle at the centre back neck and sewed to the edge of the neckline.
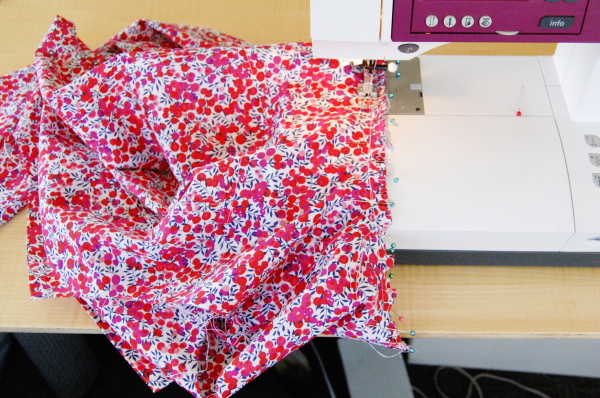
Then I flipped it around and sewed from centre again to the other end of the neckline.
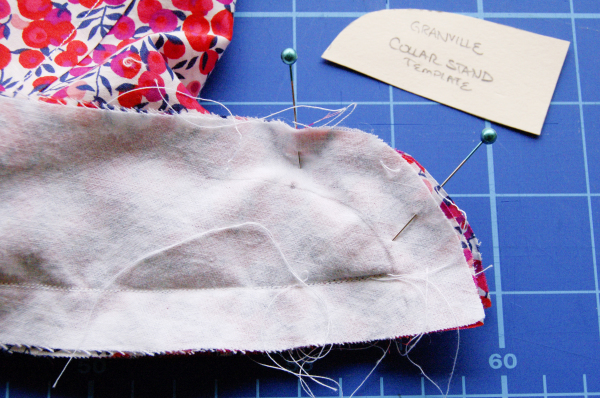
Here’s how it will look at this point:
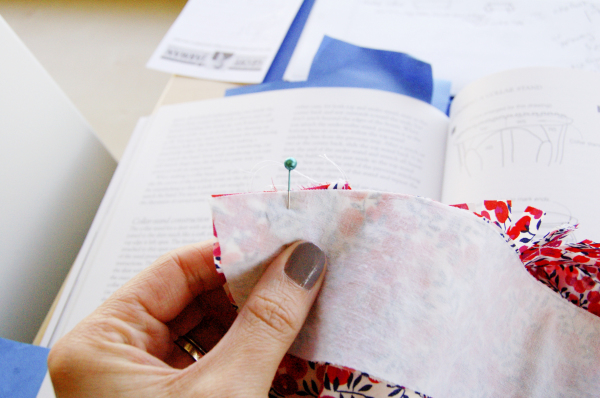
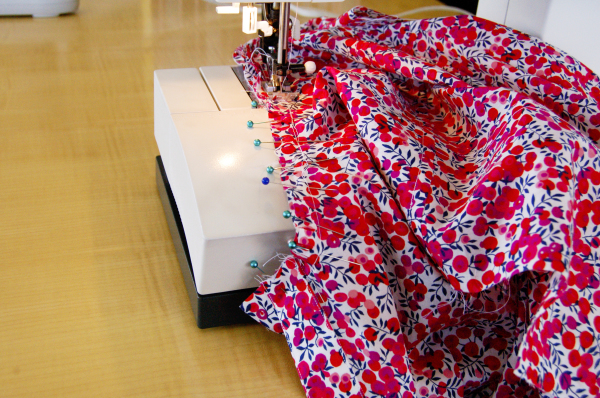
Not too much out of the ordinary yet, right? Now lay the other collar stand on top of the neckline, from the inside of the shirt. I’m lining up the rounded edge with the other rounded edge here. Lay the right side of the collar stand down, towards the shirt. The wrong side should be up, facing you. (This fabric looks nearly the same on both sides in photos.)
I didn’t take good photos through this part so I referred back to the book to write this post, and sure enough you are to stretch the uninterfaced collar stand when you sew it to the neckline, just like we did for the collar itself.
Start in the middle, and stretch the collar stand by about 1/8″ (3mm) as you sew towards the end. Don’t sew past the front bands, stop as soon as you reach the edge of the front band. Flip it around and sew the other side from centre back to the end.
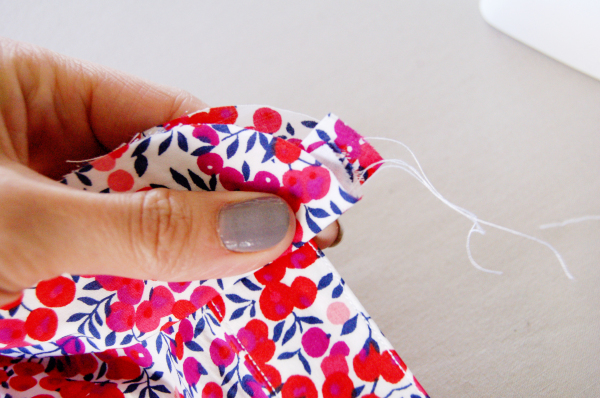
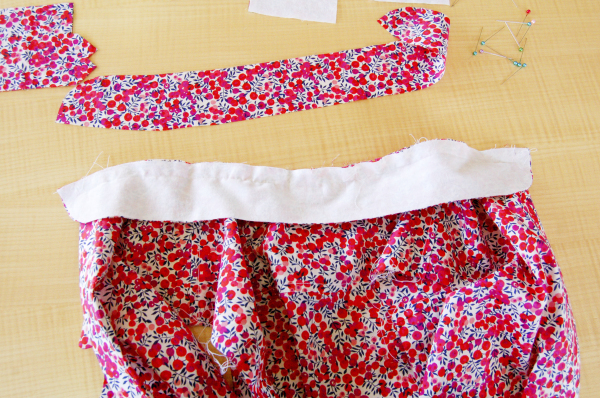
See? My collar stand is longer on one side, the uninterfaced side.
This next part is where you need the completed collar. Lay the collar on the collar stand and mark each end of the collar. This makes sure we sew up the stand and leave the correct size of opening to sew the collar in.
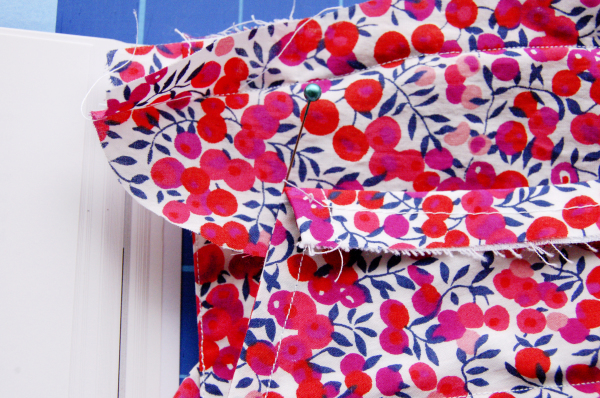
I lined up the collar in the middle, so it’s centered evenly over centre back. Then I poked a pin into the collar stand where the collar stand ends.
Put the collar away again. This little rounded area, from pin to where we stopped our stitching at the edge of the front band, is the last part we’ll sew.
And this is where the collar stand template comes in! Draw in the seamline using the template as a guide.
This is much easier to do on the white, interfaced side.
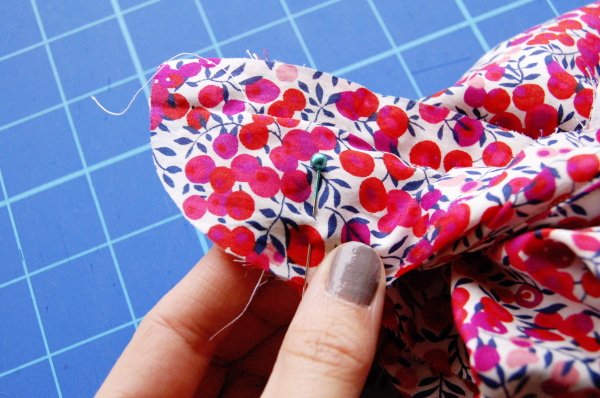
Sew along that drawn-in stitching line, stopping at the point you marked with a pin. Trim very close to your stitching, about 1/8″ (3mm) away.
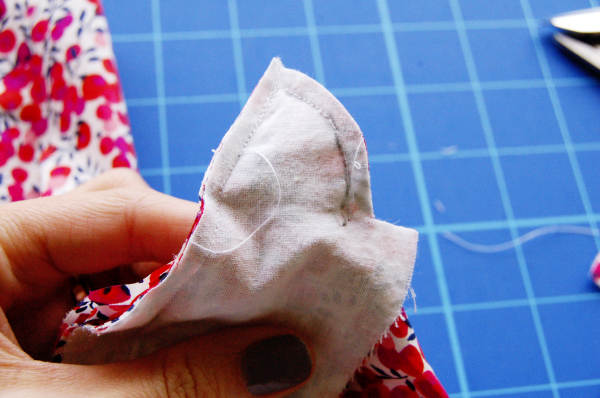
Turn the stand right side out. Looks pretty good eh?
Repeat with the other side of the collar stand.
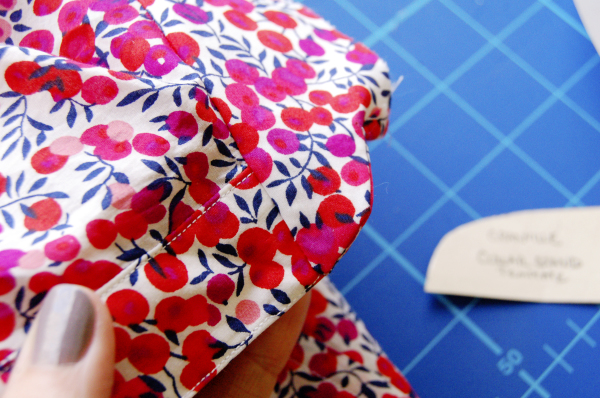
After all that, my two sides aren’t completely perfect. The underside rolls out too much on the right side of the collar stand. (That’s the one on the left in the photo below.)
That’s all right with me though! It’s too small of an area to unpick and I’ve already trimmed it too close. I’ll improve for future shirt projects. And they are the exact same shape, which was the goal of using the template.
This post is kind of long already, so I’ll write about sewing the collar into the stand in a separate post.
ps. Check out all posts on shirtmaking here!
Interesting… It is different from how I’m used to sew the collar and colla stand. I’ll try this method to see which I like better! It’s fun to try something new. Now I just have to get my sewing machine back from the store that is servicing it. :)
I have the same book and followed that method. It seemed to work pretty well, but now I wish I had waited a bit for your post, since you have such nice pictures. It makes it so much clearer. But, I just couldn’t wait to finish my Granville! :)
This is so cool, seeing it all in a pretty print:) Btw, over the years I’ve stopped bothering with stretching the second stand piece when joining it in; haven’t noticed any problems…
Good to know! I’ll try that for future projects. I really like the stretching technique for the top collar, it’s made it curve so nicely.
Hi Tasia,
I love to make shirts like this but have not tried this method for the collar, but I will now. Thanks for doing these posts.
Just one suggestion: Could you use plain fabric and contrasting thread for future posts? I find it hard to see what’s what!
Otherwise the photos are excellent as well as your commentary.
Yours, Shirtwise,
Barb
Glad they’re helpful! I’d taken the photos while sewing the shirt, and wrote up the posts after the fact using the photos I’d already taken. To redo them with new contrasting materials would mean a much longer wait to have the information up! It was either have posts now, or wait until I had time to resew them, and who knows how long that would be :)
There are some steps that would be way too confusing in this fabric, so I will redo them with clearer fabrics and contrast thread. The placket is the part I’m thinking of where the Liberty print would be too distracting.
Thanks Tasia , your posts are really helpful ! I struggled with my first shirt collar and stand, but will try again following your great tutorial !
Good steps but I agree with Barbara that it’s hard to see what’s what with the print.
Suggestion: As lovely as the fabric is, I am having a difficult time discerning between fabric pieces and thread because the fabric is beautifully “busy.”
Hi Tasia, Thanks for the remainder of the instructions for the shirt collar. I am really looking forward to trying it out, but not on my Liberty fabric. I will perfect it first on a cheaper fabric.
It was really nice to meet you on Saturday at Fabrics Etc. You are a great inspiration and a wonderful entrepreneur.
Regards, Jean
I wish you had used contrasting fabrics! I would have liked to try your method.. .
Hi!
I love this pattern. Made one long sleeve, one mid-length sleeve and 2 sleeveless shirts already. It fits perfectly, with no alteration.
Buy no matter what I do, I get the collar stand wrong. I tried with the instructions, with this method, and using a template. no. it is always too long and ends up looking weird. I suspect that something I do with the shirt itself and the button-facing-strips foldings is wrong. should the right and left side of the shirt be completely symmetrical after sewing? if so, why are we cutting some of the right side center and then adding it back… wouldn’t it be more accurate (and simple…) to just fold the center of both the right side and the left side? I know it should be simple, but can you please clarify the interfacing and folding of the right and left bottom-strips? maybe with final dimensions after folding and sewing?
thanks again for your lovely patterns.
Ofer
I’ll try to put together a tutorial with the next Granville shirt I sew! The reason you cut one side of the shirt is because one side gets the button band, the other is simply folded over and topstitched. It’s on my list to demonstrate soon!
It looks like you might have a perfect way to sew this band on and have sharp corners. However, I can’t see the details because of the busy fabric you chose. Darn!
Your fabric makes me happy! As do those crisp corners. I love precision sewing.
Following along with my own collar stand your tutorial can be figured out quite well.
I do wonder if I should press in between somewhere or perhaps grade the seam before folding the standing parts upwards. My stand is now 6 layers thick and will be A Stand to be reckoned with once finished. I’ll make an educated guess and experiment. This is my first collar (stand) ever.
The book from Coffin is on the way to me, thank you for talking about it.