Are you ready to watch a new and exciting way of sewing a shirt collar? Here it comes!
How to sew a shirt collar the shirtmaking way:
You’ll need:
- your shirt collar cut from main fabric, two pieces
- your shirt collar cut from a piece of sew-in interfacing
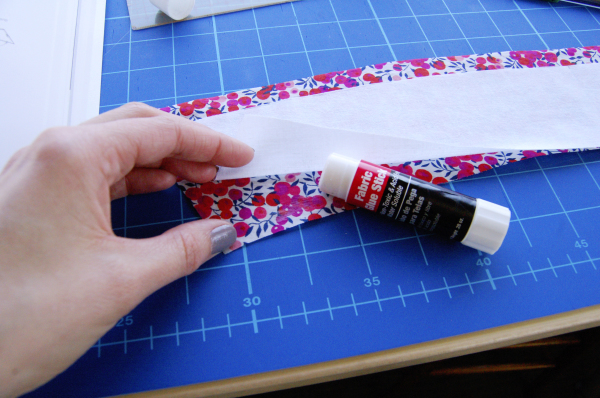
- glue!
One thing that’s different about this method is that we make the collar first, before sewing the collar stand. We don’t make a collar+stand unit and attach that to the neckline either. Instead we make the collar, then attach the stand to the shirt, then insert the collar into the stand.
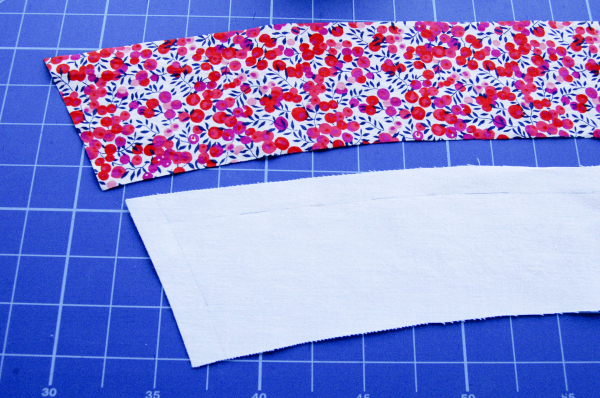
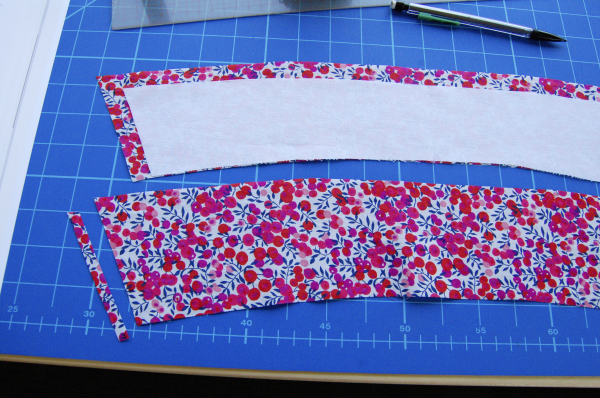
So that’s what we’re doing: preparing the collar only. Start with your collar piece in main fabric, and one shirt collar piece cut from interfacing. Then draw in the seam allowances along the short edges and long, top edge. (Basically, the three edges that are not the neck edge.) Then trim off the seam allowances from the interfacing piece only.
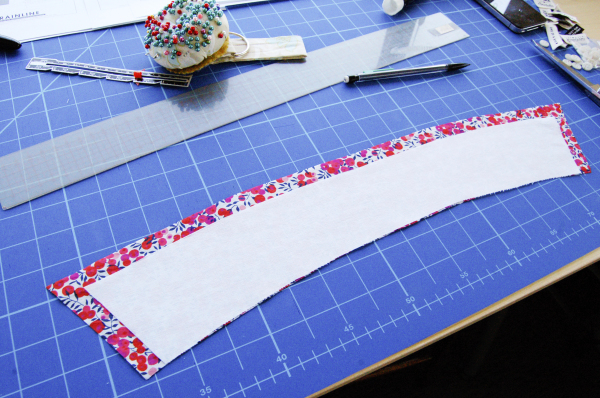
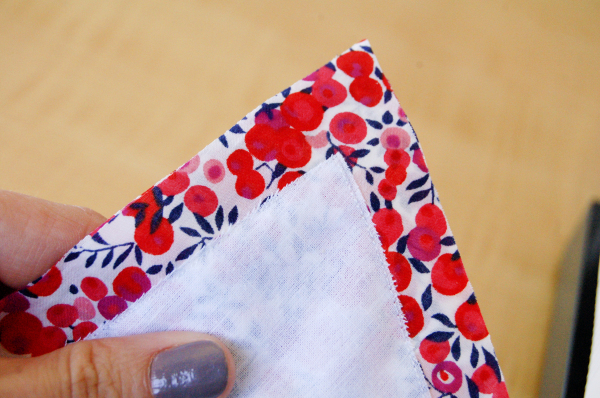
Lay the interfacing on top of one collar piece, with the interfacing against the wrong side of the collar. Now is a good time to check the edges of your interfacing, and make sure it’s exactly 5/8″ (1.5cm) smaller than the collar piece. I trimmed parts of mine where it extended too far into the seam allowance.
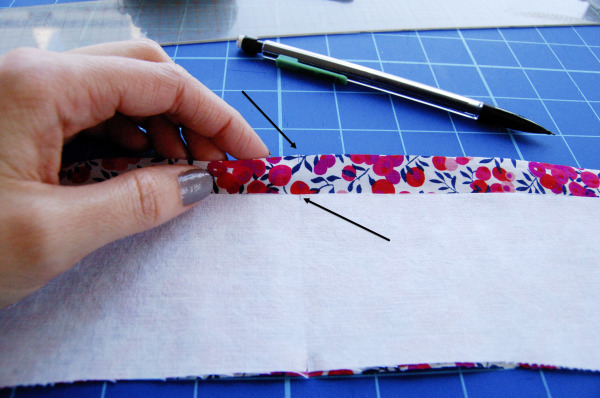
Fold your collar in half, and clip into the seam allowance to mark the centre of both interfacing and fabric. (If you haven’t marked the middle yet, that is.) The little black arrows indicate the clips, about 1/8″ (3mm) into the seam allowances. This makes it easier to line up the pieces, especially for the next few steps.
Now it’s time to glue-baste! Glue the interfacing to the collar piece. I started at one end and worked my way across to the other side.
Now take the other collar piece cut from fabric. This is where things get interesting, we’ll trim 1/4″ (6mm) from each side of the uninterfaced collar. You can only see one side in this photo but make sure you do it to both ends.
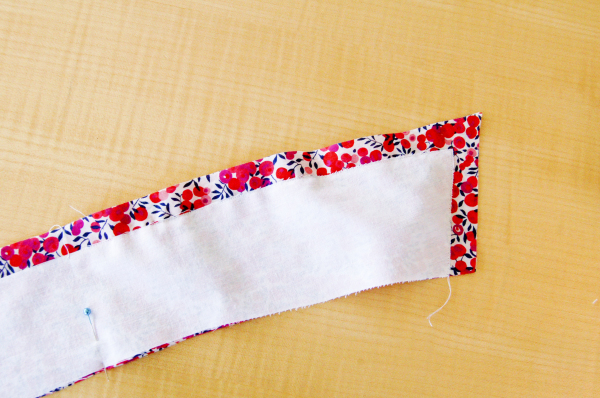
Line up the collar and undercollar, right sides together, starting by matching the points in the middle. You can see that the ends won’t line up, since we’ve trimmed one of the pieces.

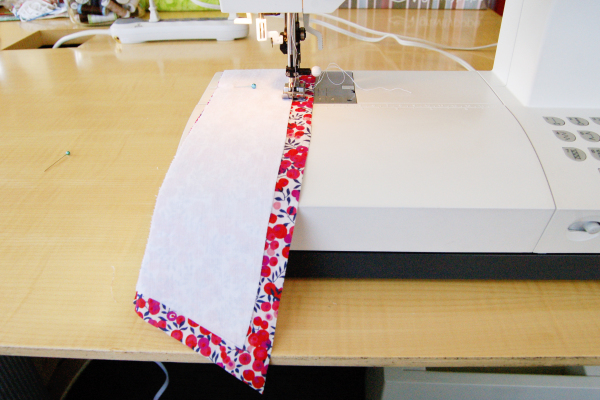
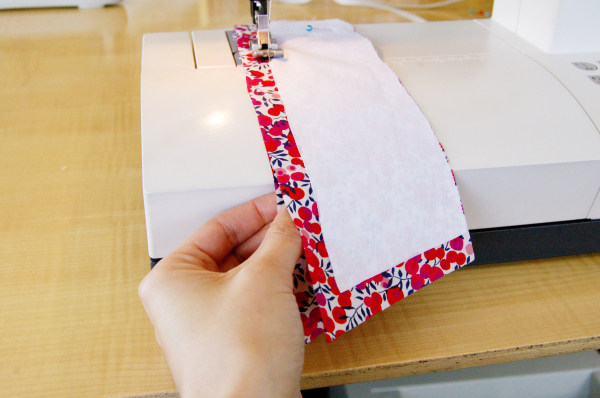
Now! What we’ll do is edgestitch around the edges of the interfacing. As we do this, we’ll pull the uninterfaced collar, stretching it to fit the top layer. Sew with the interfaced side on top. Start in the middle, and work your way to the edge. Then start again in the middle, sewing towards the other corner.
Here’s a close-up of where exactly I am sewing:
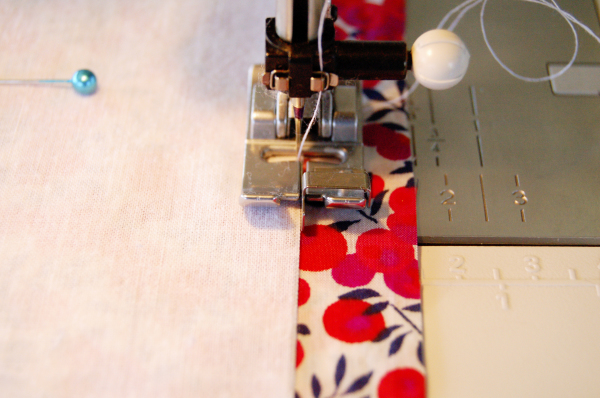
I’m using the edgestitching foot and lining it up along the edge of the white interfacing, with the needle shifted ever so slightly to the inside of the interfacing for a very close edgestitch.
It’s hard to see the white-on-white stitching but here is how it will look at the point of the collar.
Once you’ve sewn one side, it will be a little bubbly and puffed up on the interfaced side. You can see in the photo below that the top layer is not completely flat. This is intentional, so that the collar will curve around the neck. It will all come together soon!
Flip the collar around and sew from the middle to the other point. You’ll want to use two hands when you sew, to pull that under layer tight as you sew. I’ve tried to demo it with just one hand (and the other on the camera!)
Trim the corners.

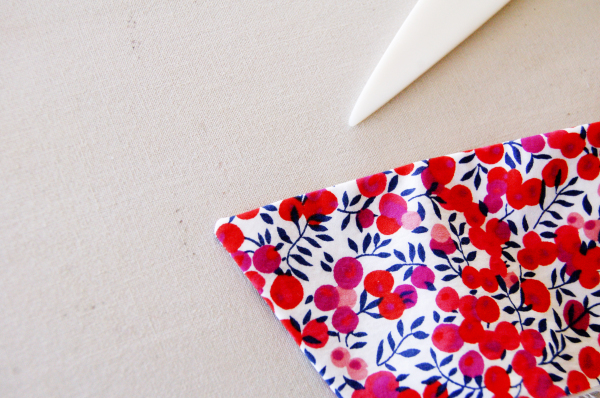
Now fold each corner in, and press. This will make the seam allowances naturally want to go into the right place when we turn the collar right side out.
Turn your collar right side out, and press. Use a point turner to poke out the collar points.
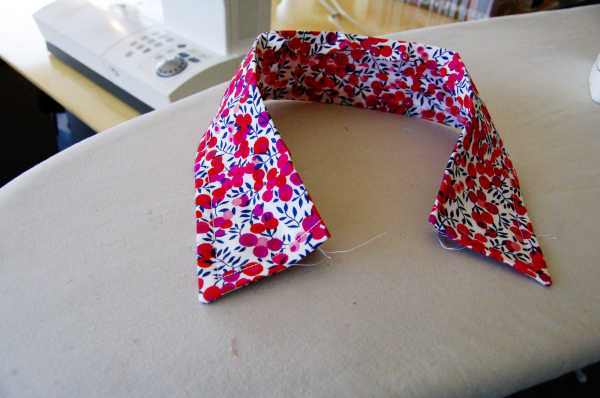
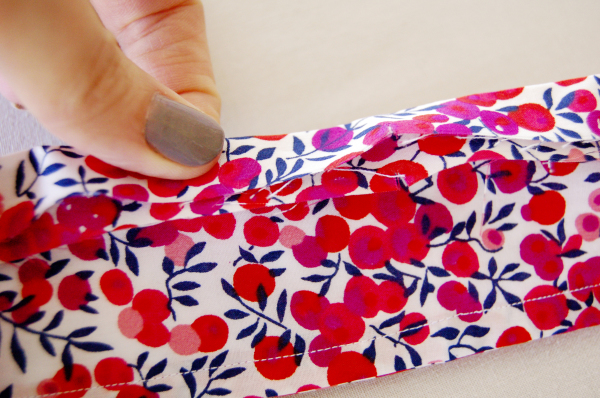
Press your collar. It won’t lie flat if you have stretched your undercollar nicely, it will look a bit like this!
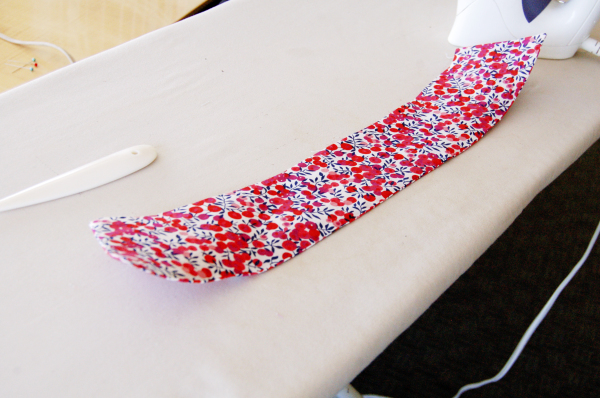
Can you tell how three-dimensional it is from that photo? How about this one?
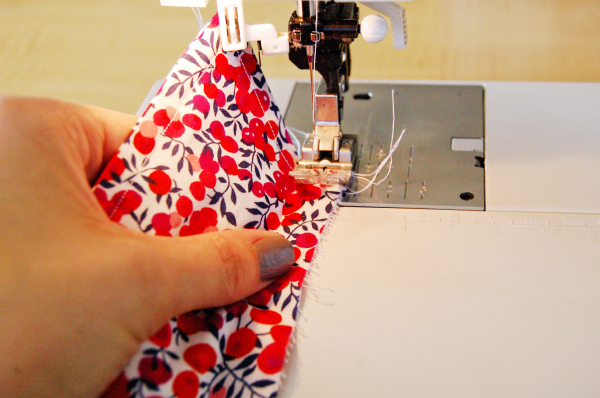
Ok! Only a few steps left. We’ll topstitch the collar next.
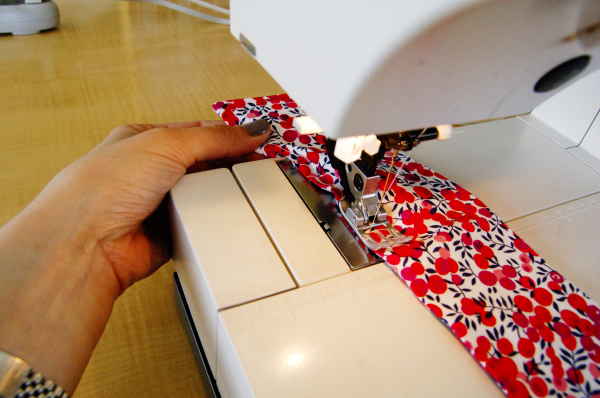
This photo is meant to demonstrate that you have to stretch the undercollar as you topstitch, or you’ll end up with it all bunched down at the other end.

One final step. If we sew our collar in as it is, it won’t bend nicely over the collar stand. This last step ensures that it has the perfect fold over the stand. I like this step even without any of the above steps! I did it on the pocket flaps for another shirt and it makes a difference.
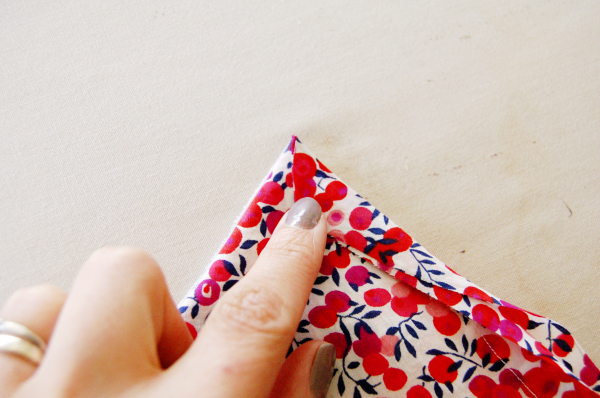
Fold over the seam allowance along the raw edge of the collar, pressing it towards the undercollar.
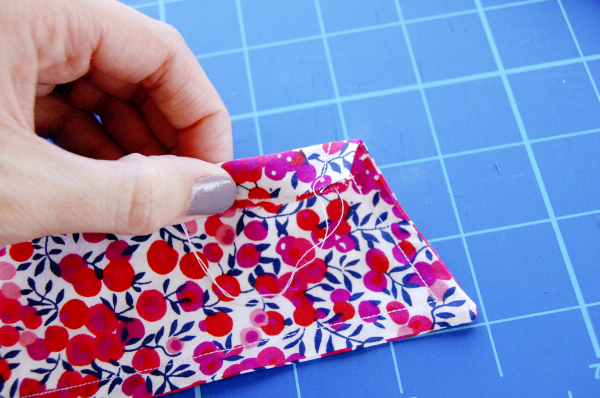
Press this fold in place. Now if you line up the raw edges evenly, you’ll have extra fabric bunching on the undercollar. What you want to do is smooth out the undercollar, so it’s flat and even. This will make the edges not line up at the top edge and that’s all right!
Baste close to the fold, within the seam allowance, about 1/4″ (6mm) away from the fold.
Now this is the part where the Shirtmaking book wants you to trim down this seam allowance to 1/4″ (6mm) but I left it as the full 5/8″ for now.
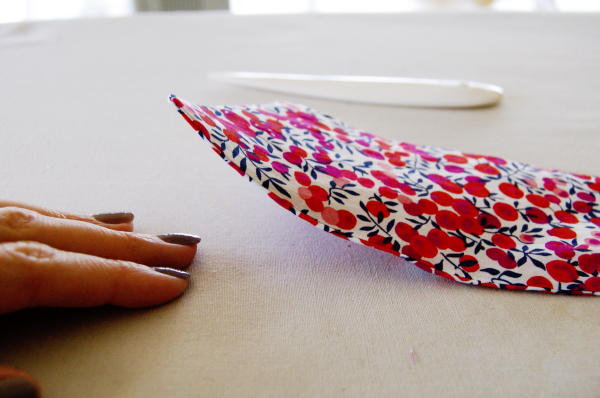
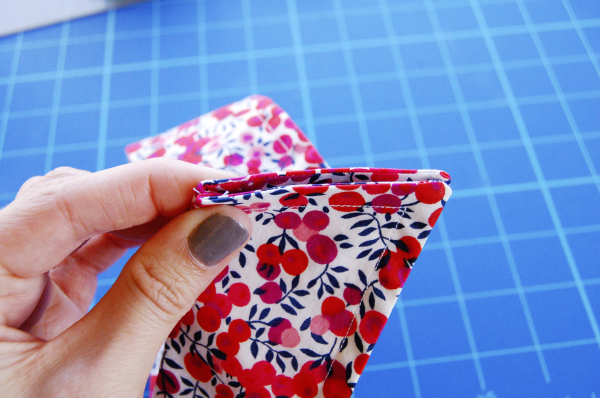
Here’s our finished collar! So pretty. Rounded and formed to the shape of the neck.
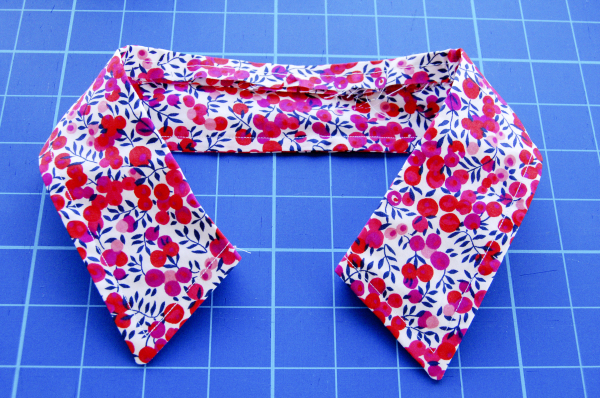
Check to make sure the collar points are exactly the same length: check!
Thank you David Page Coffin for sharing this innovative method. This isn’t the collar method included in the Granville Shirt instructions, for simplicity and efficiency reasons, so I wanted to post it here so you can see what I did. I did incorporate some of the theories, like sewing the collar first and folding it over at the seam allowance, but not with the amount of detail I showed here.
By following this method, you end up with a collar that is shaped to the neck and sits very nicely at the neckline.
Next up: sewing the shirt collar stand, again, the Shirtmaking way.
ps. Check out all our posts on shirtmaking here!
Thank you for sharing this tip. Attention to detail, isn’t it?
It really is! If you like precise work, sewing a shirt is really satisfying. I do!
Wow! I can’t wait to try this method!
There’s no one shirtmaking method. I took a menswear sewing class taught by a former designer of men’s shirts and that’s not how we did it.
Among other sources, I would look at Mike Maldonado’s site. He’s a professional shirtmaker.
I mean ‘Shirtmaking’ like the book. I agree, there are many different methods to achieve great results.
I’ve used this method ever since I read that book. Makes such a huge difference!!
Sure does!
I have never seen this method. My shirt collar attempts last year were a major “fail”, as in, wearable, but not to the office .I will try again, as the “boy” can use some new shirts, but RTW won’t work (shame on Lipson for no longer making the 36-7″ sleevelength), and custom is just too expensive. Thank you Tasia.
Glad you found the tutorial useful! Isn’t it nice to be able to customize things like sleeve length? I’d imagine that RTW only carries what sells the best, but when you sew you can make your sleeves any length you like.
This looks like a fantastic method for beautiful and accurate results. I am worried however about the long term problems with the glue. Does it stay in forever, or degrade in any way? Does it wash out but yet the collar stays perfect?
Thank you Tasia
It washes out, but the collar stays perfect! Best of both worlds. In this case, the edgestitching of the interfacing holds it in place. You do have to iron the curve back into the collar, instead of pressing it completely flat, but it rolls beautifully. (I just ironed this shirt this weekend after laundering, and can confirm!)
Thank you for answering the question about the glue, would that make it sew in interfacing you used then?
Yes it is! It’s bleached muslin, prewashed before cutting, mentioned a bit more in this post: http://sewaholic.net/coming-up-shirtmaking-tips-and-tutorials/
This is very exciting, and I love glue basting anyway. Thank you so much, I will be trying this method/technique soon!
Having the photos in such details is great! I usually use fusible interfacing but I’m keen to try this method with sew-in stuff. And you’ve done a couple of other little things that I don’t do either (like pressing the corners once you’ve folded them – makes so much sense!) that I’ll try on my next one.
It does help, doesn’t it? Glad you found it useful!
Very interesting method! I’ve read about sewing the curve into the collar but this is a very clear illustration of how it’s done. I just finished my Granville muslin and am about to cut into my first run… I’m definitely going to give this a try!
Great! I have follow-up posts planned to talk about the collar stand as well, to finish the process!
Wow, that’s beautifully done, Tasia…and I’m so flattered! Besides the clear and detailed pix, what I like best is that you’ve tweaked my methods to suit yourself, keeping what works and fixing what would work better FOR YOU. As SEWER says, there’s no ONE best way to do collars, or anything else.
I’m so excited to see you commenting on my blog! :) And also that you think my collar looks nice, what a great compliment. Thank you. I agree, there isn’t one right way of sewing anything, there are so many different ways to approach the same step. I suppose my post title was a bit misleading if it came across as the one and only way! Also I see you have a new book coming out this year on Shirtmaking, it’s on my wishlist!
I thought it was very clear from your post that you were basing your method on the book and that it was a method that worked for you. Also you took the time to sew a collar, photograph the steps and explain it clearly for the novice sewist. Thank you!!
This is amazing! I’ve only made two collars so far, but neither one seems to sit well. I can’t wait to try out this method!
This is brilliant, thank you. I’ve just finished a collar but have another one soon, will definitely give this a try.
Fantastic post Tasia! I have missed your beautifully written tutorials!
Thank you! I’ve really enjoyed writing this series and I have so many more shirt sewing posts coming up! Construction posts are my favourite sort of writing.
Thank you so much ! I have been struggling with collars and collar stands and consider them one of the holy grails of learning to sew, I am looking forward to the next post ! Karen
I’m so glad this post was interesting! The next few posts on sewing the collar stand and joining the collar to the stand will continue the story and hopefully be just as useful!
Wow! What awesome tips Tasia! I’m really impressed (tee hee) with the tip about pressing the collar points! Thanks for sharing!
Any time! Glad it was useful.
Thanks so much for these tips! I love making shirts. I get this satisfaction from seeing these perfect seams forming… There’s one thing I don’t quite understand> the last bit where you baste and fold over the seam allowance. What do you do with it afterwards? Do you hide under the collar stand? Perhaps I am getting ahead and you will explain in an upcoming post. Looking forward to it.
You’ll see! It will make sense in a future tutorial. We’re preparing for the next step and the step after that.
Now maybe I missed a step, but are there two patterned pieces and are those pieces sewn together wrong sides facing and then the interfacing sewn just on one side of the patterned piece?
Close, but not exactly, the two collar pieces are placed right sides together, with the interfacing sewn on at the same time as sewing the two collars together. It’s hard to tell since both sides of this fabric look the same, the wrong side looks nearly identical to the right side. So imagine you are sewing two collars together like normal, right sides together.. except as you do that, you’re also edgestitching the interfacing at the same time.
This how I learned to sew collars many moons ago, minus the glue of course. The undercollar I always cut on the bias, which stretches naturally, avoiding the bunching issues. It’s great to see a resurgence in sewing and other crafts.
I do prefer this method:
http://off-the-cuff-style.blogspot.se/2012/10/perfect-collar-pointsa-shirtmakers.html
It works every time and in dificult materials to.
This is incredible, I’ve never wanted more to make a collard shirt than I do right now! In fact, I suppose I’ve never wanted to make a collard shirt AT ALL before…til I saw this.
wow! it great. will love to watch the video. thnks
Thank you Tasia for giving us not only great patterns to sew with but excellent instructions and tutorials!! And, I knew exactly what your title was referring to as I have the book….I just finished a crisp, white, collar for my Granville and it looks fab!!
Thanks again and please keep up the great work….I am a big supporter and I need you =o)
Jeanna Hanna
im very new to sewing and I need a complete guide to sawing a shirt and a trousers. I have just learnt how to sew the colar. thank you.
Wow, this is incredibly helpful, especially with the collar points. I have not made a tailored shirt for myself in 20+ years. This is exactly what I needed to see so I can try this technique with my wearable muslin that I am making. Thank you again, Tasia!!