Here’s the last step of constructing the collar and collar stand!
So far, we have a shirt with a collar stand. Our collar stand has an opening along the top edge where we’ll insert the finished collar.
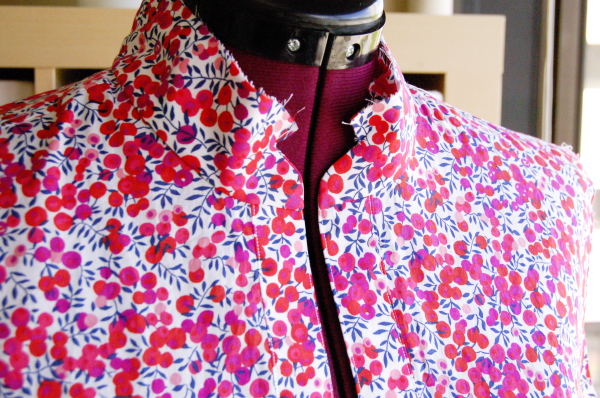
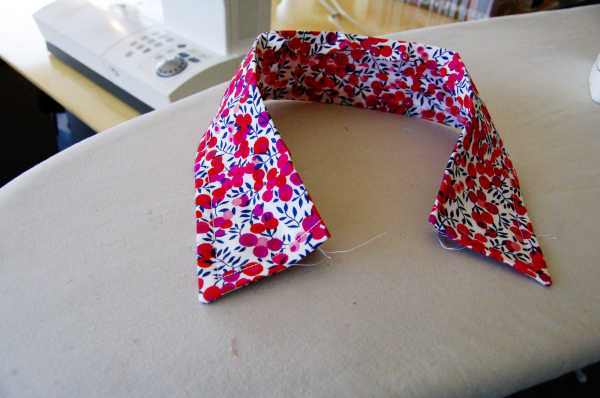
We also have a beautiful collar prepared, all ready to attach to the shirt’s collar stand.
We’ve passed the hard part already. Now we’ll simply sew our collars into the stand opening, and be done!
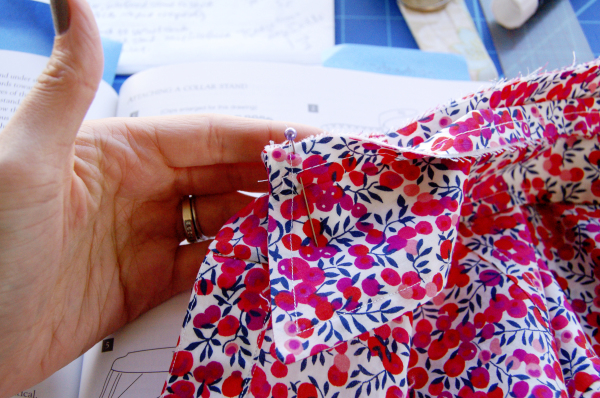
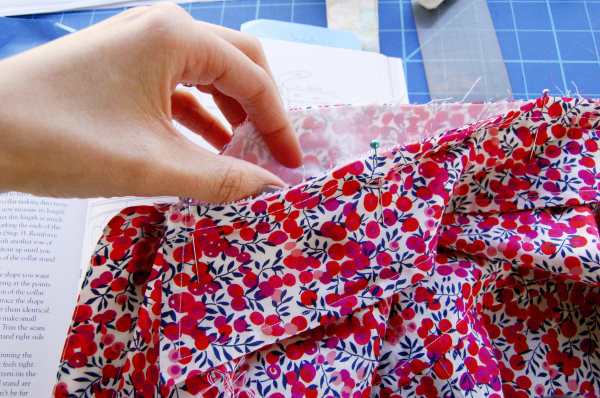
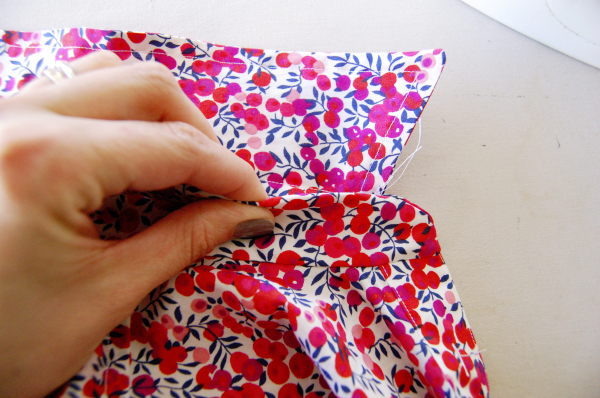
Pin the collar to the opening in the collar stand. This is why I left the seam allowance untrimmed, it’s easier to line up with the collar stand seam allowance this way. It makes the most sense to me for this specific pattern. If you were making your own pattern, this is somewhere you could use a 1/4″ (6mm) seam allowance instead, since it gets trimmed off anyways.
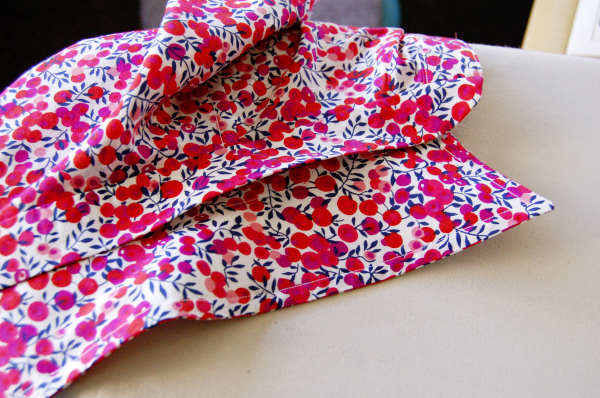
Here’s what it will look like, from a distance:
It’s important to note that you are pinning the collar ONLY to the uninterfaced collar stand, not through both layers.
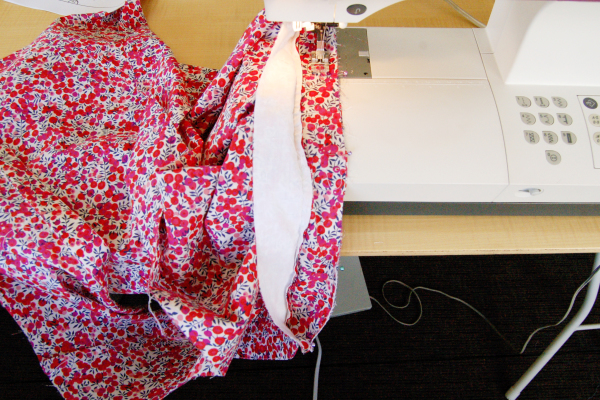
Sew the collar to the stand.
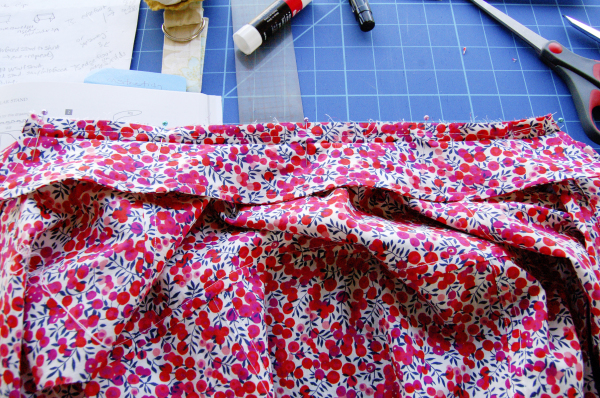
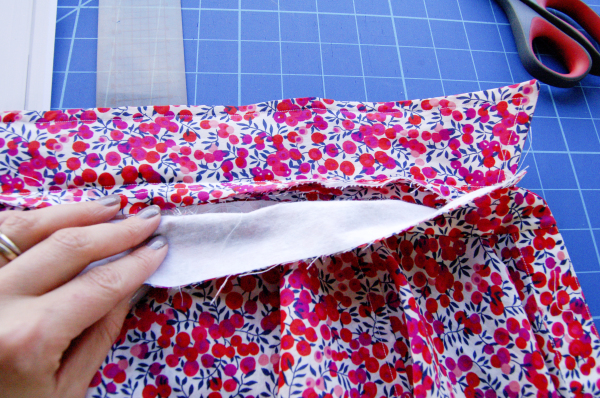
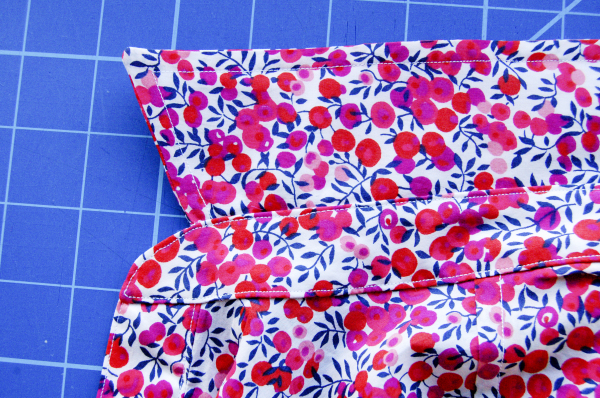
The last thing to do is to close up the collar stand. We’ll take the interfaced collar stand, and turn under the seam allowance so it lines up with the collar-to-collar-stand seamline.
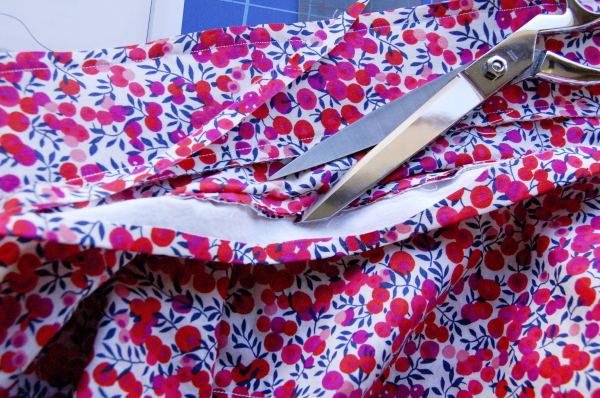
Now I’ll trim the collar seam allowance, before closing it up!
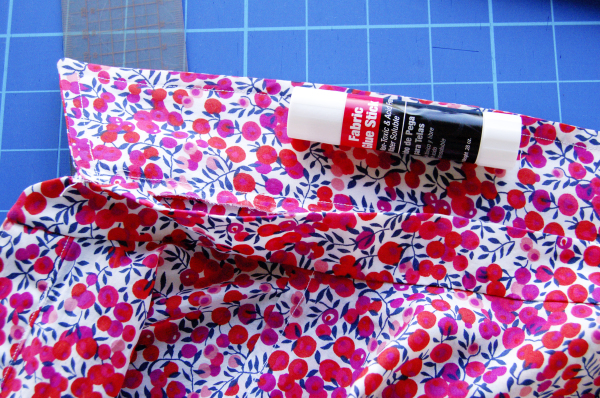
Ok, now turn under the seam allowance of the collar stand.
I like to do this part at the ironing board, so I can press and adjust the edge to line up perfectly with the collar seamline.
Trim the seam allowance of the collar stand to 1/4″ before closing it up.
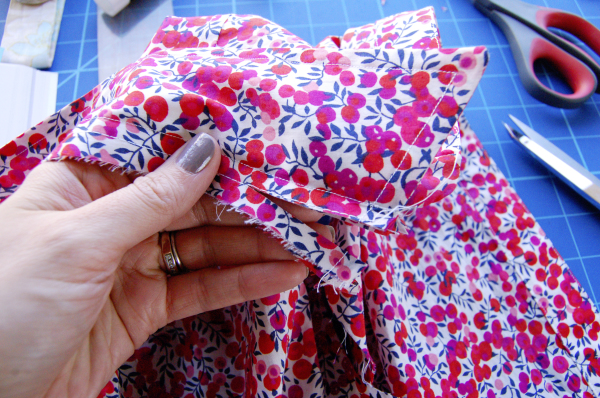
Now glue-baste that edge in place! This is a time where using pins would be challenging, as there are so many layers to pin through. It would be hard to pin this edge in place and have it flat.
Our final step is to edgestitch all around the collar stand. Start at the top edge, at the centre back. This is a good place to start as it’s hidden by the collar on the outside, and hidden by your neck on the inside.

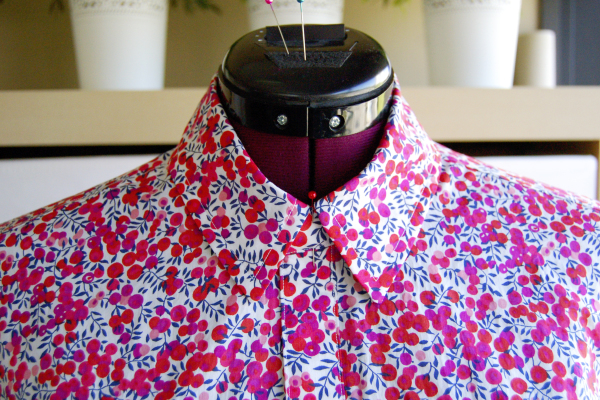
Now that looks nice!
This method results in a really beautiful collar. It curves so nicely around the neck, and it folds beautifully where the collar meets the collar stand.
What do you think of this method: do you think the extra effort is worth it? Have you tried this way of sewing a shirt collar?
ps. Check out all posts on shirtmaking here!
I haven’t tried this method, but your collar looks absolutely perfect, so I’m going to give it a whirl. I have David Coffin’s book and have tried to sit down and read it through … but I think it’s one of those books you have to turn to when you’ve got a specific shirt-sewing challenge in front of you. It’s certainly not bedtime reading. Thank you for the tutorial — and wow, that Liberty Tana pops. Love it!
Beautiful result, I will definitely try this method. I have used Margaret Islander’s technique in the past, but the front edges of the stand don’t always turn out identical. This method may take longer, but you are more in control of the results. And I love precision sewing. Thanks for posting all these instructions and photos. Much appreciated.
Thanks Tasia, looking forward to putting this into practice.
Thanks for all of these posts! The collar stand is where I struggle because it’s not straight when I top stitch it. This method seams like I will have a straighter collar stand. I can’t wait to give it a go!
Wow. This looks really clever. I will definitely try it out on my next shirt.
Tasia,
This looks exactly like how mens shirts are put together. I’ve dissected a few to check them out. As of yet I haven’t tried this method on my own sewing, but I definitely will. Up to now I have used the method where the collar is attached to the stand and then the stand to the shirt. Unless you are working with a fine tightly woven fabric, this gives you lumps. The only exception was when I made a shirt that had a front facing which folded over the collar when you sewed the seam much like a convertible collar does. Your shirt is so crisp and the collar so professional looking!
I feel like this method is easier than other methods I’ve tried in the past. And with such beautiful results! These tutorials are definitely one’s I’ll be referring to for years to come.
I tried that method for my Granville and it worked for me. :)
This is not the method I learned in a menswear class taught by a professional. We prepared the collar and collar band first. It’s much easier to top stitch the band before attaching it to the shirt.
I did use this method once, but I had issues getting the collar sewn neatly to the stand. I’ve been thinking to give it a try again though–it turned out so neatly for you!
I used a similar, but not identical method. Despite hand basting that last seam of the collar stand down I had a lot of puckers when top stitching….. Maybe glueing will help with my next Granville (I still love it, will blog it soon!). Yours looks lovely! I just need to practice :)
My first Granville following this method turned out great – though definitely not as neat as yours!
Also, a note to those, like me, who maybe don’t look at the instructions carefully, or perhaps are sewing later at night than they should – the collar is not sewn to the collar stand right sides together! :)
Thanks for the perfect instructions! I have Never Seen this method before. Tried this way twice with the grainville pattern and It worked perfect. The collar is much more precise and I am absolutely in love with my new learned technique.
It’s like magic!!! I love it! This completely inspires me to make something with a two piece collar. I get it now!
Oh good! Glad it all makes sense :)
I have make a couple of button up shirts in the past and this is the first time I have seen this technique for installing the collar/collar stand. It seems like my collar stand and collar to too long for the neck line. Did I just cut the wrong size or is they a reason for the extra length? The collar and collar stand pair up nicely but it doesn’t seem to line up with the neck line. I hope that makes sense.
Hi Amber, your question makes sense! Did you staystitch the neckline and then clip it so it can lie flat? You’ll end up opening out the clipped area significantly in order to fit the collar stand – also, the collar stand extends by a seam allowance on either end. In this post you can see the collar stand being pinned to the neckline, and you can see how much the clips are necessary in order to fit the collar stand. http://sewaholic.net/sewing-a-collar-stand-the-shirtmaking-way/
Hope this helps! This is the first thing I thought of but there could be other factors, for example if you did indeed cut the wrong size.
I did do the staystiching and clipping. I still ended up with collar stand being an 1″ or so longer then the slipped area on both sides. I sorta eased in the collar stand but it looks puffy and the collar itself lines up with the edge of the button band instead of 3/4″ back like it normal is. I am going to try to cut it down a bit, I just didn’t know if the extra length was needed to get the right look.
It’s hard to determine what might have happened, but no, it is not meant to be that much longer. It should extend by a seam allowance (5/8″ – 1.5cm) on either end, so you can sew around the collar stand. Perhaps the fabric has stretched, or the neckline was sewn a little smaller with larger seam allowances at the shoulders. Maybe the second option, since the collar is also long? Sounds like both the collar and stand are larger than your neckline of the shirt.
Thanks – it is exactly my issue with the collar stand (being too long..). I did the stay stitch but should put more emphasis on flating it all!
Hi, thank you so much for these post. They are very helpful and informative. I wanted to ask if you have any advice on selecting a size for this pattern. I know I will have to do a fba. However when I try to make shirts the upper bust is too big
and it’s tight accross the bust. How much ease do you recommend for the upper bust and bust area so that the colar lays flat against my chest.
Thanks
Charlene
Choose the size that fits best in the shoulders, for most busty women that will be the high bust measurement, especially if you already plan to do a FBA. I would measure your high bust, then compare it to the body measurements and choose the pattern size that is closest to your high bust measurement. Then adjust for the full bust from that starting point. Here’s a blog post on the curvy sewing collective blog that shows a full-bust adjustment on the Granville skirt: http://curvysewingcollective.com/tutorial-a-full-bust-adjustment-on-a-one-dart-bodice/
I’d definitely suggest making a muslin before cutting your real fabric, because there’s a lot of work in sewing a shirt and it’s nice to know you’re happy with the fit before proceeding to sew the real thing!
So much yes. After using all of the existing curse words and making up several new ones this weekend trying to do a shirt collar the old-fashioned way, I just tried this and hey presto! A lovely collar. Off to purchase everything with David Coffin’s name on it. Thank you!
Thank you so much for these posts. I am returning to garment sewing after doing mostly quilts for the past 10 years. (It’s scary!) I followed your posts and the collar and stand turned out wonderfully. Well worth the effort, although I took it slowly and really it did not seem to be any more fiddly than I recall other methods being, with the added bonus of giving a great result (which I don’t recall the other methods giving). Thank you again.