 Hello Sew-Alongers! Today, we’re going to attach bias binding to the neckline. Sounds tricky, doesn’t it? This method of binding the neckline is the easiest method I’ve used, and it gives a nice, clean finish without fiddly edges to hem. Don’t fear the neck binding! I think you’ll be pleasantly surprised at how it all comes together.
Need to get caught up on Sew-Along posts? Here are links to the earlier posts:
- Pendrell Sew-Along #1: Prewashing your Fabric
- Pendrell Sew-Along #2: Measuring and Choosing Your Size
- Pendrell Sew-Along #3: Shortening the Blouse Length
- Pendrell Sew-Along #4: Altering The Hip and Waist
- Pendrell Sew-Along #5: Princess-Seam FBA (Full Bust Adjustment)
- Pendrell Sew-Along #6: Cutting Your Fabric
- Pendrell Sew-Along #7: Bonus Post! Cutting Scalloped-Edge Lace
- Pendrell Sew-Along #8: Underlining The Pendrell Blouse
- Pendrell Sew-Along #8.5: More on Underlining & Basting
- Pendrell Sew-Along #9: Sewing! Plus, Finishing Your Edges
- Pendrell Sew-Along #10: Constructing and Attaching the Draped Sleeve
- Pendrell Sew-Along #11: Gathering Ruffles
You’ll need your neck binding piece (6) and the front-back-sleeve unit we finished up in the last post.
How to add bias binding to our neckline:
Take the neck binding piece, and fold it in half, right sides together. Pin the shoulder seam together (this is the smallest edge of the piece) so you form a loop.
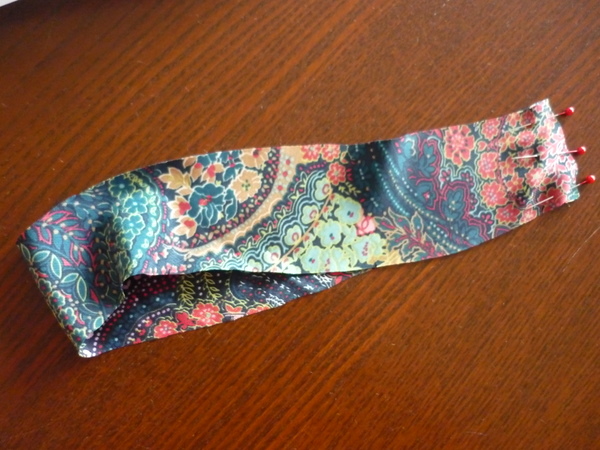
Now, sew the pinned seam, taking a 5/8″ (1.5cm) seam allowance. 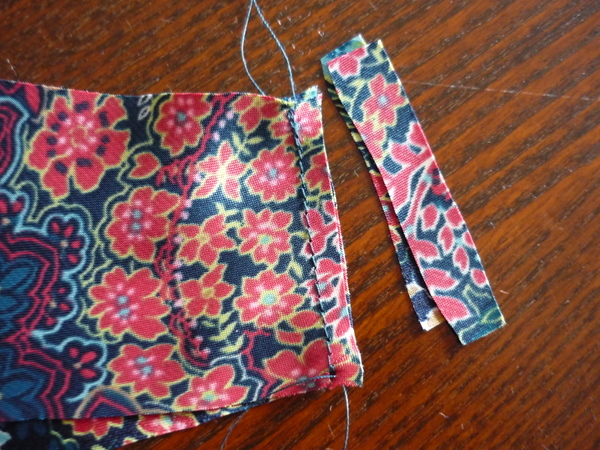
Trim seam allowances to 1/4″ and press the seam open. (You might find it easier to press the seam allowances open, and THEN trim afterwards.) I followed my own directions, but the thin, polyester fabric doesn’t like to press.
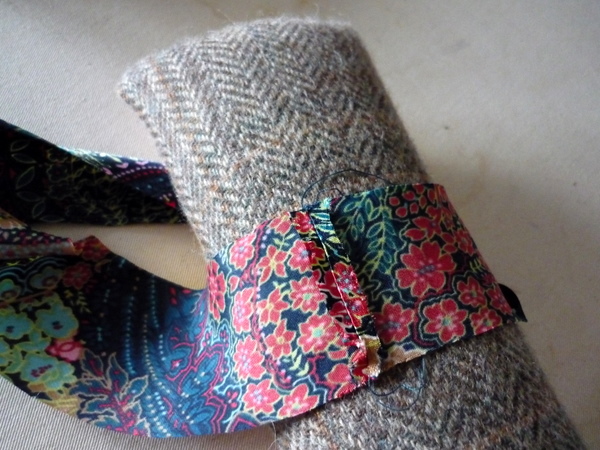
Next, take the loop of binding, and fold it in half lengthwise, wrong sides together. You’re creating a loop of binding that we’ll apply to the neckline.
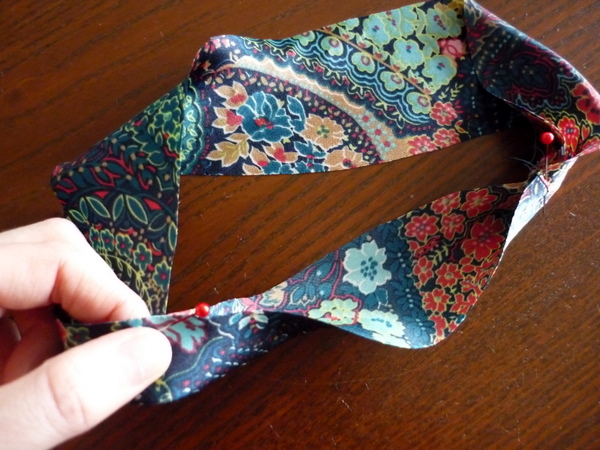
Pin the loop edges together, matching notches and keeping the edges lined up.
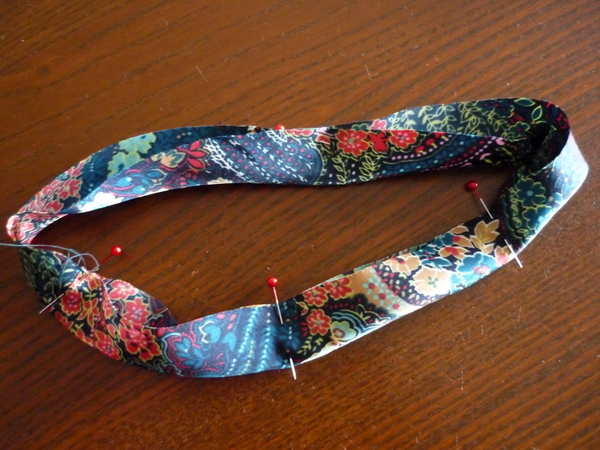
Now, we’re going to baste the raw edges together. This will make it much easier to attach to the neckline, as it will keep the layers from shifting. Baste using a long machine stitch, 1/4″ from the raw edge. I use the edge of my presser foot as the quarter inch marker.
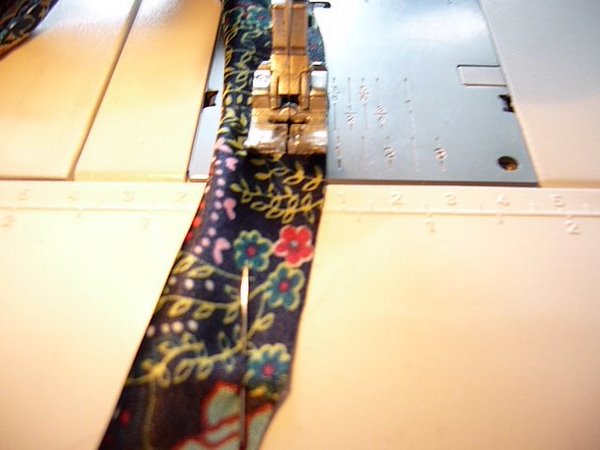
Here’s what it will look like, when you’re finished basting:
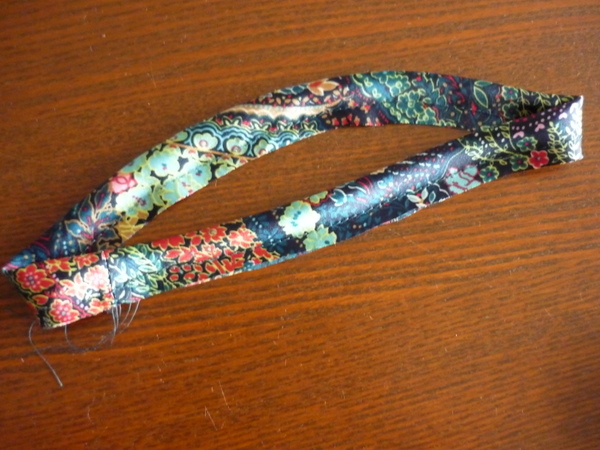
Let’s attach the neck binding to the neckline of our blouse! Start by finding the seamline of the neck binding. This will line up to the left shoulder seam of our blouse’s neckline.
There are four markings along the edge of your binding (three notches and one seam). If you fold the binding like the picture below, lining up the seam to the notch across from it, the other two notches will end up at either end of the loop. That sounds confusing! Basically, what I’m showing you here, is which is the front and which is the back of your neck binding. In the photo below, the front is on the left of my finger, and the back is on the right.
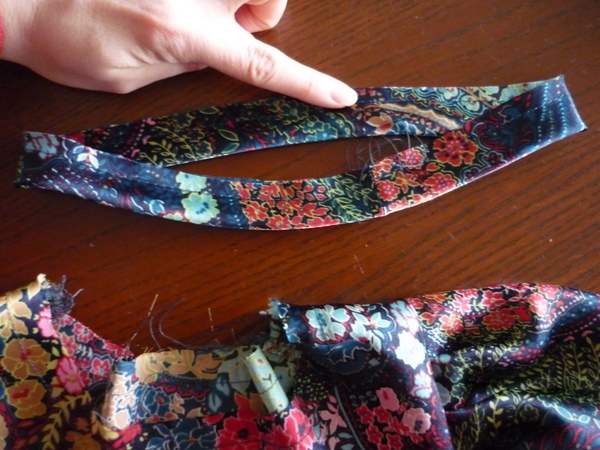
Make sense? Notches at centre front and back, notch at right shoulder, seam at left shoulder. (If you try and pin it on wrong, you’ll know right away because the notches won’t line up.)
Start by pinning the shoulder seam to the neckline binding seam. Seamlines are together, folded edge of the binding is facing down.
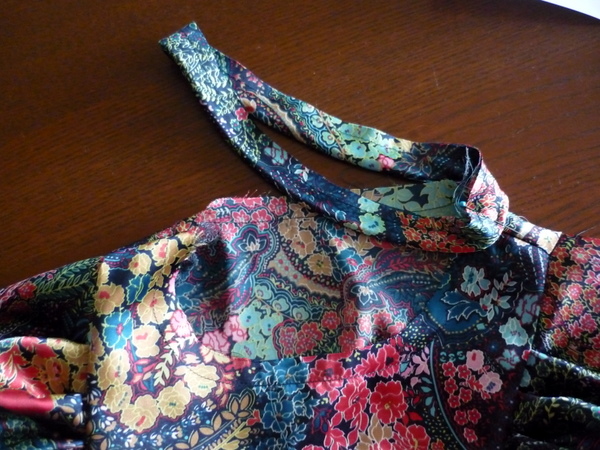
Continue pinning around the neckline binding, matching the notches. In the photo, I’ve started pinning at centre front. (See how it would be impossible to sew it on wrong? There’s way more distance between front and shoulder than there is between back and shoulder.)
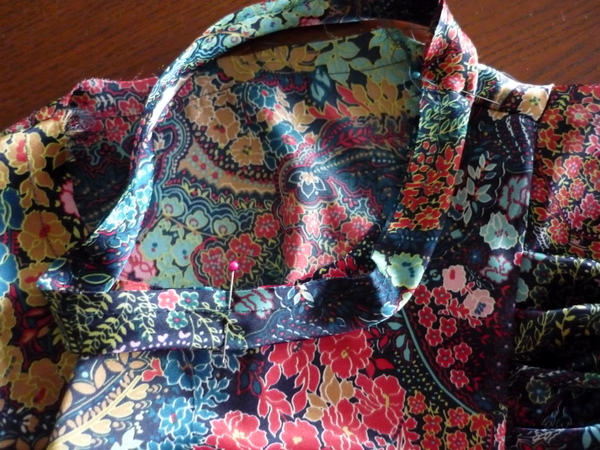
Our notches are all pinned! Once that’s done, pin as many pins as you need in between the notches. If you’re worried about pin-holes, then pin parallel to the seamline instead of at right angles.
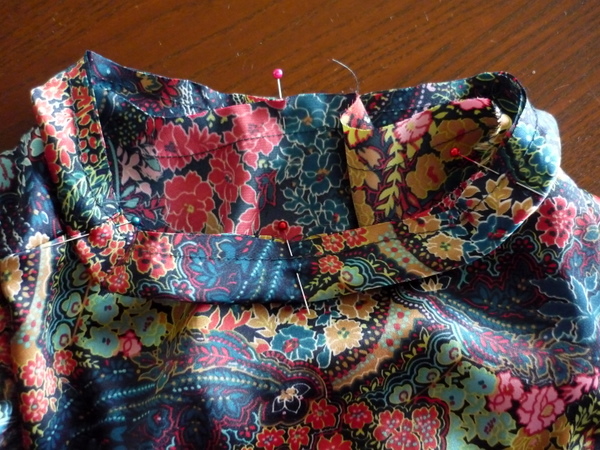
I put a few pins in between the notches, but not that many. There’s no rule or limit to pinning, it’s whatever makes you comfortable stitching the seams!
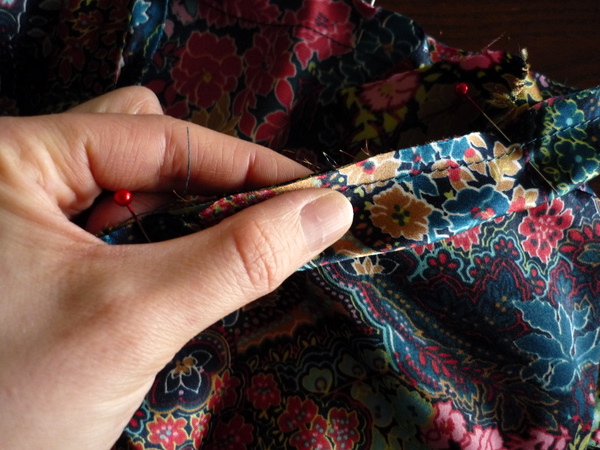
Take the pinned pieces over to the machine, and stitch the binding seam. Sew a 5/8″ (1.5cm) seam allowance, lining up the edges as you go.
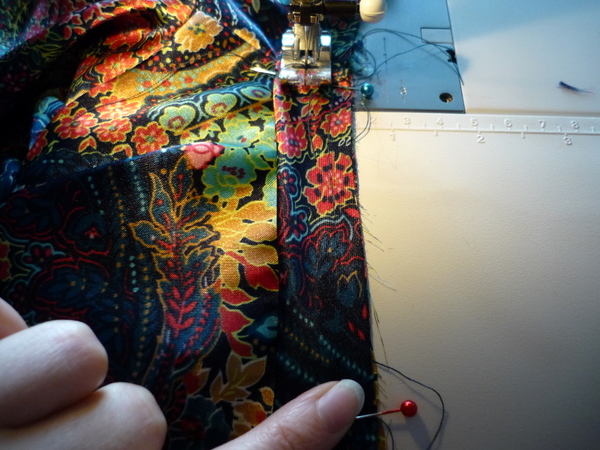
Here’s a close-up of the binding seamline:
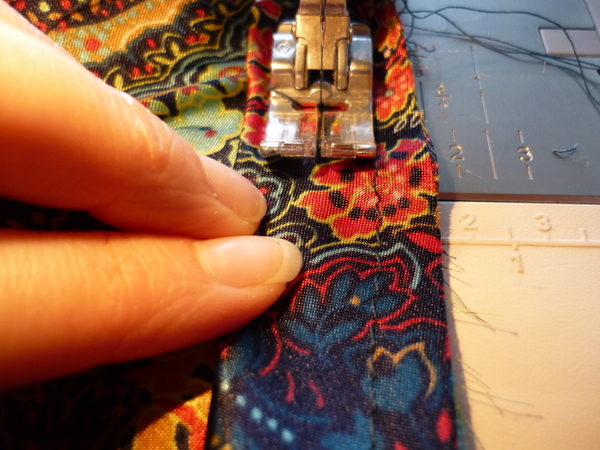
When you’re done, it should look something like this:
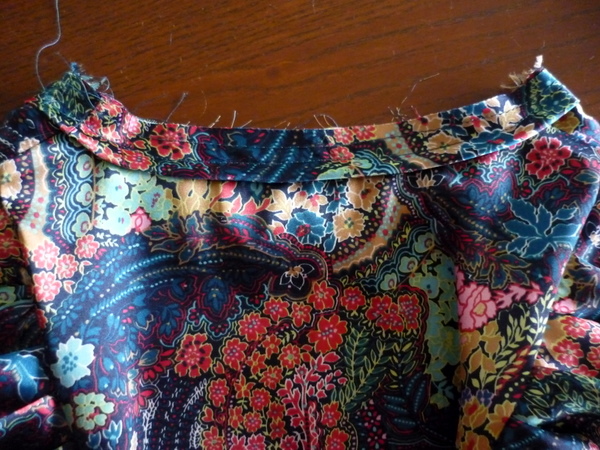
Trim the binding seam allowance. I use the original basting line as my guide, to trim the seam allowances to 1/4″. (As long as your basting is even, you can do the same!)
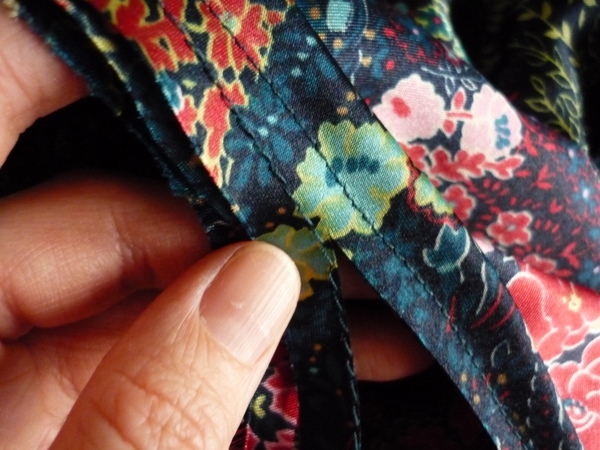
Time to press the binding to the inside! Take your pieces to the iron, and lay it out flat with the wrong side facing you.
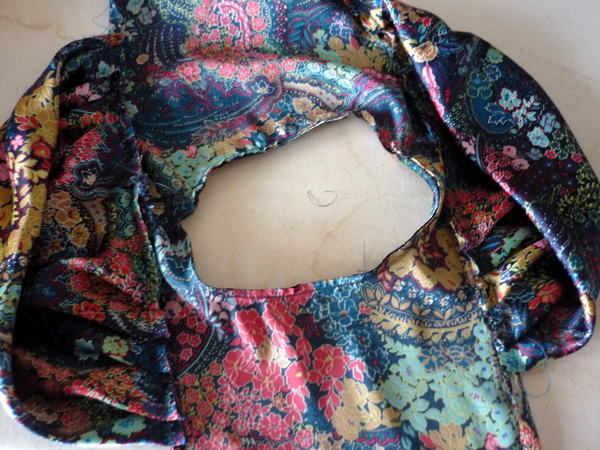
Now, roll the binding to the inside, so that just a teeny peek of the blouse front has rolled to the inside neckline. This was hard to photograph, but I think it’s clear enough to understand! If you were to look at the blouse from the right side, all of the neck binding would be hidden.
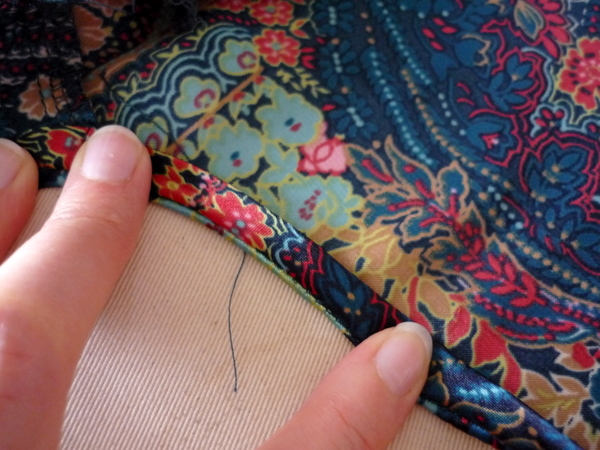
Pin all around the neck binding after it’s been pressed. I pinned at right angles to the neckline, catching the binding as the pin goes in and as it goes out.
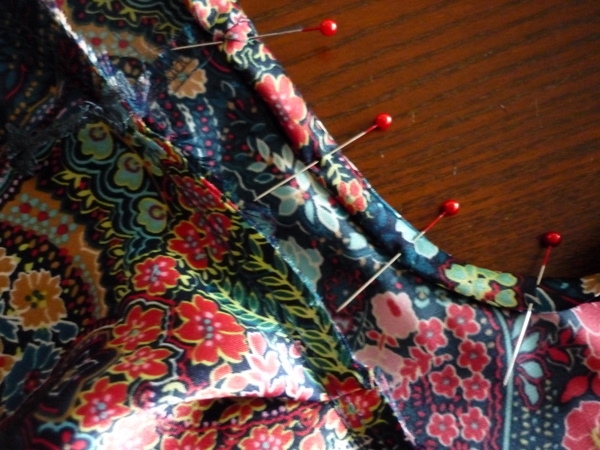
Close-up of the binding and pin:
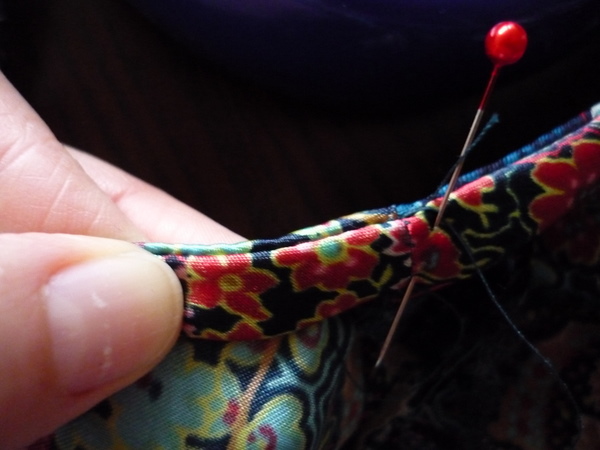 Here’s what your neckline should look like, once it’s all pinned. Look at the back neckline – see how the front is showing, and all of the binding is hidden?
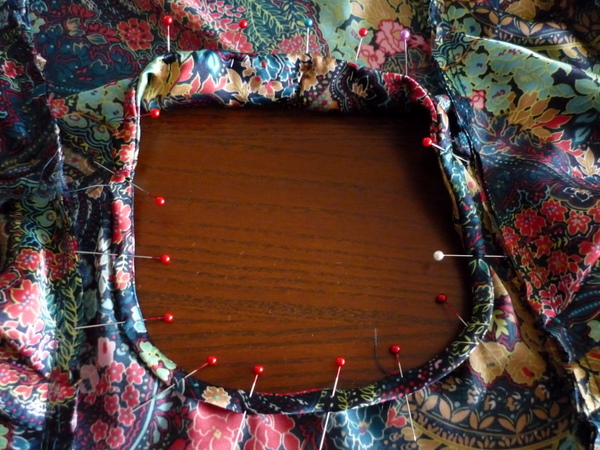
Ok! Time to sew it on. You could sew it by hand, if you wanted. I much prefer the intentional topstitching, especially because it’s hard to sew invisibly. If it can’t be completely invisible, I’d rather have tidy, visible stitch lines.
This is how I worked with the binding on my machine – start inside the neckline hole, as shown:
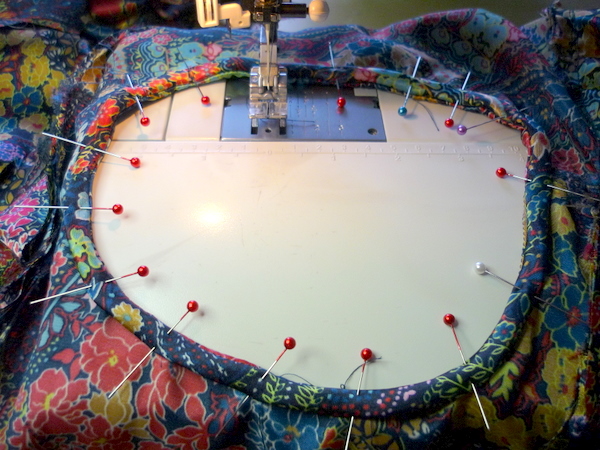
Once your needle and presser foot are inside the neckhole, it’s time to topstitch. Go slow, it’s better to sew it slowly and neatly than rush and have a messy neckline.
You’ll see I’m working from the wrong side, so I can edgestitch right along the fold of the binding piece. Start at the left shoulder seam, where the seam of the binding is. I figure there’s already bulk there, it might as well be the place where the stitching starts, too.
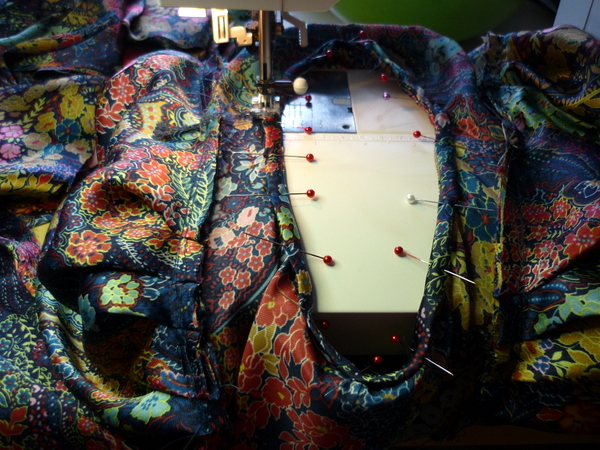
Here’s a close-up of the needle position as we edgestitch. You can see I’m stitching as close as I can to the fold of the binding. Again, it’s better to be slightly away from the fold, than to have your stitching miss the fold and have to rip out. 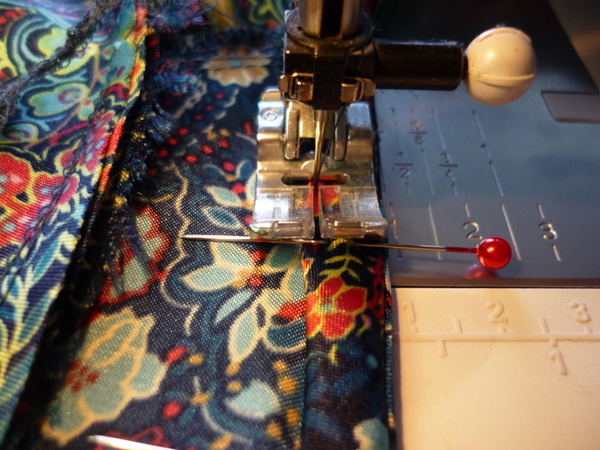
Go slowly! I have an urge to speed-race when I sew, but I dislike unpicking even more. Slippery fabric plus tricky curves means it’s time to go slowly, use the handwheel where necessary, and adjust as we go if the fabric starts to move around.
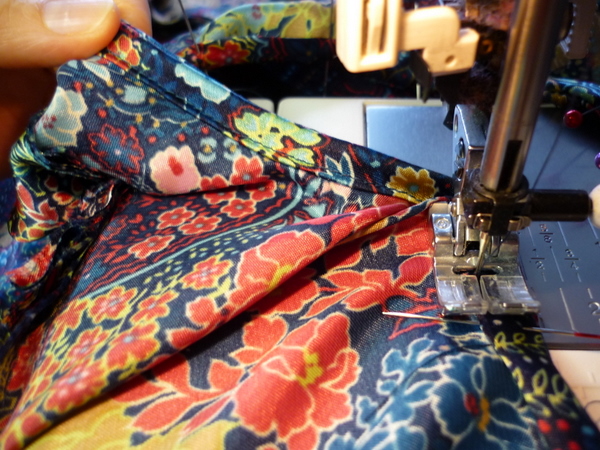
Here’s what your neck binding will look like, as you sew.
When you get back to the shoulder seam again, where you started, overlap your stitching over top of your starting stitches. Clip your threads, and give the binding a press to set the stitches.
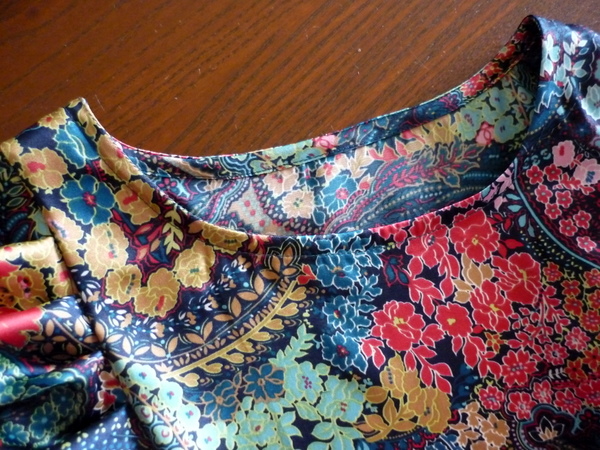
And voila! Tidy-looking binding around the neckline. Here’s a close-up shot of the pretty binding:
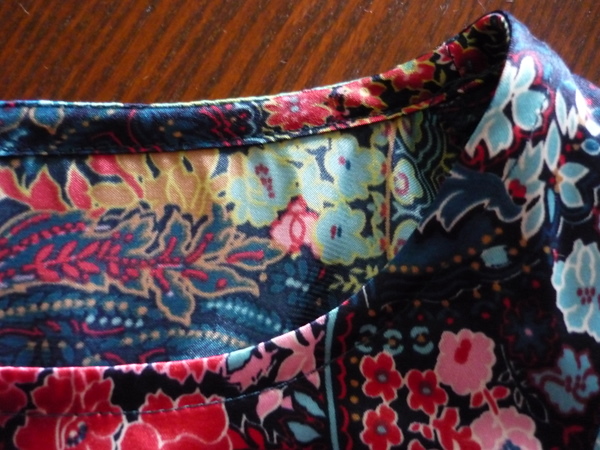
Trouble with your Neck Binding?
Q. My fabric won’t press nicely! I’ve trimmed the binding seam but when I press it, the fabric doesn’t hold a crease.
A. Mine doesn’t either! Use lots and lots of pins to hold the binding in place, and edgestitch slowly.
Q. Help! My staystitching is showing at the neckline!
A. No problem! Just carefully unpick the staystitching stitches where they show. I’d recommend gently lifting the stitches out, instead of ripping. Use your seam-ripper to cut the first stitch and the last stitch, and then use the tip to lift out the stitches in between.
Any questions or comments on today’s neck binding post, or tips and tricks to sewing bias bindings? Leave a comment below!

Can I just say I loved this step! It was a much more fun way to do bias binding!
What a great way to use bias binding. This will definitely be going into a project in the near future. So much easier!! Out of interest is there a quick way of finding out what length of bias binding you need for an opening eg. armhole, neckline etc.?
I just love this method, it looks SO nice and neat but it was also extremely fast and simple to do! For once I’m enjoying applying the bias binding, that is sure a first! Thanks Tasia.
Tasia – I’ve been saving the tutorials until I start my pendrell but couldn’t resist today’s – what a great tutorial – AND a great method!
Great method, i will definitely remember this one!! :) Thanks so much…
I think your tutorials are excellent! I normally have trouble understanding tutorials but these are so clear, thank you.
Hey Tasia, I’m having trouble with my neckline. It seems to want to stand up. I posted a picture here: http://sewing.patternreview.com/SewingDiscussions/topic/57902
As I said in the forum, I redid it & am still having troubles, though it did get better. What do you think??
Hi Tasia, another random beginner question. What is the reason for using a long stitch length for basting? Does it really matter if you change the length of the stitch, since you just want stitches to hold things together temporarily? I’m looking forward to getting home from work tonight so I can work on the neckline of my blouse now!
@Misty:
Hi Misty,
IIRC basting stitches are normally longer – so that they are easy to remove as/if & when you need too (longer stitch-length = less stitches along the line).
Basting isn’t always removed of course (as in the case of Tasia’s tutorial above where the bias fabric edges are basted together to stop them wiggling around messily when she sewed the binding to the neck), but say if you were sewing a muslin (sometimes called a toile) and you wanted to play around with hem length, or how it fitted – then you’d be really glad you had those long basting stitches to unpick – than to have a million more tiny ones LOL :)
Very nice job on the bias binding, looks great!
For steam ironing fabrics like satin, I put a heavy piece of 100% cotton flannel on top of my work, set the iron for cotton and press away. You might want to try it on a piece of scrap first to ensure your fabric doesn’t melt. If it does, try 2 pieces of flannel on top of your fabric. I used this method on a black satin shirt I made: http://sewsister.wordpress.com/2011/01/01/sewing-revealed/
@Claire: Thanks! That makes sense. So I guess in this case, since we can just cut off the basting stitches when we reduce the seam allowance, it’s not really necessary to change the stitch length (assuming I can sew a straight line anyway).
And thanks to everyone who is answering questions for us beginners! I like to know the “whys” behind each step because then I can see the big picture better and I feel more like I know what I’m doing instead of blindly following directions. :)
FABULOUS tutorial!
Thanks Tasia. These are great tutorials, and so clear. Couple of quick questions again:
1. Once you have sewn the binding to your neckline and trimmed the seam down to 1/4″ would you also clip the seams around the neckline?
2. Is it ok to put another line of topstitching on the inside edge as well? Whenever I’ve used shop binding I’ve always have the urge to do this.
I like the idea of using self-fabric for the binding. Can we follow the same principles if we want to use self-binding on other projects that call for shop binding or are there projects that you wouldn’t use this for? I presume for starters it may be an expensive way of proceeding if you need extra fabric to cut the binding pieces.
Thanks again.
Great tutorial Tasia! I’ve actually never seen this method in action (I mean, I think I’ve seen the result on garments, but not given much thought to how it’s made). I love knowing how to do this technique now, and I look forward to using it soon!
You are one of the best tutorial makers! Love it!
I found when sewing mine that the fabric crept a little bit and I have some slight diagonal strain lines on my fabric (only noticeable close up). Next time I might try using my walking foot for this step to see if that helps.
Also, my fabric wasn’t liking to hold a crease after pressing so I did similar to sewsister and used a piece of cotton batiste left over from a previous project as a press cloth and cranked up the heat on my iron. It worked great.
What a great tutorial. I actually did this differently (and not as cleanly). I will certainly follow this method next time…
Hi, Thanks for this tutorial. I usually have problems with this technique, as the width of the binding comes out uneven on the Inside. I think this is because i might stretch the biastape during construction. How do you prevent this?
Really cool technique, certainly easier than other methods. I guess that if you are using store bought bias tape where one fold is wider than the other you wouldn’t line up the edges, right?
Hey everyone! I’m glad you liked this method, I did too! I would normally avoid bias binding because it’s so hard to make it look nice and keep all of the edges turned in evenly. This way, you get better results and less fiddly edges!
@Sewing Princess: If you are using store-bought bias tape… I would iron it flat, and then re-fold it so it’s folded in half like the self-fabric binding. That’s what I would do, so I could apply it using this method. I would also steam it a little into a curved shape, as I find the store-bought stuff is stiffer and won’t curve as nicely unless you shape it.
@Katharina: To prevent stretching.. I would go slower, use more pins, and almost ‘push’ the bias binding towards the needle a teeny bit, so it puffs up and doesn’t stretch and narrow itself out. (Does that make sense? If you stretch it, it narrows, and if you ‘push’ it, it fattens up.) The other trick is to use the edge of your presser foot, the left side, as your sewing guide. use the lines on the right to get it into position, then watch the left side as you sew and keep it the same distance from the fold.
@Rachel: I would suggest more pins! On one of my armholes (where the technique is the same) I sewed without pins, and I found a little bit of warping too. What happens is there’s not enough binding to go around the curves, so you’re sewing the binding tighter than it should be, and when you turn it to the inside there’s not enough binding to fill in the curves. When you sew binding around an inside curve, there should be lots and lots of binding, so when you turn it to the inside, it can flatten out and fill in the curve. Picture a facing – it’s way wider than the curve, so when you turn it to the inside, there’s lots of facing fabric to fill in the curve. We’re using this bias strip to create a facing, but we’re relying on the nature of bias fabric to stretch and fatten as we need it too.
@Sewingdina: I didn’t clip the neckline seam, as I trimmed it very close and figured that was enough. If you’re concerned about the binding standing up and not lying flat, or if you’ve having troubles turning it to the right side, then I’d go back in and clip your neckline seams. Carefully though – don’t clip the stitching!
Sure, you could add another row of stitching! Or, what you could do, is understitch the binding first. That would give you two rows on the inside, flatten out your neckline, but won’t show on the right side (just in case it’s a little less than perfectly straight!)
Of course you can follow the same steps if you wanted to use self-fabric binding on other projects! I love the look of self-binding much better than store-bought binding. Store bought binding is stiffer and comes in limited colours. Plus, if you save your fabric scraps and leftovers, you could always cut them into binding strips for other projects. It doesn’t have to be expensive, but it does use more of your main fabric especially cut on the bias.
@Misty: Hi! The other thought about basting, is that sometimes you DO want to remove it later. Sometimes it shows on the right side despite all your best intentions for it not to.
Also, I think and I could be wrong, but I believe long basting stitches use less thread? So you’re saving a little bit by switching to long, basting stitches. Plus they’re faster!
@SewSister: Great tip! I like to crank the iron up past the recommended setting, so this is a good tip for anyone who has the same urges.
@Claire (aka Seemane): Thanks for jumping in with the answer!! I appreciate it :)
@Jenna: Hey Jenna! I’ve been thinking about your neckline, and there are a couple of things that might have happened:
1. The neckline on the blouse itself stretched out. Did you staystitch? If so, perhaps you have a very shifty and tricky fabric? Did you try it on before the binding was attached? (I feel like a schoolteacher for asking these questions. It’s in the name of science and figuring it out, not pointing fingers!)
2. You said the fabric frayed easily – I wonder if the neckline ‘frayed off’ a little, and therefore was too large for the binding to fit properly? Does that make sense? Even if a quarter inch of fabric disappeared all around the neckline, that would make a difference to the binding fit.
3. The binding was stretched too much to fit the neckline. Then, when you turn it to the inside, there isn’t enough ‘fatness’ to the bias left, to cover the curves. I feel like I could explain this better with my hands! Ok, think of a facing. A facing is small on the neckline edge, and wide on the outside, so when you turn it to the inside, the outside, wide edge is what covers the neckline. That’s the idea behind binding, too, except we haven’t cut one edge wider. We’re counting on the bias binding to stretch around the narrow parts, and puff and fatten around the curved parts. It will look like a mini-facing, fatter on the outside and narrow around the neckline, but all of the work is done by the bias itself.
Jenna, sorry it didn’t work out on your muslin! I would suggest, for round #2, making a little mock-up of just the neckline, to practice the binding. (Here I go sounding like a teacher again!) Cut the front neckline and back neckline, and cut the bias binding piece. Then make a little test, sewing on the binding. Maybe you might want to clip the binding seam allowances, so it turns to the inside even easier. When you turn it to the inside, put a zillion pins in, to hold it to the inside. It should be flat at this point, the binding should curve around the neckline flatly, not standing up at all. Put in a pin every inch if that helps flatten it out! Even hand-baste around the neckline first, if that helps. Then when you stitch the binding for real, it should already be in the right place and completely flat. Go slowly, sew SLOWLY over the pins if you have to keep it from shifting on you, and don’t stretch the neckline at all. (I need to figure out video, so I can show you for real!) Then once you’ve done it on the sample, you know exactly what to do on the real blouse. I hope this helps!!
@jadestar: Hi Jadestar – let me check and let you know, I can’t remember offhand! I have a feeling the length of the binding matches the opening, plus the seam allowance for the shoulder seam. And the width of the binding is your desired bias width, plus 1.5cm (5/8″) seam allowance, times two!
@Tasia:
Oh, Tasia. Thank you so much for such a thorough response! To answer your questions: I did staystitch, but my fabric was incredibly shifty, the most challenging I’ve ever worked with. And, I did not try the blouse on before attaching the binding (good idea-lesson learned!)
2. It is absolutely possible that the neckline frayed a bit. I fray-checked a few of the edges that I was handling a little more, but the neckline was not one of them, so that could have been the case.
I love the idea of doing a neck line mock up, and I think I will try that. Also, my actual fabric is a silk/cotton blend, so it doesn’t tend to fray quite as easily. I’m glad to see that it is more likely to be a construction problem than a fitting issue. :)
One other question, I did add 1/4 inch to both the neckline & binding, and I will need to enlarge them a bit more the next go around. Am I correct in adding the same amount to both the neckline & the neck binding? Also, should I add the length for the binding at the center front notches?? Thanks again, Tasia. I really, really appreciate you taking all that time to help me out!
Tasia you ROCK! I never once thought to do bias binding this way. I always tried to avoid it too cuz it was fiddley and all that hand basting to get it right. Definately gonna do it this way from now on.
I can’t say how much I love your tutorials, it’s like the sewing course I’ve ever dreamed of. I am catching up and just finished this step. Me, too, I had the staystitching showing in 2 or 3 places and did just what you suggested. Thanks again!
Hi Tasia,
I’m not sure if comments are still open for this post, but I’m only just getting round to sewing my Pendrell now! I’ve got to the point of sewing on my neck binding and got a bit stuck so I referring back to your really helpful sew-along posts. If you are still taking comments on this I wonder if you could clarify some things for me. I have two neck binding pieces – since the tissue piece says ‘cut 2’ and I’m confused if I need two or one, as this post seems to only use one! Also, because it’s cut on the bais (and I cut it out a few days ago) it has grown considerably! Should I just trim it to the right length, or should I cut out a new piece and start sewing with it straight away before it ‘grows’ again?!!!
Sorry if those are really basic questions, but I am very much a beginner! By the way, I’m making view A and I’ve just basted my draped sleeves on and I love them!! Cannot wait to get this top finished and ready to wear!
Anyway, if you can help, thanks so much!!!!!
Suzie :)
@Suzie: Hi Suzie! Sorry, it should only say Cut 1, not cut 2! Even though you end up cutting two if you pin through both layers of fabric, only one actually gets attached to the neckline. Sorry for the confusion!
Don’t trim it down if it’s grown – it will need the length to stretch around the neckline curves. When you pin it on between the notches, it will stretch back the other way, and fill the curves. If you trim it down, it won’t be long enough to stretch around the curves properly.
Can’t wait to see your top! Leave a comment if you get stuck again, and remember there are no silly questions. If you don’t know what to do next, that’s what I’m here for! :)
Thank you SO much! I was wondering the same thing about the cut x2 neck binding… I was reading and re-reading the instructions, the pattern sheet and the sew-along instructions thinking I must have missed something! I will now get to finishing my blouse – I was sure it was just me and if I went ahead with just using one piece I’d find out I’d screwed it up later! I’m very excited – I’m currently doing the ruffle sleeve version in a blue swirl vintage fabric and already have a vintage floral ready to go for the draped sleeve version!
@Tasia:
Thanks so much! This is just what I was looking for! : D
Hi Tasia, love your patterns and I’m following your Pendrell Sew along now so thanks for making it available online! Your tips and attention to detail in your sew along have been the best I’ve seen since I started sewing. Quick question I’m about to do my neck binding and the pattern peice says cut 2 but the instructions and pictures show you using just one piece, is this a typo or am I not seeing the photos right?
Thanks,
Natalie
Sorry, I should have read the comments above mine which answered the question! Thanks Tasia.
@Natalie: Hi Natalie! Sorry for the slow reply. Yes, you’re right, you only need one piece of neck binding. Happy sewing!
Hi Tasia,
Im using sheer bindings and soft elastic. Can you give any suggestions how to stiffen up the bindings and elastic to make it easier to sew. Im using an old school machine that doesn’t work well on soft fabric. Any suggestions would be great.
Thank you!
Asha
Hi Asha, I’m not sure what to suggest as I wouldn’t recommend using elastic for the neckline! It won’t stretch, so there isn’t really a point of using elastic instead of fabric. For sewing sheer fabric, you could use spray stabilizer, or sew with a layer of tissue paper against the feed dogs and tear it away afterwards. Hope this helps!
Just found this posting the other day, and let me say, wow. I have been dreading attaching bindings for years and this has completely changed my ways.
After sewing this method a few times, i have come up with some tips that may or may not help some people but i felt like i should share.
Before doing the basting stitch on the bias piece, or even before sewing the ends together, i recommend pressing the whole piece in half. I used a particularly slippery fabric, so even sewing the basting stitch was a little wonky for my taste.
Second, when you begin to sew the binding to the garment, in order to get the proper stretch on the binding to fit to the neckline, you may have to make a few snips in the basting stitch that you have created. I segmented the neckline between four different pins, and I would make a few snips in between each pin on the basting line so the binding had the ability to stretch.
All in all, this is the absolute best method that i’ve ever used for finishing the neckline or armhole of a woven garment and i really appreciate your sew-along!
wow… thank u so much. i needed this.
Just a bit of info on terminology. What you have created here is a bias “facing”. A bias binding would be stitched in such a way that the binding strip would show on both sides of the fabric, and it would wrap or bind the edge. This is true whether the bias strip is folded wrong sides together and sewn as a double layer, or a single layer with the final raw edge folded.
for hard to press fabrics and beautifuly crisp pressing use 1oz really cheap vodka and 8 oz (1 cup) of water in a fine mist spray bottle. There will be no vodka smell in the pressed fabric. This is a couture technique that produces lasting creases but creases will iron out easily with another spray and press if needed. Use the hottest iron your fabric will allow but NO STEAM.