Gussets!!! They’re kind of intimidating right? We’ve had some requests for a tutorial on sewing the gusset in the Pacific Leggings, so I am here today to do just that! I’ll outline our technique for inserting a gusset into these leggings, step-by-step, with loads of photos and some extra tips and tricks. Let’s do this.
Start off by completing Step 1 (View A & C) or Step 2 (View B) for your leggings: sewing the back piece to front along the side seam, and sewing the lower leg panel if you are making View B. If you’re doing any fancy seam finishes, like seams that look like flatlock, do that to your side seams now.
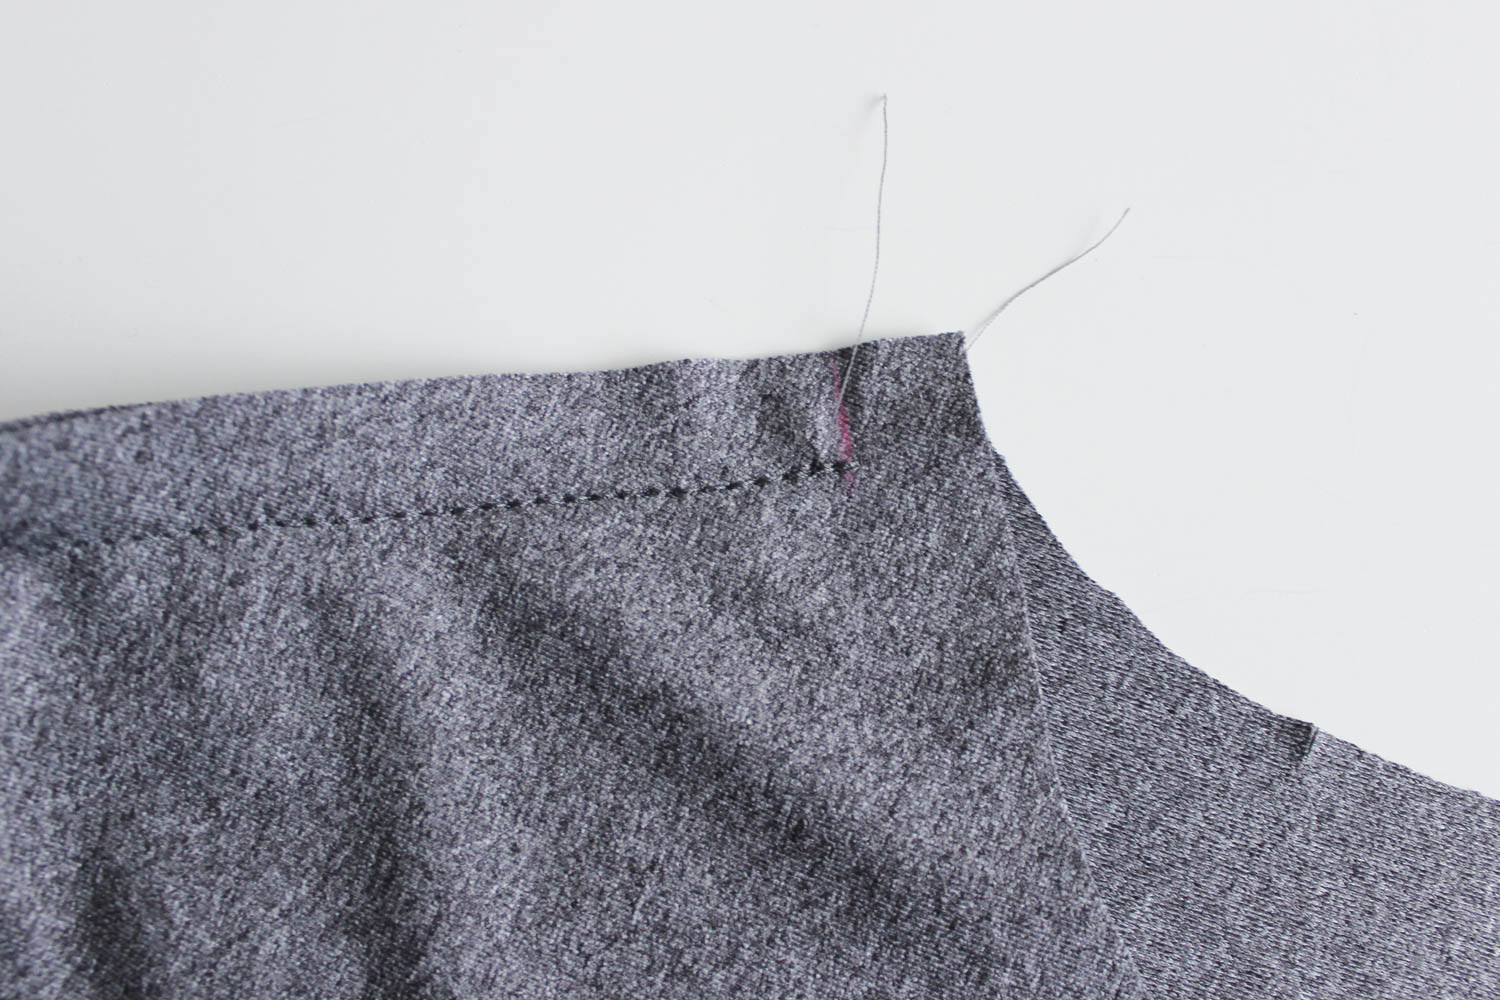
Next you’re going to fold the leg in half lengthwise, right sides together, and sew the inseam at ⅝” (1.5cm), starting at the hem. Stop sewing ⅝” (1.5cm) before the end of the seam. Above I’ve marked that point with chalk so I remember to stop! Repeat with your other leg piece.
Here’s what that looks like when you open it up.
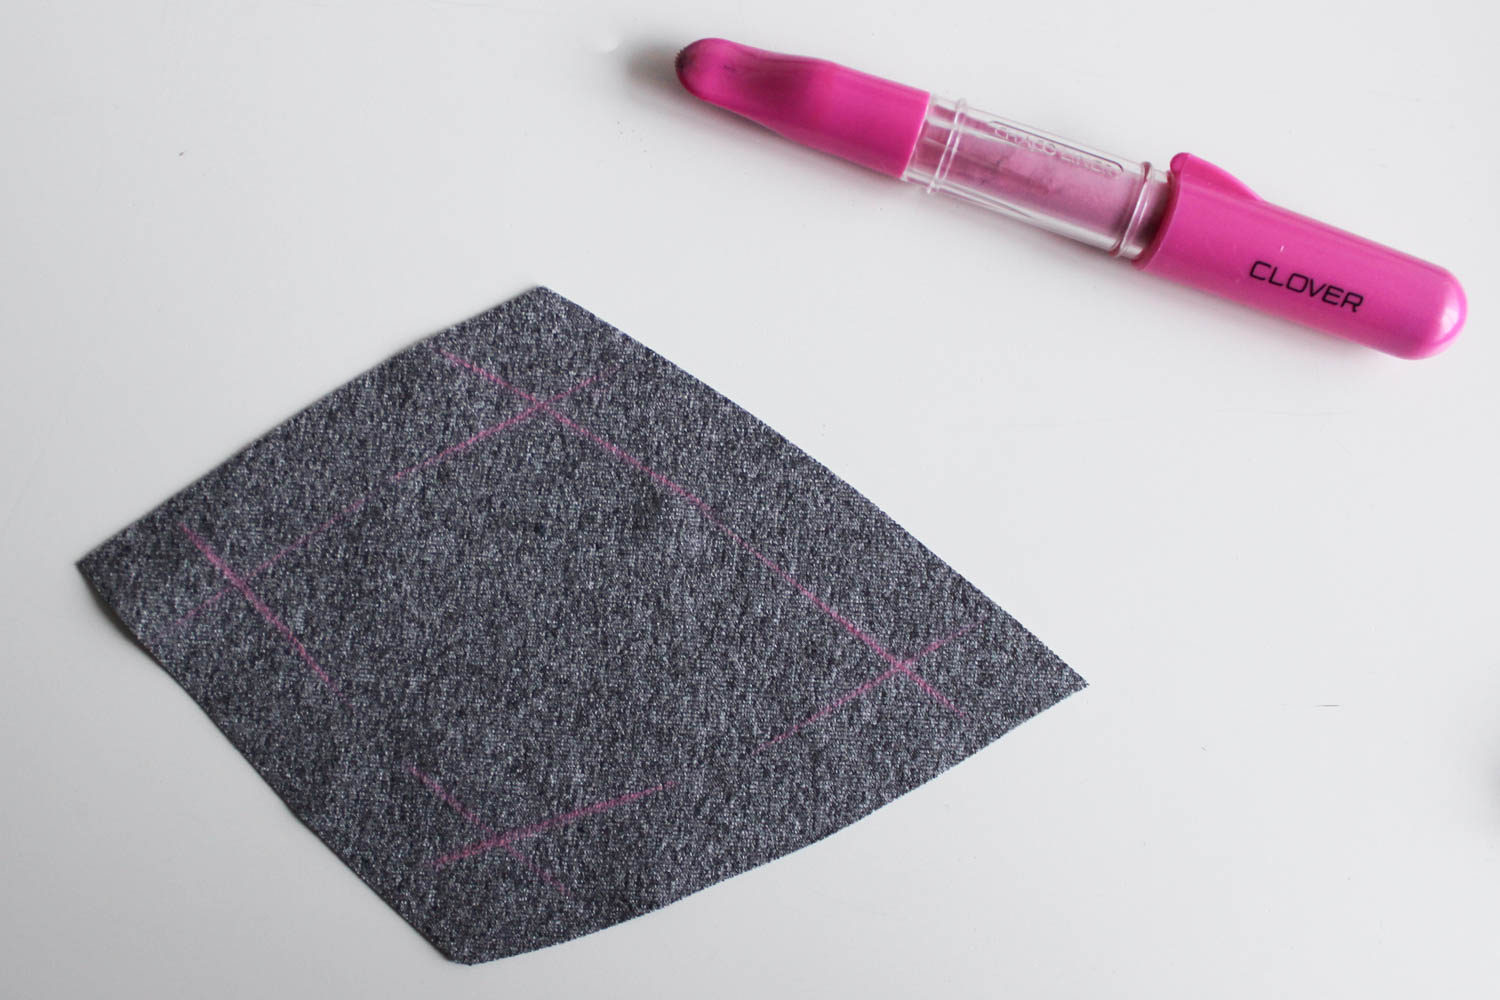
I like to use chalk to mark the corners of my gusset. Mark each corner on the wrong side of your gusset at ⅝” (1.5cm) from the raw edge.
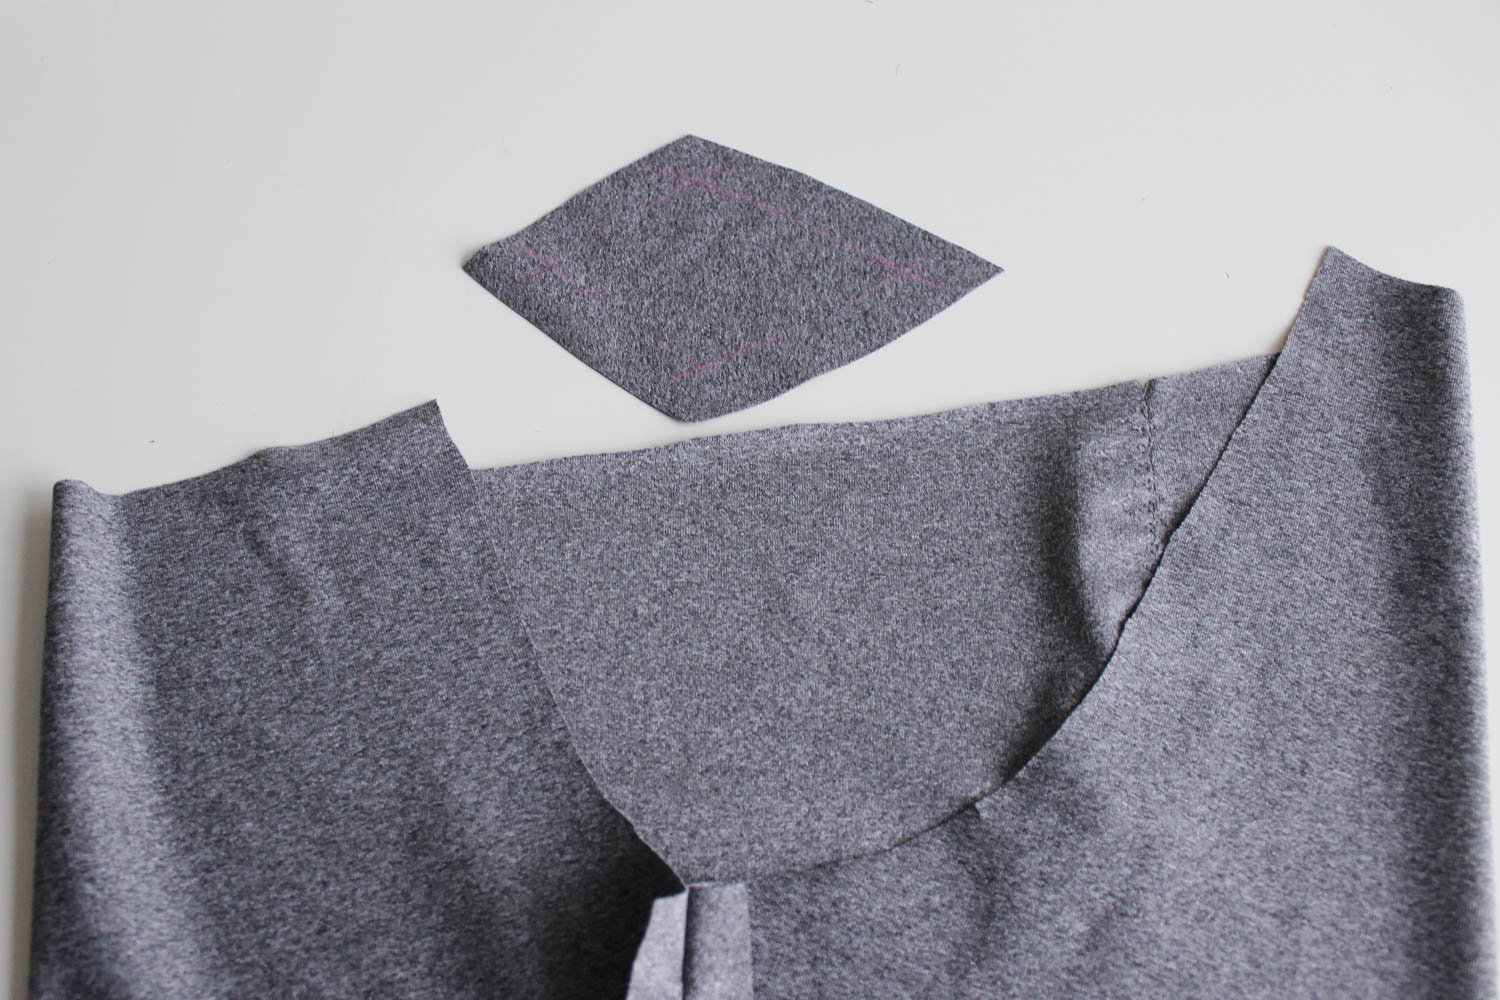
Next we’re going to pin the gusset to one leg piece first. I’m working with the left leg piece here. The longer side of the gusset is the back.
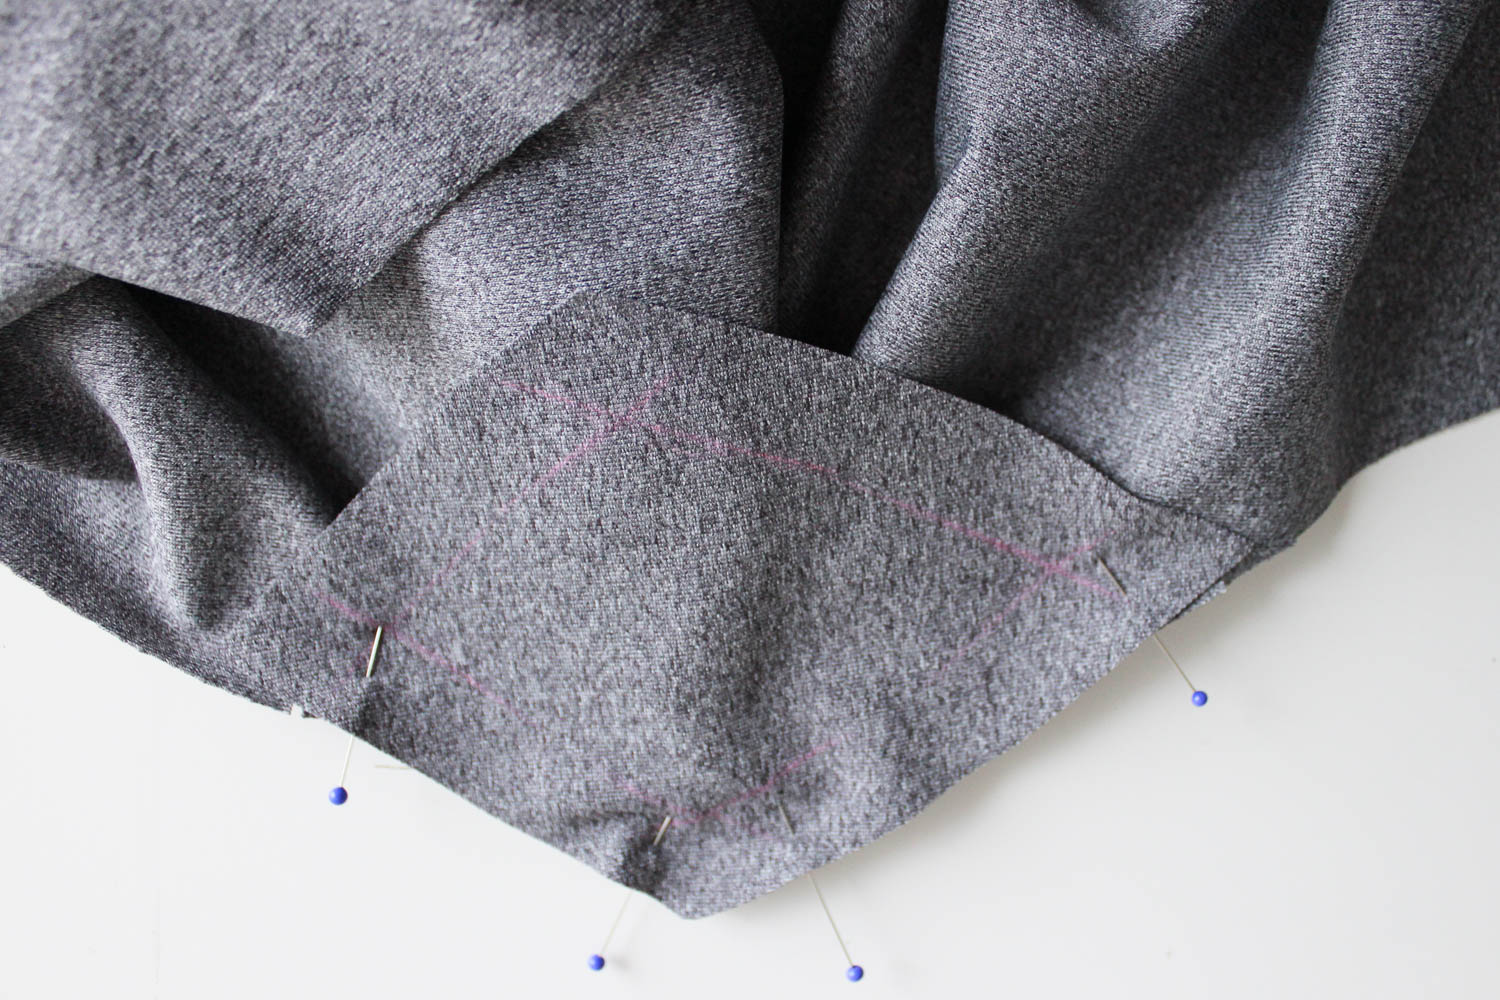
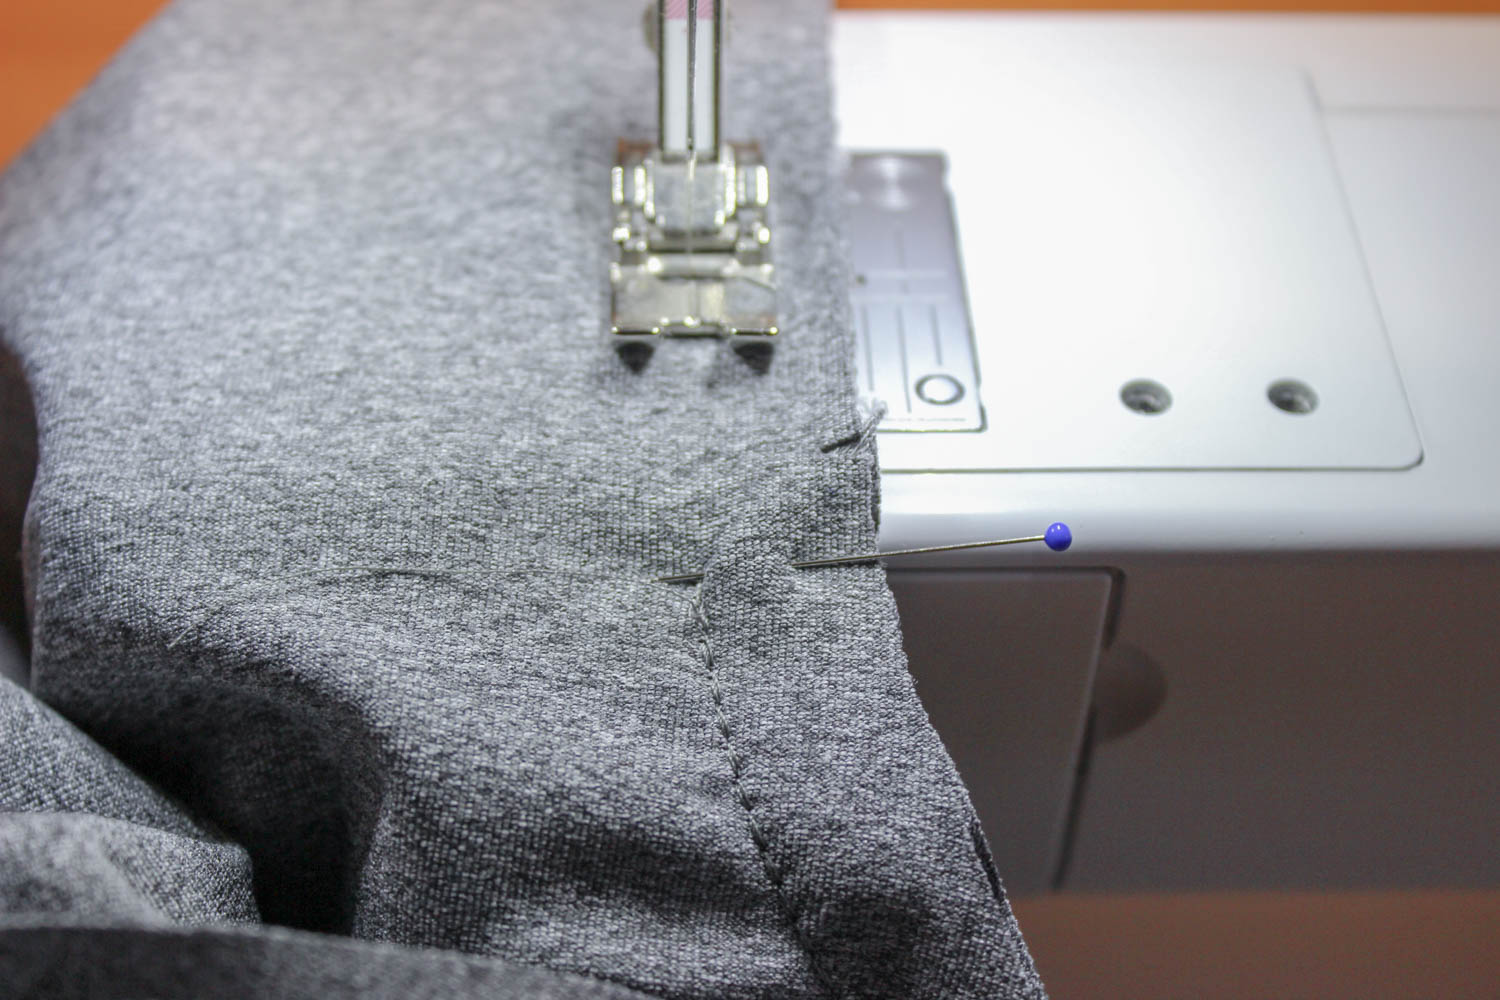
Here it is pinned. I failed to get a good photo of the following: clip your left inseam at ⅝” (1.5cm) from the edge so that it lays flat. You’re clipping at the point where you stopped sewing the inseam. If you’re a visual person, I show this step for the other leg below.
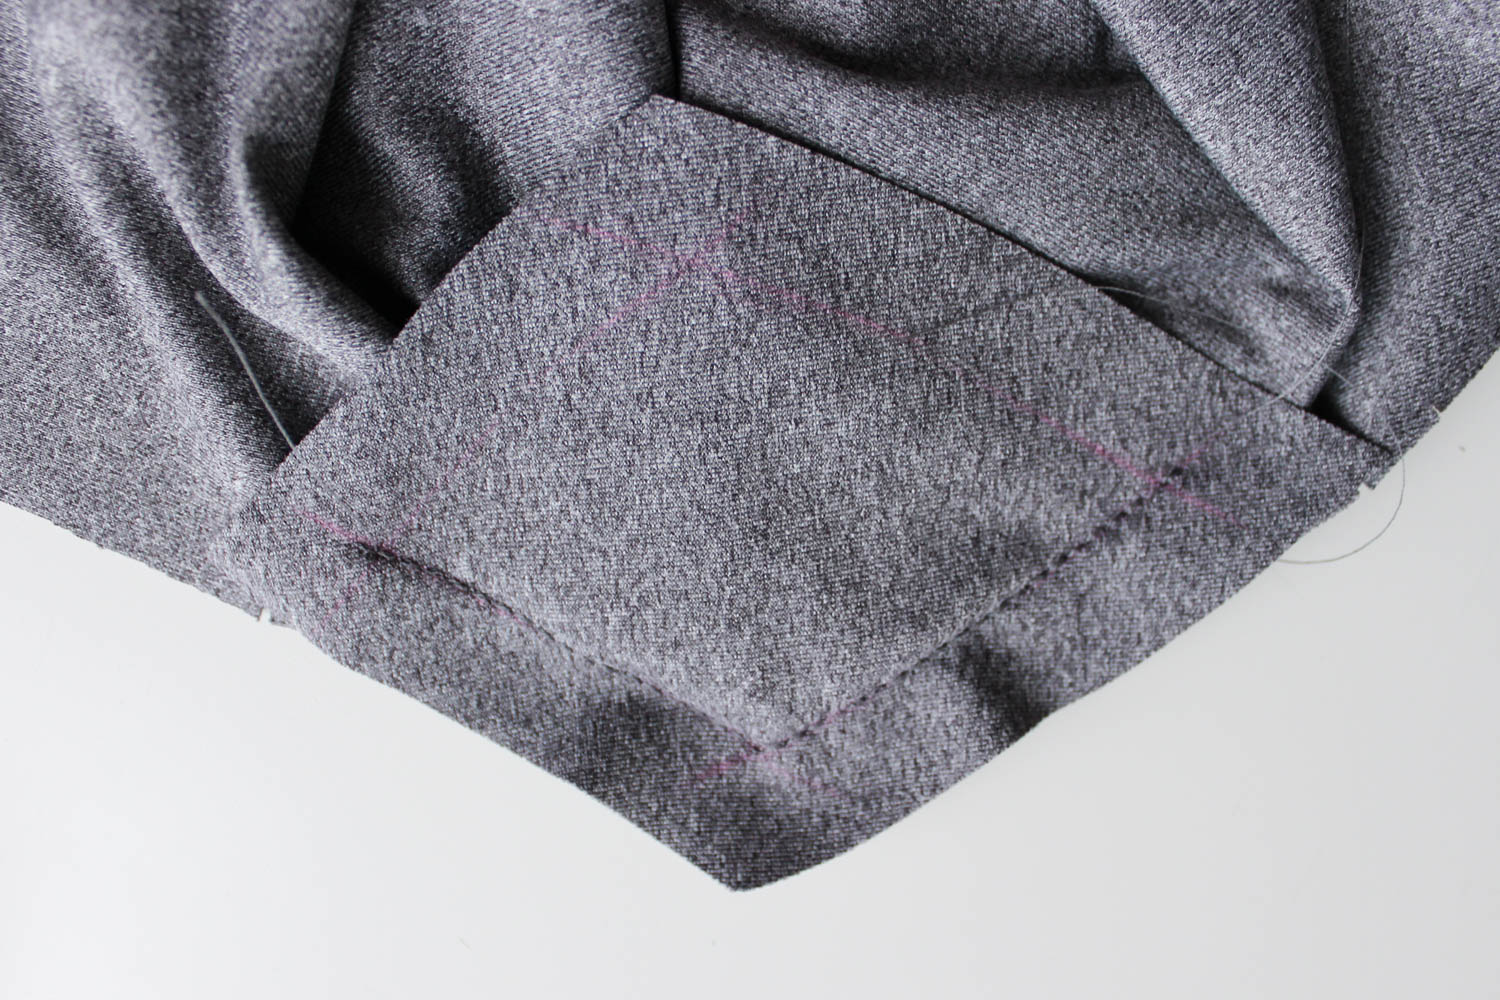
Sew the gusset to leg, starting at ⅝” (1.5cm) from one end of the gusset – the corner that you marked. When you get to the inseam corner, insert your needle, lift your presser foot, pivot your project, and then lower your presser foot and continue sewing. Stop sewing at ⅝” (1.5cm) from the other end of your gusset.

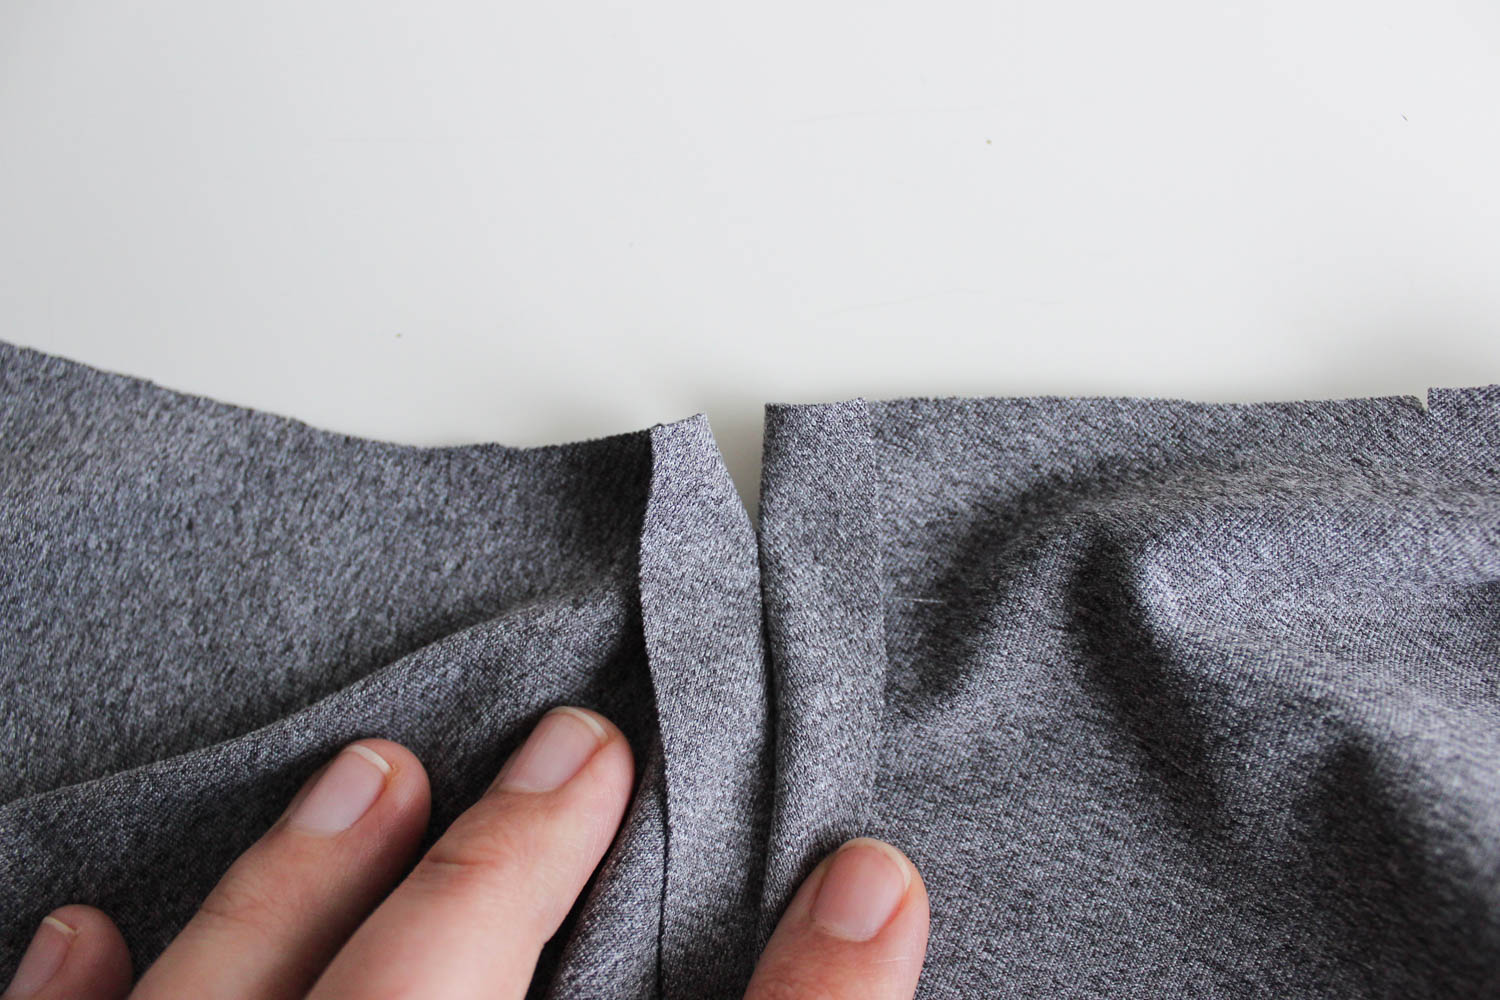
Turn your other leg piece right side out (in my case it’s the right leg piece), and slip it into the leg piece you’ve been working on (for me, that’s the left leg piece).
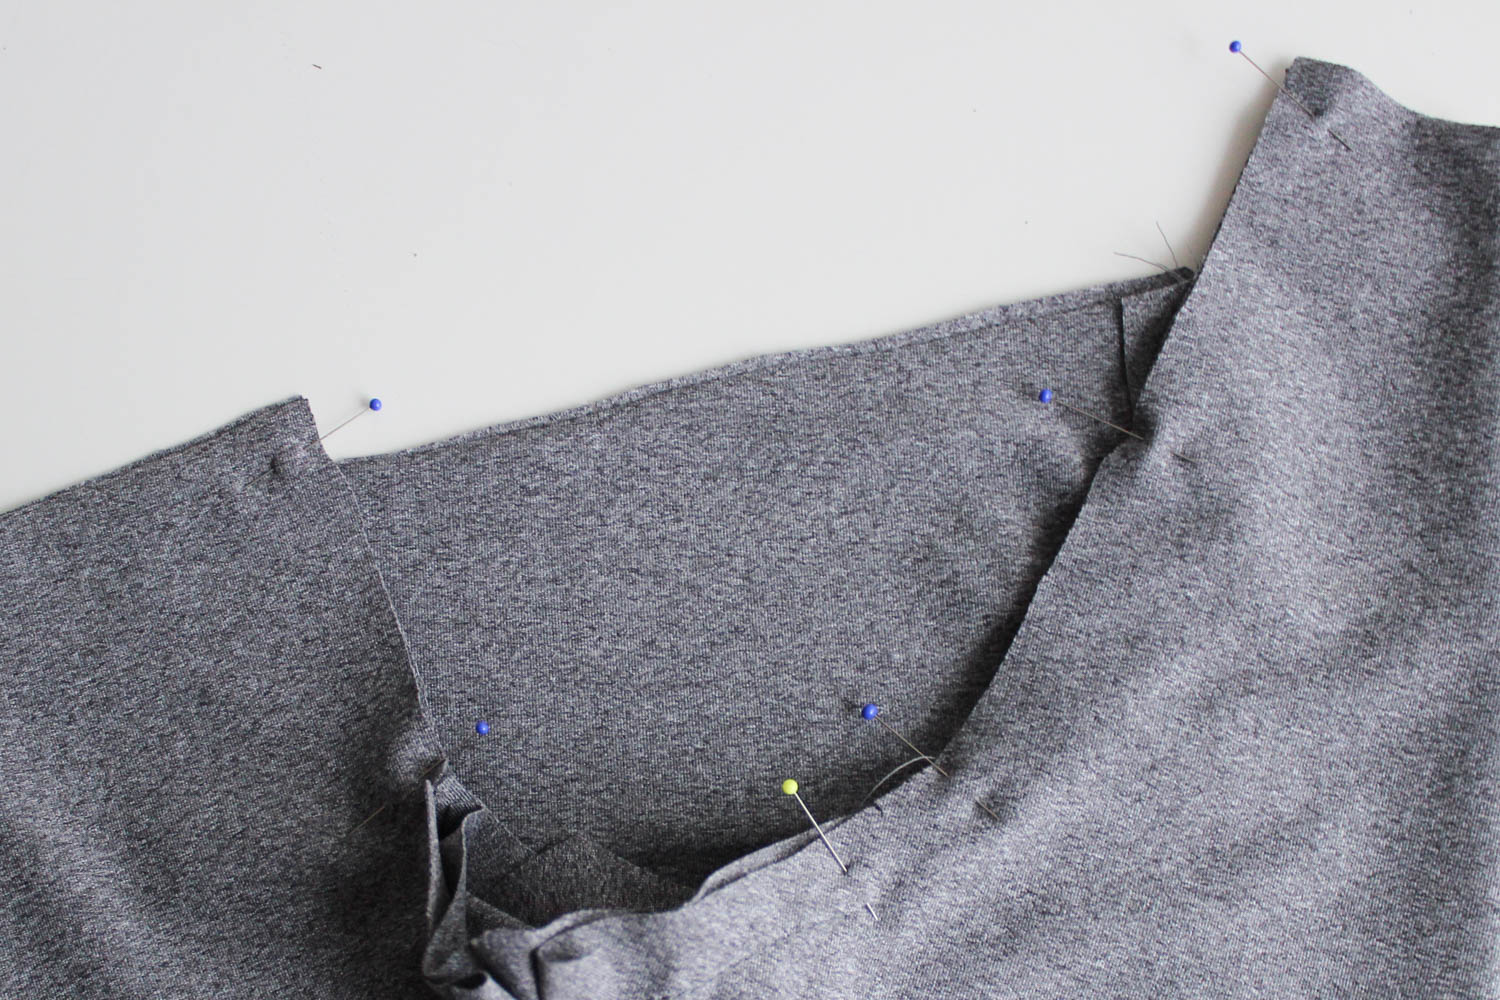
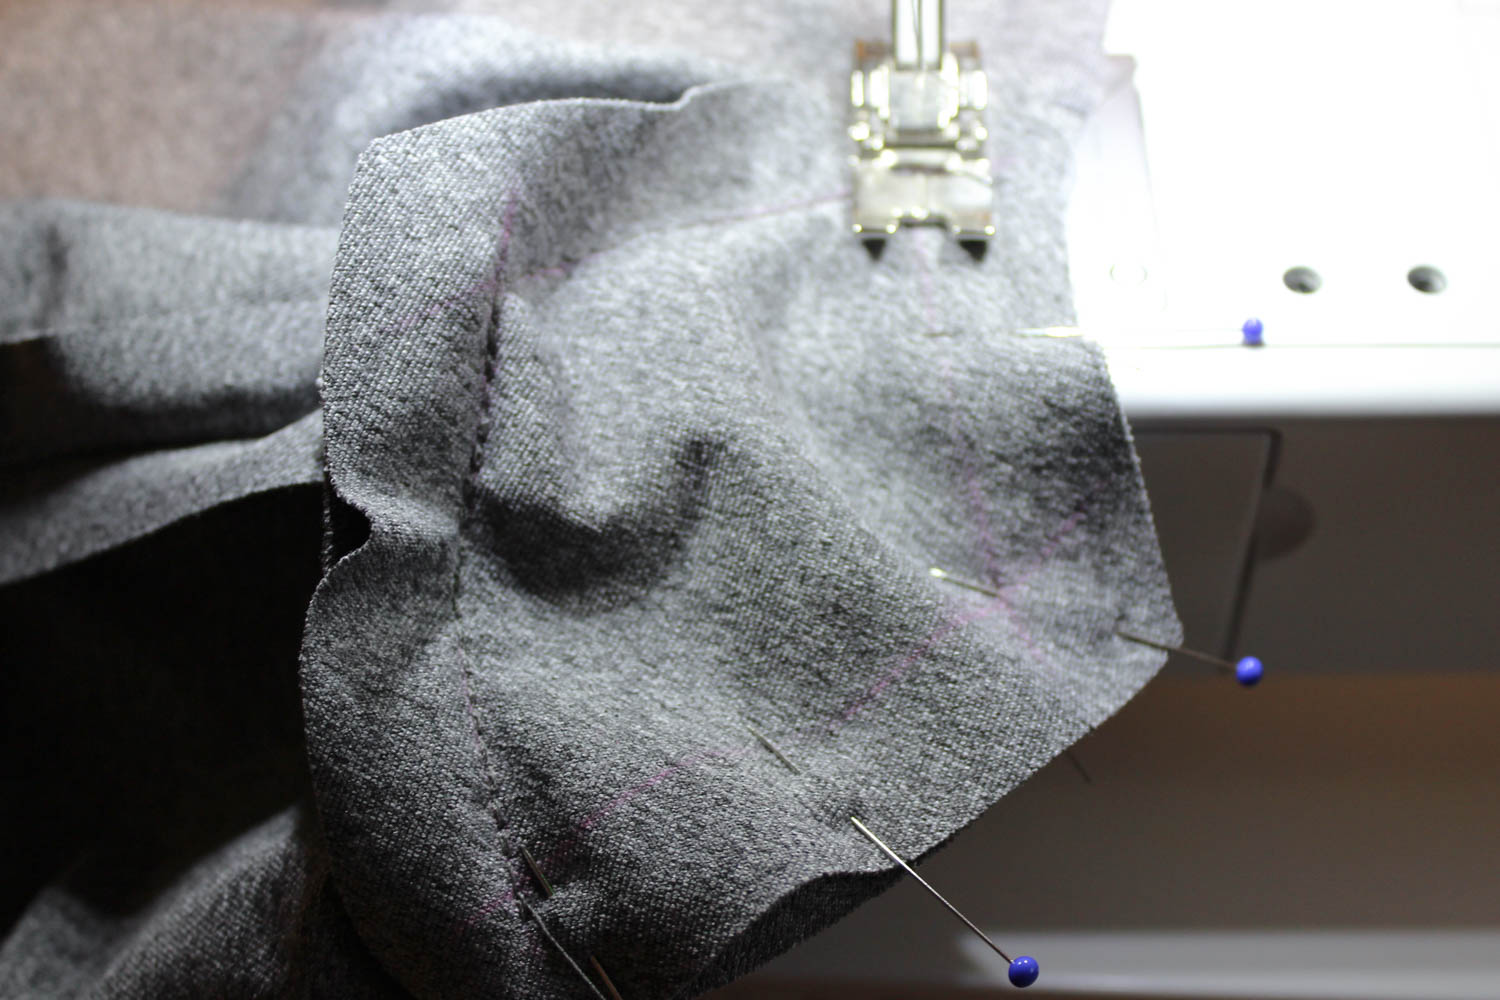
Pin the two legs together all along the center seam.
To make pinning and sewing the gusset seam easier, clip your inseam at ⅝” (1.5cm) from the edge.

Pin this gusset portion.

Here’s what that looks like from the other side. Clipping the inseam helps you to get a really nice corner and less bulk. It lays flat which makes sewing easier! Okay we’re all pinned now…
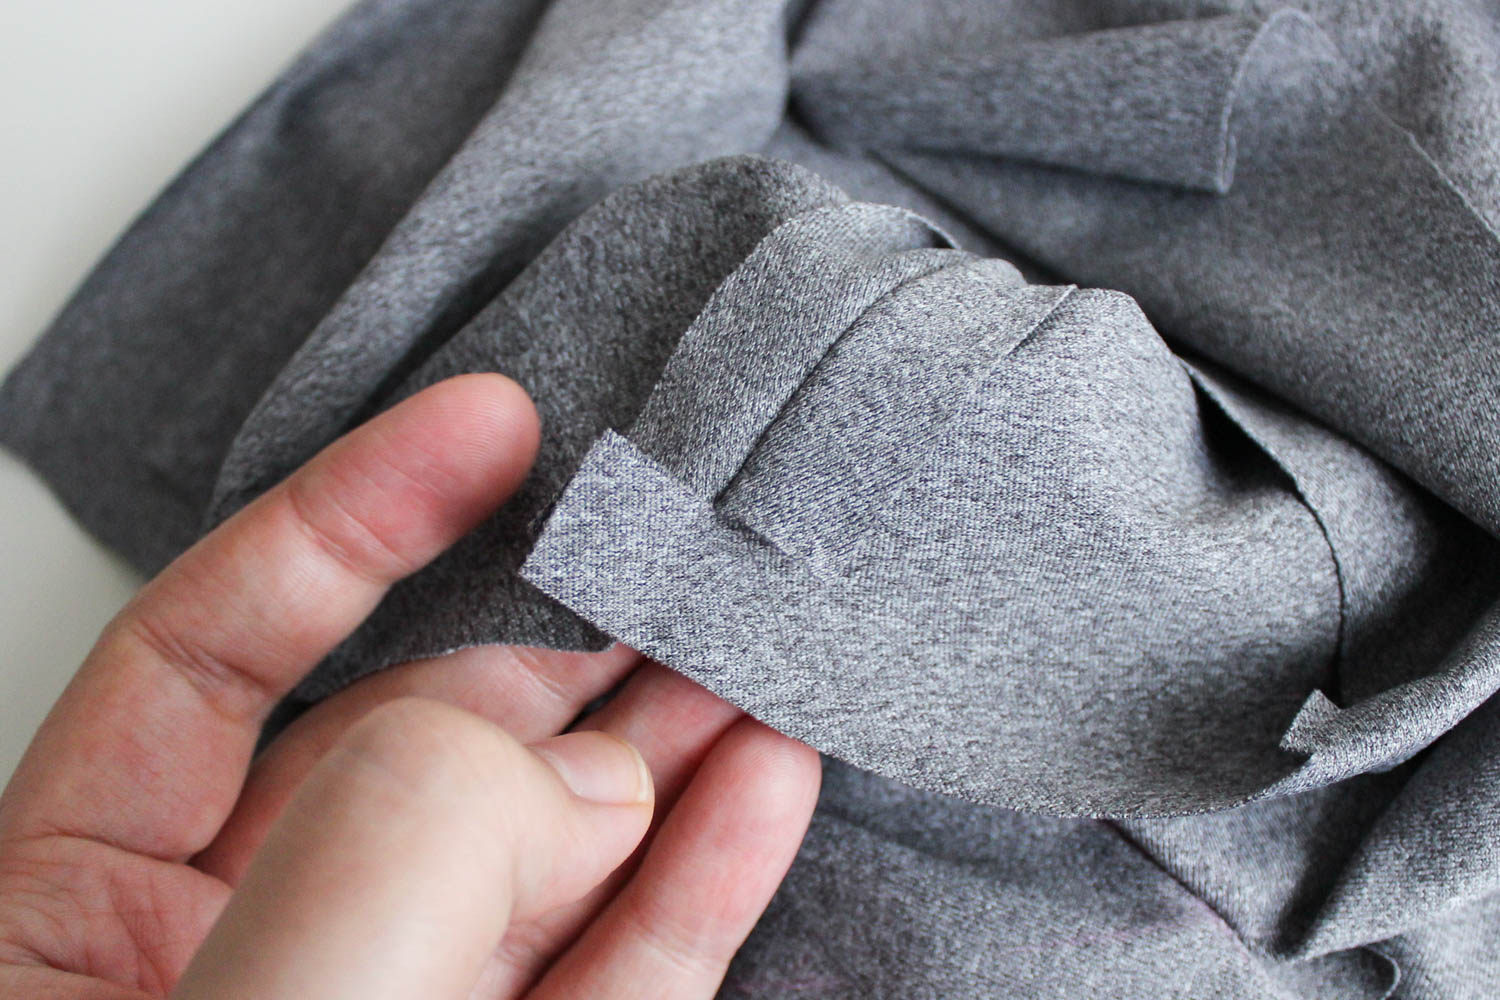
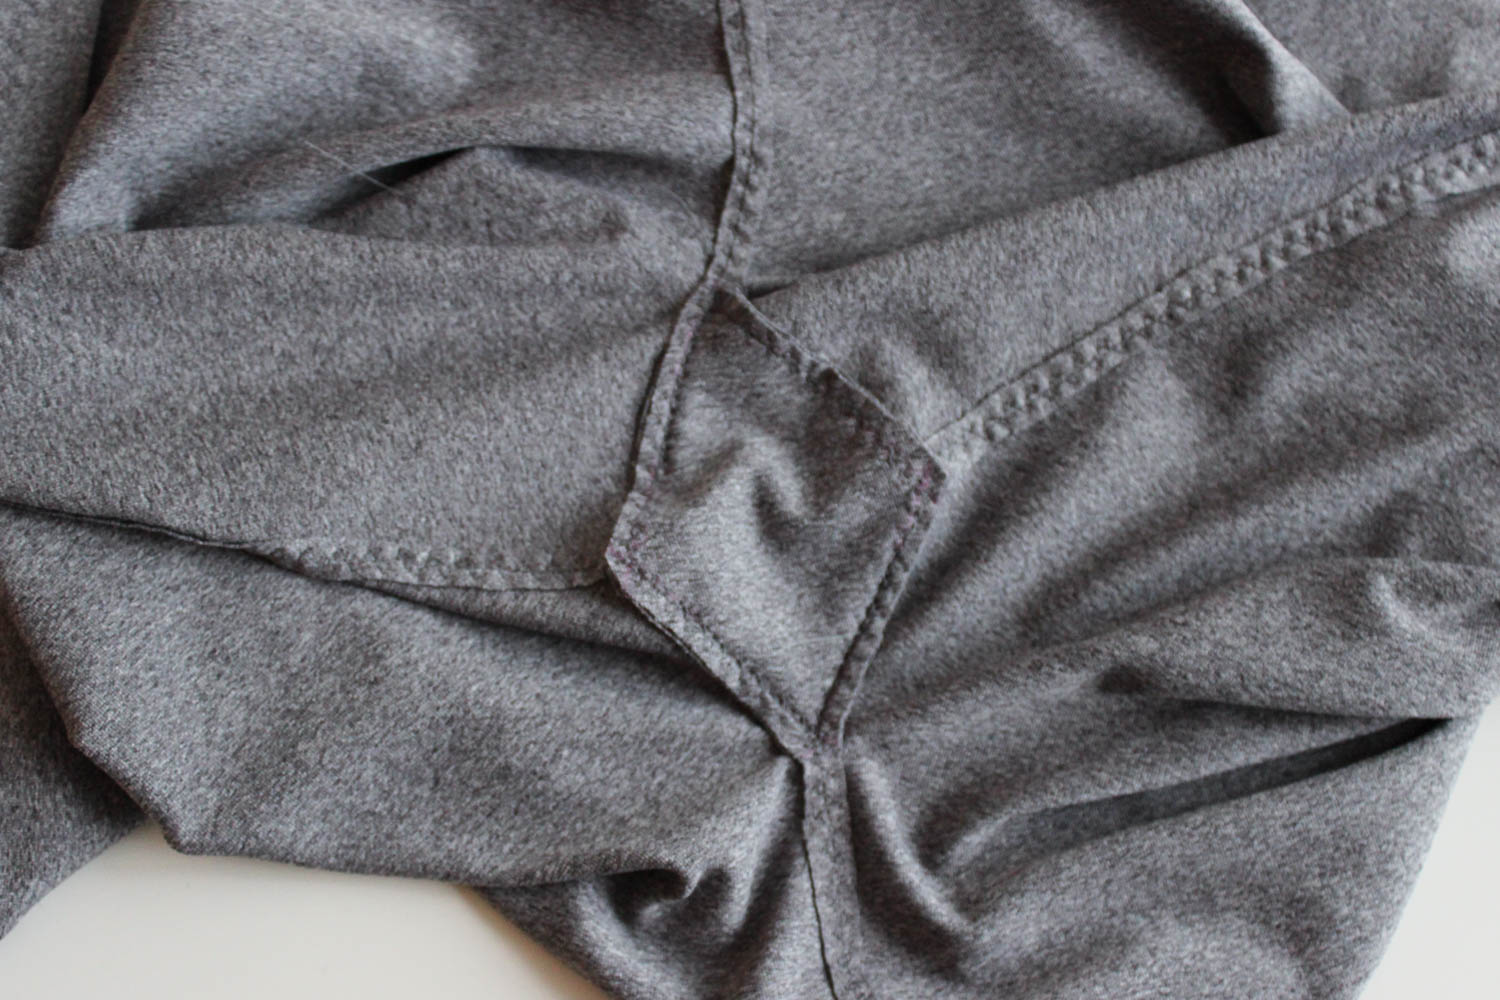
Start sewing your crotch seam from one end. I’m starting from the center front. Stop sewing and back stitch right when you reach the first gusset stitch line (see where my pin is?).
You’ll need to pull out your needle and clip your threads, because now we’re beginning to sew from the gusset side. Start sewing at the front corner of the gusset, and sew to the inseam corner. Take your time and make sure everything is lined up on the back side.
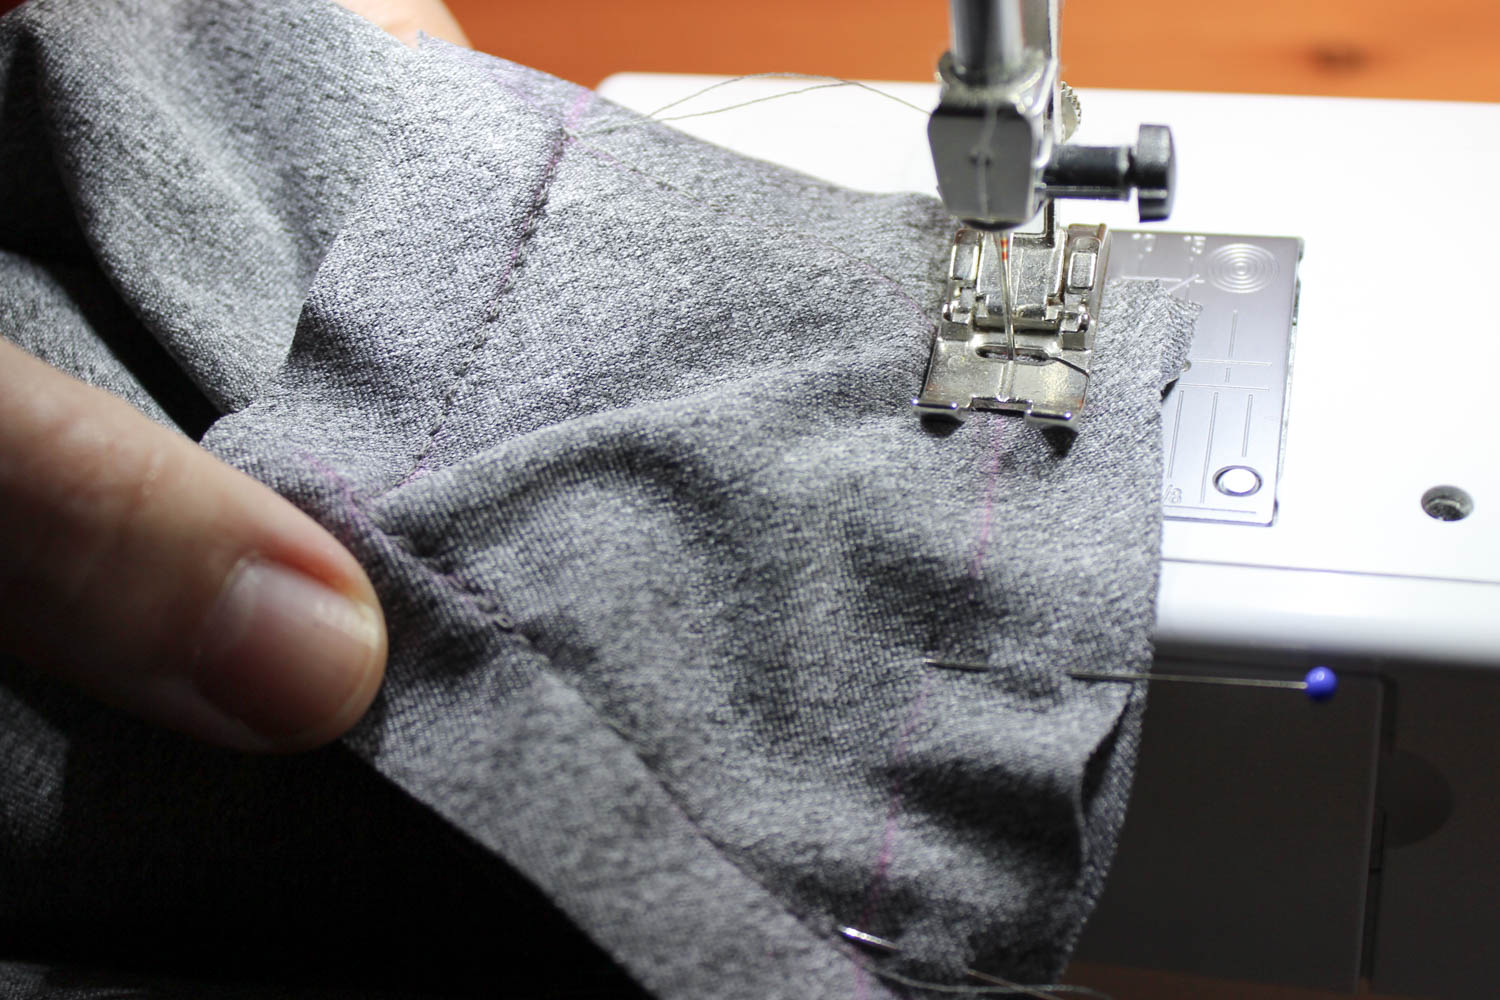
As before: insert your needle, lift your presser foot, pivot, and then lower your presser foot. Sew along the last edge of the gusset, stopping when you reach the corner that you marked.

Now you can sew the other side of the center seam. Start sewing right where your gusset stitches stop.
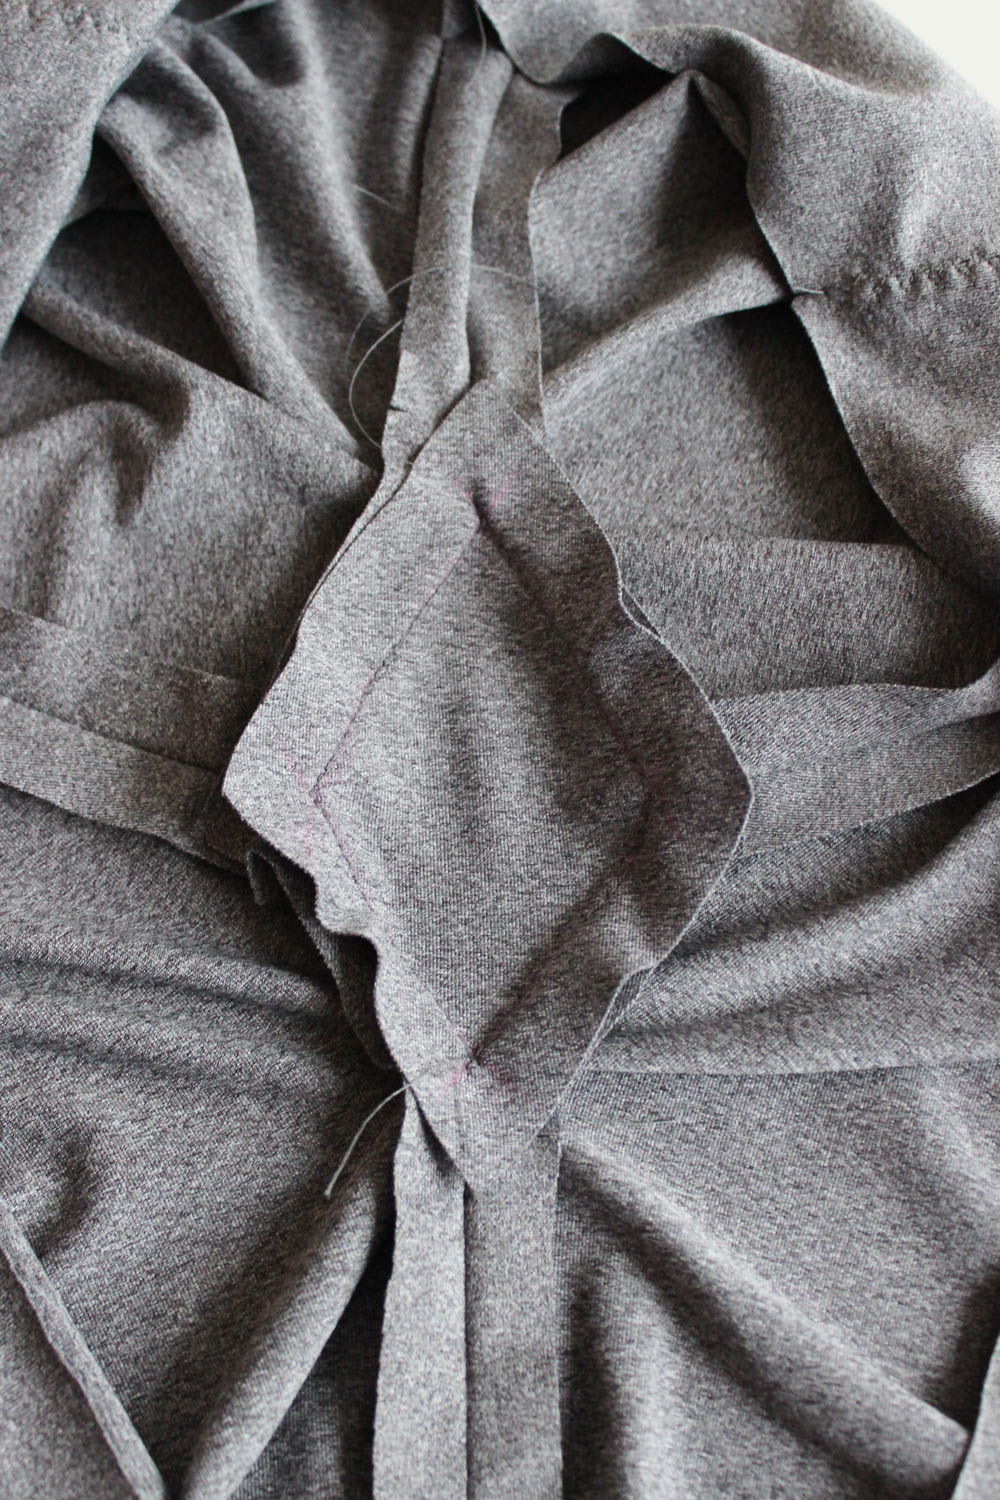
Your crotch is now officially assembled. Above is the view from the wrong side!
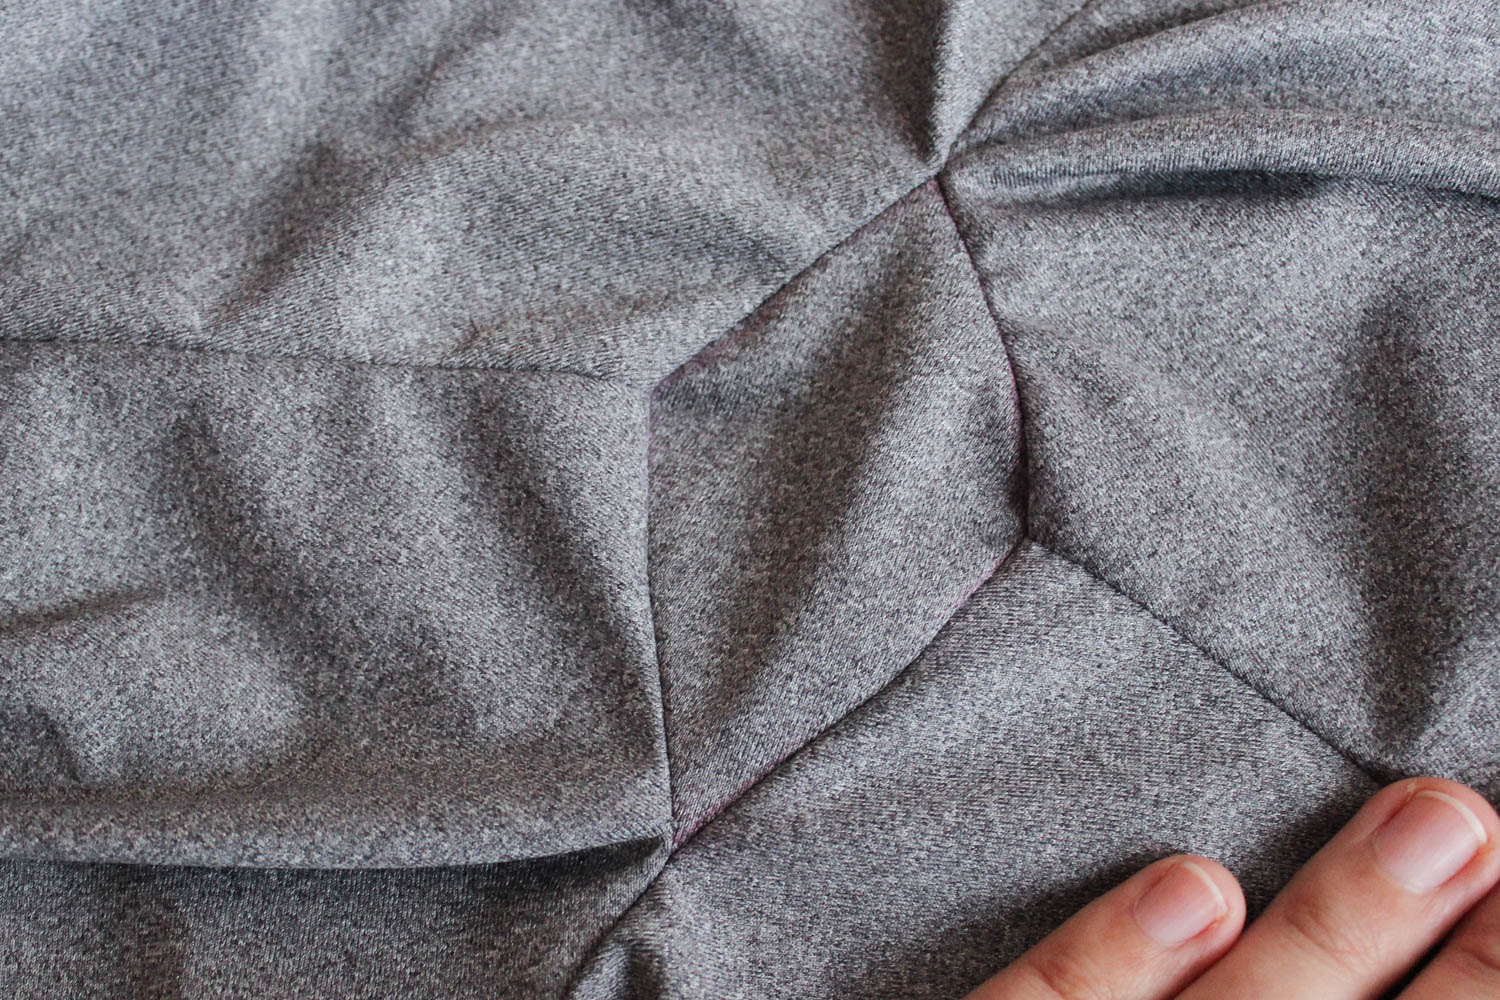
And from the right side. If you’re using the faux-flatlock seam finish (I am!), here’s what that looks like… Wrong side:
Right side:
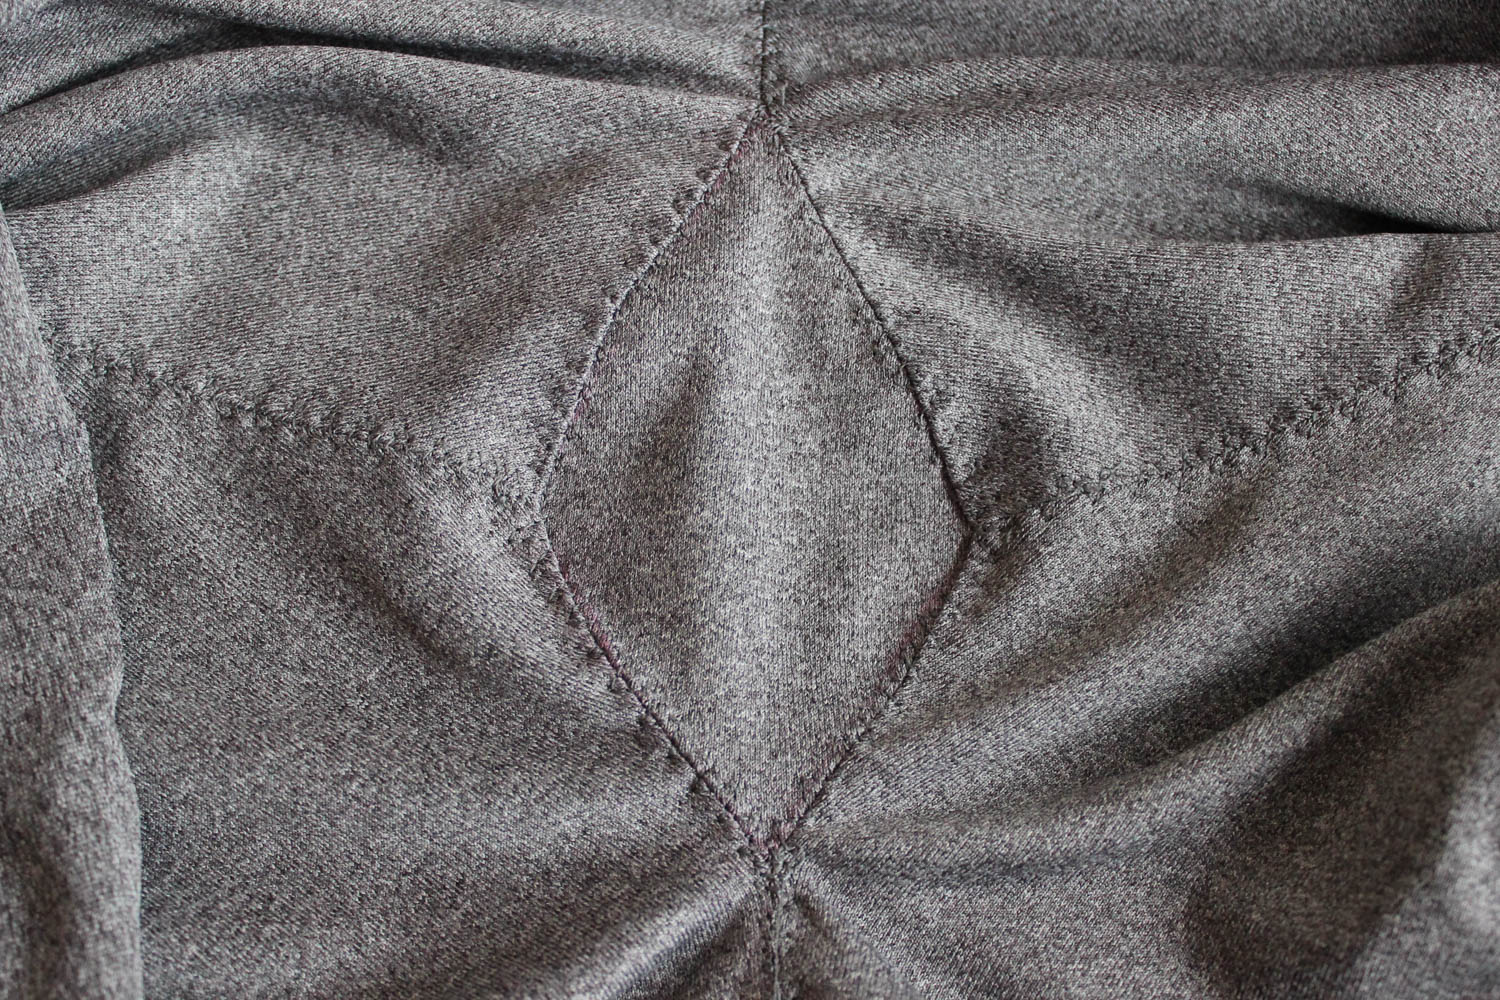
Just for your reference, I am sewing my seams with a triple stitch (3.0 length). Then I open the seams, and use a three-step zig-zag stitch to sew along the center of the seam from the right side. I don’t have the baseball stitch on my Bernina 530, so I experimented with a few other ones and settled on the three-step zig-zag. Bottom right in this photo:

So there you have it! We tackled the gusset and really, it’s not so bad when you mark your pieces properly and take your time, using lots of pins.
Caroline this was SO helpful! I love to make my own leggings but it’s nice to have a gusset in them too for shaping and comfort. Thank you!
Great tutorial! Indeed very helpful. Just curious, where is Tasia? Haven’t heard from her lately on the blog. Everything ok?
Just working on other stuff! Still alive and well. :) Caroline’s here to work on some of the things people have been asking for, like finished project round-ups and tutorials like this one.
Good, glad to hear all is well!!!
Like Tina, I was wondering about Tasia, too! What is the word?
Thank you for the tutorial, as well. I was wondering about what to do about the inside seams of the gusset so they wouldn’t chafe. I see you trimmed them down. Do you have additional advice about how to make sure they stay flat, especially if your material isn’t the softest? Or just trim as close to the final stitching as you can? Thanks!
Hi! All good, just have my hands full with other things. Caroline’s helping with the blog posts so I can focus!
I’d trim real close to the stitching. I do have a pair of leggings with a lined gusset, it’s more of a cottony fabric so that might help as well. (Can’t see it from the outside, but on the inside you can see a different fabric that’s much softer.)
Hi! Good to hear!
Thanks so much for the gusset advice. Next time I’ll try a lining for the gusset, that sounds like a nice idea! I guess you would just baste the gusset and gusset lining together before you start and that would do it?
That’s probably how it’s done, since the seams show on the inside. Kind of like underlining the gusset, really. Hope it works out!
So glad to see a post from you! Was worried! :) Hope to see some posts from you soon.
So glad to hear you have help while you’re busy Tasia.
I really appreciate this gusset post Carolin and knowing the sewing nerd stuff like what stitch you used to sew the gusset.
I’m going to try using the overlocker for a test version and see how that works.
Thanks Ladies.
Thank you!
Nice tutorial! I have a question, though – I don’t have your pattern, so I’m trying to follow from your photos and explanations. In the instructions for stitching the gusset to the first leg, where you say to clip the seam allowance, you indicate this clip is on the inseam – but isn’t it actually on the crotch seam? In the step following, you say to pivot at the corner of the gusset at the inseam. Both these corners can’t be the inseam – the middle of the diamond goes from inseam to inseam, while the points go up into the crotch, no?
I make my own leggings and have failed miserably at trying to insert a gusset. This was great! I will try it this way next time.