 Today, I’ll show you how to narrow the hip width on the Pendrell Blouse. That’s the great thing about sewing – you can adjust anything to fit your body no matter what your shape!
What we’ll be doing today is the reverse of what I do on just about every pattern. I always have to add to the hips on regular sewing patterns!
WARNING: Today’s post involves math. Simple math, but math nonetheless. It can be a little confusing so I hope having the photos to go with the calculations make it clear and easy!
Catch up on the first sew-along posts here!
- Pendrell Sew-Along #1: Prewashing your Fabric
- Pendrell Sew-Along #2: Measuring and Choosing Your Size
- Pendrell Sew-Along #3: Shortening the Blouse Length
First, start with the traced pattern, like we did in the Shortening the Blouse adjustment post.
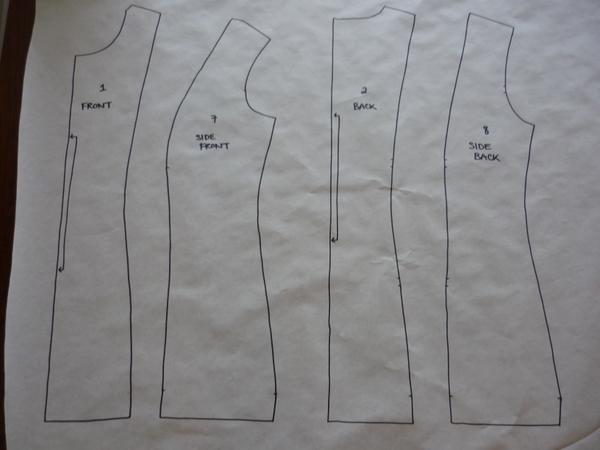
You’ll be happy to hear we’re being kind to the environment for this demonstration! This is the same piece of paper from the last demo, with the pencil marks erased.
Now, let’s determine how much we want to take out of the hip measurement. In our Size Chart, a size 4 has a 32″ bust, 26″ waist and a 38″ hip. Compare that to the Vogue/McCalls/Butterick standard, where the closest comparable size is a 10 at 32.5″ bust, 25″ waist and 34.5″ hip. For today’s demo, I’ll show you how to reduce the hip back to standard proportions – from a 38″ hip to a 35″ hip.
For your adjustment – measure your hips, and compare that to the hip measurement on your chosen size. If you’re a 32″ bust, 26″ waist and a 35″ hip – then you’ll reduce the hip measurement by 3 inches. Determine what the difference amount is for you, before proceeding to the next step.
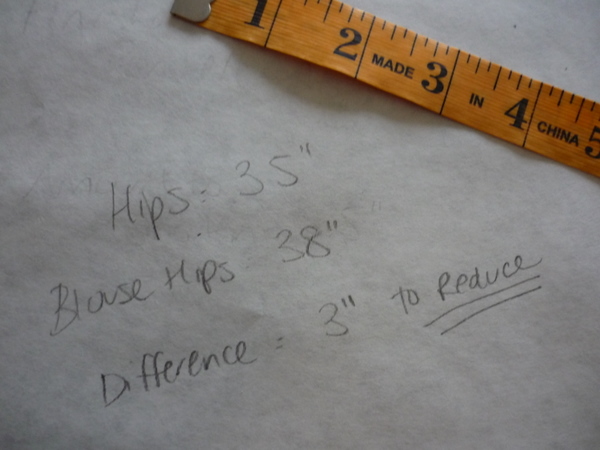
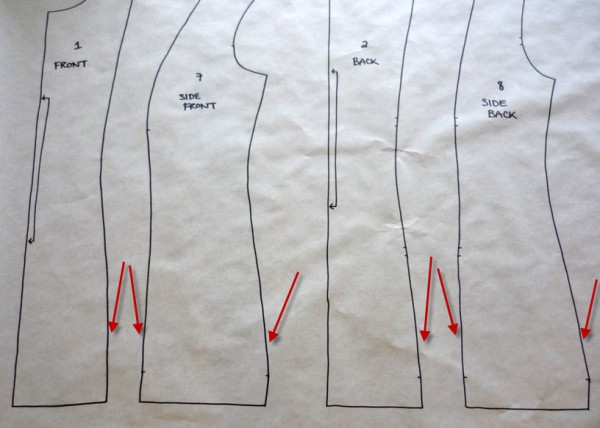
Ok! We have three inches to remove, so let’s see where we can take this amount from. Look at the pattern pieces and see how many seamlines we have to work with:
We have a total of three seams on each side of the body: front seamline, side seam, and back seamline. Now, that onlycovers half of our body! We have two sides to our body, so we’ll double the three seams for a total of six places to reduce.
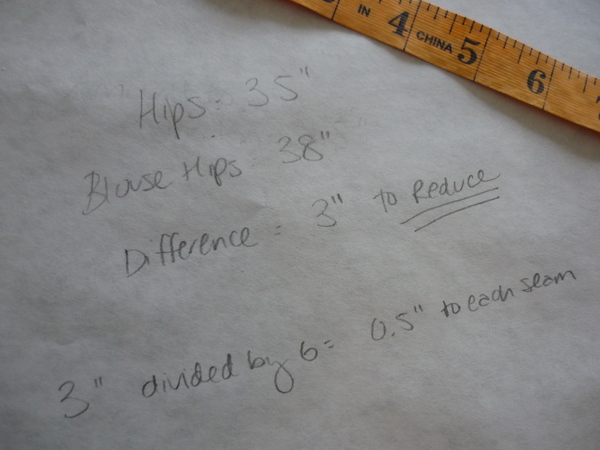
Let’s divide our three-inch amount into six equal amounts. That gives us half an inch to take away from each seam.
Remember, for each seam there are two sides of the body to account for, so divide this amount in half again. Now we know exactly what we’re doing – reducing each side of each seam by a quarter of an inch.
Let’s start with the front princess seam. At the hipline (which is the hem of the blouse, unless you’ve drastically shortened yours) make a mark 1/4″ inside the cutting line.
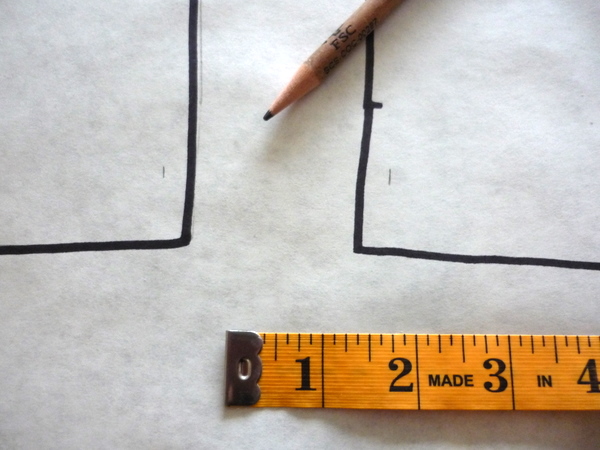
Repeat with the same marking on the other side of the seamline – in this case, the side front piece.
Now, we’ll blend this line into the waistline. You can see where the pattern dips in at the waist, that’s where we’re going to blend to. It’s not a lot, in this case, once you break down the 3″ into quarter-inch segments.
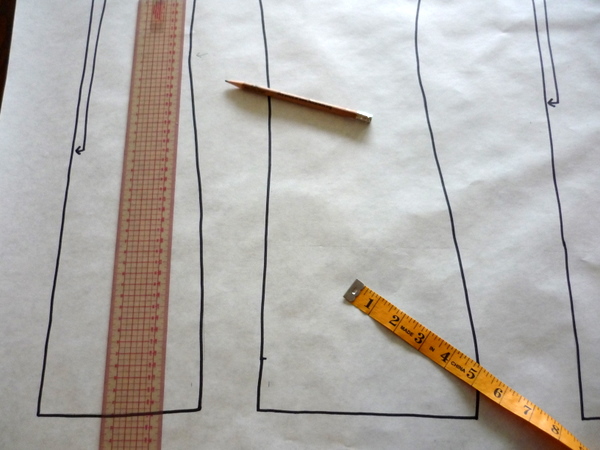
Draw a straight line for a couple of inches up from the hemline. Once the seam starts to curve in, that’s where you stop drawing your line.
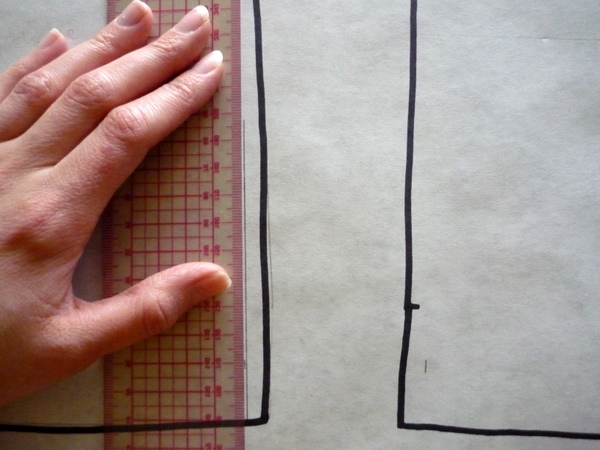
Now, pivot your ruler inwards so it lines up with the waistline AND with the line you just drew. Draw the rest of your line. If you have a curved ruler, you’ll be able to draw a much nicer line. I’m demonstrating with a straight ruler as I’m guessing that’s what most people have at home!
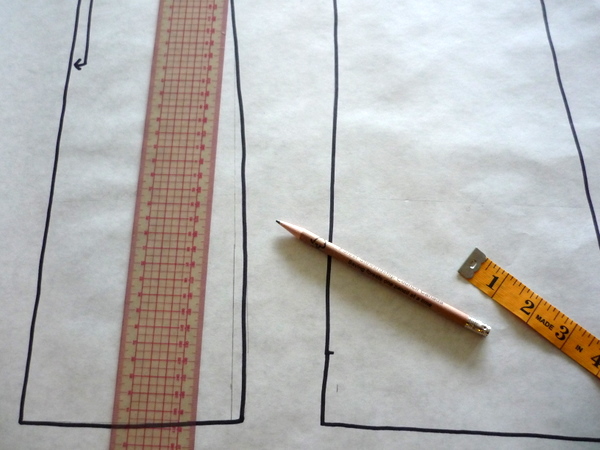
Repeat on the other side of the seamline, on the Side Front.
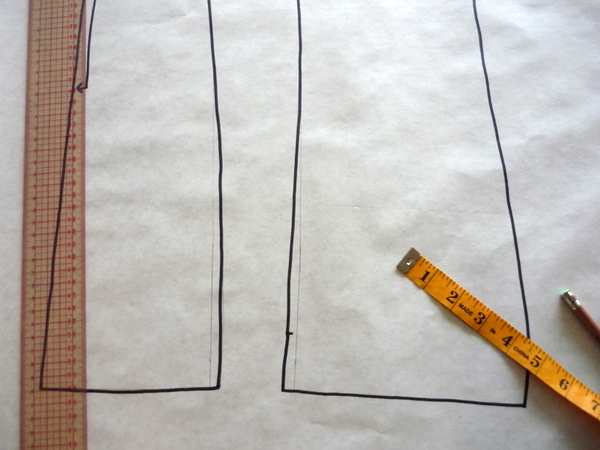
You can see the piece is much straighter than before. It looks more standard, for a slim-hipped figure. Repeat with all of the pattern pieces: the other side of side front, both sides of side back, and one side of the Back piece.
You’re done! Now, your pieces will narrow at the hips evenly around the body. If you add up all of our decreases, they will add to our 3″ difference. Do the math quickly to make sure that all of your little seamline decreases add up to the total amount of decrease.
Now that you’ve seen how it’s done, the same theory applies to increasing the hips. If your hips are larger than the pattern sizing, simply figure out how much to add and add it the same way, evenly to each pattern piece.
The same theory also works for adding or reducing the waistline. Compare your body measurements to the pattern’s body measurements, and add or reduce following the steps above.
Any questions? Have a specific question about your own body measurements and how to alter or cut different sizes? Let me know!

I just wanted to reiterate how invaluable this is… a lot of this stuff is common sense but seeing it with photos and step by step instructions makes me have a lot more confidence about my sewing decisions. Thank you! One question I do have, which relates to yesterday’s post, I was asking about how shortening the blouse affects the fit depending on where you shortened the pattern. I guess what I was really asking was, which alteration should I make first: shorten the blouse or decrease the hip so that the fit and proportions stay correct? Again, keep up the good work!
Tasia, you are doing a wonderful job explaining this. Your teaching skills are superb!
That was very helpful! I was thinking I was going to have to do a bunch of adjustments since I’m not a pear, but I just need to adjust the hips. And the calculation method was very helpful for those of us smaller than the smallest size on your chart!
Thanks Tasia, I am looking forward to your finishing tips once we get to the sewing part.
Tasia, are you going to have a flicker group? I commented on your facebook post about my finished Pendrell and you commented back that you would like to see it. I have to get my fiance to take some photos first, but I wondered if you have a central Pendrell Blouse Sewalong to share them at? If not, I will comment with my blog address when I get the post up! The blouse was a dream to make! Although, after today’s post, I probably should have tapered the hips in. I used to be a perfect pear, but I have lost weight and now am not quite a pear, but not a perfect hourglass either. It looked great when I was done regardless though! I am looking forward to my next (the ruffled version!)
Thanks for this Tasia! This matches up with how I would have approached it, but it’s so nice to see it laid out clearly!
I just got my Pendrell pattern in the mail yesterday and I’m excited to get started this weekend!
Yay! Thanks guys, I really love explaining stuff. In my previous job I did training occasionally, and really liked playing teacher :)
@auzzi: I replied also on yesterday’s post, but I’ll post it again here in case others want to see:
You’re right – if you shorten the blouse from the hem,the hip measurement will end up smaller, slightly. If you want the blouse to be shorter, I’d do the shortening first. Then, measure the width at your new hemline (on the pattern pieces), and see how much you want to take it in. Hope this helps!
@Amanda: Exactly! That’s the main difference on the blouse pattern, just a minor adjustment at the hips and it’s back to standard proportions.
@Sandy: Sweet! I bet some of you guys are just dying to start sewing, especially if you don’t need or want to make any adjustments. Very soon!
@Jennifer: Yes! We have a Flickr group, here’s the link:
http://www.flickr.com/groups/sewaholicpatterns/
Just click ‘join’ to be part of the group and start uploading your pics. Can’t wait to see your blouse!
@Kate: Thanks! I agree, it’s nice to watch someone else do something first, even if you think you already know the answer.
Hi again! I’m a size 4 in your pattern except for the hip (35″), which is the exact size you used for your tutorial. I just tried moving the size 4 hip in by 1/4″ like you mentioned and I’m a bit confused since the distance between the size 4 hip and size 0 (36″) hip is 1/2″. For a 35″ hip wouldn’t the difference then be more than 1/2″ or am I missing something? I hope that makes sense. Thanks!
Thanks for this post. I have narrow hips and was nervous that the Pendrell Blouse might not be a good fit, but I think I may try it now!
I only found your blog a few days ago (I think perhaps through Tilly & the Buttons). Sorry to leave a comment that’s unrelated to the sew-along, but I just wanted to say how fantastic I think the blouse is and how much I’m enjoying reading your sew-along posts even though I’m not taking part – it’s so lovely to find someone who has designed around a specific body shape (particularly when it’s so similar to my own) so I’m looking forward to seeing the blouses appearing on Flickr and hopefully eventually making one myself.
Florence x
Hey Tasia! Great information! I’m at the tissue fitting stage & I was wondering if you could go into a touch more detail on enlarging the neckline. :) I have big, curly hair (and maybe a big head) ;) and it’s a bit of a tight squeeze, so I think I’d like to enlarge it a bit for my muslin to be sure. Thanks!
hi Tasia,
I’m trying to taper from size to size, and it’s VERY confusing. I want to go from 12 at shoulders to 10 at waist to 16 at hip (I’m using a knit, so I’m trying to take out some of that extra space you mentioned at the waist in your blog post on the knit version—also, the pattern is designed for 4 inches of ease at bust and hip but 7 inches of ease at the waist? Is that right?). On the outside seams, that works fine (right hand side of pieces 1,2,7,8). My modified pieces follow the same basic lines but a bit more exaggerated in-and-out. But when I try to do it on the inner seams (left hand side of pieces 7,8), going from 12 to 10 to 16 is going to give me something that actually bulges out on the waist, instead of narrowing. Is that right? I don’t understand how to taper in that situation.
I’m also worried that tapering will mean the curves won’t fit together right.
Thanks much,
daiyami
Hi everyone! I’ll see if I can answer your questions so you can keep going over the weekend.
\
@Amanda: Hi Amanda – I’m not sure if I understand correctly. You want to reduce the hips by 3″ just like my demo. Except that you’re concerned it won’t end up small enough? Ah, I think I know what you mean – you can’t just taper to a zero because the zero hip measurement is 36″ not 35″. Is that it? In either case, the difference around the whole body is so minor, it will barely make a difference. I’d suggest taking it in like the demo, and then when we sew the princess seams, that will be a chance for you to slim it down even more. I hope that helps!
@Susan – Knitters Delight: It would be lovely on you! It’s easy to slim down the hips even after the blouse is mostly sewn.
@Florence: Thanks for stopping by Florence! I’m glad it’s interesting to follow along, even if you’re not sewing along. And when you go to make the blouse, all of the posts will be here for you!
@Jenna: Hi Jenna! You could try one of two things. One, cut out your muslin as-is, and then when you try it on, scoop out the neckline so it’s where you want it. Once you have the neckline where you want it, then add to the neck binding.
Or, you can drop the neckline evenly all around before cutting. Then, for the neck binding, measure your new neckline, compare it to the old neckline, and add that amount to the bias binding. I’ll see what I can put together! I should be able to squeeze in a quick how-to post.
@daiyami: Sorry that you’re confused! Let me see what I can do to help. Yes, there are 7 inches of ease at the waistline! That’s a lot of extra ease especially if you’re using a knit fabric.
And sorry, that was my mistake on the inner seams. You’re right, the way the graded lines go, they go from smallest to largest on the other side. So sorry for the confusion! I’ll fix up the post so it makes more sense.
To fix it – let’s see, you want to go from a 12 at the bust and shoulders – trace the 12 line. Then, when you look at the waist, you want it to be size 10, I’d taper the line inwards so it’s actually where the 14’s dotted line is, but it’s going in at the waist by the right amount. (It will dip inwards by 0.5cm). Then, when you get back to the hem/hip, go outwards from the 14 line to the 8 line, moving outwards by just over half an inch. This sounds really strange, but it should work.
Then, on your outside line, start at the 12, taper in to the 10, and back out to the 16 at the hemline/hipline – because of the way the sizes are laid out.
OR – if this is just way too confusing – trace out the size you want to make (12), or cut it out from the tissue, and THEN make the changes to the outer edges of the size 12. Nip it in at the waistline, and add extra to the hipline.
I hope this helps! If this isn’t completely clear let me know, and I’ll draw you a picture :)
Ok, now signing off for the weekend. See you all Monday!
Thanks much, Tasia! I think I’ll try the first method (trace the 12, then adjust in and out) but good to know how to work around if necessary. Very helpful!
@daiyami: No problem! I’m glad it makes sense. You’ll still end up with a curved pattern piece, in fact you’ll have an extra-curvy seamline when it’s all done with. Happy sewing, and give me a shout if you get stuck again! :)
Another fab post, Tasia.
Thanks, Tasia! Sorry for the confusion. What I meant is when I took the size 4 hip in 1/4″ that left me at the size 0 line. I guess I just assumed the line would go in a bit more if I’m smaller than the 0, but you’re right, I’ll just adjust if need to when sewing! Have a great weekend!
Hi Tasia – check this out (if you haven’t already seen it yet!)
http://tessuti.blogspot.com/2011/01/pattern-review-pendrell-blouse-from.html
That is the blog of my fave fabric store — your pattern line is getting much deserved exposure!
HI Tasia, I’ve just made the adjustments you explained and the hips now taper in perfectly. Thanks for such a clear explanation. Jane x
Thanks, Tasia! I charged ahead and sewed it up and am very happy! (well, not hemmed yet, and I did a t-shirt style edging on my rayon jersey so still need to topstitch that down). But a lovely pattern, and looking forward to making the next one in a non-knit, and only minor fitting tweaks to make (what a relief). Will post to Flickr once I get the details done and some light (oh, Oregon).
@Rachel: YAY! That’s so fantastic!! (And a gorgeous version of the Pendrell too!) What an awesome-looking fabric store. Thanks for passing it on!
@Jane: Great! Glad it was easy to follow!
@daiyami: @daiyami: Wonderful! See, it is easy to sew once you get the rest sorted out. I know the feeling about light! It’s the same here in Vancouver, only a couple hours of decent daylight and rain, rain, rain… Can’t wait to see it!