Our Dunbar Top has a really cool knit binding finish. It looks super professional, and it stretches and moves nicely so that you can work out without worrying about popping stitches.
There are many ways to sew a knit binding as a neckline or armhole finish. I particularly like this method because all raw edges are enclosed. To finish, the binding is turned to the right side of the garment (it’s not visible from the wrong side), and because of this it’s easier to get a clean finish. You’ll see what I mean!
I’ll demonstrate this tutorial on a swatch, but this is the exact method we outline in the instructions for the Dunbar top. Let’s get started!

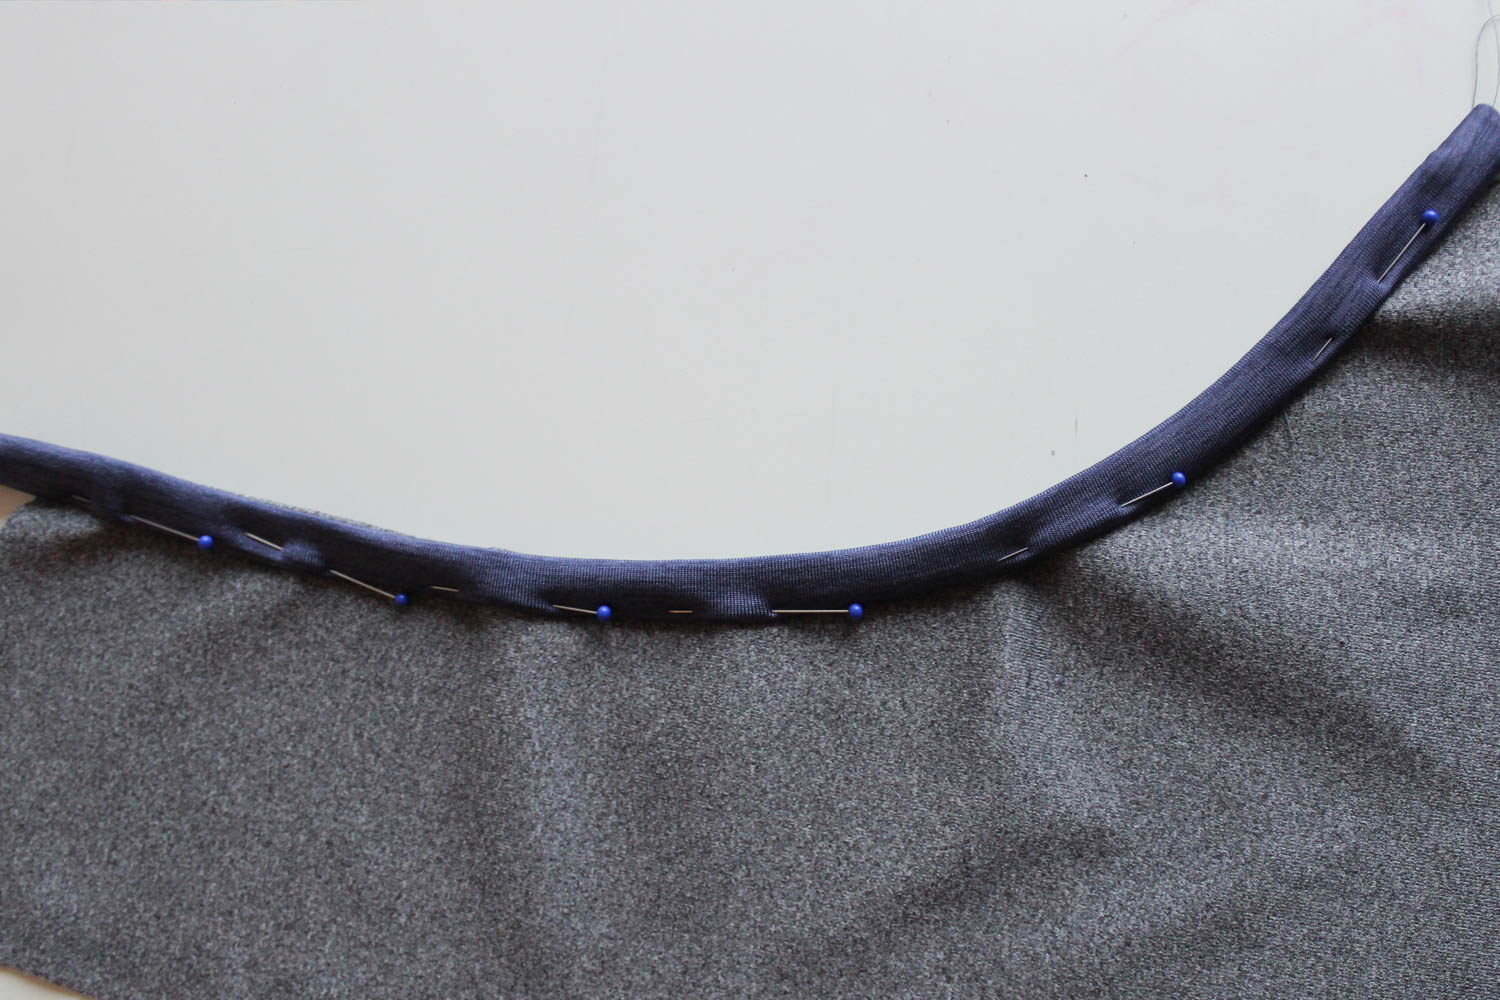
The knit binding piece is drafted to be 1¼” (3.2cm) wide, and the neckline seam allowance is ⅜” (1cm). Start by pinning your binding strip with the right side of the binding facing the wrong side of your neckline. Since I’m not using ballpoint pins, I like to pin inside of the seam allowance and parallel to the raw edge, so I don’t accidentally poke holes into my garment.

Sew with a ⅜” (1cm) seam allowance. Here I’m using a narrow zig zag stitch (length: 2.5, width: .5). I also love to use my machines triple stitch, it’s great for knits and has a lot of give. I recommend testing out a few stitch options on a swatch and stretching the heck out of them. The one that doesn’t pop and feels secure is your winner!
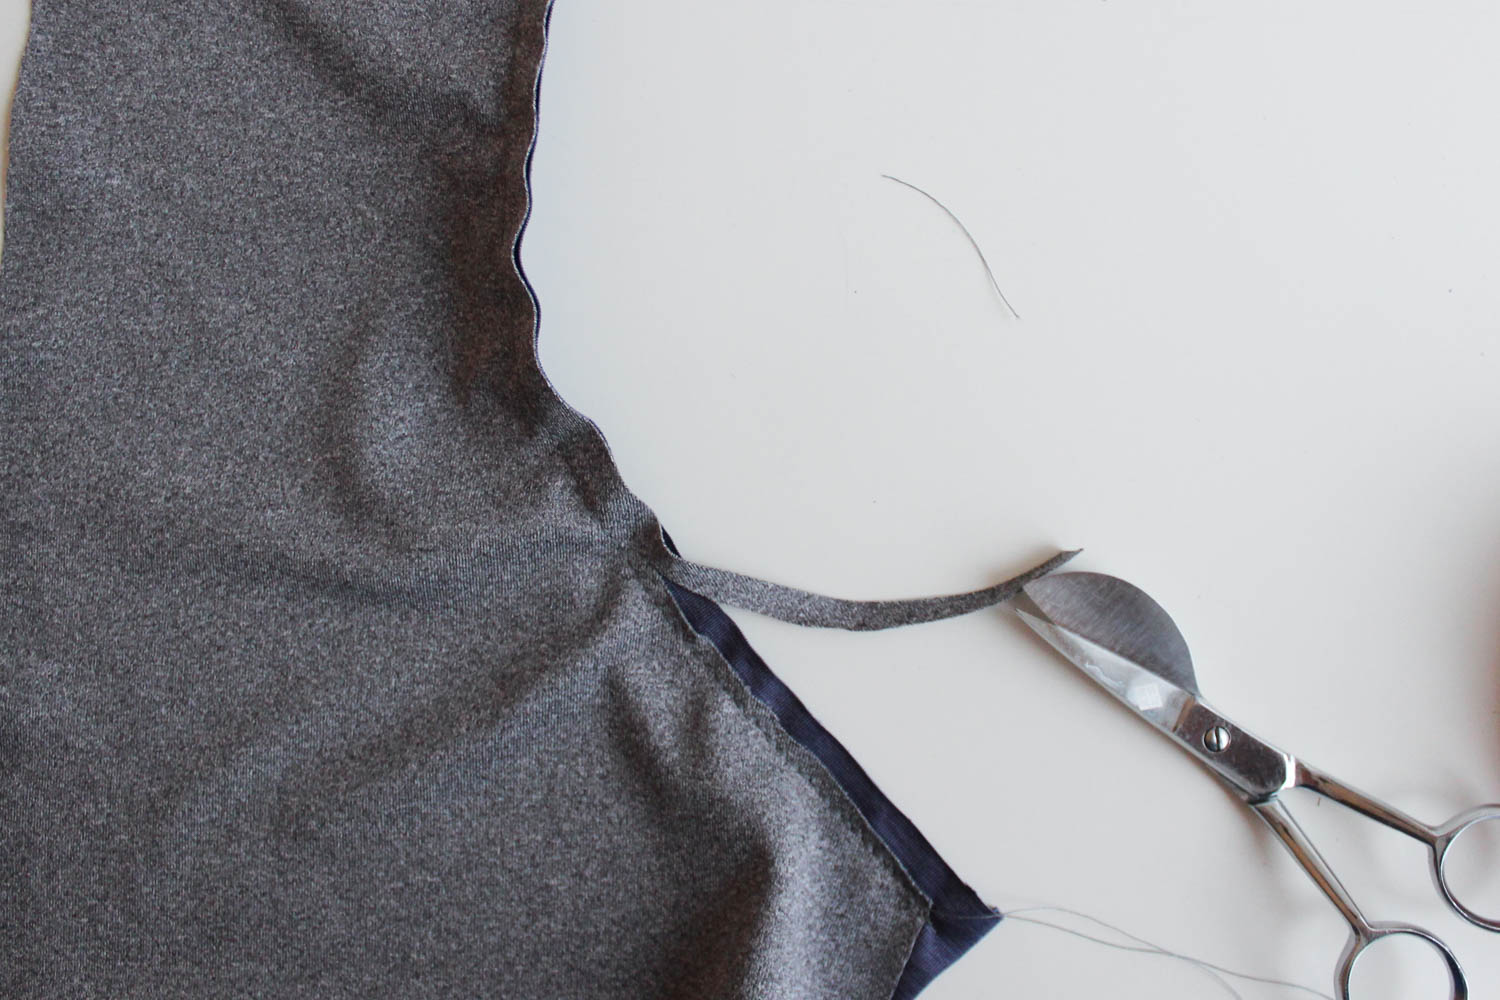
Trim the neckline seam allowance (not your binding). We’re looking at the right side here.
Turn up your binding. Again, this view is from the right side.
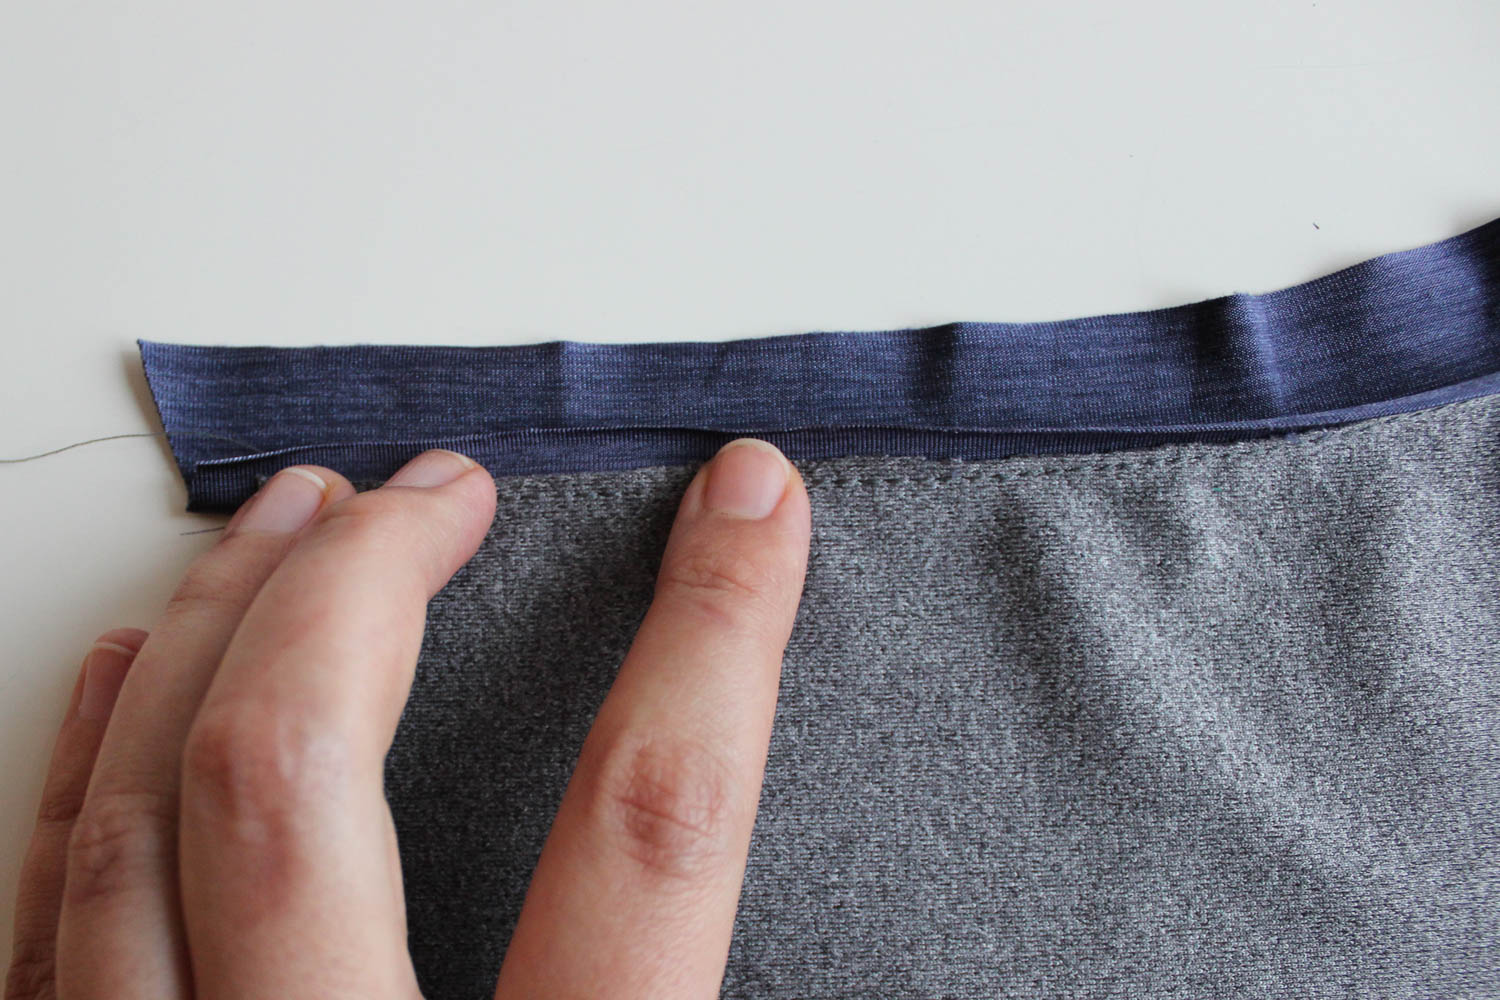
Turn under the raw edge of your binding by ⅜” (1cm). The raw edge will line up with your stitch line. You can do this with your fingers or press it with low heat on your iron.
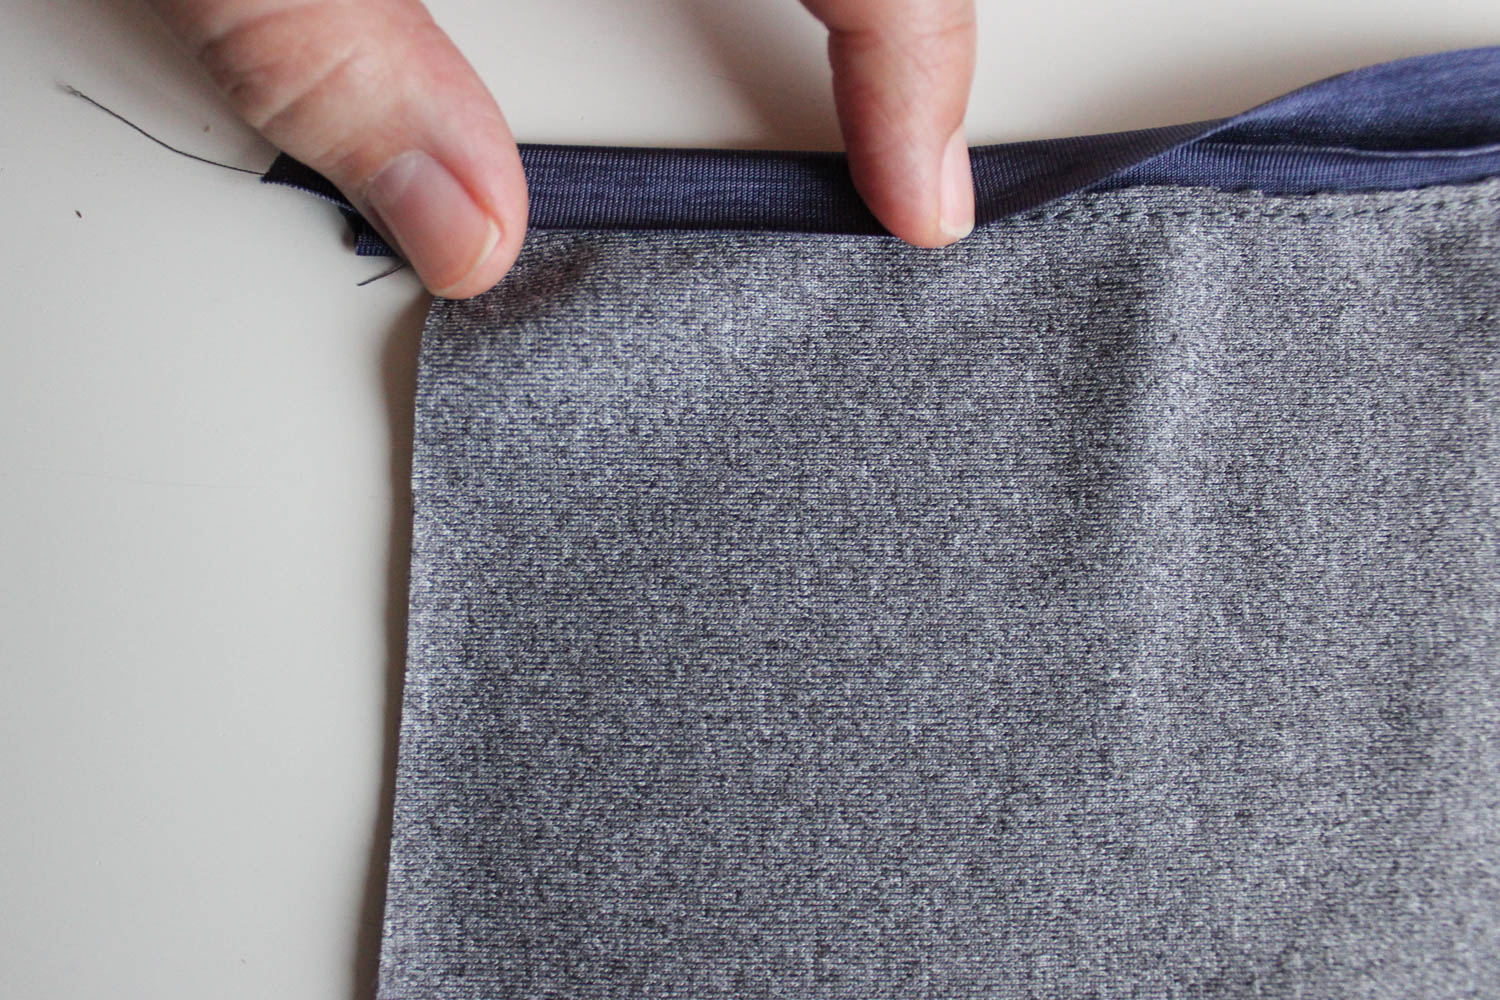
Turn it again, so that your raw edge is enclosed and the binding is not visible from the wrong side.
Pin in place.
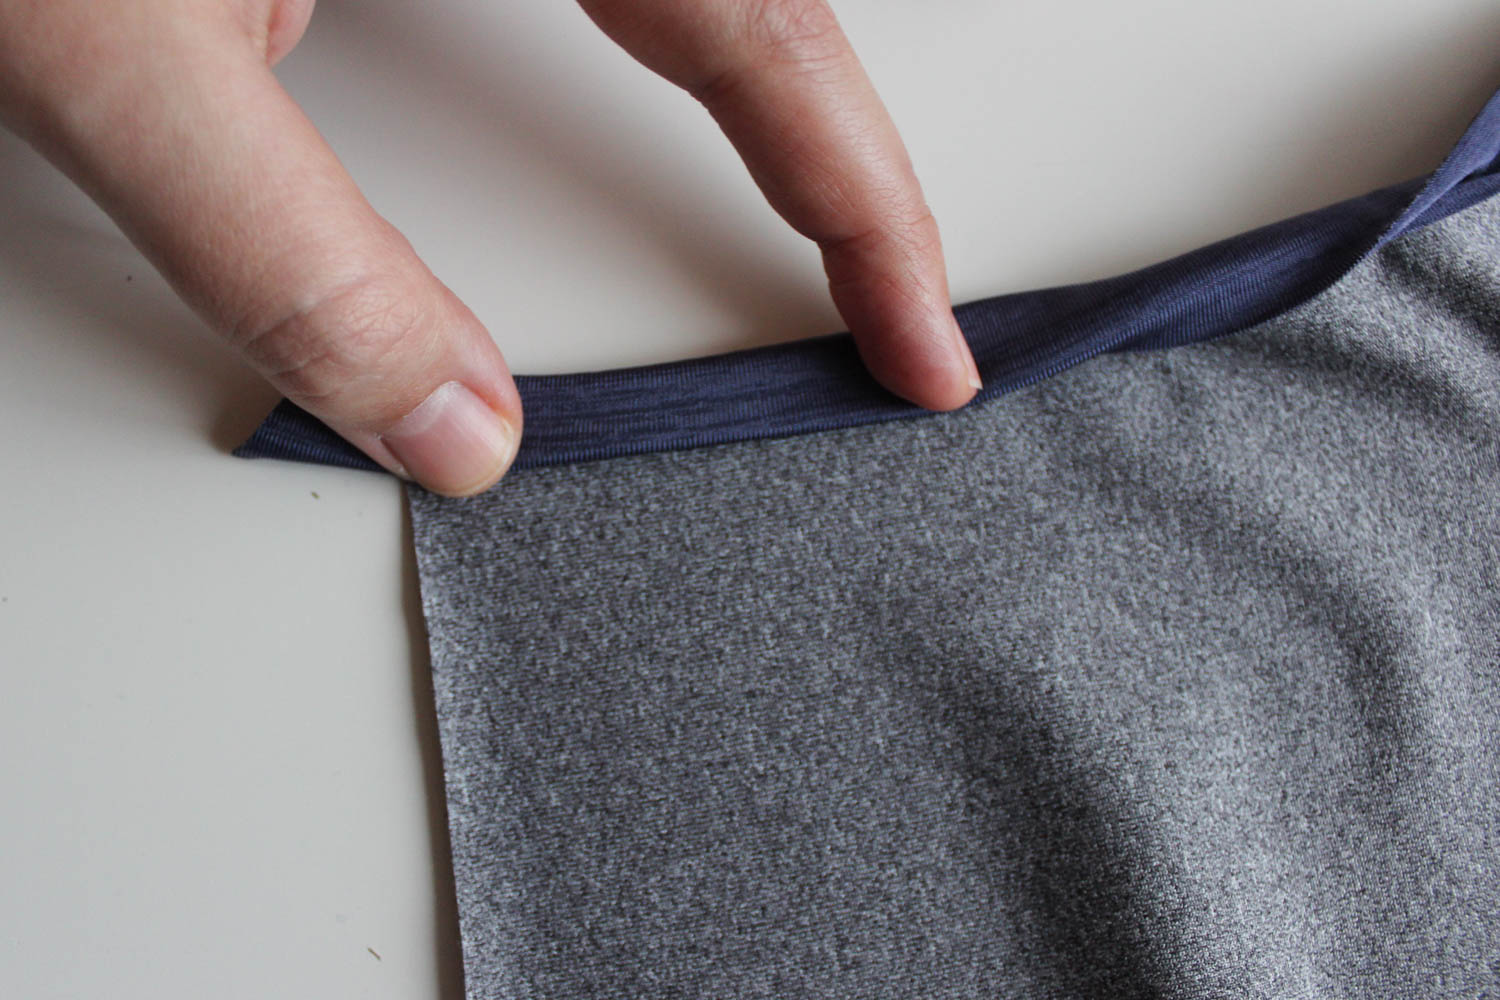
 Here’s what it looks like all pinned, from the wrong side. You can barely see the binding from the wrong side of the garment. This makes the final sewing step so easy because you can focus on getting a nice clean finish on the right side, and not worry about catching another binding edge on the wrong side.
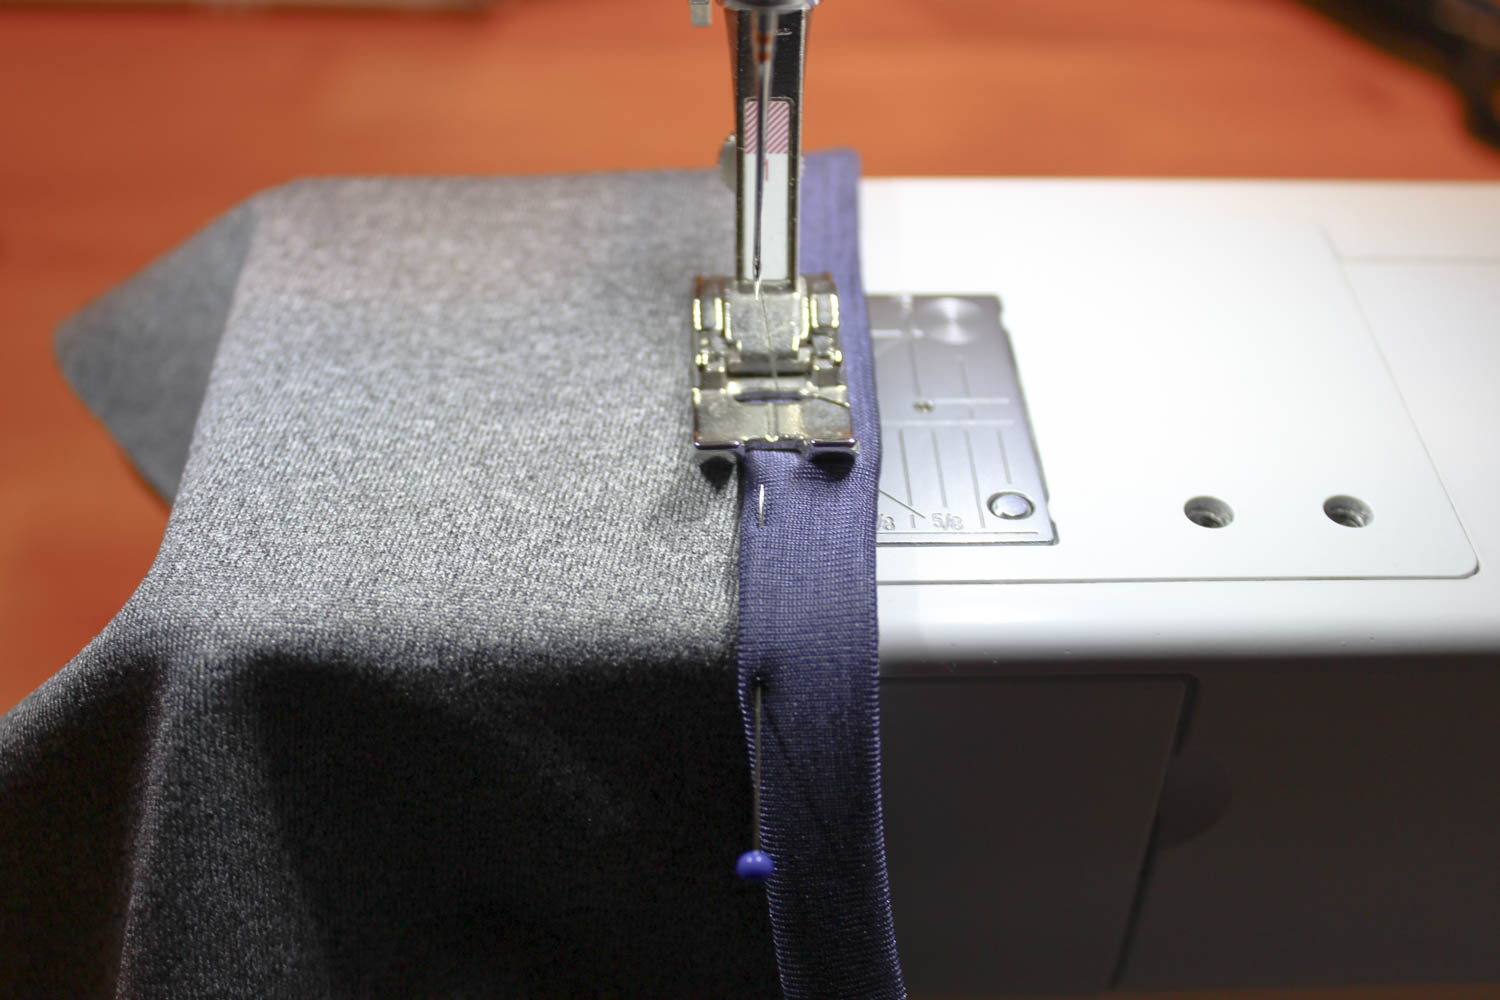
Sew a zig-zag stitch close to the fold from the right side of the garment. You can use a short and wide zig zag for this (I did length: 1.8, width: 2.8) so it will stretch really nicely.
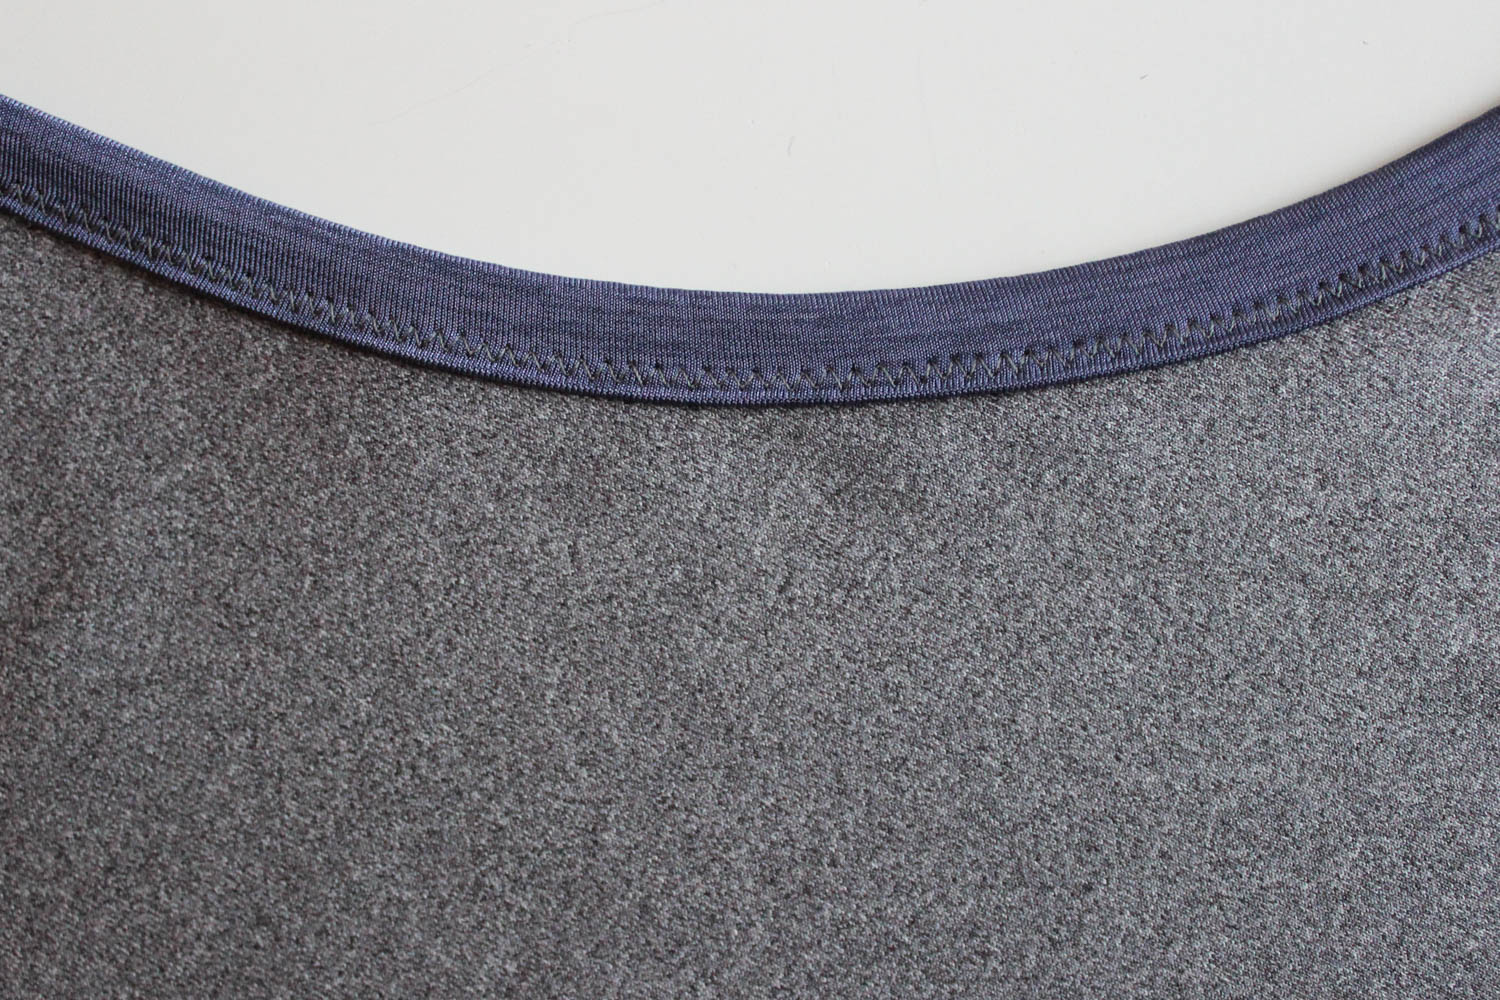
Here’s what it looks like from the right side! I love this clean finish.
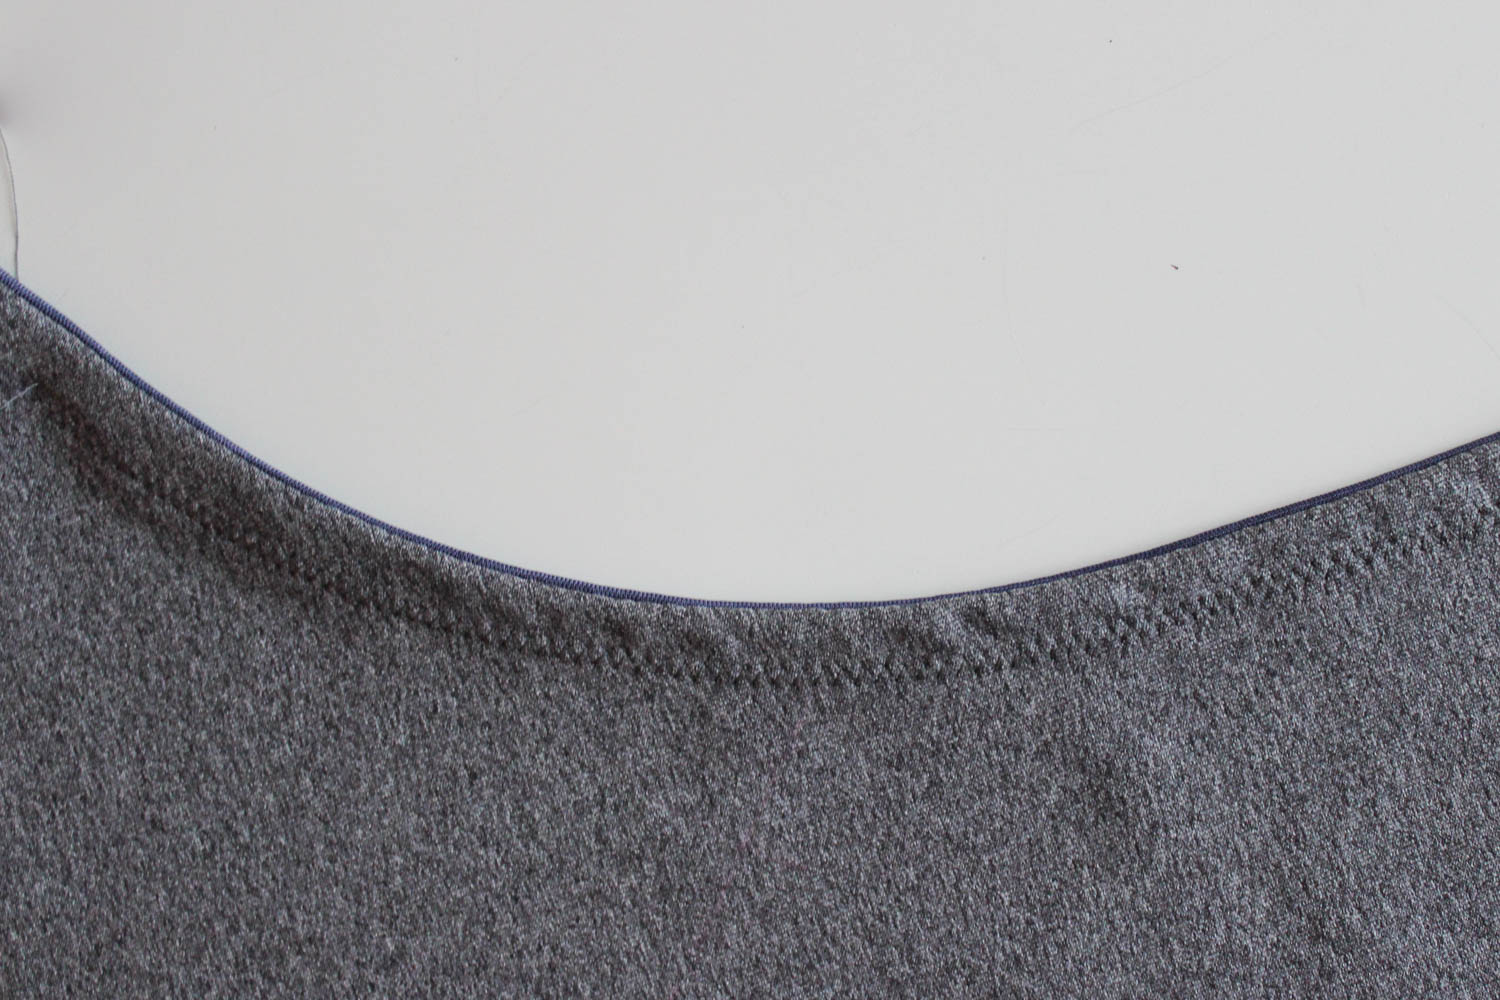
Here it is from the wrong side. Still nice and clean, all raw edges are enclosed, and you can barely see the binding peeking out from the right side. I prefer to have a millimeter of the binding visible from the wrong side, than to have the body fabric peeking out from the right side.
Like with any knit project, preparation is key! I recommend using your fabric scraps to do lots of testing before you sew up your finished garment. Test out seam finishes, test out this binding method, figure out your zig-zag widths and lengths and note them on the pattern instructions.
What’s your favourite method for applying knit binding? If you try this one out, let us know how it goes!
I love this finish – I’ve done something similar but what I love about yours is that you can do it the opposite way as well so that what you show as the inside is actually what’s visible on the right side giving it a very neat finish. No fuss of a binding showing which sometimes is what you want too. I can get tired of seeing so much bias tape on my garments – it actually makes it look very dressy on the right side! You could use a fancy knit bias and see only a hint of it for example in the armhole or neck. Thank you for this inspiration! :)
This is a lovely finish, and perfect for this top. I still have to make mine!
Perfect timing :0) am just gonna cut one out for my sister-in-law for her birthday present. Will definitely try this technique when I am constructing it. Thanx
Looks like a great method for woven fabric too! Necklines and armholes are my weakness, thank you Carloine!
Great tutorial, thanks! I will try this way on my next Dunbar. When I made my Dunbar tops, I sewed the binding on with the raw edge to the underside. They look awesome, but now that I see your step by step instructions I will definitely give this technique another go!
This is awesome! Thanks!
I’ve used this technique, but the other way, where I apply it to the RS and fold to the WS so the binding is on the WS, but I like the idea of doing this the way you have, and with a contrast color to boot! Very cool!
This is such a great tutorial! I have looked for so long for a tutorial like this for knit fabric! Thank you so so much. Pinning this for the next make. :)
I really like this technique! Will absolutely try it. I am never happy with my bias finish. How much wider would I need to make it if using 3/8 (1.5 cm) seam allowance? Thank you!
oops. I’m so glad you put this tute up. I’ll go back and try the binding again.
Slick!
I’m all set to cut out my binding strips – do I need to cut these on the cross? Thanks for any help.