 Hello Sew-Alongers! I wanted to follow up on this morning’s post with a few more thoughts on underlining. Now that I’ve basted my underlining, here are examples of how to baste the underlining and a few thoughts on each method. Jump in with your thoughts, or let us know which method is your favourite!
Here’s a link to the first post on underlining, if you missed it:
Pendrell Sew-Along #8: Underlining The Pendrell Blouse
I’m going to show you machine-basting and two different ways of hand-basting, so you can see what it will look like! I’ll also give you what I think are the pros and cons of each method, now that I’ve tested them out.
Machine Basting:
Here’s the Back piece, with the edges machine-basted. You can see I’ve ran the stitching off the edges of the fabric, instead of pivoting at the corners.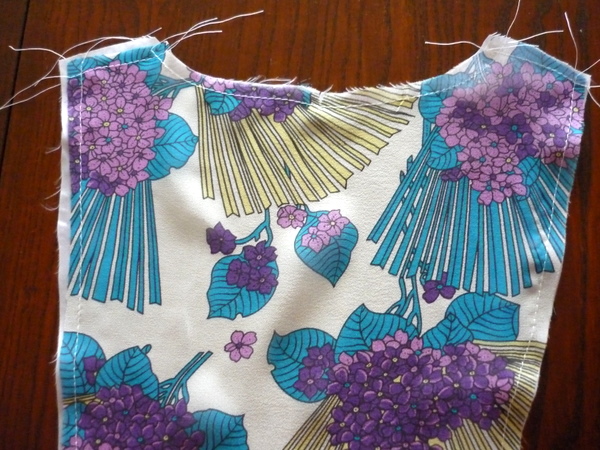
PROS: Speed – this method is fast! You can run this through your machine quickly and the whole piece is basted in minutes. Also, this basting is really strong. It’s not going anywhere!
CONS: Some slippage of the layers. You can see a bit of a bubble in the middle of the piece, where one layer is pulled tighter than the other. When you machine-sew, the piece hangs off the edge of your machine and is no longer perfectly flat. Plus, it’s true that the basting is very secure, but what if you need to take it out? Machine-basting makes way more holes in your fabric than if you were to hand-baste.
Hand-Basting, with running stitches:
I’ve used regular all-purpose thread to baste both layers together, and a nice sharp needle.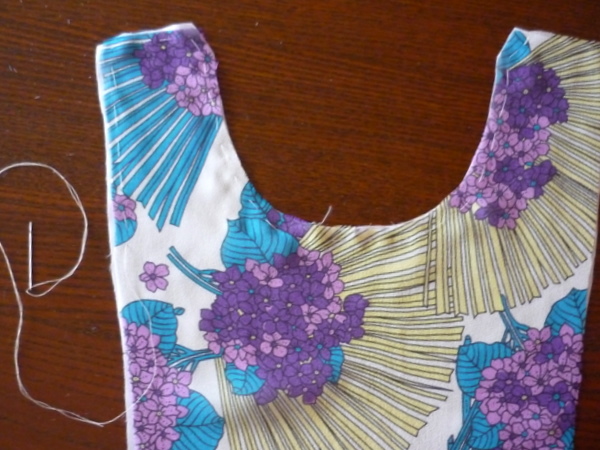
PROS: Accuracy, which is really important! With this method, you work with the fabric completely flat so there’s less slipping. You can also adjust and re-adjust as you stitch, shifting the fabric slightly to line up the edges.
CONS: Slow! This method is way more time-consuming, especially when you have a few pieces to do. Also, large running stitches could pull out easily if snagged. (Take off any rings or jewelry when working with fine fabrics and hand-stitches!)
Hand-Basting, with diagonal basting stitches:
I liked Nikole‘s suggestion of using diagonal basting stitches (also know as tailor basting) to secure the two layers. I used the same all-purpose thread, but switched the direction of my stitches.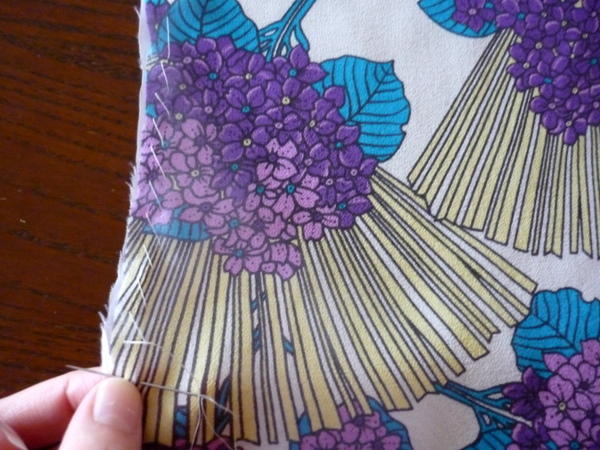
PROS: Accuracy again! With this method, we also work with the fabric completely flat so there’s less slipping. Also, I find it’s easier to make diagonal basting stitches than running stitches, it feels more natural to be holding the fabric so it’s vertical, rather than horizontal. (See where my hand is? It’s easy to hold both layers of the fabric from this angle.)
CONS: Slow! Again, this method is more time-consuming than machine basting. I found it faster than basting with running stitches, just because you hold the fabric in a more natural position.
Let’s compare! Here’s my front on the left side, hand-basted together. Compare it to the back on the right side, with the layers machine-basted.
Can you spot the difference?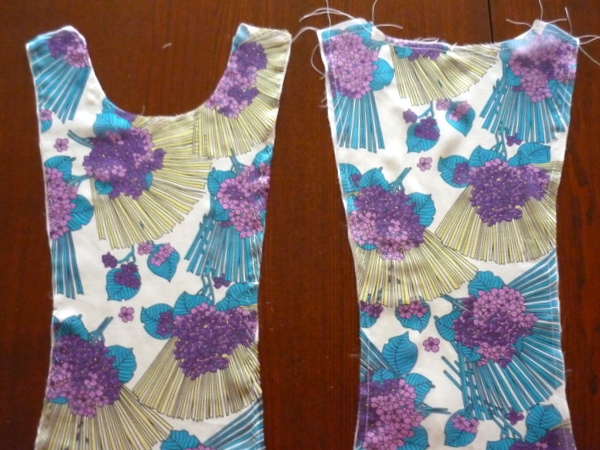
How about a close-up? Same pieces, just a closer look:
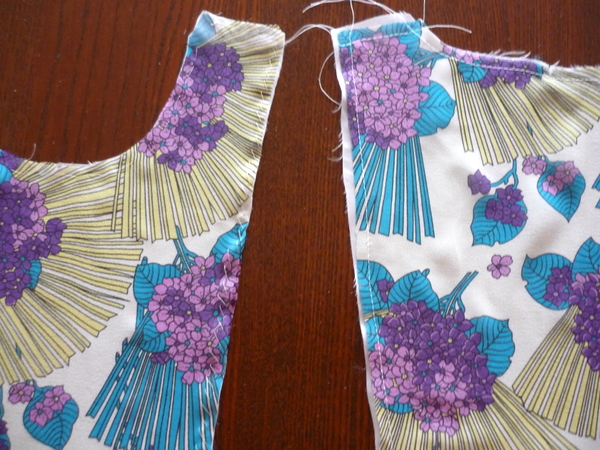
In my opinion, there’s a little more bubbling on the machine-stitched side, but not a lot. Is it worth the time it takes for hand-basting? You decide! It might be faster to machine-baste all of your piece, and fix up any bubbles afterwards. But if your fabric is very delicate or fine, hand-basting might be better. You don’t want to be unpicking fragile fabrics, if you can help it!
I hope this helps, for all of you who are underlining your blouses.

You know, I really think this one comes down to how you choose to spend your time and approach your project. I didn’t take any shortcuts with the Lady Grey coat – but I take shortcuts with other projects all the time. And I don’t think those other projects turn out badly, for the most part. I think I’m more inclined to machine baste. Then, I’ve never even underlined anything at this point.
Thanks for using my suggestion.
Another quick point before I turn in, I was thinking of tailor basting through out the whole piece and not just the edge (see pic) http://lh6.ggpht.com/_e7zYcrT4hWQ/S1S9EZ1wlMI/AAAAAAAABD0/Ob7dxTksn6w/IMG_8421.JPG
I’ve done it this was with wovens and found less bubbling (assuming it would be the same for the slippery stuff) and though still slower you can make bigger stitches since you’re going throughout the entire pattern piece.
Thoughts?
I’m for hand sewn using tailor basting. More control, less ripples and can easily be removed. It’s slower, but kind of relaxing.
@Dei: Agreed! It’s one of those things.. once you find a better way to do something, it’s hard to go back to the easier, faster, not-as-nice method when you know you can make it look better. Especially on tricky chiffon!
@Nikole: This is a great way to make sure your pieces are evenly lined up! For my demo blouse, it’s silk chiffon and I’m already worried about snagging and pulls, so I’ll keep my basting within the seam allowances for this one. Although, that’s a really good idea for less delicate fabrics! Thanks for sharing, again! :)
@K-Line: True, there’s a time for shortcuts when it doesn’t really matter, and there’s other projects that deserve a slower, more careful approach. If you’re going to hate every minute of hand-basting, then it’s not the right method for you. I like sewing slowly on certain projects! Especially when I’m not in a hurry to wear it, or to write about it :)
Thanks for the feedback everyone!
I have to say, after doing the tailoring for the Lady Grey coat, I’ve never had something (before or after) come out as well as that project did. While I doubt it was just the basting, I’m sure it certainly helped. There certainly is something to taking your time on a project vs. doing it all with shortcuts. I somehow need to find that happy medium. :)
Thanks for showing us all three methods. It really helps to see you do it before we do so we know what the outcome will be like.
What about using a walking foot – that way you reduce the amount of slippage (because both layers of fabric move evenly) and get the speed of the machine.
I think what we did for the crepe sew along was to cut out the underlining fabric using the pattern, then basting it (the cut-out underlining piece) to the (uncut) fashion fabric… then cut – does that make sense? I found that easier than trying to baste together two already cut-out pieces. What do you guys think of that method??
Until now, I never really knew what underlining was. Now, I don’t only know what it is, but thanks to you have totally understood how to go about it. I won’t do it for my blouse this time, but I’ve cut out the fabric and am eager to get sewing tomorrow.
Tasia, a question: if one have two cottons (like two voiles) for fashion fabric and underlining, would it work to cut them out and then run them together through the overlock? Finishes the seams and attaches the underlining fabric. Or is there a too great risk of the layers shifting?
@Tasia: True silks are tricky and snagging is a big concern; very fine needles and pins come in handy when working with silk. I was thinking about the bubbling that could happen in the body of the pieces but based on your pictures basting the edges seems to be working just fine
@Erika: Hi Erika! Personally, I’d worry myself about the layers shifting – and if they did, that’s a lot of stitching to unpick! So I wouldn’t recommend it unless you’re extra confident, or can live with a slight bubble between the layers.
@Cat: That makes sense, too! And might be easier than cutting with tissue or paper patterns.
@Ali: I’ve never used a walking foot, but anything that helps to even out the feeding of your fabrics is a good thing!
Hi Tasia, thankyou for this post. I am currently making a dress to wear on Saturday (with today being Tuesday), and I need to underline it. I have never done this before, so i found it very useful to find your post about both machine and hand basting. After trying both I have decided to use hand basting as I like the finish better.
I am late in joining the party, just started to read up on the posts before i start my project. I am also thinking about using a sheer fabric and will need an underlining (will hand baste, i think). My question is, should I also underline the sleeves and ruffles. I will be using a gorgette/chiffon looking fabric and it doesn’t much structure. Thanks :)
@sulovessew: Hi and welcome to the party! Underlining the sleeves or ruffles is completely up to you. If you don’t, they’ll be sheer, softer, and more delicate. If you do, they’ll be more substantial, a little stiffer, and more structured. It all depends on what you want!
I’m going to leave mine un-underlined, just the chiffon on the sleeves. Hope that helps!
Hi Tasia, Thanks a lot. One more question, what kind of needle did you use for your underlined chiffon material and did you serge the raw edge or did you use french seam?
@sulovessew: Sorry for the slow reply! I’m a little sheepish to admit this is as far as I’ve gotten on the blouse. I haven’t sewn any of the seams yet! Busted. :) What I will do, is french seam the blouse. I think it will look tidier and remove the potential of serging showing through when ironing. for the needle, I have some in my box that are for sheer fabrics, I think they say Micro-tex on the package. If you are going to use what you have, try a few test stitches to see what works best. I believe you want the smallest needle possible – and use a new and sharp one to reduce snags! Hope this helps and good luck!