Today we’ll sew our front plackets to the jacket, and baste in the front zipper. Now you’ll really be able to try on the jacket and see how it looks!
Want to catch up on previous Sew-Along posts? Click the links below to read more:
- Minoru Sew-Along #1: Let’s Get Started!
- Minoru Sew-Along #2: Sewing Sleeves and Topstitching Tips
- Minoru Sew-Along #3: Gathering!
- Minoru Sew-Along #4: Sewing the Hood
- Minoru Sew-Along #5: The Secret Hood Zipper
- Minoru Sew-Along #6: Sewing the Hood to the Collar (Quick Post!)
- Minoru Sew-Along #7: We Finally Get to Pull the Gathers!
- Adding Pockets to the Minoru Jacket: Amy’s Awesome Tutorial
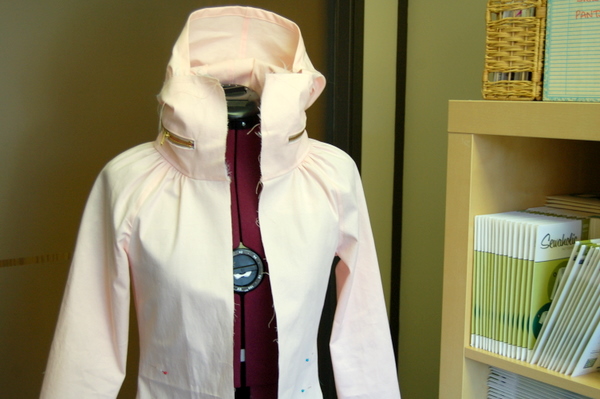
Let’s get to it! We’ll need our half-finished jackets from this post, and our front placket pieces. We’ll only need to sew in two of our band pieces today, but we needed to cut 4. (Make sure you have four placket pieces in total!) And if you’re like me and still haven’t cut your lining, we won’t need it today thankfully.
Apply fusible interfacing to your band pieces. (To save time, you might want to fuse interfacing to all four band pieces at once, while we’re at it.)
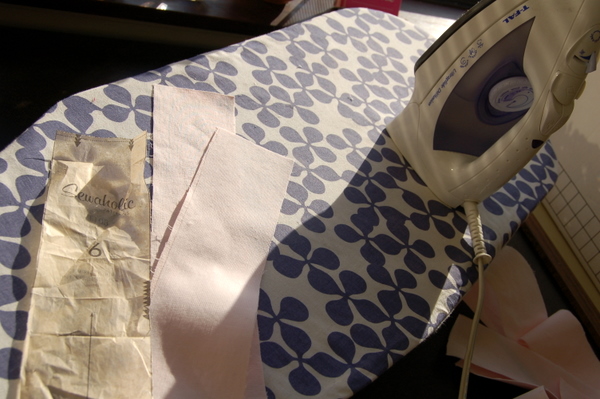
One thing I should mention, if you’re using a nylon or similar fabric, you may not want to use fusible interfacing as it might melt your fabric! Consider a sew-in interfacing instead, or perhaps doubling-up your main fabric to strengthen the front bands. Having the bands interfaced helps to support the collar and the zipper but if it really won’t work with your fabric, leave it out completely. You’ll end up with a slightly softer, more relaxed collar and band area.
If you applied the interfacing to all four bands, set two of them aside. (One pair, that is – check to make sure you have two different bands set aside (not two of the same side) and two different bands ready to use today.) Compare the tops which are slightly angled, and the notch placement – your pair of bands should be a mirror image of each other, not identical!
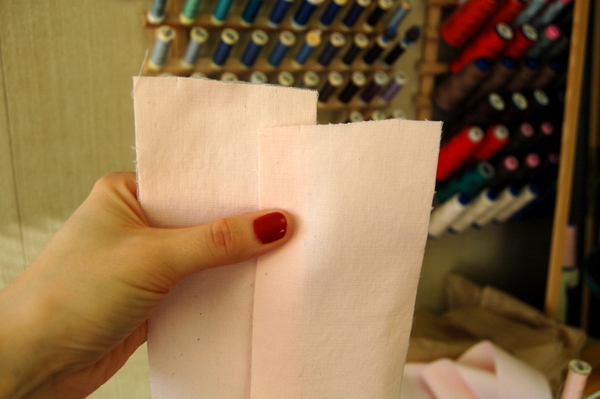
Pin the front placket to the centre front opening. (Placket, band, it’s the same thing. I call them plackets in the pattern instructions but also think of them as front bands, too.)
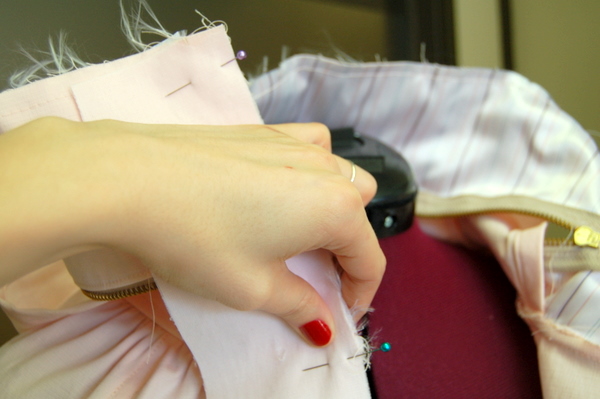
Line up notches to neckline seam, and match notches halfway down the body.
Sew plackets to jacket, starting all the way at the top and stitching all the way to the bottom.
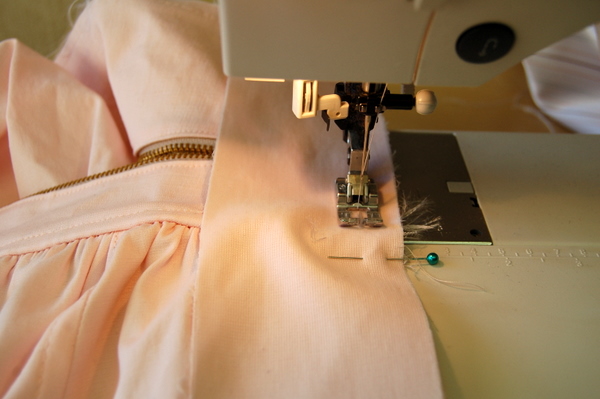
Press seam allowances towards plackets, and topstitch this seam. (I didn’t press the seam before topstitching it, but pulled the seam apart gently to make sure it was open while topstitching.)
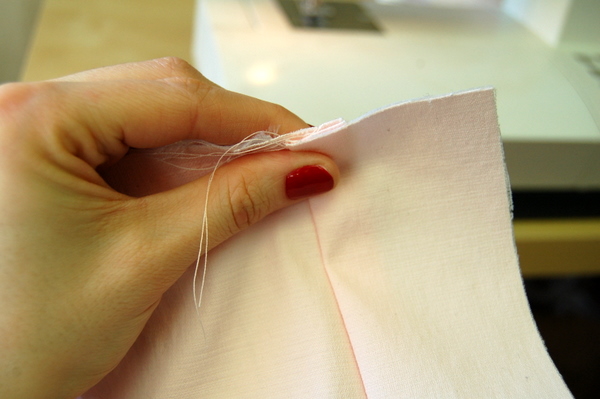
Remember to use the same topstitching stitch length and distance away from the seam as we did in this first topstitching step!
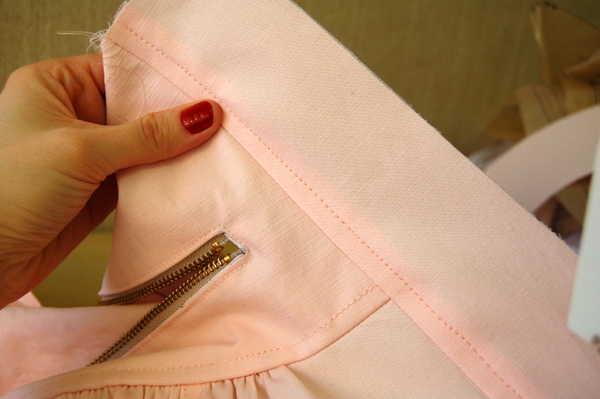
Trim seam allowances. Repeat for the other side of the jacket.
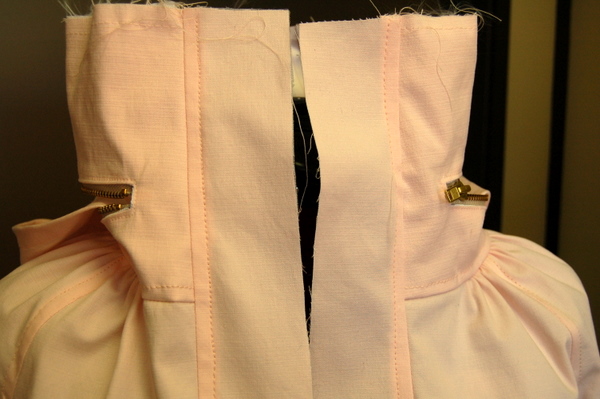
Now, we’ll baste our centre front zipper in place. Take your zipper, and open it up a couple of inches. You want to be sure that you’re basting in place with the zipper pull on the outside, not on the inside. See how in the photo below, we have our zipper aligned with the placket edge, but with the pull facing down?
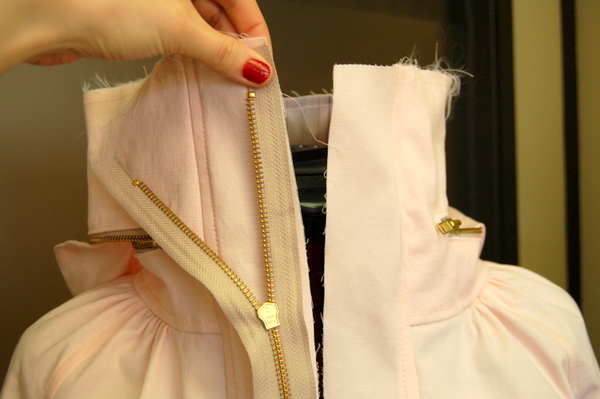
Starting with the left side of the jacket (right side actually, but the side that’s on your left when facing the jacket), pin the zipper tape to the placket.
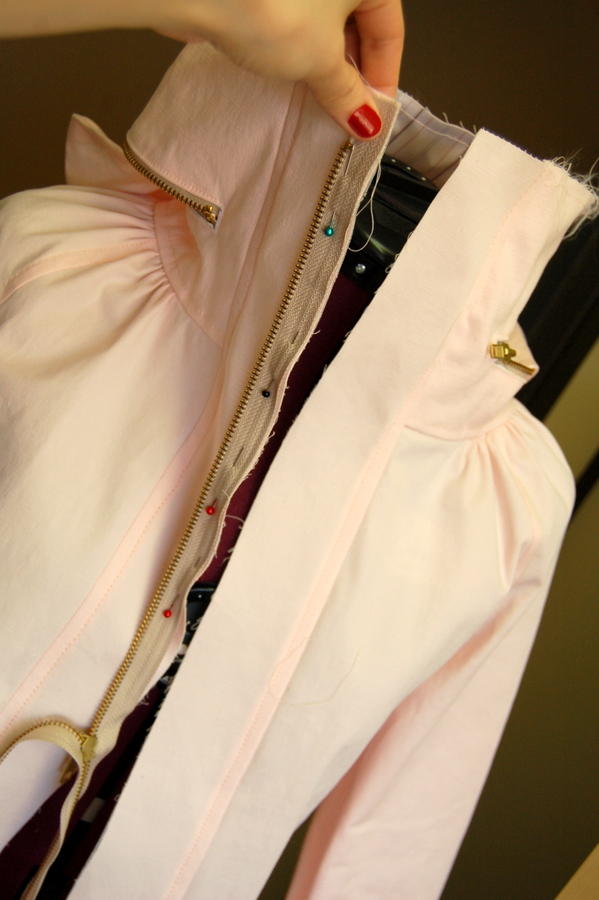
Now when we turn the zipper tape and seam allowance to the inside, our zipper slider is right where we want it – facing us!
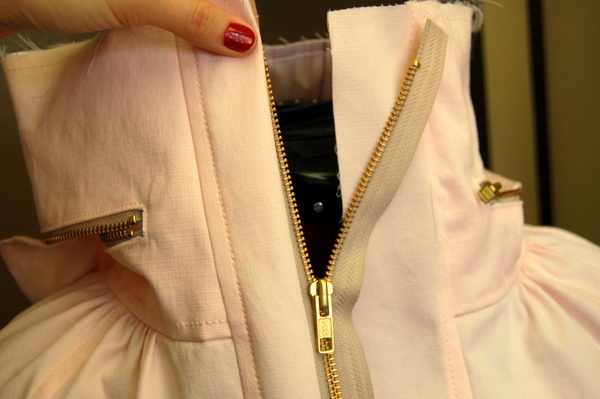
I find it’s easiest to start pinning the opposite side at this point too, so we don’t end up with twisted zippers.
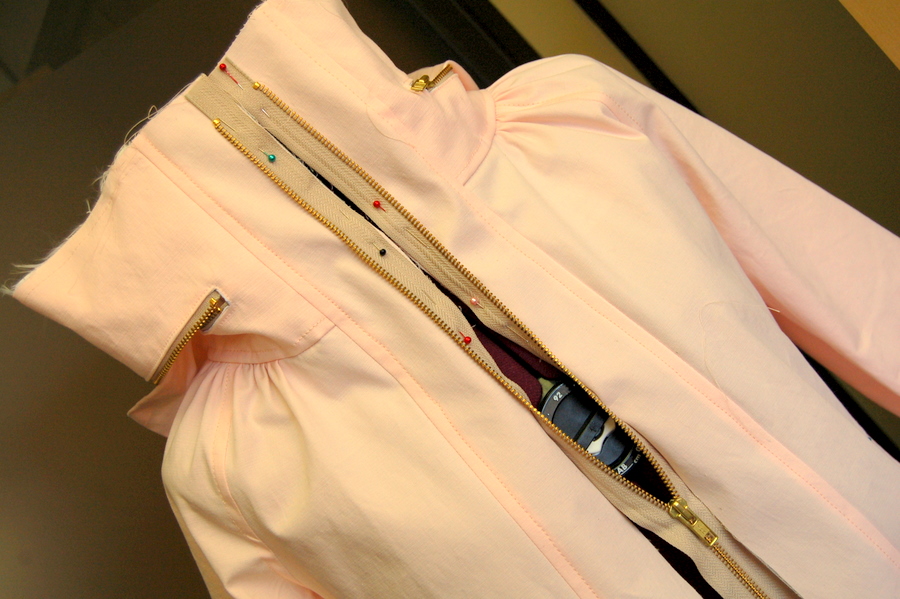
Continue pinning the zipper all the way down, to the bottom of the jacket.
NOTE: Your zipper will end before the placket does. That’s intentional! It’s supposed to end before the placket for looks, and also to reduce strain on the bottom of the jacket when we’re sitting down. If you really wanted your jacket zipper to end in line with the bottom of the placket, measure from top to bottom of the placket, and choose a zipper that matches this length exactly, shortening to fit if needed.
Let’s baste our zipper in place! This basting stays in permanently, but it won’t be the only line of stitching holding our zipper in place when we’re all done. Open the zipper completely and separate it at the bottom, so you can sew one side at a time.
Baste about 1/4″ (6mm) from the edge or so. I like to use the edge of my presser foot as a guide, but in this case I’m using the left edge and getting it as close to the teeth as I can without riding over them. Repeat with the other side of the zipper too. If you come across the slider, simply move it up out of the way while you stitch that section, and move it back down when you’re done.
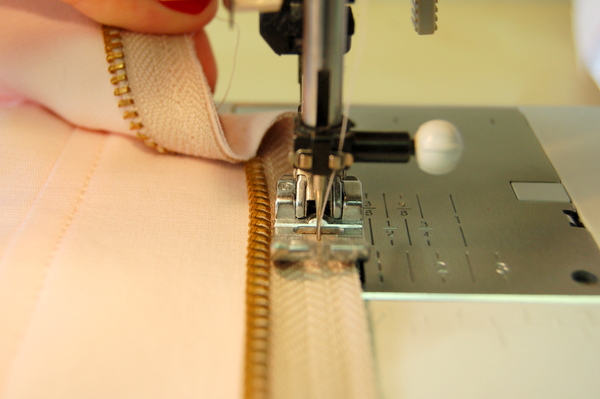
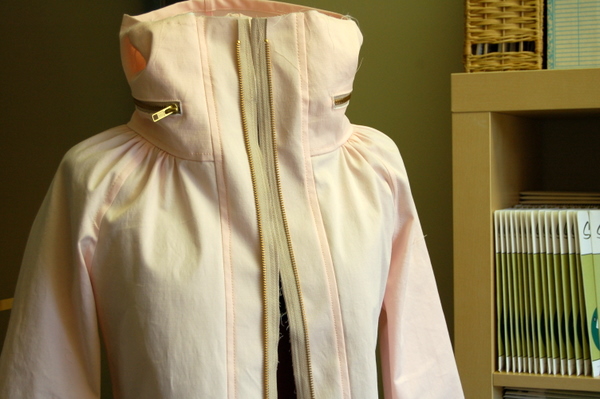
And that’s it for today! You’ll be able to try on your jackets now, and get a proper idea of fit. When we stitch the zipper down for real and press that seam, it will give us a little more ease, in case you find the fit to be snug!


Glad you are back…and also glad we are sewing again. I waited! It was dreadfully hard to wait.
I’m glad you’re feeling better. I’m impressed that you have a perfectly manicured thumb nail after being sick. That’s more than I can usually manage on healthy days.
Even though I’m not sewing, I look forward to seeing the project come together. Take it slowly and let your body recover naturally. We can wait on the posts.
Ha, that is because I have a hard time sitting still enough to paint them, normally! But when I’m sick and bored and stuck in bed, that’s a good time to paint my nails.
Thanks for noticing! :)
Glad you’re feeling better, although you did give me some time to actually start the sewalong!
Tasia! So glad you are feeling better. Mary, I waited too. It was hard to wait but we did it. So happy to be sewing again but I did manage to make my first Renfew in the downtime (and catch up of course). Happy sewing everyone.
I was so excited to get the Renfrew pattern in the mail yesterday – are you planning to do a sew along for that pattern as well? If so, any idea when that might start? I am looking forward to starting it, but would love to do it as part of a sew-along.
I had to use a sew in interfacing, I learned this the hard way! I melted and distorted a placket piece! It isn’t too terrible, I’ll use it for the inside, but I hadn’t enough fabric left to cut an additional piece. I am learning how to use synthetic type fabrics and they just don’t appreciate heat quite like cotton or wool do, lesson learned. I’m happy to hear you are back in the game, it did give me time to catch up but I have to admit that I couldn’t stop myself from going further a bit since I am excited to wear it.
I look forward to taking on this jacket as soon as there’s room in my sewing docket. Conveniently I have a fabulous fuchsia fabric that will make a perfect Minorou, and it will be great to have the sew along as a reference.
Awesome that you’re feeling better! My Renfrew pattern arrived the other day, and now I’m torn about whether to start that or the Minoru. Will probably be Renfrew – not so many pieces to trace!
I’m glad you’re feeling better, and I’m glad to be back to sewing. How fun that I should be able to zip up my Minoru by the end of the day!
I’m so glad you are feeling better. Being sick is the worst, isn’t it?
Your jacket is looking amazing! I cannot wait to see the final product!
Glad you are feeling better! I waited and didn’t sew any further on my Minoru.
But I will be starting on a Renfrew or two in the next few days. I received my pattern last week and picked up some nice fabric for a bargain on the weekend. Exciting!
So glad you’re feeling better, Tasia!!
Thank you! It’s nice to be back to normal and sewing again!
I have a question about pockets.
You have shown a couple of different methods for the pockets… which is the correct method as shown in the pattern.
I thought the only pockets in the jacket were a couple of pockets like in men’s coats, – inner pockets on/below the breast… am I confused?
Ah, sorry if that was confusing! In the pattern, the only pockets are interior pockets like you mentioned. You’re correct on that!
But many people wanted to know how to add extra pockets to the jacket, so I thought I’d point out some blog posts that might help if they wanted to add their own pockets! The extra pocket posts are just ideas on how to customize the jacket. If you want to follow the pattern exactly, you can skip these extra pocket blog posts!
Thanks. I just want to follow the pattern as I like that way best… We haven’t covered those pockets yet have we?
Nope! Well, we hadn’t started on pockets when you wrote this comment. The pockets post went up Friday morning (today as I write this) so all of the pocket-sewing info is there. I did post one little tip that wasn’t part of the sewing instructions but you’re welcome to either follow it, or follow the instructions. The finished pocket will look the same either way.
Another question:
I am having trouble getting a zipper to match my fabric. The closest that I have are in two sizes 26″ or 29.5″.
What length is best?
It depends on what size you are making! And if you’ve made any length adjustments to the jacket that involve the placket – either shortened or lengthened.
A 26″ zipper will stop quite a bit shorter than the end of your jacket. I would suggest the 29.5″ unless you’re making the smallest sizes (0 or 2). I make the size 4 and it calls for a 28″ zipper (stopping short of the hem, like my orange jacket sample in the pattern store photos) but you could use a 30″ and it would extend right to the bottom of the jacket.
Unless you’ve shortened the jacket quite a bit, in which case I’d measure the placket piece, subtract 5/8″ from the top and 5/8″ from the bottom (1 1/4″ total) and that’s how long the placket will be. A zipper that’s at least that length or shorter will fit, and then you’ll know exactly how much shorter your zipper will end.
You could always get the 29.5″ and shorten it, too!
I hope this helps!
Yes that helps. I think I will keep looking for a zipper. Next time I will be sure to find a matching zipper before I choose my fabric!! :)
One more question.
Why not pull the zipper apart and see the two pieces separately. It looks very fiddly trying to pin it whil joined. .. What is the benefit?
Sew* sorry iPhone typos.
Hi, Tasia, I’m slightly worried that the placket is a couple of inches shorter than the jacket front at the bottom. I’ve measured the pattern pieces again and this seems to indicate the same. I’m making a size 10. Please put my mind at rest,thanks
Did anyone ever answer your question? I’m following along with the sew a long late and have the same issue. Please let me know!
Hi Abby! It’s supposed to be shorter. The placket lower edge is finished with a regular seam allowance, but the jacket front is hemmed with a much wider hem.
You can see it in the photos of this post – http://sewaholic.net/minoru-sew-along-18-hemming-and-then-were-done/
Hope this helps!
I just re-read this post in an attempt to catch up, but now all I want to do is paint my nails a daring red…guess the catch up will have to wait for tomorrow. So easily distracted :)