 Today, you can pull up the gathering threads on your jackets! (When we get to that part in the sewing instructions, that is!)
Today we’ll sew the collar to the jacket neckline, sew the underarm and sideseam, and topstitch the underarm seam.
Note: If you’re wanting to put inseam pockets in your jacket, stop before sewing up the underarms and sideseams. No pocket tutorial as of yet, but it’s coming! (Unless there’s someone out there who already wrote one? Let me know if you’ve seen one, written a side-seam pocket tutorial yourself, or would like to!)
Want to catch up on previous Sew-Along posts? Click the links below to read more:
You’ll need your collar (either the hood-and-collar combo we made the other day, or if you’re making View B, just the collar piece) and your jacket body.
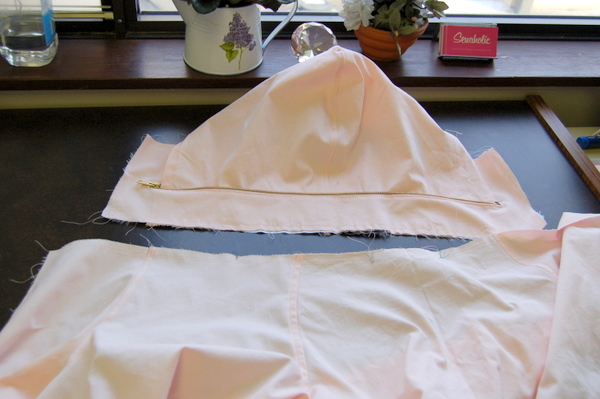
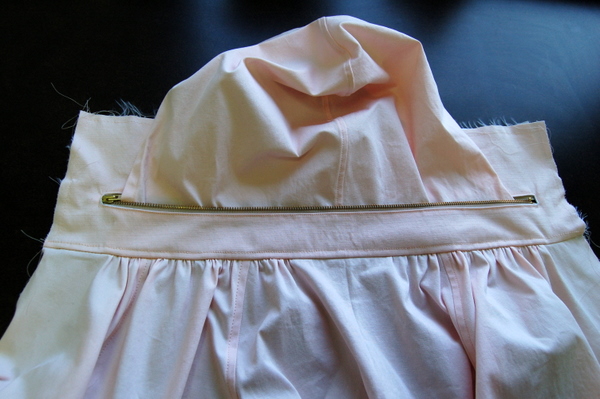
Line up the collar along the top neckline, right sides together. (Someone asked about seeing the collar from the other side, this is it! You can see the zipper tape from the inside, but it’ll be hidden when the collar is completed.)
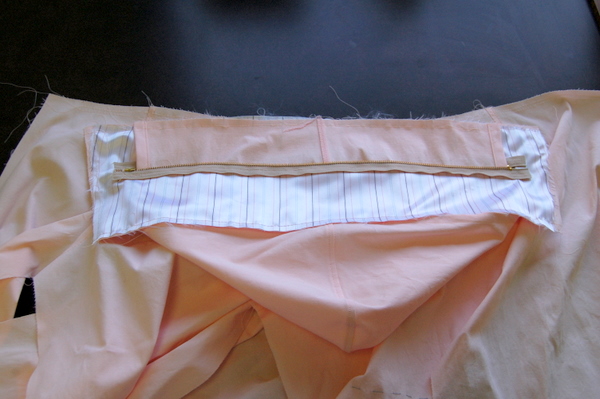
We’ll pin them together in three strategic places:
- Pin the centre of the collar to the centre of your jacket.
- Pin the edge of your collar to the edge of your jacket.
- Pin the notch in between.
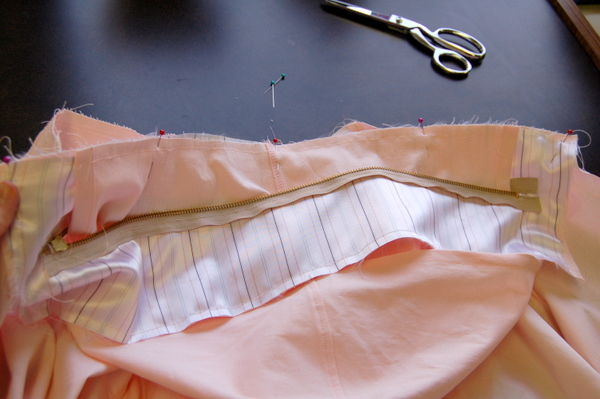
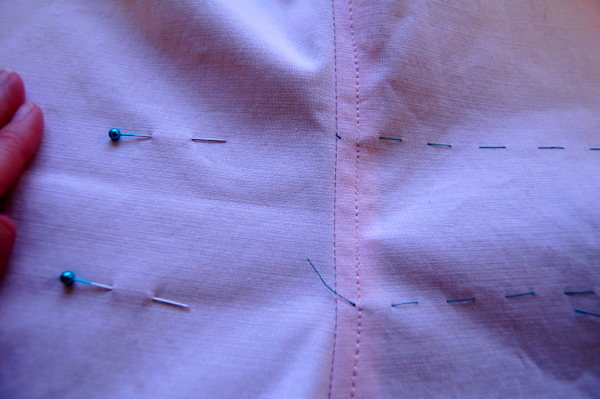
Now, pull up the gathers in between the pins! Distribute the gathers evenly. If you’re unsure about the gathers, baste this seam first. Check the gathers, adjust if necessary, and then sew the seam for real.
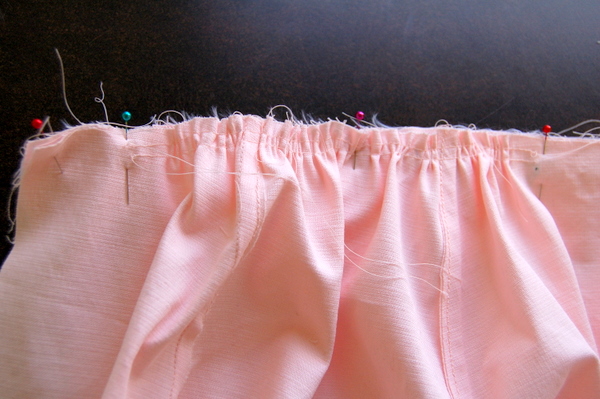
Sew the collar to the jacket. Looks good!
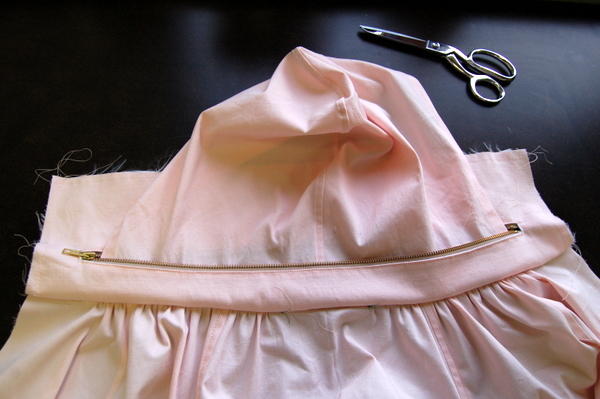 If you did tailor’s tacks, you can take them out. I’m going to pull my little green threads out so they’re out of my way.
Trim the seam allowance, press it upwards towards the collar, and topstitch this seam. Don’t forget to topstitch the same way you did in this post!
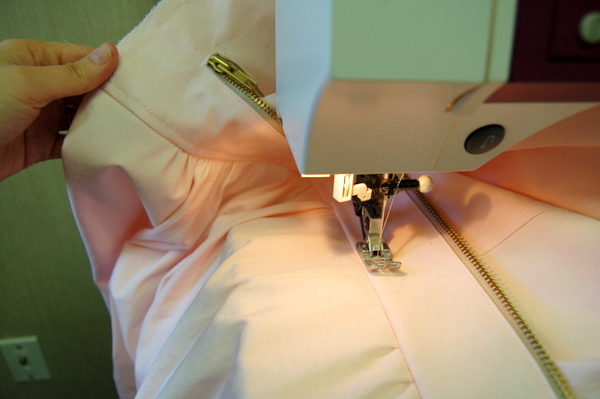
Here’s how it will look so far:
Our jackets are going to look pretty good by the end of today, as we’re going to sew up the sideseams and underarms now! (Unless you want to add inseam pockets. In that case, don’t sew up the sides quite yet.)
Fold your jacket so it looks like the photo. Start with your jacket back facing you, right side up, and fold the jacket front over, lining up the sleeves and sideseams.
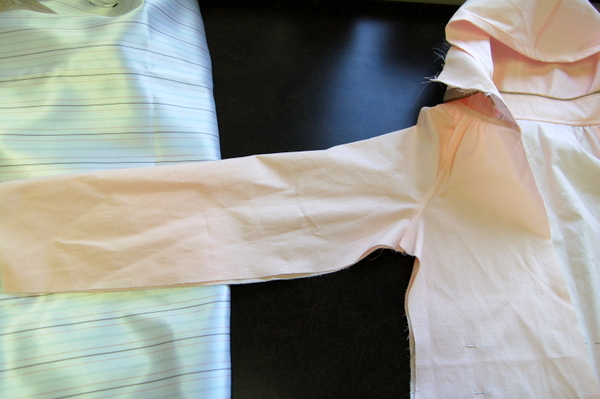
Pin along the sideseam and underarm seam, matching raglan seam intersections at front and back. (Yes, that’s my uncut lining fabric underneath! Still haven’t had a chance to cut all of the lining pieces…)
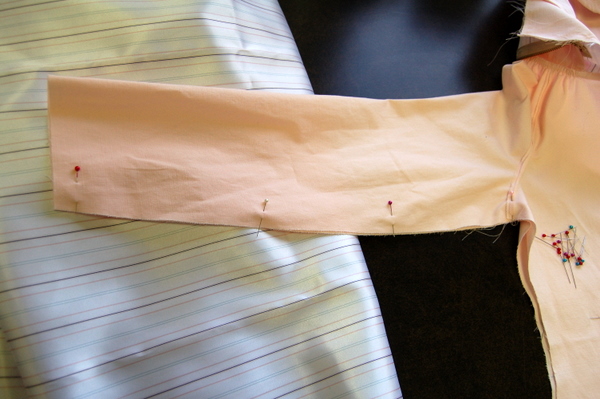
Stitch the sideseam and underarm seam as one. Or, if you’re thinking of making adjustments to the fit of the jacket at this point (perhaps the hip width, if you’re less of a pear-shape) baste this seam instead. Try on the jacket, adjust the seams to fit, and stitch the seam permanently.
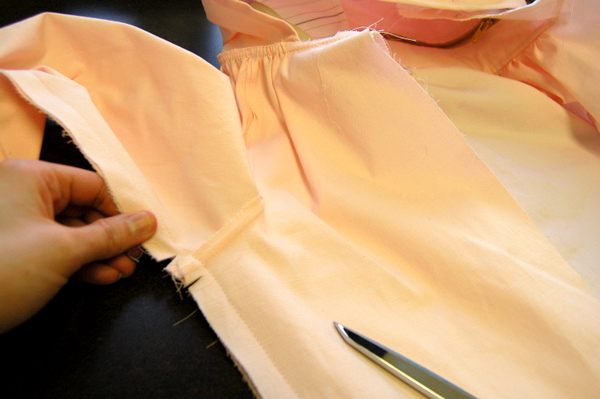
Trim and press this seam towards the back. In the photo above, I’ve shown how I clipped it at the armhole so it turns and presses more easily. This next step is optional, but I like to topstitch the seam from the underarm down to the hemline. I feel like it gives it a sporty look and more durable sideseams.
And that’s it for the day! How do you feel about your jackets so far?

They’re not side-seam pockets, but Sophia Sews has written one for vertical inseam pockets here: http://sophiasews.blogspot.com/2012/01/minoru-jacket-adding-pockets.html
Yay! It’s starting to look like a jacket! I haven’t even cut out my pattern pieces, but this is next on my list – I just need to get a couple of smaller makes out of the way first.
Hi Tasia! I’m planning on adding side-seam pockets. I already have the pieces cut out of my lining fabric, and I’d be happy to take lots of pictures and write up a tutorial when I sew them in. I’m all caught up in the Sew-Along, so I might even be able to get to it today. Email me if so.
The jacket is starting to look great! I can’t wait to start this.
Hey Tasia, Amy has posted a tutorial for inseam pockets in her minoru here: http://sewwell.wordpress.com/2012/01/26/minoru-sew-along-side-seam-pocket-tutorial/
Thanks for linking my tutorial here. I figured it would automatically link, but it didn’t. You rock!
I’m sorry to ask such a basic question…I’m a newbie. I’m making View B without the hood. Your tutorial for the View A is so great and detailed, but I’m unsure what to do with the 2 collars pieces before attaching. Do I sew 3 sides with right sides together? And then attach? Please help!! Thank you. Can’t wait to finish. Thank you for the sew-a-long
Hi Trixie, I think that if you’re making the view without the hood you only need to attach one collar piece to the jacket – the other collar piece gets attached later. Yours should be the same as the one pictured, but without the zip and hood – so just one collar piece.
Thanks, Rachel! I wouldn’t have gotten that myself. I appreciate the help!
Really enjoying my first sew-along. It makes you pause, take time to enjoy the process, do a better job and gives you ideas to make a pattern your own. I took my inspiration (copying) from the “Dots” post and so far its looking really good.
I’ve learned so much from this sew-along. Thank you!
Thanks for the great instructions – i’ve been loving sewing along with all. Although my sewing along has been mostly catch up on the weekend sewing. Love the pattern – the fit – and even the material I chose. Very excited to finish and start on the Lonsdale – my daughter is making that one with me – first she needs to find some vintage looking fabric she loves. We will using your Sew-A-Long for that one as well.
I love this pattern! As I work through it, I keep thinking “Tasia is so clever!” I love it so much I am starting a second one. Everything is so well thought out – I would never have come up with this construction on my own and it gives such a nice result!
It’s a miracle! I have caught up with the actual sew along and am sewing along in real time! It has been a battle, mainly between myself and the fabric I chose to use but once I made it to this step and completed it I am back in love with it! Now I just need to improve my top stitching.
Hi, I got my pattern a few months ago but haven’t had to start it yet. When I realised you had started a sewalong for this jacket I was so happy. I’m going to start this evening and see if I can catch up like Amelia did, looking forward to starting, wish me luck!!!
THanks
Yay. Finally finished top stitching. Next step!!