 I know, technically the zipper isn’t a secret. You all know it’s there! Nor is it a secret that there’s a hood in our collars, it’ll be a soft roll around your neck. Secret or not, it’s a very cool feature on this jacket. Today we’ll insert the zipper into the collar, so we can get our hoods out when the rain starts coming down.
Note: If you haven’t cut your lining yet, you’ll need to cut at least one collar piece out of lining for today’s sewing step!
Want to catch up on previous Sew-Along posts? Click the links below to read more:
- Minoru Sew-Along #1: Let’s Get Started!
- Minoru Sew-Along #2: Sewing Sleeves and Topstitching Tips
- Minoru Sew-Along #3: Gathering!
- Minoru Sew-Along #4: Sewing the Hood
- Minoru Sew-Along #5: A Change in the Line-Up and Checking In
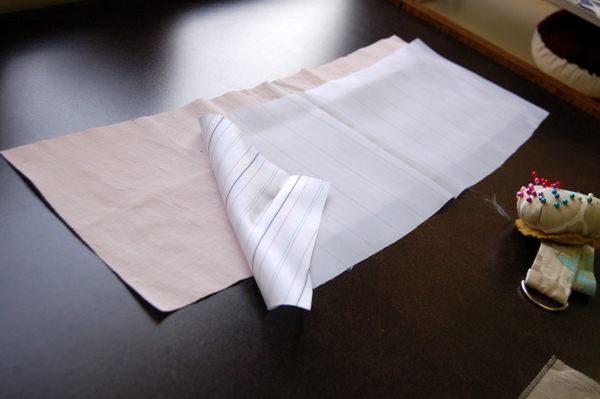
Lay your lining, right side down, on top of one fabric collar piece that’s lying right side up. You want them right sides together. Pin around the edges, smoothing out any bumps.
If you’ve marked your zipper opening lines, great! If you haven’t, that’s all right too. I haven’t either. I’ll grab the original pattern piece, lay it on top of the collar, and mark the top and bottom corners of the zipper opening line.
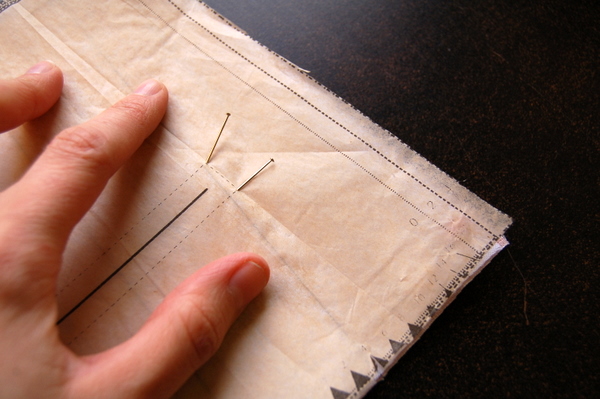
I’ll also mark the centre points of each line.
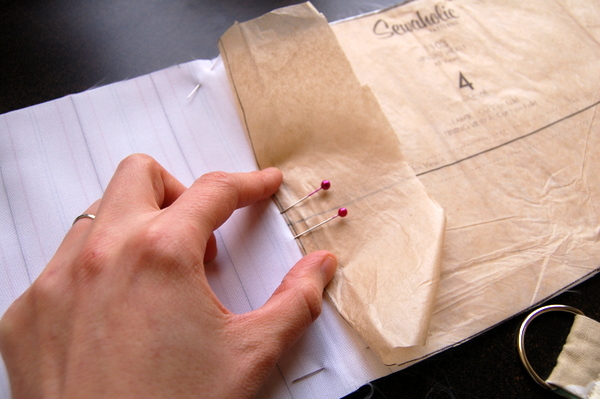
Then we’ll flip over the pattern piece, and mark the corners on the opposite side.
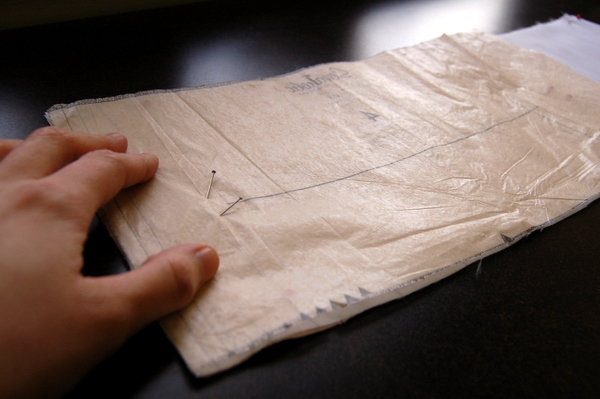
Marked! I’m going to draw in the zipper placement lines with chalk so they’re easy to stitch. You could use a fadeaway marker as well.
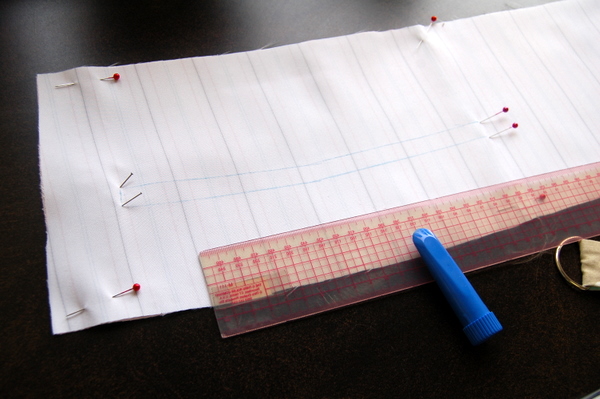
Once the opening is marked, we’ll stitch around the lines. This will make a window for our exposed zipper. Take your collar layers to the machine, and stitch around the opening. If your fabric is loosely woven at all, you may want to use a shorter stitch length. I’d also suggest shortening the stitch length when you get to the corners. This way, when we clip to the corners, our stitching will be strong.
You might want more pins on either side of the zipper stitch line, too!
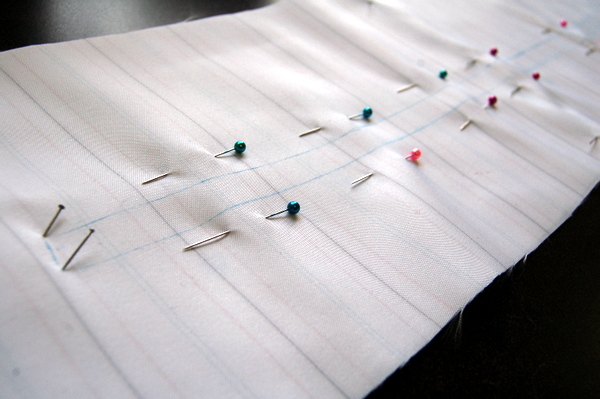
Here’s what the zipper opening will look like, stitched.
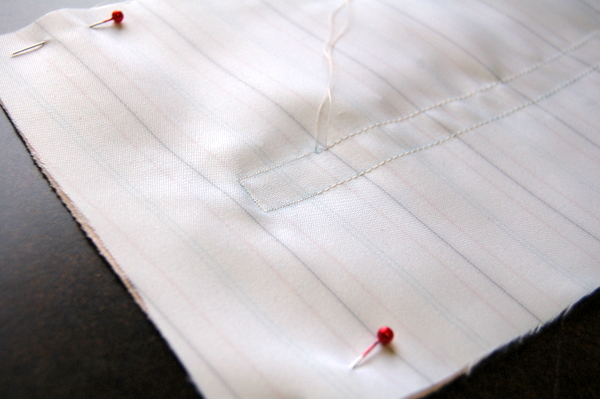
Now we’ll cut it open! Slash down the middle of the opening, cutting diagonally into the corners.
Fold it in half to get the slash started.
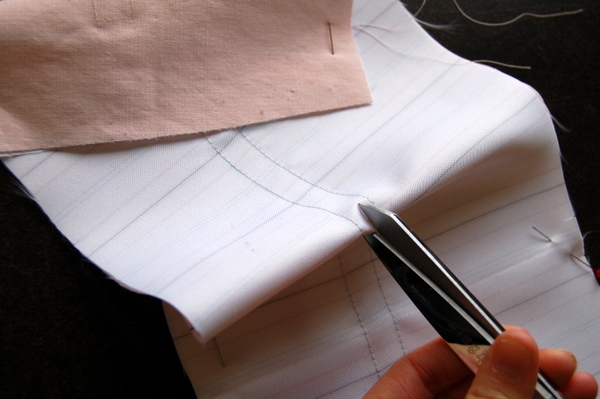
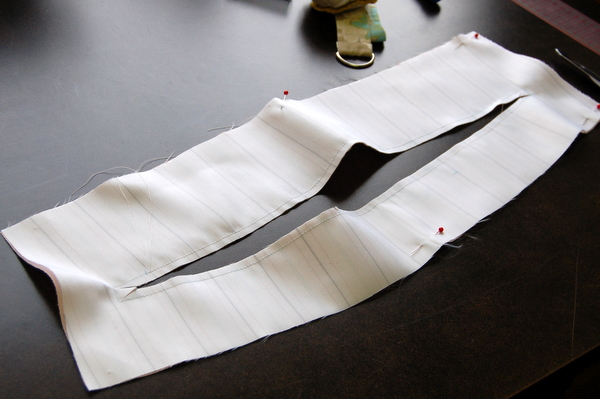
Here’s what the opening will look like, slashed and clipped.
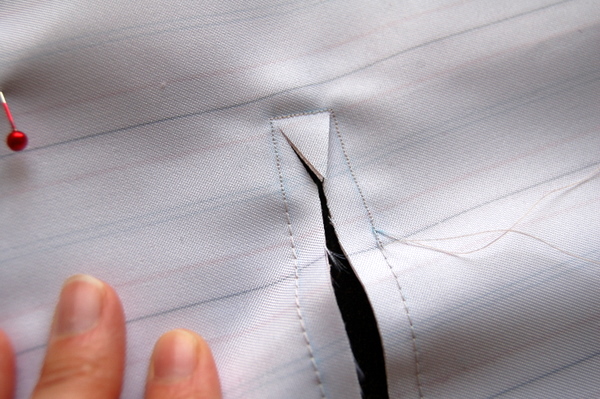
And a close-up of the diagonal snips into the corners:
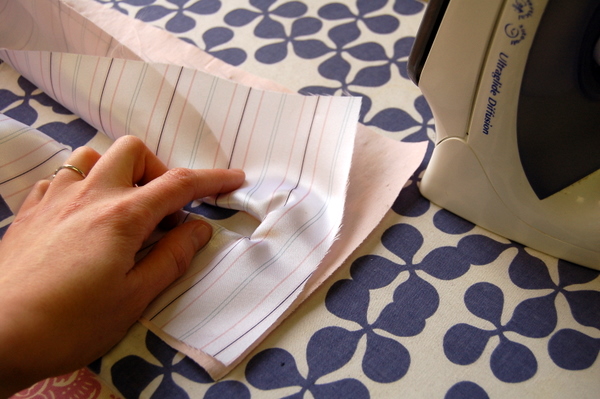
Turn the piece right-side out, pressing around the opening, rolling the lining to the back. If you get puckers at the corners, clip slightly further into the corner stitching.
Take your time and carefully press all around the opening, until you can’t see the lining from the front. You’ll see a nice long rectangular opening, and that’s where we’ll insert our zipper! This is easier to do if your lining fabric cooperates. Cotton, flannel, anything that presses well will be easy to work around this opening.
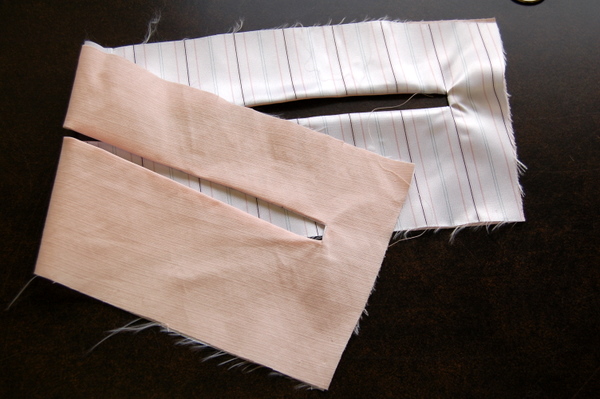
Note: I forgot to baste around the raw edges. Oops. Do as I say, not as I forget to do! Basting the raw edges together will make it easier to sew the collar to the jacket, sew the hood to the collar and sew the inner collar layer to the outer layer.
Zipper time! So for my zipper, I couldn’t find one in the right length that matched my centre front zipper. I ended up buying two in the centre front length so they’d look the same. Now I’ll have to shorten my zipper.
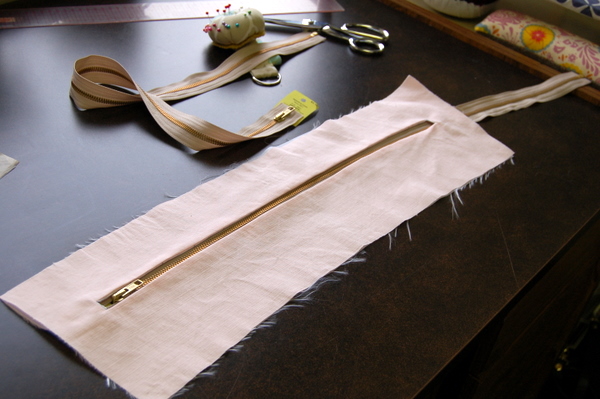
Because the ends are hidden, I’m not going to do the painful method that involves pulling teeth out with pliers. I’m going to do a quick-and-dirty stitch across the ends over and over, and trim off the excess. (Do not use your good scissors to cut the end of the zipper off! I’m somewhat embarrassed to show you the hack job I did on mine but here it is, hacked up with some very old scissors.)
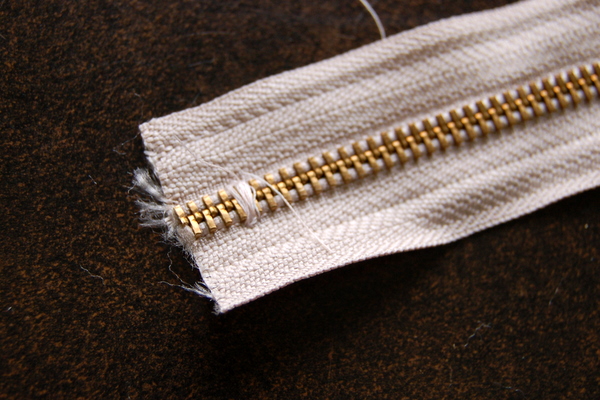
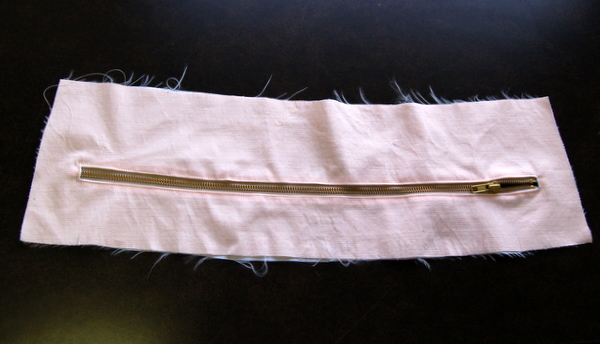
If your zipper is the right length, you’ll be able to simply centre it in the opening, leaving a bit of room at the top end for the zipper stop to fit.
Once you’ve got the zipper set under the window opening, pin around the edges. This might be hard to do on some fabrics, pinning through this many layers and the zipper tape. In that case, I’d suggest hand-basting the zipper in place before stitching it securely.
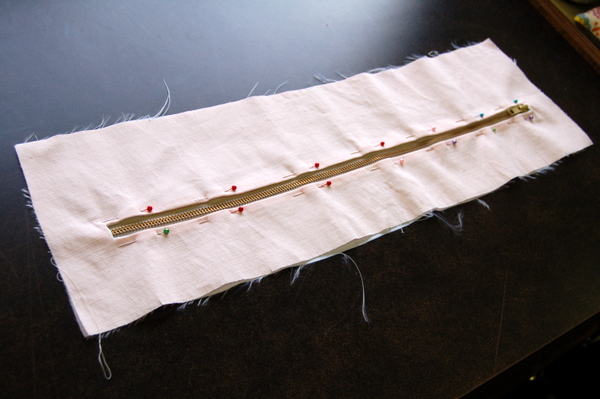
Align the zipper so the pull is on the right side as shown. (If you’re left-handed, maybe you want to have the pull on your left side?)
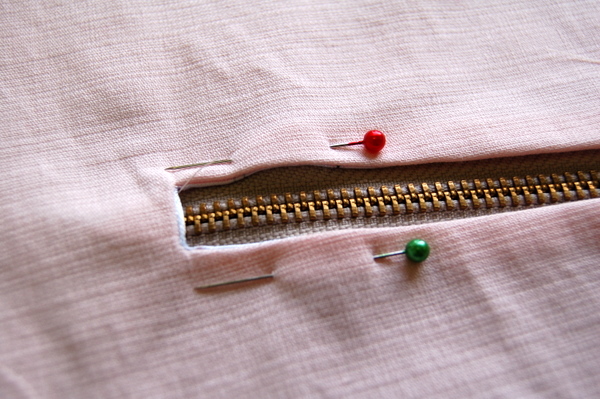
Last step! We’ll edgestitch around the zipper opening, securing the zipper in place. Use a zipper foot to get nice and close!
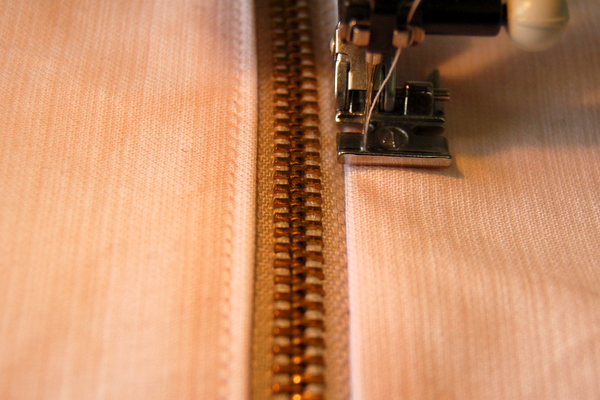
That was a lot of work, but doesn’t it look nice? This is the part where it starts to transform from just fabric, to a real jacket. You know that feeling, where before you weren’t sure whether it was going to look any good, and then all of a sudden it starts coming together? For me, this is when it happens!
On interfacing: I didn’t interface the collar pieces for this jacket. I prefer the collar to be soft and relaxed, not stiff and upright. It’s up to you whether you want a stiff collar or a soft collar. If you’re making View B, the hoodless view, you may prefer more structure in the collar because there’s no hood hidden inside. If your fabric is loosely woven, you may want to interface the collar to reinforce the zipper window and stabilize the collar.
Alternatives:
I settled on using the layer of the lining to create the zipper window, because I thought it would be the easiest way to cleanly finish the opening. You could try simply slashing the opening and turning the edges under. Or use a piece of fusible interfacing over the opening, stitching it like we do the lining, and then turn it to the inside, fusing it in place.

I really love that design feature. It’s super cute and the sewing bit seems easier than I expected.
As my canvas is quite hefty I may give the fusible a go to try and cut down on the bulk, or use some Organza?
I guess it’s something clear for most of you, but I can’t see how to turn rightside-out the fabric/lining after stiching the zipper lines.
You’re supposed to let some space unstiched (like 2 or 3 cm) so you can pass the fabrics from one side to the other, no?
I am not sure I express myself clearly, but I feel like I am missing some step. It might be an evident one not worth mentionning, but as a beginner, I thought I’s ask.
Thanks for your help Tasia and fellow sewalongers!
Hi Pauline
You sew a complete box around the zipper markings with the fabrics right sides together. When you then cut through both pieces of fabric inside the box you’ve just sewn you can then pull the lining through the box so that it’s wrong side is against the outer fabrics wrong side. This then means that you don’t have any raw edges around the hole that you then sew the zipper in to.
I hope that helps a little? Have faith in Tasia’s instructions, if you follow the stitching, snipping and pressing in this post you’ll be fine. If you are unsure though you could do a mini practice version on some scrap to help get your head round it before doing your collar?
Vicki Kate
Thank you very much Vicki Kate, I will practice on a piece of scrap to be sure.
I couldn’t wait, I finished my jacket last night and I absolutely love it!
I would love to see – have you posted a picture anywhere?
I just posted a quick photo on my website. http://blog.alisonrea.ca
I just posted a photo on my website.
if it weren’t for the sew-along, i’d be quite lost. i keep trying to go ahead in the pattern but i’m getting really confused. i don’t consider myself a beginnger, i’m more of an advanced beginner or intermediate sewer. thanks for the extra clarification with the sew-along!
Hi,
this is really great… I am not participating in the sew along because I was away last week and have other sewing projects to finish first, but will definitely sew a Minoru soon‚Ķ
My question is related to lining fabric. My choices in fabric stores here in Switzerland are very limited and expensive, so I often order online from the US… despite the higher cost for postage it normaly works out cheaper… I will most probably make the jacket from a twill cotton with a (quilting) cotton style lining. As many have mentioned, I also plan on lining the sleeves with a slippery fabric.
Now my question, how much slippery fabric will I need, and how much less normal lining fabric will I need? I expect the that normally I would need the same amount of outer and lining fabric?! Thanks for your help and greetings from Switzerland
Seraina
Hi again,
another question, did anyone buy their zippers online? If yes, where? I have problems finding a 28” separating zipper and a 18” non-separating zipper in the same style/color…
Thanks
Seraina
I got my zipper from a Hancock Fabric store – they do have an online order on their website. http://www.hancockfabrics.com
Seraine, I bought my zippers through Amazon who, in turn, offered them through ZipperStop, and was very pleased. I got them quickly and they had just what I needed. Hope this helps! (I got my 2″ elastic through Amazon as well).
Tasia, when you say “baste the raw edges,” do you mean of the whole piece? Or baste the edges of the window?
I have a whole week of work to catch up on (was away on vacation last week) but am so excited to be participating! Will there be a Renfrew sew-along too? ;-)
Hi Ledys! Sorry this response is so delayed! I basted the edges of the whole piece (not around the window, but the outer edges of the fabric). I hope this helps! I showed it in the next day’s sewing steps as well.
I’m reading through all these great posts as I’ll be starting my jacket soon. I might just interface the square window part on mine, much like I would a welt pocket.
I have a question about the quilting fabrics. These are 100% cotton correct? Does the label specifically say “quilting”? I love sewing with and wearing cotton.
What other cotton fabrics should I be looking for, what would it say on the label? Would it be 100% cotton or should it be a blend? I live in a small town where the fabric department is mainly the quilting type fabrics, at least that’s what I think they are. This probably sounds like a dumb question. Thanks.
Thank you so much for this instruction with pictures! I am just sewing my first hooded jacket for my little son and I really was not able to sew this part of the jacket only by the written intruction in my Ottobre design magazine :)
Hello, I just wanted to sew my lovely 45cm zipper into the opening and realized it’s too short! Did i do something wrong or could it be that the opening is of course larger as only the fat line on the collar pattern piece is (2x) 22,5 cm long and obviously the opening gets a bit longer when cutting into the edges of the stitches “along the dotted markings”? Thankfully i have a second large zipper which i will shorten now. I just wanted to know if it was me that made a mistake or if you maybe should change the instructions on the envelope back??
Plus: The hood is 49cm wide and wouldn’t fit into a 45cm opening. So i guess getting a 50cm zipper for the hood opening should be perfect. :-)