 Today, we get to sew! If you’ve finished cutting and marking your fabric, you’re ready for today’s set of sewing steps!
We will sew our jacket front and back to our sleeves, and we’ll topstitch these seams. Easy, right? The Minoru Jacket features raglan sleeves, which are much easier to sew than classic set-in sleeves.
The only thing that may take a bit of time and experimenting is the topstitching. Do you want to use a contrast colour? A thicker topstitching thread? How far away do you want to topstitch? I’ll demonstrate following the pattern instructions, which is my favourite look, but you’re welcome to try any sort of topstitching you like on your jackets! (And I’ve posted a couple of topstitching tips below to help you get a nice-looking stitch on your jackets. Have a tip to share? Already done the topstitching on your jacket and have a suggestion? Leave a comment!)
Want to catch up on previous Sew-Along posts? Click the links below to read more:
Today, you’ll need your jacket front and back pieces and your sleeve pieces. Thread your machine in matching thread, and we’re ready to start!
Start with your jacket back piece, and lay it on your table, right side up. On mine I can tell which is the right side of the fabric because the tailor’s tacks are facing upwards. (Other than that, it’s pretty hard to tell the difference!) If your fabric looks basically the same on both sides, mark the right side with a pin, a piece of tape, a chalk ‘X’ on the wrong side, or something so it’s easy to tell which is which.
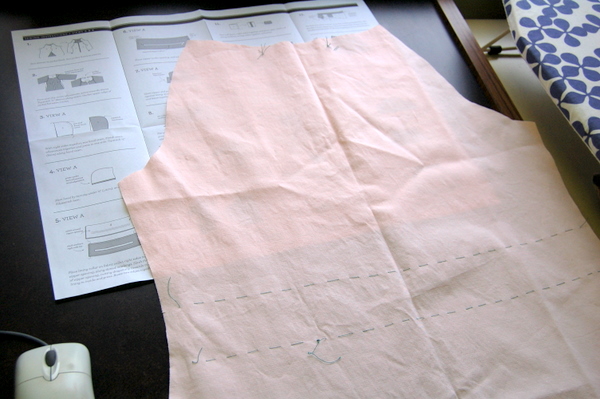
Open your pair of cut sleeve pieces, and place them right side down on top of the jacket back. Start by lining up the notches, then the top and bottom edges of the sleeve seam, and then pin evenly in between.
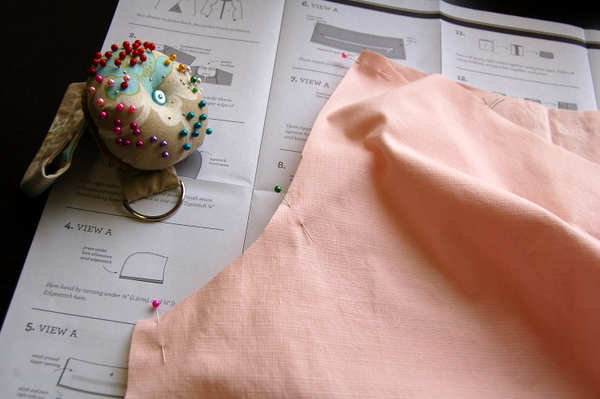
Sew this seam, backstitching at both ends. Repeat these steps to sew the Jacket Front to the sleeves, making sure to place right sides together.
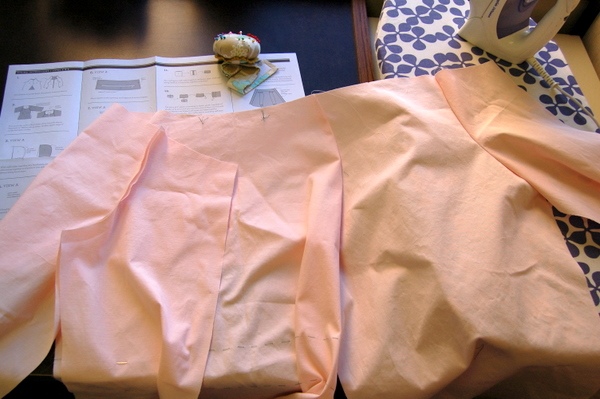
I was in a hurry, and didn’t finish thread-tracing my elastic markings on the Jacket Front. Busted! Instead, I poked a pin through the starting points of each line, and clipped into the seam allowances to mark each line. It’ll do for now!
After these seams are sewn, let’s trim and clip the seam allowances so they can be pressed flat.
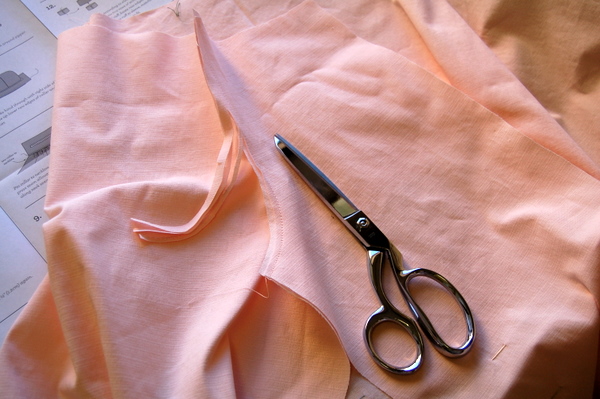
Press the front seam allowance towards the sleeve, and the back seam allowance also towards the sleeve.
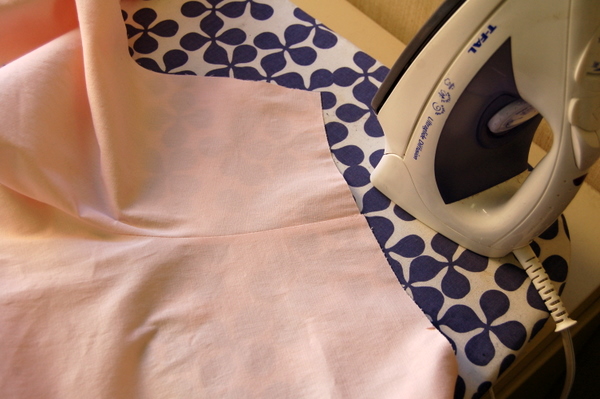
Now, let’s topstitch that seam allowance in place! I like a 1/4″ (6mm) topstitch. It’s close enough to the seamline to look clean, not too close that it disappears, and I can use the edge of my presser foot as a guide.
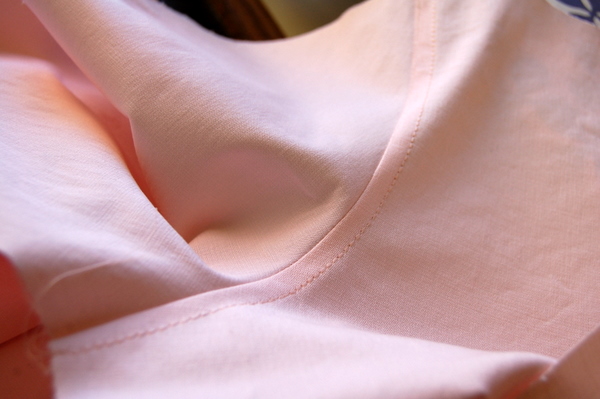
Some topstitching tips:
- You may prefer to topstitch first, and then trim the seam allowances. That way your topstitching is going through all of the layers, and you’re only trimming off the extra.
- Use a triple stitch as alternative to thick thread.
- To change the width of your topstitching, move the needle position. Just make note of where you’ve moved it so you can keep topstitching consistent.
- Go slow. It’s not a race! No one will know how slowly you topstitched your seams, but everyone will know if it’s crooked or uneven. (Ok, they might not notice – but you will!)
- Unsure of your topstitching skills or thread colour choice? Test on scrap fabric.
- Compare a couple of colours if your fabric is hard to match. Stitch a couple of rows of different colour thread next to each other and pick your favourite.
- Lighter thread colours = shiny! Darker is better. If you can’t get the right colour, try and get the right shade at least.
- It may be easier to topstitch and THEN trim your seam allowances.
It may be easier to topstitch and THEN press the seam allowances, because you haven’t pressed a crease. - Gently pull apart the seam as you topstitch, so it’s as far open as it can get.
- Use the edge of your presser foot as a guide. If the edge isn’t where you want it, use one of the grooved lines on the foot, or shift the needle position so the edge is in a better place
I only did the one seam for the photographs, so I’m off to topstitch the other four seams and catch up. Any tips for topstitching? Any questions on this step of the Sew-Along? Leave a comment below!

How do you do a triple stitch??
It’s a stitch setting on most sewing machines. Your sewing machine manual should have a table of available stitches. This is the typical symbol–> http://i87.photobucket.com/albums/k153/Retro_Mama/TripleStitch1_opt.jpg
(image found on this blog post: http://craftsnob.com/2011/04/sewing-101-part-3/)
Thanks Jodi! That’s basically what mine looks like as well. I thought it was fairly common except on vintage sewing machines that only do a few stitches.
Vicki, I also did a quick post on triple-stitching as I thought there might be others that wondered as well:
http://sewaholic.net/what-is-triple-stitch/
I hope that helps!
I love topstitching! I will probably buy a thicker topstitching or embroidery thread, even if it is in a similar rather than contrasting colour. I always switch to a stitch size 3 to topstitch (from 2.5 normal size). It may be also worth mentioning to beginners that you only need to put the topstitching thread on the top thread – no need to wind it on the bobbin (which would be tedious!)
Good point about only needing to use special topstitching thread on the top thread – thanks for jumping in!
Man, I’m realllllly wishing I was doing the Minoru sewalong! This looks so fun! I’m committed to finishing UFOs right now, but best of luck to all of you who are sewing along! :)
ooh… I like the idea of a triple stitch for mock topstiching thread. I’ll give that a try. It sounds Way easier than buying ANOTHER spool of thread and fussing with needle sizes and tension.
I also like the idea (read; idea!) of a triple stitch, but I have never done topstitch before – so I slavishly follow your instructions :D
I was sick yesterday, so I have started today – and like Tasia wrote “Cutting and marking will take some time..” thanks – 4 hours for me!!
Now I will start sewing sleeves and topstitching – I have just made a test; I think its gonna be SO fine :D My jacket is black (somewhat shiny..), so I have chosen to use a black thread. Just simple :D
I just found out that my Bernina has a topstitching option, so I am going to try that tonight. I was able to cut and mark my notches and tailor tack my circles, but have to finish marking my elastic guide. Will do that if I have time after going to the gym today.
I’m seriously thinking of using a contrasting thread. My jacket is red, and I only found black zippers, so I’m thinking of topstitching everything in black… Wish me luck!
Good luck!
I think it will be fab with the black topstitch to the read :D
Thank you Malle! So far so good, I’m really excited!
Love the sound of it. I am hoping to make a second jacket with more contrast (once I finish this one)
I just finished the topstitching. I used a matching thread as my fabric has a pattern and I didn’t want to make it anymore busy. By the way, I broke the first rule, I am using a kind of plaid fabric, but that doesn’t need too much matching. Let’s see how it will turn out…
Could you use a flat felled seam? My corduroy frays A LOT and I need a seam to deal with that. Any suggestions?
A flat-felled seam might be hard to do around the curves. It’s not impossible if you are comfortable sewing flat-felled seams and have experience with them! I’m thinking that topstitching will hold down the seam allowance, and keep your fabric from fraying any more once it’s stitched down. The jacket will be lined, which will keep it from fraying further or shedding bits of corduroy on your clothing. Perhaps two rows of topstitching – one 1/4″ away, one very close to the edge will give you the look of flat-felled and add extra strength to the seam and keep it from shedding or fraying? Consider finishing the seam allowances too if you’re worried about fraying.
I hope this helps!
SarahB if you have a serger (over locker) use that for your seams – you can still press your seams and top stitch or not as you wish, and no fraying.
Thanks Tasia and Sarah for the advice.
No serger unfortunately, but zigzag should do the job I think (Are sergers wonderful? I’ve never used one). I am also considering the possibility of finishing my seams with bias binding, then topstitching. I won’t start sewing the real thing until the weekend so plenty of time to test out seam finishes!
I use my serger a lot, but I also go long periods of time without using it too. Serging gives you that ready-to-wear look and it’s fast, but then again you need to buy lots of spools of thread for it, and there are plenty of finishing options that look just as nice if not nicer (like binding!)
For me, it’s a need-to-have because of what I do, but if I didn’t have one I’d find ways to work around it. Fully lined garments, garments with fancy finishes like bound edges, these kinds of things don’t need serging.
Then again, thinking about not having one, when I’m used to having the option, makes me happy that I have one! It’s one thing to use a turned-and-stitch finish by choice when my serger is right there, but I love having options!
One tip I learned recently for topstitching is to make your stitch length a bit longer. It makes it look neater somehow. I’m also using a contrasting thread. I have a hunter green cotton twill and am using light orange thread (also light orange lining).
I started the jacket yesterday and totally forgot to topstitch the sleeve seams before putting in the collar, so this morning was a few hours of me picking out bits of the collar seam to topstitch…sigh…
I use the 1/4″ foot on my Janome as the guide lets you run this along the seam, keeping your stitching in line with the seam. I also use the G foot for the Janome that lets you move the needle either side of the guide.
As Tasia said it is very important to note on the pattern or on your sewing notebook what your needle position is, stitch length (I use either 2.8 or 3) and what foot you use when you are finally happy with your toptstitch choice. It is so easy to forget and if you have to stop and leave the jacket you have it all written down.
Good point – I’m going to start writing on my patterns. Why did I never think to before? Especially if you come to make the pattern again a few months down the track…you have to start all over again.
That is a good tip. I’m a beginner, and I was really scared of topstitching at first. For me, what really works well is to use an overlock foot. You sew with your regular straight stitch, and position the needle to the side (6mm, in this case).
The overlock foot has a guide to align the fabric, and you can use that to make sure you’re stitching at an even length. Works really well!
(Hope I was able to explain it, English is not my native language.)
SarahB – I love my over locker/serger and use it a lot. That said, you can’t do everything with it – so your sewing machine is always needed.
With this project, you don’t need to finish the seams as the jacket is fully lined, just grade and clip them. If you lining is a mesh, I would personally chose to finish my main fabric seams and probably the mesh seams as they would show.
With your corduroy, because it’s bulky, I would suggest sewing the seam, grading, clipping and then using a zig zag finish. Then press and top stitch. This should maximise fray prevention and minimise bulk.
I have some nice reversible good quality fleece with wind block in the middle to use and have now considered this pattern :) It is a pity I’m in the UK.
Thanks for the great tips and suggestions! Sarah, I ship internationally although I know it’s a bit pricey, but I also have stockists in the UK too!
Check out Backstitch and Sewbox:
http://www.sewbox.co.uk/sewing-patterns/sewaholic-sewing-patterns.html
http://www.backstitch.co.uk/index.asp?role=product3&c1=Sewaholic&type=all
Just thought I’d mention it!
Sarah – I too am in the UK and a fleece with wind block in the middle sounds fantastic! Where did you get it? I am not sewing along this time, but I am seriously considering this pattern now!!
Ooh! That’s very tempting Tasia – your UK stockists have it priced around the same as a Vogue pattern…..
Sue – my fleece is some years old and I am determined to sew down some of my stash this year, my second project for this year is to clear the mending heap! Must start that actually…..
The fleece came from Croft Mill, when they still ran a paper catalogue. They are web based now, and whilst I haven’t used them in some years (having 2 kids and doing long term breast feeding severly reduced sewing time availability – been back to normal sewing these last three – five months), they had a good service.
Woohoo. I have finished #1. Hoping to be all caught up by the end of the week.
Love the tip about lengthening the topstitch. I have been using a triple-stitich topstitch on a few things since reading one of the sewaholic blog posts… I am liking the effect.
.. Off to do some gathering.
Hi!
I started my Minoru about a week ago and I’m currently at step 2! I’m taking it slowly as I have a tendency to rush my sewing as I always want to wear what I am making the next day! I am doing 2 lines of topstitching along my seams using embroidery thread and am quite happy with the results although some of my stitches are a little wonky! Loving the sew-a-long, thanks for all the advice!
Rebecca
pickwoodstitch.blogspot.co.uk
hola,me gustaria participar ,como puedo hacer? , donde puedo inscribirme? .muchas gracias
Hi Tasia,
I’d like to know how tall is the seam allowance and if it´s included on the pattern.
Thanks!
It’s 5/8″ (1.5cm) and yes it is included in the pattern!
Thank you very much Tasia!