 Today, we’re going to cut our fabric! I’ll be cutting View A in a teal polyester print, and View B in a cream silk satin. For today’s demo, I’m cutting the teal polyester print in the draped sleeve version.
I’m thinking I will just show you how to cut once, instead of showing you the cutting of View B, as they’re the same except for the sleeve pieces. Is everyone OK with this? Please let me know if you really want to see the cutting of View B as well.
Need to catch up on the previous Sew-Along posts? Here are the links for your reference:
- Pendrell Sew-Along #1: Prewashing your Fabric
- Pendrell Sew-Along #2: Measuring and Choosing Your Size
- Pendrell Sew-Along #3: Shortening the Blouse Length
- Pendrell Sew-Along #4: Altering The Hip and Waist
- Pendrell Sew-Along #5: Princess-Seam FBA (Full Bust Adjustment)
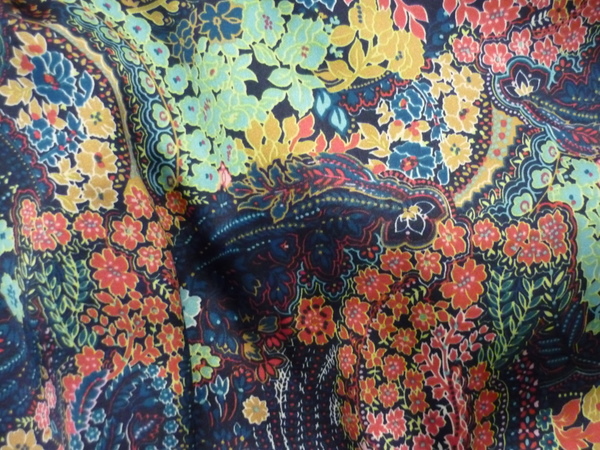
Here’s the fabric we’re working with today. It’s oh-so-slippery and smooth, so cutting will be challenging!
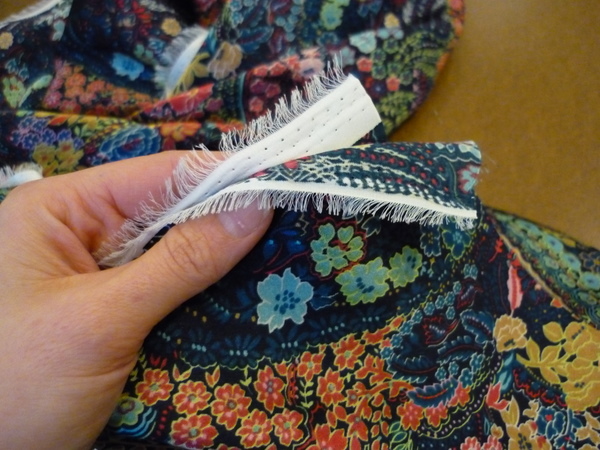
First, fold your fabric in half, right sides on the inside, selvages together. (Did you know: selvage is US English, and selvedge is British English? Both are correct!)
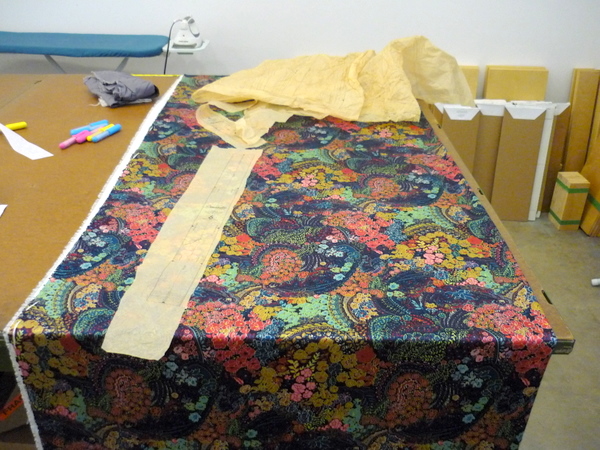
Lay out your folded fabric on a flat, hard surface. Some of you might use the floor, or your dining table, or maybe you’re really lucky and have a large, high cutting surface.
At home I use the dining table, but at Spool of Thread they have big, high cutting tables. Definitely worth dropping in to do some cutting on the tables there, which is what I did!
Grab the instruction sheet from your pattern, and find the right layout. First, find the view you’re making (A, B, or C) and then choose either 45″ (115 cm) or 60″ (150 cm) wide fabric. If you like, circle the layout you’re using with a pencil, so it’s easier to find the right one at a glance.
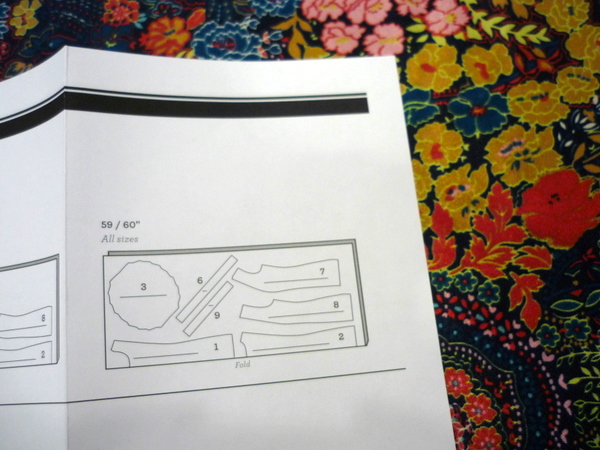
If you can’t remember how wide your fabric is, measure it up again! You can measure it while it’s laid out flat. Just measure from fold to selvage, and double it! Mine is just over 29″ wide, which makes it 58″ in total. So I’ll follow the layout for 59″/60″ wide fabric.
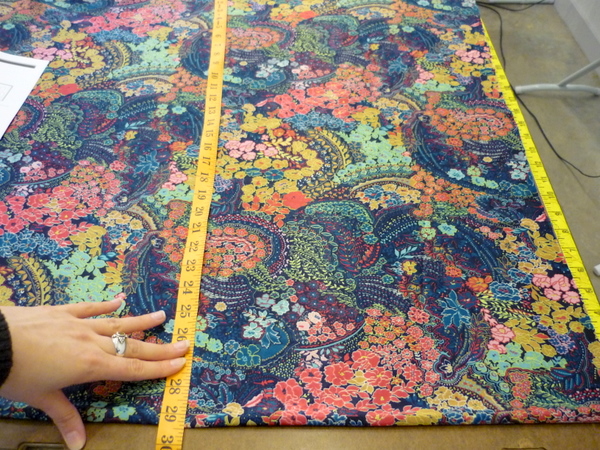
The fabric layout will also tell you which pattern pieces you need. For View A, I need all pieces except for the ruffles.
NOTE: I’m demonstrating with the actual tissue pieces. If you’ve made alterations, or traced off the pieces, follow along using your new pattern pieces.
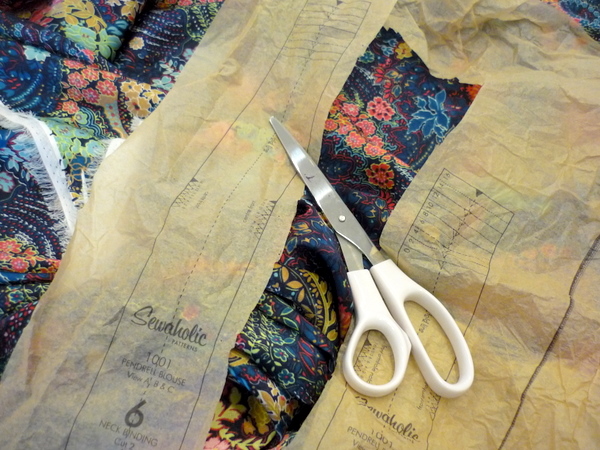
Unfold the tissue, and cut loosely around the pattern pieces. When you’re done, you will have one piece of tissue for each pattern piece with extra tissue space left around the actual pattern lines.
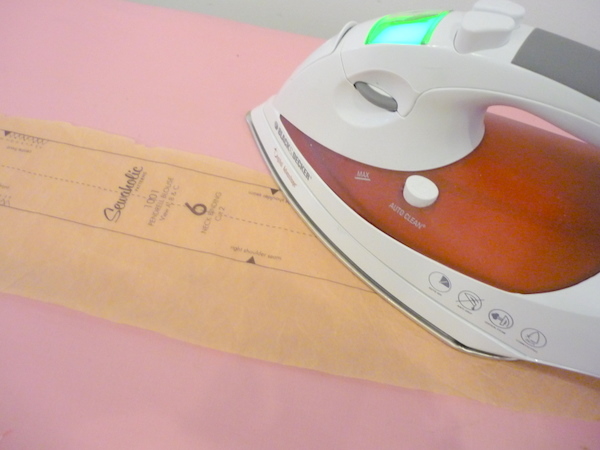
If necessary, iron the pattern pieces with a cool dry iron to remove any wrinkles.
Now, lay out the tissue pieces according to the cutting layout. Your fabric may be ever-so-slightly wider or narrower than the standard 45″ or 60″ widths, so you may have to shuffle a bit to get them to fit. Also, if you’ve made alterations to the tissue pieces, you may need more or less fabric than the regular requirements.
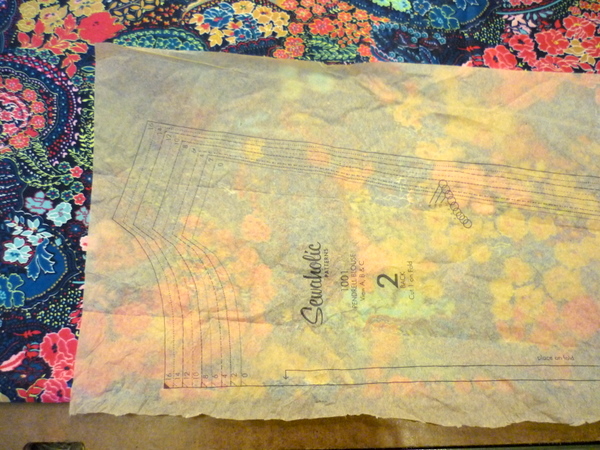
Start pinning any of the pieces that go along the fold. In this case, the front and back pieces are both cut on the fold. Line up the fold line of the pattern pieces along the folded edge of the fabric, and pin along the fold first.
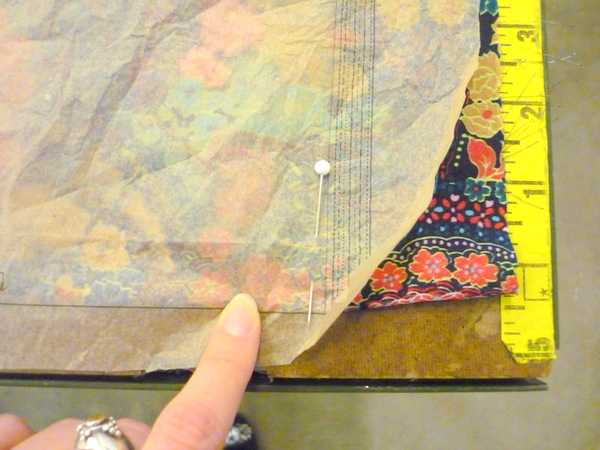
Smooth out the pattern piece with your hand, going from the fold towards the other edge of the piece. Pin along the remaining edges of the pattern piece.
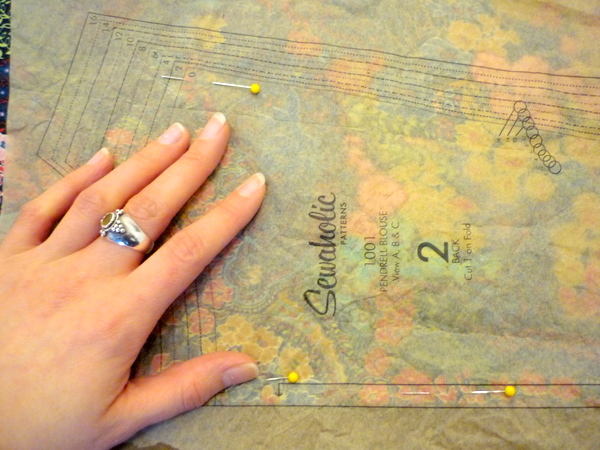
If you’re worried about the pins leaving pin-marks in your fabric, then pin close to the edges, within 5/8″ (1.5cm) of the tissue edge. This way, your pin-marks will be in the seam allowances only and won’t ruin your delicate fabric!
After the pattern pieces on the fold are done, let’s pin the rest of the pattern pieces in place. The grainline is used to line up the pattern pieces. Place the grainline parallel to the fold or to the selvage, so that it’s on the straight grain. In order to make sure our grainlines are straight, use a tape measure to measure from each end of the grainline to the fold or selvage.
Start at one end of the grainline arrow, and measure to the fold, as shown:
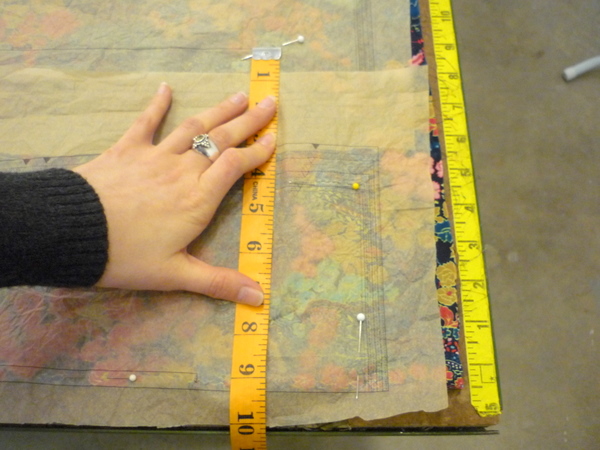
Measure the other end of the grainline, and adjust the piece so it’s the same distance from the edge.
For example, my first end of the grainline was 9 1/4″ from the fold, so I want to make sure my other end is 9 1/4″ from the fold as well. Just pivot the piece until it’s in line with the grainline.
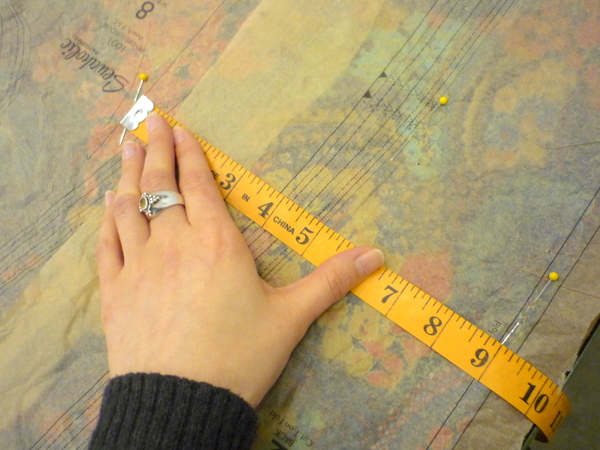
Repeat with all of the pattern pieces. I recommend pinning everything before you start to cut, just in case you need to move the pieces around as you go. Even if you’re working on a small surface, just slide your fabric down the table, and keep pinning. Slide it back to the beginning when it’s time to cut.
We’re all pinned and ready to cut!
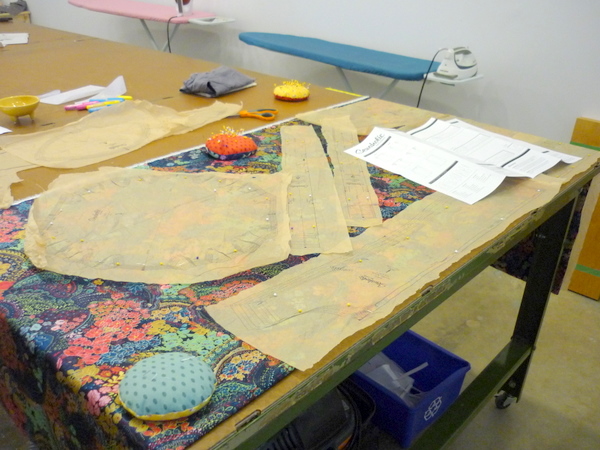
Before you grab the scissors, do one last comparison to the fabric layout on the instruction sheet. Does yours look like the diagram, more or less? Do you have all of the pieces pinned on – do a quick count to be sure. It sounds obvious, but it will get you in the habit of checking, for when you move on to more complicated projects!
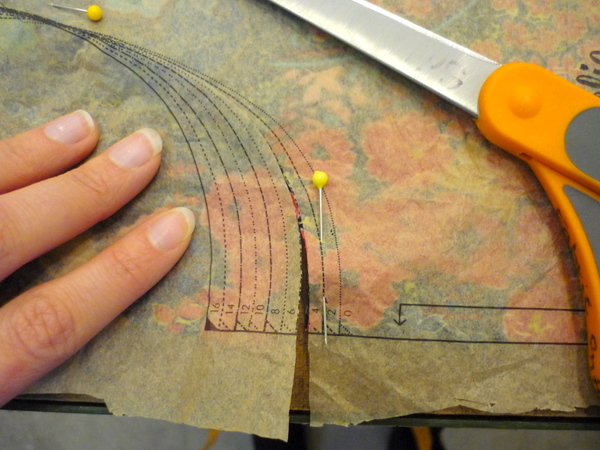 Cut along the dotted or dashed line for your size. The lines are marked with size numbers at different spots along the pattern piece.
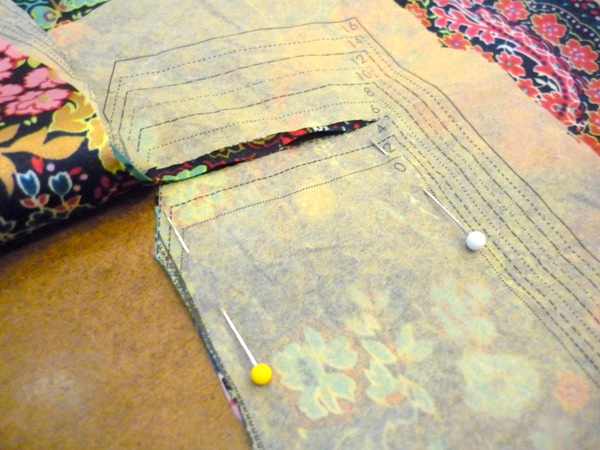
Cutting is done! Save the extra scraps of fabric for testing. I always save all of my fabric scraps until the project is done, just in case! Toss them in a grocery bag or other handy place, so they don’t get thrown out accidentally.
Mark all of the markings on your pattern pieces before you remove the tissue. I like to clip inwards for my notches, and use chalk or pin-markings for the other markings.
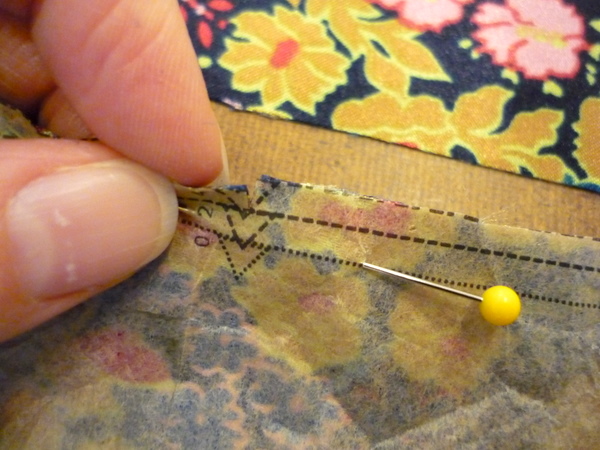
If you’re making View A, the most important markings are the pleats on the sleeve. Make sure these are marked clearly on your fabric!
I also like to leave my tissue pieces attached as long as I can, so I know which piece is which. Remove all pins except for one, or re-pin right through the middle to secure the tissue.
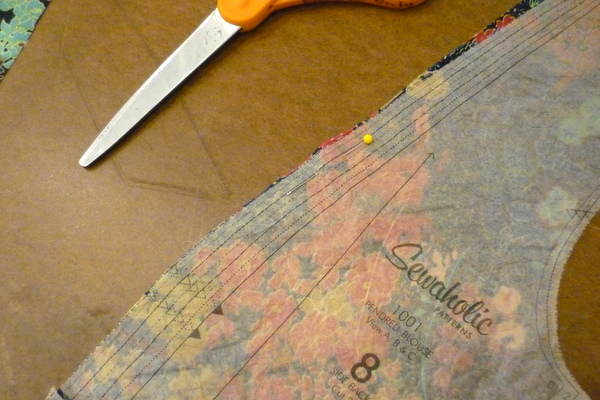
Let’s stop here for today. Tomorrow we finally start to sew!
Intermediate and expert sewists, thanks for your patience as we go at beginner speed. Beginners – how’s the pace so far? Any questions on cutting or marking your fabric? I know there are a few questions from the last post still unanswered. Don’t worry, I’ll take care of those today!
Next post: the first couple of sewing steps!

While I’m not participating in your sew-along, I’m loving your posts. They are perfect for me as a beginner! I’m glad that when I do get to make my own Pendrell blouse I’ll have these to refer back to. Thanks!
Do you recommend more or less pins to tame the slippery fabric? I noticed that in your images you don’t seem to use a lot of pins.
I’m not participating in this sew-along, but this post is so helpful! I have not yet sewn a garmant from a pattern, but I have plans to very soon (pattern and fabric chosen). Thank you!
I have the dumbest question in the world: Will cutting through the tissue paper dull my “fabric” scissors? Does anyone else worry about this?
Thanks!
cat
I traced my pattern onto thick butcher block paper, because I didnt want to cut into the tissue before being sure of the fit. But then, I found cutting to be a nightmare- (I couldn’t pin through it at all, without shifting my poly chiffon, and pattern weights were not doing the trick either.) So I traced these peices back onto muslin, and used that. It sounds like a lot of work, but it took less time in the end, and I think my cutting was more accurate,and I’ll have those peices for future use. Anyone else wind up with a situation like this?
Also, I had a question- Im having a little trouble marking my fabric with tracing paper so that the pleat lines show up—maybe because my fabric is so slippery and has so much pattern going on- Do you have any suggestions?
Thanks!
Hi everyone! @Liz: I used less pins, because I didn’t want to poke too many holes in my fabric. I also use less pins than usual just for speed. Although, if you have very shifty fabric, more pins is better. Use however many pins make you comfortable with cutting. (Pin in the seam allowances, within 5/8″ (1.5cm) of the cutting line, so the pinholes are caught in the seams!) It’s impossible to do along the fold, so use your sharpest, freshest pins so they don’t catch on the fabric. Hope this helps!
@Cat: Ah, that’s a good question! It’s not dumb at all. Probably, over time, cutting tissue will dull your fabric scissors..but so will cutting metallic fabrics, thick fabrics, and even regular fabrics. That’s another reason why patterns are printed on tissue, so that you can cut through the tissue with less damage to your scissors. I never, ever cut regular paper with my fabric scissors, but I cut tissue all the time and so far, my scissors are still sharp. (And I’ve never sharpened them either… though I probably should at some point.)
@Bhoomika: Interesting – thanks for sharing! Whenever I use really thick paper for patterns, I use weights and trace around the pieces. I could imagine poly chiffon would be a challenge no matter what method you used, though!
For the pleat lines – it’s important to mark the *start* of each pleat. I made a small snip into the fabric, following the angle of the pleat line. So when I fold the pleats, I’ll line up the snips. Because I’ve made this blouse so many times, I feel comfortable just marking the pleats along the edge, but for beginners I’d recommend marking the end points of the pleats, too, for easier sewing. You could try thread-tracing the pleat lines. Or, make tailor’s tacks at the ends of each pleat line, and snip into the seam allowances at the start of each pleat line. Depending on the colour of your fabric, you may be able to use a purple fadeaway marker, it’s like a felt pen but the lines fade away over time. I love using this marker! But, you should test it first on a scrap, to make sure it actually will fade away for you. Also you have to act quickly with the fadeaway marker. I haven’t officially timed it, but it seems to last around 8 to 12 hours. If all else fails, keep the pattern piece handy when it comes time to make the pleats, and mark each pleat with pins as you sew them. Sounds slow, but it will make sure your pleats are accurate. Hope this helps!!
Thanks for these posts Tasia!
I muslined (is that a word?!) over the weekend and plan to post a full update with pics on that experience on my blog tonight.
The overview is that I cut the muslin in a 16 in the bust, 14 in the waist, and 12 in the hips according to my measurements.(the difference between my bust and high chest measurements was 2 inches, so I don’t think I need an FBA). I did end up with a bit too much ease under the arm holes so I’m still finalizing where I am going to take that out (in just the side front and side backs or the center as well…)
I’m excited to get going on the real fabric once I have the fit finalized! Also looking forward to underlining – that will be a first for me.
@Kate: Hi Kate! I say ‘muslin-ed’ all the time, so it’s totally a word. Just like Sewtionary. We sewaholics can have our own language :)
Oh yes, I forgot to mention, I’ll still do a post on underlining as well. It’s easy and might even make your main fabric easier to work with!
The slower pace is great. Perfect for reference later. Also, not all of us can sew everyday. I save up a lot for the weekend.
Great so far! Thanks!
great posting for beginners and those in re-entry! Even with much experience, there is always something to learn. I totally appreciated your FBA tutorial. It prompted me to rediscover the Sew/Fit system I purchased in 2001. That book has been buried on a book-shelf since purchase, I forgot about it. So thanks for everything.
I can’t wait to get cutting, but I need to do some reading up on matching plaids first.
@Bhoomika: Hi again! I got a couple of new suggestions from asking on my Facebook page: Crayola washable markers (yes, really! just make sure they wash off on a scrap first). Also, there’s apparently a water-soluble marking pen, like my fadeaway one but it lasts until you wash it. Or using pins, just before you’re ready to sew. Or hand-basting with silk thread and removing once the pleats are in. Hope this helps!
@Rachel: Hi Rachel! Here’s a link to a helpful plaid-matching tutorial:
http://selfishseamstress.wordpress.com/2009/10/27/perfectly-symmetrical-plaid-matching-works-for-stripes-too/
I have a plaid project in the works but it’s not ready to post yet – hope this helps you get started!
Loving the posts Tasia. Thank you! Can’t wait for my pattern to arrive.
Question – I was taught NEVER to cut a pattern but to trace the pattern on to tracing paper (in my case I use cheap interfacing as it is inexpensive, transparent but also strong) and then to adjust as necessary. The theory behind is that if you change sizes at a later date (inevitable weight gain?) you can then just retrace the pattern at the bigger size instead of buying another (not that there is ever anything wrong with buying more patterns!). I grant that it adds another step and can be annoying, especially as all I want to do it start sewing, but I guess it only really takes maybe an extra five or so minutes depending on how many pieces to trace. I know some people even trace and laminate pieces of their much loved and much used patterns.
What are your thoughts on this?
@Matinee: I’m the worst – I love to cut my original pattern! I’ll even cut vintage patterns, which is so bad because they’re not easily replaceable. I figure, I bought it, I can do what I like with it. And if I gain/lose weight, I’ll cross that bridge when I come to it. Likely, I won’t change size, I’ll just add a little around the hips if I’ve gotten larger.
That’s not a good thing to teach though! :) With some of my patterns, I’ll trace them off. I’m thinking of starting to trace my vintage patterns just in case I need to alter them, so I’m not wrecking the original. Right now, I usually use the tissue and cut out my size! Bad, bad me, according to some experts. Everyone has their own point of view on this one though! There are lots of people that use the tissue, and don’t trace. Yes, you can see I’m cutting the original pattern here! If it helps, it was a ‘printer glitch’ tissue that was used as stuffing, I didn’t cut up a real pattern that I could have sold. :)
Hi Tasia! This pace is working out great for me. I have one more alteration question, though. :) I am doing a broad shoulder alteration & the illustration in Fit for Real People says to add width to the front side pattern piece. Am I correct in thinking that it should also be added to the back side pattern piece?? Thanks!
@Tasia: Thanks Tasia. I’d found that one, and also this one is very thorough and helpful for general plaid information: http://www.ca.uky.edu/HES/fcs/FACTSHTS/CT-MMB-018.pdf
I think i’ll do a single layered cutting layout , and as i’m doing the version with the ruffles, focus more on matching the plaids below the bust rather than above it (hopefully the ruffles will hide any errors underneath them!)
@Rachel: Great! You’re right, the ruffles will hide most of the side front panel above the bustline. You can also lengthen the gathers if you want! Just pull them out a little longer than the notch, making sure both sides are even. (I’ll show you when I get to that stage, as well.)
@Jenna: Hi Jenna! Yes, I checked my copy of FFRP and you add to both the front and the back, at the front side at the shoulder. (Unless of course, you’ve checked it on yourself and the back looks fine, but the front needs an extension. I’d imagine that’s not the case, so add to both shoulders, front and back.) Just a thought – if you’re making A or B, the shoulders are covered by either sleeves or ruffles, so an alteration might not be needed unless it’s more comfortable with the extra fabric extended farther down the shoulder. (Hope that makes sense!)
Hi Tasia,
I’m just wondering how do you make sure that the pieces that need to be cut on the bias are accurately cut on the bias? Is that a silly question?!
Thanks. :)
@Amelyn: Hi! Ok, the first thing is making sure your grainlines are lined up. But you’re right, the grainline is really small on these pieces! So it’s possible that your strips may end up slightly off the bias farther down. These pieces are meant to be at a 45 degree angle to the fold and selvage. One thing you can do, if you suspect your fabric isn’t staying still, is to mark another grainline farther down the piece, PARALLEL to the original grainline. Then, use this new grainline to measure to the fold on both ends, to be sure it’s still straight.
One other thing you could do, once you have ONE piece cut out, is to use the cut bias edge to line up the second pattern piece. Line up the tissue cutting line along the cut edge, and you’ll have one less line to cut too!
If your pieces DO end up a little bit off the true bias, that’s all right. They’ll still work as bias binding strips. But it’s best if they’re as close to the actual bias as possible.
Does this make sense>? I hope this helps! And there are no silly questions in sewing. Especially because there are often multiple answers to the same question, and several methods of doing the same thing for the same result. :)
Hi Tasia, the pace is great for me as a beginner and I’ve already learned a lot from your great tutorials! I’ve got a question though, I’m trying to save fabric and read on your blog to cut the fabric open. But, what is the best way to cut the pattern pieces that say ‘cut on fold’?? Thanks!!
@Susanne: That’s a good question! You can do one of two things:
1 – fold the section of the fabric you’re about to use in half. This works well when it’s the last piece you’re cutting, or if it’s near the edge of the fabric.
2 – Or, you can trace your pattern piece onto a larger piece of paper, and fold it in half along the fold line with enough extra paper to cut the piece. Like you would if you were cutting the fabric on the fold, except with paper. That way you have a full-size pattern piece to use for your open layout! (Or: fold the piece of paper in half, and THEN trace your tissue pattern piece on it, so you know you have enough to cut an on-the-fold pattern piece.)
Does that make sense? You could also lay out your fabric open, but then fold over the edge along one side, to cut the two folded pattern pieces (Back and Front.) That way, the fold pieces are easy to cut, and the rest of the fabric is open to cut the remaining pieces.
Thanks a lot, Tasia! I’ll see what works out best with my fabric.
Hi Tasia!
Total newbie sewer here (only 2 very easy skirts done!) I never really got the ‘grainline’ thing and I feel that my google searching is only confusing me further! Do you think you could post a link with a little tutorial on ‘grainlines’? Or recommend a good resource? I couldn’t find anything in your previous posts!
@Reana: Hi Reana! Grainline refers to the lengthwise grain of the fabric. Sounds confusing, doesn’t it?
Try thinking of it this way – your fabric has length and width. Width is measured from selvage to selvage, and doesn’t change. Length is how much fabric you just bought.
So, the lengthwise grain of the fabric, follows the *length* of your fabric. It’s parallel to the selvages. Imagine your fabric has a stripe on it – then the stripe would be parallel to the selvages too, and that would be your grainline.
Fabric needs to be cut on the grain, so that it doesn’t twist or hang funny. Ever bought a cheaper t-shirt, where the side seams start to twist and work their way around your body instead of hanging straight? That’s because the fabric wasn’t cut on-grain.
So – we use the grainline markings, as a way of making sure our fabric is cut straight. If we make sure the little arrows are parallel to the selvages, or to the fold, then we know it’s being cut on grain.
How to use the grainline markings? An easy way is to measure from one end of the arrow to the selvage. I show this in today’s post. Then, measure from the other end. Move the piece around until both measurements are the same. Now your piece is on grain!
I hope this helps! Please let me know if you’re still stuck and I’ll see what I can do :)
Hi Tasia – I’ve been on holiday and haven’t kept up with the sew-along so far, but I just cut my fabric today in an effort to try and catch up! I’m making View A, and the sleeve piece sure was tricky to cut – but… there was no size marking on the sleeve piece of the pattern like there was on all of the other pattern pieces, and I always find the size marking really useful when I’m cutting a pattern out (I know that each size has a different kind of ‘line’ to follow as well but having the actual size marked on each pattern piece provides peace of mind, so you know you’re definitely cutting the right size). Just a thought :-)
@Homebake Queen: Hi and welcome back! You’re right, that sleeve piece was super tricky to cut out. I didn’t mark the sleeve because the lines were sooo close together, and it was hard to even point them out with lines and arrows. But I appreciate the feedback! Next time, would it be better to have little arrows pointing to each size line, like I did on the sleeve ruffle and seam ruffle pieces? I won’t have weird pieces like that very often, but I will do my best to mark sizes on all pieces of future patterns. Thanks for the input!
Thanks for this post – I have been wasting so much time cutting out my pattern pieces neatly, then attaching them to the fabric, and then cutting around them again, when I could have cut them out roughly (as shown), and then done the neat cutting step when I cut the fabric. D’oh!
Really obvious now that I’ve seen your post, but if you don’t know …