 Hi everyone! Today, we’re assembling skirt panels. Lots of fabric, but very simple. If you’re just tuning in, all of our posts related to the sew-along can be accessed by clicking the badge to the left.
Let’s start today by assembling our front skirt panels.
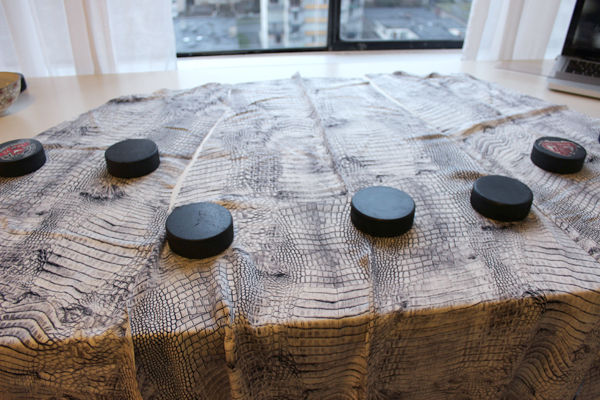
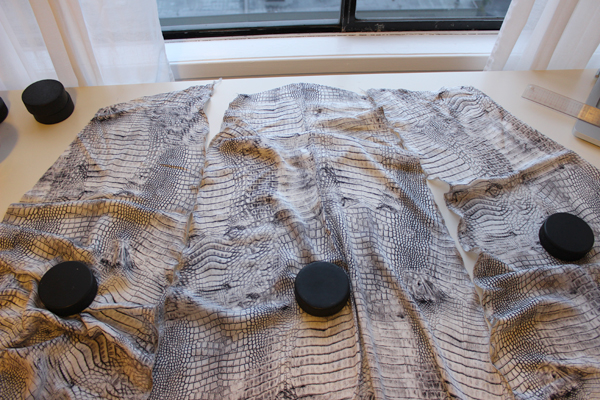
My fabric is slippery and my table top is too. Plus, that’s a lot of fabric to handle! When I am laying out pieces or pinning, I find it handy to have my pattern weight on hand to keep things in place. Some of you may not know this yes, but in my case, pattern weights = hockey pucks. Yes, I’m Canadian. It works great!
In the pattern instructions, you are asked to sew a seam, and then finish your seam allowances. In my case, when I am sewing a seam that I am sure to press open, then I prefer to finish my seam allowances before sewing my seam. This is really a question of preference. In this case, my fabric is slippery, and using my overlock to finish two small seam allowances separately seemed like it would be a bit tedious. It also frays a lot, so I wanted to get that edge finished as soon as possible!
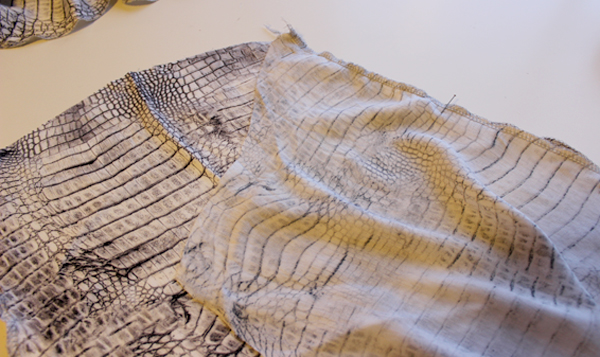
Lay your side panel over your center front panel, right sides together, and pin along the seam edge, matching your notches as you go. Yes, this is a pretty simple seam to sew, no tricky curves to ease or anything. BUT I still use a good amount of pins. Since this skirt has an a-line shape, the seams are actually a little bit on the bias. This means they can stretch or warp if you aren’t careful. Pins are your friend!
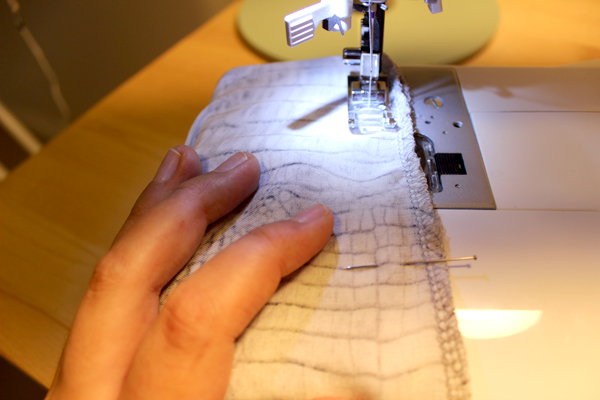
Now sew this seam at 5/8″ (1.5cm) seam allowance. Repeat for the other side, attaching your side panel to the other edge of your front panel.
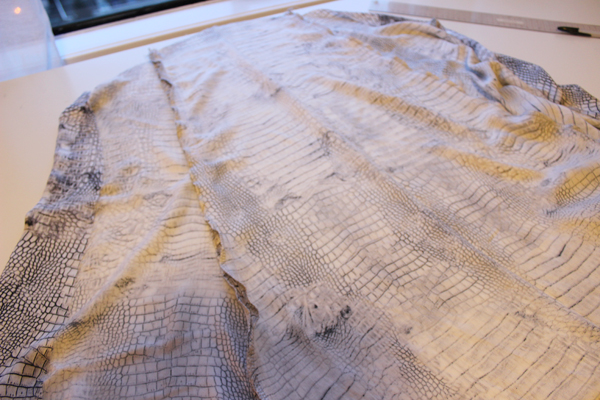
There we go, our front panels are assembled!
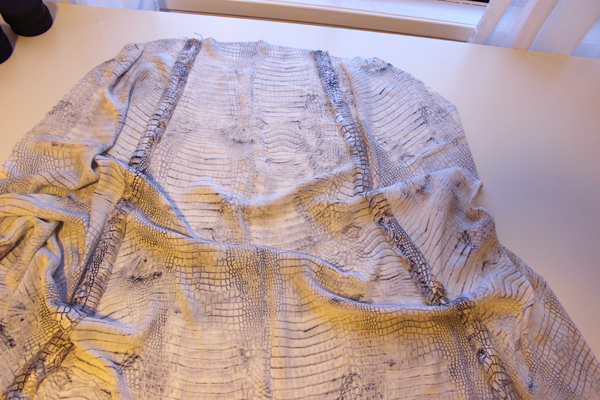
Press these seams open to get a nice flat open seam. Now repeat for the back! Sew your side panels to your back panels in the exact same way as above. Just be sure to leave your center back seam open for now, and don’t finish that seam allowance yet since we will be inserting a zipper.
That’s all for today! Happy sewing!
Hi Caroline, love your sew-along! A question about finishing the seam allowances: I don’t have a serger, so I like doing French seams whenever possible. Do you think this would be a good idea for the skirt panels or could it affect the drape of the skirt? Would you press the finished French seam to the center or the side of the skirt? FYI, I’m using crepe de chine silk, so the fabric is fairly thin and very drapey. Thanks for your answer!
Hi Claudia, for the skirt panels I think french seams with be fine. I would press them towards the side seam, and the side seams towards the back. On the yokes, you could use french seams to connect top yokes and bottom yokes together. However your center back seam (in your skirt panels and yokes) will have the zip, so it will back to be finished another way. Also your center front seam where you sew your left side and right side of the yokes together would also have to be finished another way, because of how we will sew the yokes to the skirt panels. For these seams, you could use pinking shears perhaps, OR maybe zig zag if it does not eat up your fabric. Hope this helps! :)
Hi Tasia,
I’m still waiting on my Gabriola skirt pattern from pattern Review. How long will you keep the tutorials up? I’m sad it’s still not here.
Sincerely,
Sheryl
Hi Sheryl! Not to worry, the sew-along will stay up indefinitely! You will be able to catch up :)
I thought those were ice hockey pucks on your fabric. What a great idea. Love that fabric.
Hi Camilla, yes the hockey pucks are great pattern weights! I have been meaning to spray paint them a cool color so that it isn’t so obvious. :)
Hi,
I will have my pattern hopefully soon. I’m wondering about skirt length. I’m 5’4″ tall with an hourglass figure, so I’m wondering if u have any suggestions on how I should adjust anything (or not) on the skirt for my body type, so I look more elongated instead of short and squatty.
Thank you for answering quickly (above).
Sheryl
Hi Sheryl! I’m about 5’4″ and I’m modeling the skirt in the photos. I shortened the skirt at the hemline only, and only to even it out after the bias had settled. If you look in the web store (http://www.sewaholicpatterns.com/gabriola-skirt/) the paisley version I’m wearing with heels, and the light floral version I’m wearing with flats, to give you an idea of the length. I don’t think I look short and squatty in the photos :) and I didn’t make any major changes. High heels help and so does tucking in your top or wearing a shorter blouse/sweater with the skirt, something that stops at the waistline.
Hope this helps! Caroline is taller than me so we’ll see how it looks on her at the end of the sewalong.
Hi Caroline,
I am now feeling like I might need to add lining to my skirt. It’s a drapey black rayon that is seeming fairly see through, once I put the panels up to my legs. When are you going to discuss lining options? Another idea I have is maybe wearing/making a slip, so I have it avail for other long skirts. What do you think?
Hi Elizabeth, adding a lining is fairly easy, I’m am putting together a post on it as we speak and it should go up on Sunday! The method I am using will very similar to this: http://sewaholic.net/finishing-simplicity-3965-zippers-and-linings-and-facings/
I will also go over a couple of other options in my Sunday post, but the method above will be the one I am demoing (I myself am in the process of making a black chiffon version).
For now, if you’d like to get ahead, you can cut all pieces out of a lining fabric (except your waistband). I am going to cut my lining short (above knee length) because I think it will have a nice effect to have a half sheer maxi. But if you’d prefer a fully lined skirt then just cut the same length as your shell and you can trim in down by a couple of inches when you hem the lining.
A slip is also a great option! Tasia did some great posts a while back about making your own slip:
http://sewaholic.net/make-your-own-slip-version-1/
http://sewaholic.net/make-your-own-slip-version-2/
Hope this helps!
Caroline or Tasia, when you’re serging your seam allowances, what stitch are you using? I’ve been using the 4 thread overlock, just because that’s what I’m used to, but it seems a little bulky. My fabric is a rayon challis, and when I press it up against my skin I can sort of see the outline of my serged finish. I say sort of because I imagine no one else will see it. I know it probably won’t be a big deal on the skirt panels, but on the hip area where it fits tightly do you have issues with that?
Hi Aspen! I use my four thread overlock as well. The fabric I’m using for the sew along is a similar weight and drape as a challis. I can feel the seam finish a bit through the seam but once the skirt is on I really don’t notice. If it bothers you though, then there are other options! You could zig zag your seam allowance, or perhaps if you could convert your overlock to just three threads this would remedy the bulk a bit. Do some tests on fabric scraps and see what you like best? Hope this helps!
Hi Caroline, I’m enjoying the sew-along so far. Can I ask why not cut the serged edges? Is is so the fit can be adjusted if necessary?
Hi Barbara. So glad you’re enjoying the sew along! Good question – we tend to prefer to leave seams un-trimmed, unless they are too bulky (like when they are enclosed in a waistband or facing). I like to leave the seam allowance as is for extra security, like you mentioned, fit can be adjusted if necessary! But if you prefer to trim your seam allowance, it would be really easy to cut it with your serger as you finish it, and it wouldn’t affect the finished garment. Up to you!
Hey, I am sewing up my gabriola skirt, and I am really confused figuring out how to line up the skirt panels. 1, 2, and 3 all have at least one side with the same notch pattern. I’m used to matching up notches on patterns, but these have me stumped. I feel really silly for asking because everyone is raving about how wonderful and easy this skirt is to sew. Am I missing something obvious?
Hi Brittney! Let me look into that for you…
Ok! If you look at the pattern piece diagram on the front side of the instruction sheets, you can see the original shape of pieces 1 2 and 3. Piece 1 is cut on the fold, so that’s your centre front panel. You can also see how the top edge of Piece 1 slopes downwards. It connects to Piece 2, the side panel, so that the top edge continues to slope downwards.
Piece 3 is the centre back and you have two of those. Again, the slope of the top edge points towards the side seams. Line up the side panel 2 to the centre back piece so that the top edge slope continues downwards, towards the side. If your top edge is a straight diagonal line, you’ve got it right! Look at the line drawings again for guidance – the top edge of the skirt panel has to slope in order to attach to the yoke. Hope this helps!
I have the same concern – why put in notches if they are not going to match up? I can certainly match up the top and the bottom, but with the slight A-line and bias effect, it is helpful to have the notches along the way to be certain that the ease is not getting out of hand.