 It’s the first official day of the sew-along! If you’d like to catch up on all things related to the Gabriola Sew-Along, you can click the badge to the left.
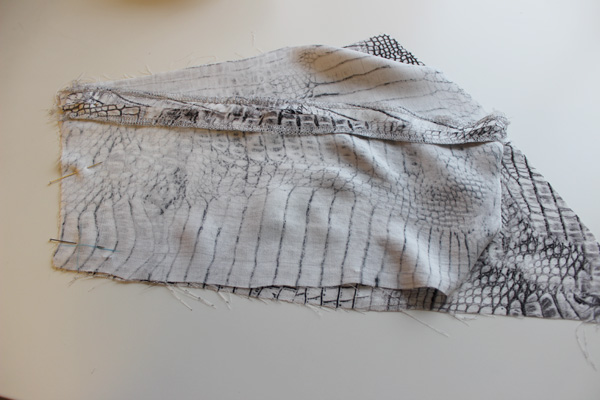
So let’s begin with some super easy prep – we are going to iron our fusible/interfacing onto our waistband piece.
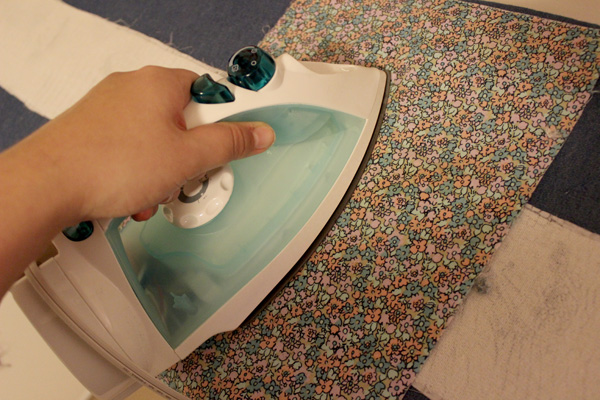
Some notes about this; I always use a press cloth when I’m ironing interfacing. If I don’t, my iron will get gunky! You want to press your iron down onto each section of your piece, holding it there for 10-15 seconds, then lift your iron and put it down in the next spot. Don’t drag your iron across the piece – it could warp your waistband or move the interfacing! Once I am done I do a little scratch test on the edge of my interfacing. Is it really stuck on there? If not, go at it again with that iron.
Once we are finished with ironing the interfacing onto the waistband, I recommend checking this finished piece with the original pattern piece. Heat and glue can do funny things. Pieces can shrink or stretch, which will leave us scratching our heads later on when we are attaching our waistband to our skirt! So let’s be extra sure that our piece is still the same size. Now we can put our waistband piece aside until later on.
A note about lining: we’ve had some readers ask about how to add a lining to this skirt. I’m happy to cover this during the sew-along! For now, you can cut pieces 1-7 out of lining fabric (everything except the waistband), and assemble your lining as you go, in the same way we are assembling the skirt shell. There will be a post a bit later on about how to attach the lining to the skirt, we’ll do it right before we attach the zipper.
Now let’s grab our yoke pieces!
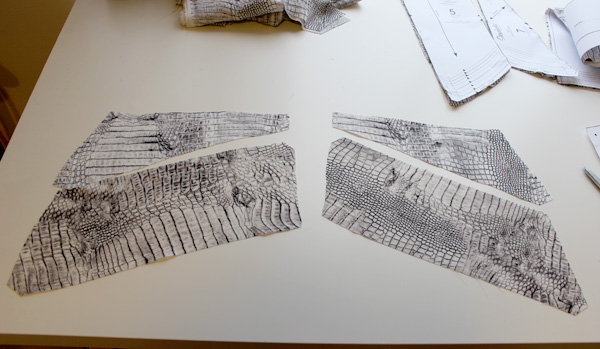
Let’s work with our front yoke and front top yoke pieces first, pieces 4 and 6.
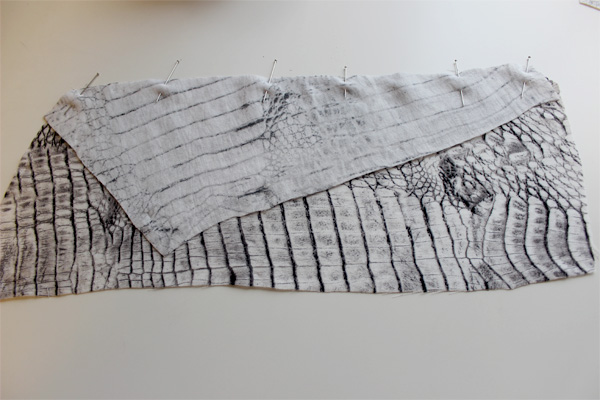
Lay your top yoke on top of your yoke piece, right sides together, and pin along the joining edge. I used a lot of pins because some parts of these pieces are on the bias, so I want everything to stay put.
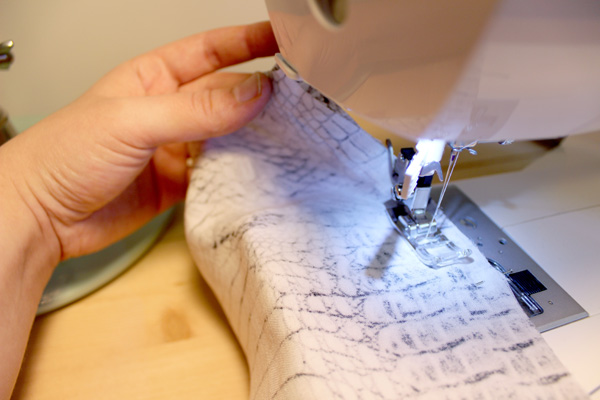
Let’s sew along this edge, at our usual 5/8″ (1.5cm) seam allowance. Next finish your seam allowances separately, and press this seam open.
Now let’s pin along the center front seam, with the ride sides of the fabric facing eachother, and sew this seam, stopping at 5/8″ (1.5cm) from the bottom edge. See there, I’ve marked that point with chalk so that I remember to stop sewing! Finish your seam allowances separately, and press this seam open.
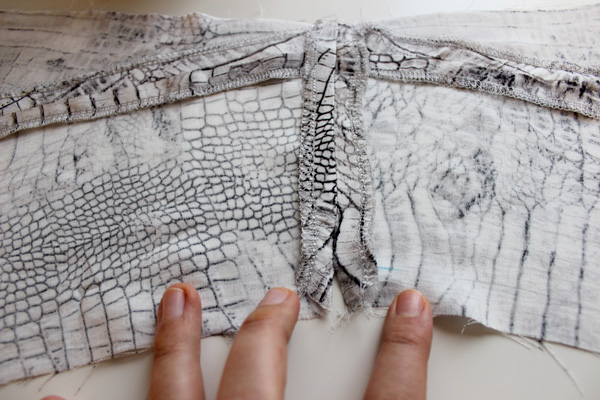
See how we’ve left the bottom open here? This will help us later on when we are attaching our skirt to the yoke panel, it will give us a perfect corner.
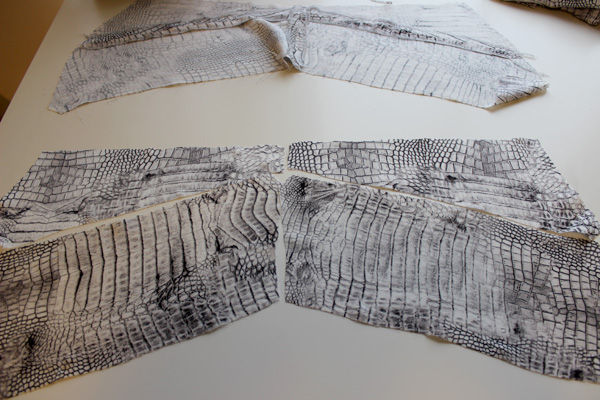
Now grab your back yoke and top back yoke pieces, 5 and 7. Let’s repeat the same steps as we did for the front, except don’t attach them at center back. So lay your top back yoke piece onto your back yoke piece, right sides together, pin in place along joining edge, sew this seam, finish seam allowances, and press open. We’re not attaching the right and left side together this time, because we will have a center back zipper going in later on!
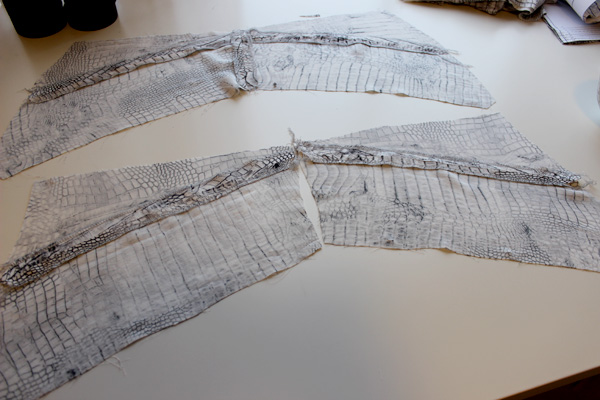
There you have it! Our yoke pieces are ready to go, and this is where we will stop for today! In the next post, we will pick this up again and sew our skirt panels together.
Remember, if you have any questions leave them for me in the comments. Happy sewing everyone!
Can’t wait to dive in after my little one’s bedtime tonight!
I have a question. Why don’t you finish the edges of the fabric(seam allowances) before you sew the seam? It’s just something I’ve wondered about for a while. It seems like it would be so much easier while the fabric was flat.
Thanks so much for the response.
I was just going to ask the same question as Carol… I was taught long ago to “zig zag” around all edges after the pieces are cut out, before you begin to sew. Is there a reason to do it after you sew the seam? Thanks!
It’s funny because I think this method is Caroline’s preference too! I prefer to sew the seams first and then finish them. The reason is so you get an accurate seam allowance, before the serging or zigzagging can affect the piece edges. Also, sometimes it’s best to finish seam allowances together, which you can’t do if they were pre-serged. I always finish seams afterwards, but some sewing teachers teach the finish-first method and many people who sew prefer to do it that way as well.
Hope this helps! It’s not a right or wrong issue, more of a personal preference. If you pre-serge or pre-zigzag you’re limited to what you can do with the seam afterwards.
Most seams I finish after sewing, so that the seam allowance can be trimmed first; the exception being seams that will have an invisible zipper in them, which are just plain easier to finish before hand. But then I finish everything with seam binding, serging or another method could call for a different approach entirely! It’s interesting hearing how people go about things differently to all arrive at the same results :).
Oh yes! That’s the only time I finish the seam allowances first, when I’m inserting a zipper in the seam. I finish the seam allowances first for invisible AND regular zippers. I usually indicate this in my pattern instructions as well.
Also, on some garments like lined garments, you don’t want to or don’t have to finish the seam allowances, if the lining encloses the raw edges. Zigzagging them would add lumpiness to the seams inside the garment!
But it’s totally up to you, if you’re happier pre-zigzagging everything so you never have to stop and finish the edges, that works too.
interessante
I’ve had the same question about finishing seams. Really interesting to read the discussion, thanks.
I’m enjoying reading this…
I wonder if I could pull off serging my seams before seaming, without accidentally chopping anything off the seam allowance. Because I’m attempting to serge the seam allowances now, (after sewing the seams) but i’ve never finished the two pieces separately before, and my serger is not making it easy on me. Arg. I’m thinking after I pick this latest attempt out (again) maybe i’ll try pressing the seam open first just to give me a clearer shot with the serger.
I do that – press first, then finish. Helps to keep the rest of the garment out of the way. Do whatever works for you, there’s no set way that it has to be done and it’s no fun to be unpicking serging!
I’ve been having trouble sewing along the bias edge of the top yoke piece – it keeps getting wavy and I end up with an uneven seam. Any suggestions?
Hi Emily! If you’ve already sewn the seam, then try tightening it up by using steam with your iron. If you havent sewn your seam, then try basting your raw edge beforehand – use a long stitch length and push your fabric forward as you sew (ever to slightly). this should help to keep the bias in check. Hope this helps!
Steaming really helped – thanks so much!! So excited for the next step!
Hello! I am not sure if I will get a response since this is coming so late after you posted this, but I am just starting my skirt now. I do not have a serger and typically finish all of my seams as french seams – would that work for this skirt or would it be too bulky in places?
Hi Annabelle! You could definitely french seam it! The only area where this might not work is in the yoke where it comes to a point. For this area you can perhaps just zig zag the raw edges. Hope this helps! Here are some bloggers who used french seams, just so you have some examples :)
http://sewbusylizzy.com/2014/03/16/sewaholic-gabriola/
http://lladybird.com/2014/04/28/completed-the-gabriola-maxi-skirt/
Great! Thanks for the examples :)