Today, I’ll demonstrate how to sew the Cambie Dress Sleeves (or straps, if you prefer) into the front bodice. This is one of those sewing steps that might become super clear as you’re doing it yourself, but may be a little confusing in the directions. One of the great things that comes out of pattern testing are notes on which steps might be confusing to less experienced sewers. In this case, the explanation and diagram are correct, but a little extra photo demonstration can greatly help you visualize.
Let me show you how it’s done, step by step!
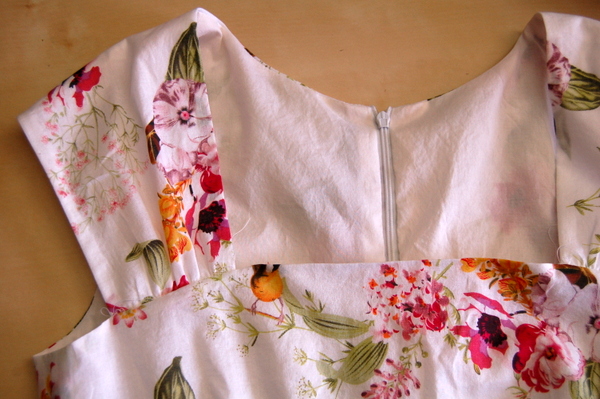
Here’s how it starts. Our dresses are nearly a hundred percent sewn, with loose, floppy straps that need to be sewn down.
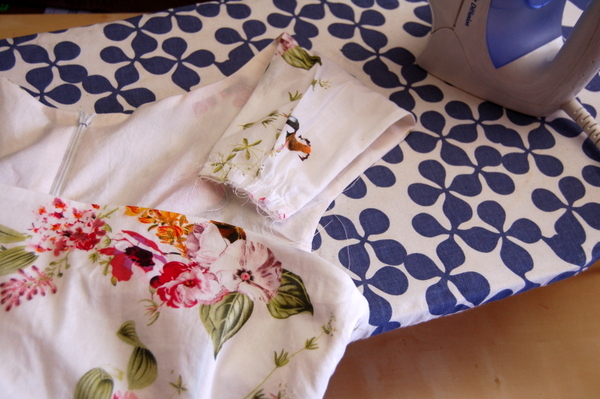
We’ve left an opening across the top of the bodice, and that’s where we’ll put the straps/sleeves! (I call them straps sometimes, but I know on the pattern I called them sleeves. They’re a sleeve-strap hybrid so both words seem appropriate in my mind. Sorry if I interchange the words!)
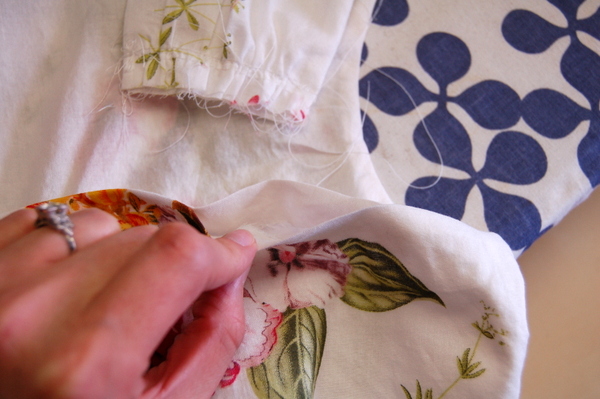
If you haven’t pressed the opening yet, press it as shown, so the top edge is even across the opening. (So that if you don’t pop it open, it might be hard to even tell there is an opening!)
Slip the strap into the opening. Line up the seamlines, so that the strap sits 5/8″ (1.5cm) into the hole.
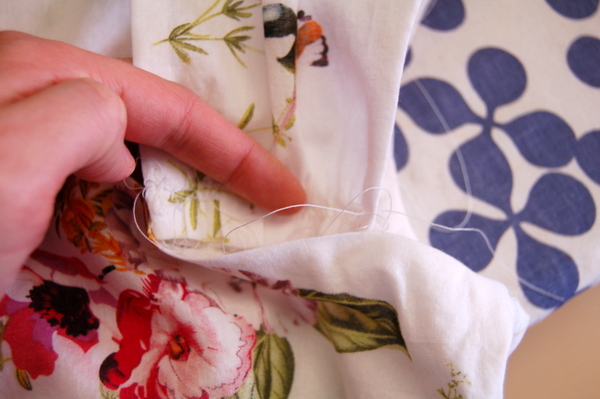
Pin in place. Now if you’d like, you can try on the dress and adjust the strap/sleeve as needed. If you need a little more length, let the strap out a little and re-pin. (Remember to remove the basting threads if you do end up letting it out!)
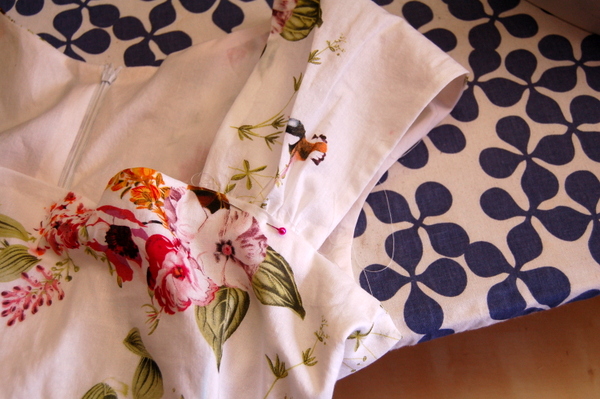
Ok. Now, we’ll reach up the skirt of your dress, between the lining and dress fabric. (Strange photo, I know!)
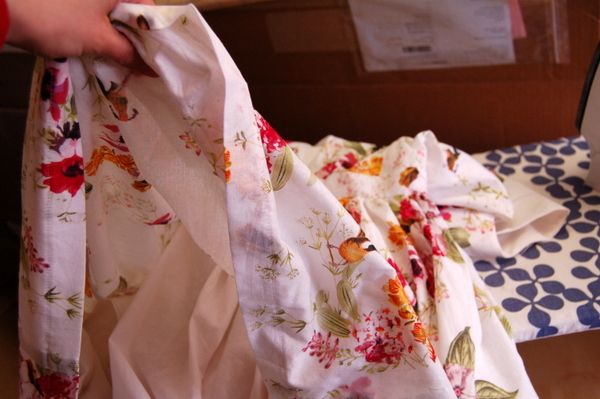
When you get to the bodice, turn it out so you can find the strap/sleeve end.
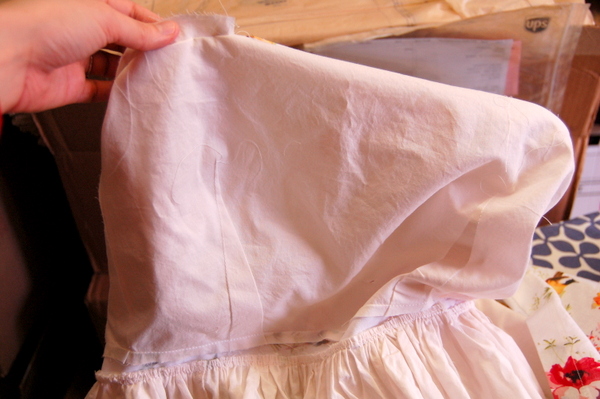
Re-pin with the pins on the inside. It’s nice that we have a fold line to guide our stitching!
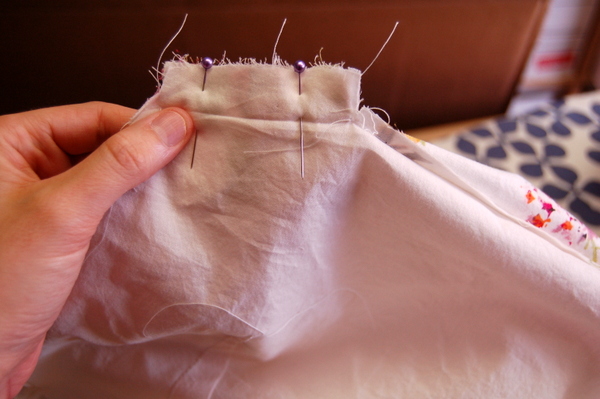
That’s exactly where we’ll sew – right down the folded line, connecting the bodice stitching.
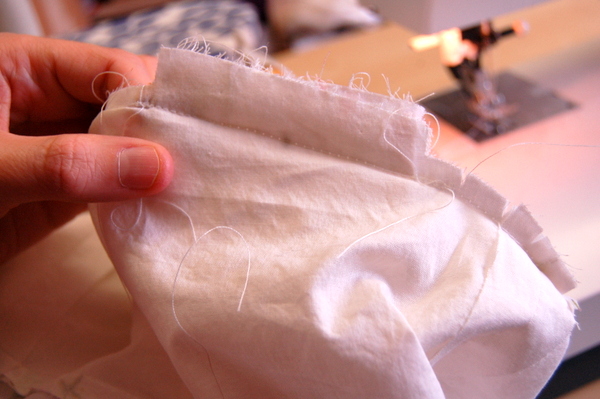
Trim off the extra seam allowance, turn the whole dress right side out, and press!
Easy enough, right? It’s one of those things that might seen daunting until you have the project in your hands. Hope this helps!
More Cambie Dress sewing blog posts:
- Slightly Less Sweet: Cambie Dress with a Straight Neckline
- Sewing Inseam Pockets
- Sewing the Lining into the Cambie Dress
Get the Cambie Dress pattern here!

Super cute! I love this dress.
This was one of my favorite parts of putting together the Cambie dress. I love the finished look it created.
HI Tasia,
Can I ask what you used to line the dress with? It looks so much nicer than the lining material i have! thanks!
I used a cotton voile in ivory to line the dress. It’s easy to sew and feels soft next to the skin, a great alternative to regular lining fabrics! Cotton voile, batiste, even a lightweight cotton lawn would also work.
Voile is what I used as well – turned out to be an excellent choice with my cotton. Just the right weight, doesn’t fray much, holds a crease beautifully, and feels nice and soft.
Love this pattern too by the way – it came together so quickly! Next up I want to make view B in white eyelet with pale blue lining.
thank you!
Glad you posted this. I was a little confused through this step, but once I figured out where you were going with the directions it was crystal clear and so easy.
I’m getting tons of compliments on my Cambie—I need to get some pictures up on my blog soon. I used a black eyelet cotton with neon green lining, which I meant to be my practice dress/muslin. It fit perfectly on the first try, though, so I’m wearing it! It’s super comfortable.
Thanks for a great pattern. This is the first of yours that I’ve sewn, and now I’m excited to sew up my Minoru (since it doesn’t seem likely to warm up in the Northwest any time soon…).
I love this dress. I love the fact that the from the front it looks like nice little straps but that their is a full back piece! Ingenious- we can wear a regular bra with this dress!
Huh, that’s pretty ingenious! I love how you think up stuff like this!
Thanks so much for these extra little tutorials, I know they’re going to help me a bunch!
My cambie pattern arrived yesterday, and I am soo excited about making it.