Today, I’ll demonstrate how to sew the lining into the Cambie Dress. This part of the sewing instructions makes a lot more sense when you’re actually doing it yourself. The next best thing? Watching someone else do it first!
So I’ll do it and show you how it’s done, with plenty of pictures and explanations. You can use this method in most lined dress patterns to avoid slipstitching the lining to the zipper. This is faster, more durable, and gives you a really nice corner at the top of the zipper.
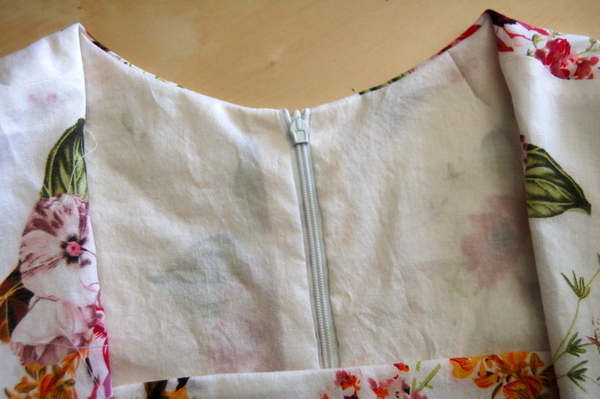
If you love the idea of never slipstitching another lining to a zipper, but you’re unsure if this method will work on a dress pattern that’s not the Cambie Dress, here’s what to do. Try pinning it in place, and act out the steps below without actually sewing your project. That’s what I do when I’m trying to work out how to sew something unfamiliar!
At this point, you’ll have a whole dress sewn out of your real fabric, and a whole dress sewn out of your lining fabric.
Now, we’ll pin our lining to the dress along the zipper. I only had room to show one diagram in the instructions, but I get to show you tons of photos here!
The dress is right side up, lining is right side down. Place the lining on top of the dress, with the right sides together.
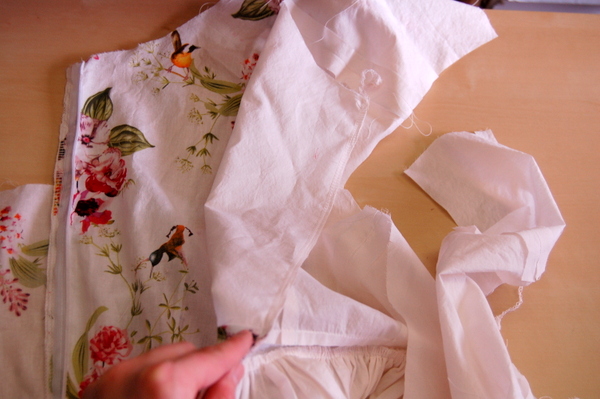
Line up waistbands and pin.
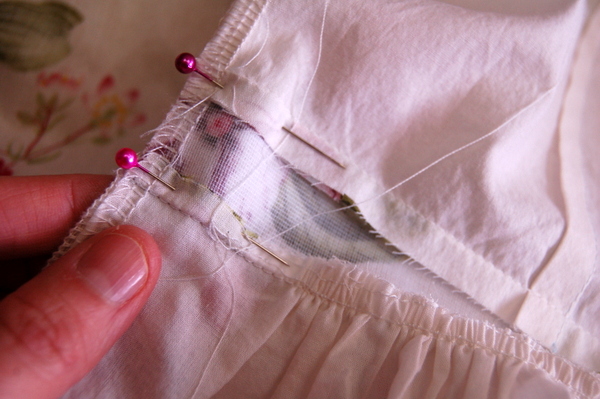
Pin other side. Here’s what it will look like when the pinning is done:
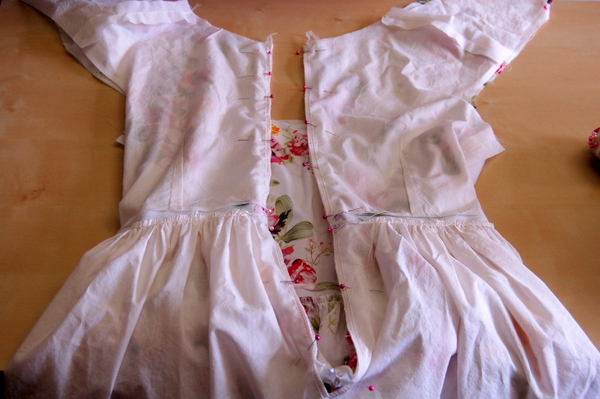
Start with the left side, and sew from the top down using a zipper foot.
You can feel the bump of the zipper teeth – be sure not to cross over this with your stitching, or get too close. Try and stay an even distance away from this bump.
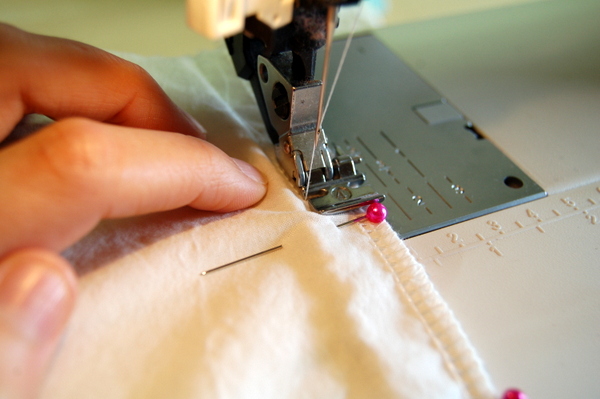
Here’s what it will look like as you go.
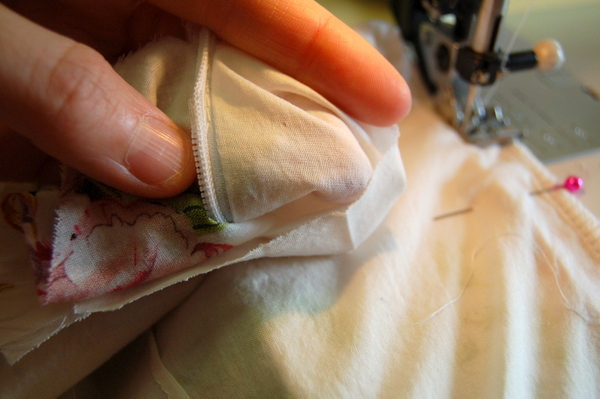
When you go to sew the second side, you have a choice. Depending on your machine and your preference, you can either switch your zipper foot to the other side and sew from the top down again. Or, sew from the bottom up and keep the zipper foot where it is. (This is my preference, because I like to keep the bulk of my project on the left side while I work.)
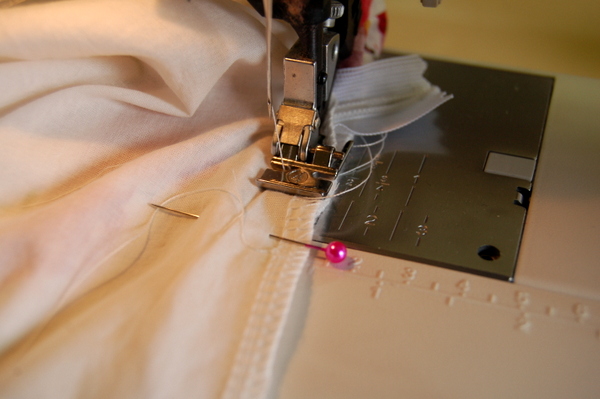
After both sides are sewn, we’ll sew the rest of the lining to the dress. There’s one last important step here. Watch and see what we do here as it’s hard to explain.
When we zip up our invisible zipper, there’s a tiny little bit of fabric overlap at the seam. Not a lot, just enough to ensure the zipper isn’t pulling apart.
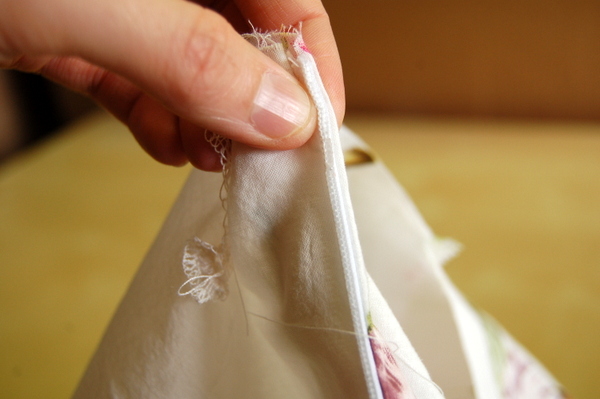
We’ll be wrapping our seam allowance to the back, and stitch it down as we sew the top edge.
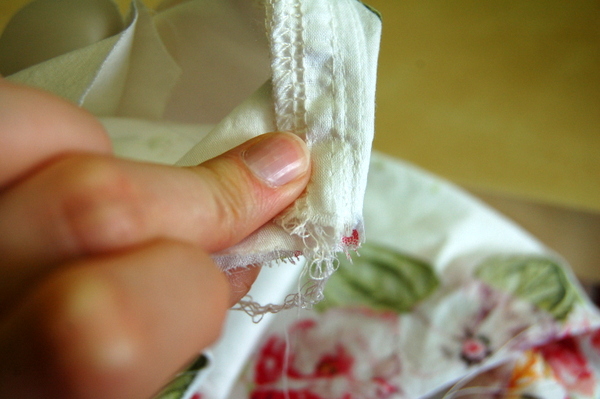
Unsure if you’ve got it folded the right way? Pinch the top edge as if you’ve just sewn it, and turn it to the right side.
Ok! Now pin that seam allowance down.
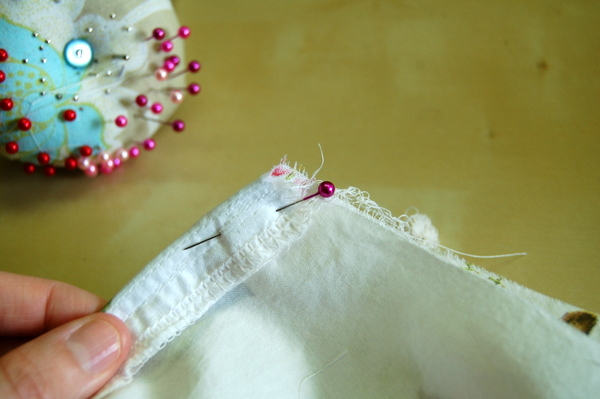
Pin the rest of the top edge.
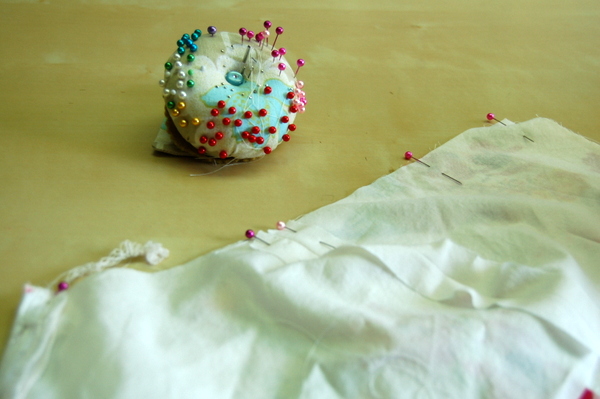
Sew this top edge with a regular seam allowance.
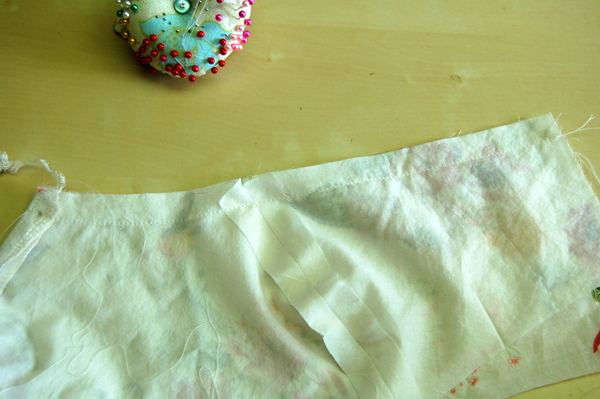
Repeat with the other side. Trim corners diagonally.
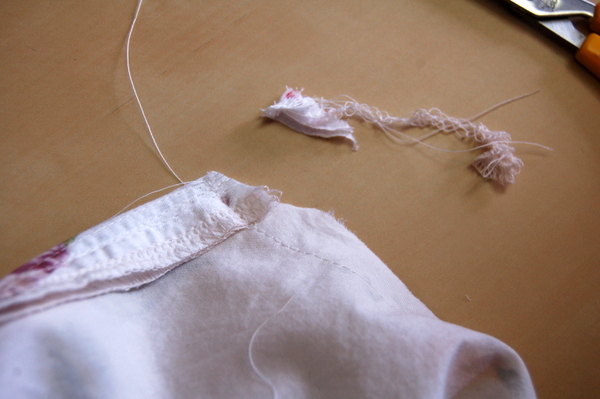
Tip: Check to make sure the top edges of your zipper are aligned before trimming. If one is slightly higher, go back in and stitch across the top end to even them off. If you’re concerned about taking too much off, stitch half the amount you think you need, check, and stitch again if needed.
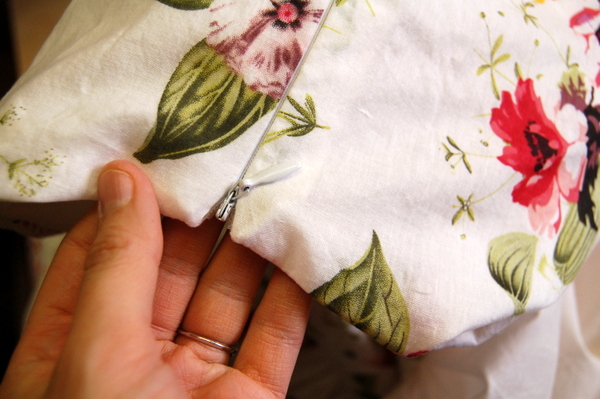
Let me show you how nice our corners will look!
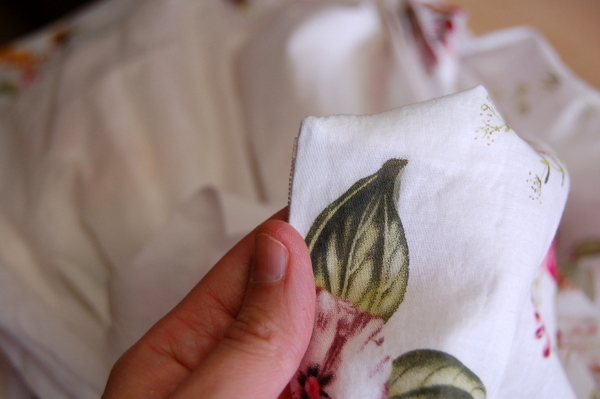
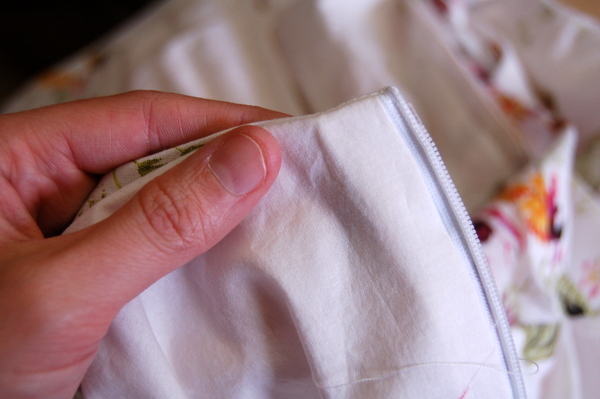

This method of sewing the lining into the dress isn’t hard, and it gives a professional and strong result! Never slipstitch your lining to the zipper again! (Unless you want to, of course. It’s nice to have options.)

Perfect timing, thanks for this! I just sopped working on my Cambie dress for the evening right before these steps, thinking it was best to tackle it when not tired. Not I have this tutorial to reference as well, hurrah!!
Hi Tasia! Love the cambie, u have introduced such a beautiful dress into the sewing world :) I’ve used the technique before with my sewing at home, so quick and easy and the result is lovely. At class my teacher teaches us to slip stitch, which is also great, like u said its good to have options :)
Hello there, just one question about this method, isn’t you lining supposed to be smaller along the zipper? I haven’t seen your pattern pieces or instructions but if I were to try this on another dress, should I remove some seam allowance? And if yes, what do you recommend? I never could figure it out as different tutorials give different measures. Thanks
thanks for the introduced, i use it for my first dress:)
I just learned this technique a few weeks ago with Colette’s Iris pattern (it’s used to attach the facing to the zipper), but it’s so good to see it used with a full dress lining. Especially since I’ve never learned to insert a lining properly–I’ve just been making it up as I go! Thanks for sharing this!
I have done this method before and as I’m really itching to make a Cambie dress soon, I can’t wait to do it again! I love doing this for dresses because I feel that lining them makes life so much easier in the end. No elastic waist showing through from a slip or finding that your slip is too long and such. PS I love the fabric and the fact that you’ve made an alliance with a fabric company! I’m so jealous!
xoxo, Sunni
Lovely finish!
I’ve used this method ever since I learned it via the zipper tutorials over at Fashion-Incubator. CarmencitaB asked a good question about trimming seam allowance. The F-I tutorials advise trimming off the seam allowance completely. Here’s the main link:
http://www.fashion-incubator.com/tutorials/
Thank you!
I’ve just this method as well and it is my favourite way to finish of a lining to a dress. I just recently did this to my Lonsdale dress and I loved the way it looked finished! I also use it for facings at the side of invisible zippers for pants. Pretty much for a lot of garments, as the only dress I’ve ever slipped stitched became undone only after a few washings…
Hi Tasia. Thank you for posting these – really helpful. I can’t understand what you mean here: “When we zip up our invisible zipper, there’s a tiny little bit of fabric overlap at the seam. Not a lot, just enough to ensure the zipper isn’t pulling apart.” Can you help me out?
I have been doing my zips like this – I think you did something very similar for your Crescent skirt zip? I’ve used the fashion incubator method as well. Following on from CamencitaB’s question – if you look at Kathleen Fansella’s method, her facings are slightly shorter than the shell of the dress and once the zip is folded back it lines up with the shoulder. I don’t understand how you have managed to do this with the lining the same size as the dress front and still get the neat result!
Thanks for yet another great tutorial. You make everything so clear that I can actually convince myself that I can do this stuff!
Looks a lot like the method you use on the Crescent Skirt :-) I’ll need to give this one a go, my only problem is that both times I’ve made the Crescent I’ve sewn too close to the zip and the facing always gets stuck when I pull it up.
Could you also do this with an invisible zipper foot? Am assuming so, but having bought one that I haven’t yet got round to using I’m not sure of the ins and outs of it ;-)
I don’t have your pattern yet, but plan on purchasing nearer to Summer as I am in the Southern Hemisphere. Your dress is beautiful, I especially love that fabric. Thanks for the tutorial. On a cheeky note, did I notice that you keep your pins in colour order?? WOW.
Bless you Tasia! What great timing, my next step is the lining on my Cambie.
This is such a beautiful dress! You’ve inspired me to sew something for myself….just need the fabric! I keep sewing household items but really I’d love to wear this dress. Thanks for sharing!
Thanks for the tutorial.
I really hate slipstitching the lining to the zipper so I will certainly give this a try!
Constance
PS: Do you know whether Telio fabrics are sold in Europe, too? I’m totally in love with your fabric!!
I can’t wait to have a go at this dress, I love the sweetheart neckline especially! Do you think it would be possible to make the full skirt version floor length? Its possibly for a wedding dress! Would I just extend the skirt pattern pieces to the right length or would I need to make them wider at the base hem as well?
Hi tasia!! I’m still a bit new to sewing. I’ve sewn quite a few things but I haven’t used lining. Where exactly could I find lining fabric? And what would it be named? Is it just muslin or what?
You are a genius. When my Cambie pattern came in the mail and I read through the instructions, when I got to this part it totally rocked my world! I’ve done this with skirts, but I could never figure out how to apply it to dresses, since most patterns have you construct the whole bodice with lining, then attach the waistbands and skirts, resulting in wonky invisible zipperage. It never occurred to me that you could just make two dresses and attach them together zipper first! I love it, and I can’t wait to get started on my Cambie!
What a great tutorial! Why didn’t I think of that? I’m sure everyone’s thinking/saying that. Another thing you could do to ensure that the lining doesn’t roll out would be after you’ve sewn the zipper, understitch the lining. This makes such a difference. Anyway, great tutorial. I’m trying this out on my next lined and zipped dress or top. Thanks!
Hi Clarissa,
Just a quick question, on this case, how exactly would you understitch the lining?
Thanks for your help!
Tatiana
You can find tips for understitching here http://buzzybeesworld.blogspot.it/2010/04/tricks-of-trade-facing-invisible-zip.html
Thanks for the tutorial. I learned a lot. No, I didn’t know this way of sewing lining in. You are a great teacher – the pictures are so informative too.
Nothy
http://www.aftagley.blogspot.ca
I have used it on my skirt and the result is great (just need to remember to do it on every project!).
http://bombardone.com/sewingprincess/2012/02/the-skirt-that-was-not-meant-to-be/
I first learned this trick through Sherry http://buzzybeesworld.blogspot.it/2010/04/tricks-of-trade-facing-invisible-zip.html
Thanks for the tutorial…it´s lovely to have another perspective.
Hi Tasia!
I love this pattern, so much so that I purchased it without realising it’s designed for pearshaped women. I’m an hour-glass and I really want to get this to fit me – according to the back of the envelope, I’d take a 14 on the waist and skirt but my bust size would make me a 16 or even an 18 (I know it doesn’t go up to that size but my friend showed me how to enlarge patterns!) So how do I alter the bodice so that it fits a large bust but still fits the 14 waist?
I’ve started by lengthening the bodice, as the back bodice seems the right length but the front is very short thanks to my bust (the pattern piece doesn’t actually cover my bra :) So what would you recommend? Thanks in advance.
Hi Gillian
It sounds to me that you need a full bust adjustment. So what you need to do is measure your high bust – around your back, under the armpits and above your chest to determine what size you need to make up.
You then do a full bust adjustment to give yourself the room and length you need in the front of the pattern
http://threedresses.wordpress.com/2012/01/25/full-bust-adjustment-tutorial-shift-dress/ is a tutorial from three dresses which should help.
The Fit for Real People by Palmer and Pletsch is an absolute gem of a book for altering all sorts of styles. It’s my go to book for all my FBA issues (I have a 6″ difference between my high bust and my full bust).
I really hope that helps. If you have any questions about the application of it, please drop me an email and I’ll do my best to help! Lazy stitching also has a lot of bust adjustment tutorials here http://www.lazystitching.com/tag/fba/ that may be of help too.
I’d also recommend the FBA. I haven’t made the Cambie yet, but I’m currently working on the Lonsdale. I’m also more of an hourglass than a pear, and in the process of doing a muslin of the bodice, I had to do both an FBA and also add some underbust darts. Since the Cambie already has a dart there, you might be able to play with moving that side dart that the FBA makes into that underbust dart to just make that wider.
If you do make this one up, I’d love to hear how the FBA goes! I’ve got the pattern and am considering it for a project a few months down the road…just have to take care of some other things first.
I’m one of them classical hourglasses, and I’ve had a heck of a time fitting this bodice. Doesn’t help that I’m only 5ft tall.
In the end I:
Lowered the bust point by an inch.
Took half an inch of length out under the bust.
Widened the bust/waist darts by 1/2 inch.
Converted sweetheart neckline to square neckline.
Did a further swayback adjustment (horizontal 1/2 inch dart at low centre back.
Chopped 11/2 inches offer bodice back shoulder piece to sort out neck gaping.
It’s looking half-decent after three muslins… This is a good thing. I was about to wad it!
These tutorials are fantastic and really add to the experience of sewing Sewaholic designs. Thank you for providing such clear and detailed online resources. I am up to inserting the zipper, attaching the lining, inserting the straps – in other words on the home strait. I’ve spent my night studying the Cambie tutorials & can’t wait to wake up tomorrow!!
I have been sewing over 30 years and I always hand sew the lining. After seeing this pin and trying it I have to say I WILL NEVER EVER Handsew a lining again unless I ABSOLUTELY have to. Thank you very much for the pin and tutorial!
Tasia- This is a good tutorial but I’m a little confused. I’m sewing a sleeveless shift dress and trying to use this method of lining. I did it this way but then couldn’t figure out how to sew the rest of the seams without getting stuck. I had to take it out and then sew the neck and armholes first but now it seems like I can’t do the zipper the way you do it with it sewn this way. Any tips? Thanks!
Michelle
I am having this problem on a sleeveless dress, as well. I haven’t sewn anything, yet, but I tried pinning the neck, armholes, and along the zipper to see if I could turn the dress right side out with all of these areas sewn together, and it didn’t work – it got caught up around the armholes. What to do!
Really don’t understand but really want to !!!!!
Like your tutorial, but interested to see how you complete the armhole. I was taught to make dress, add zip. Join lining to dress at neck then do armhole.
Which is great but complex, especially as I have forgotten how !!!
Hi, thanks so much for the detail on sewing the lining rather than hand stitching. I’ve one problem, the sleeves. I’ve noticed your shoulder seam is not sown yet when you attach the lining at the zipper/back and the neckline. When and how do you sew the shoulder seam. I’m working on a sleeveless dress, the shoulder are already sown, (but easy enough to remove), the side seam is sown after the facing at the neck & armholes are sown. I’m using lining instead of facing. Using both was going to be to heavy for this summer dress. Please advise. thanks
I’ve just tried this technique on a little girl’s sleeveless party dress. I usually line the bodice only, separately, and then attach the zip at the end just to the outside fabric and then handstitch the lining. I can’t get my head round how to get it all the right side out. If I sew the armholes it’sball going to be stuck on the outside, right?
Hi Charlotte! This method works for the Cambie because the armholes are open, the ‘strap’ ends are not connected to the bodice yet. If the armholes were closed circles, you wouldn’t be able to turn the lining. Hope this helps! If you’re unsure, you could baste or pin your lining first, then try to turn your work, to see if it will work.
Hello! I’m a little late to the Cambie game, and just starting my first one this fall. I’ve read this post several times now, and I guess I’m not quite clear on what happens at the bottom of the zipper (and below the zipper). Is the lining of the dress sewed to the shell below the zipper, or are they still separate? Do you sew across the zipper at the bottom and catch both the lining and the shell? Thanks!
i really dont understand how you can turn de dress right sides out ones you have finished the lining. im sewing the zipper in the side seam.
hope you have some advice
Are you sewing the Cambie Dress but with the zipper in the side seam? In order to follow this tutorial exactly you’ll need to be using an invisible zipper in the centre back. The Cambie Dress won’t be able to turn right side out if you sew up the armhole.
loved your post. Just about to do this.. Loved the idea about sewing the corners before you trim them off to check it will be right. Thanks very much for the tips
Great! Yes, that’s an important tip, it’s easy to fix at that stage but a little harder if you’ve already trimmed the corners off!
Thank you for the tutorial, I needed this a while back and I think it’s time for a remake.