 Good morning lovely sew-along superstars!
Is anyone else getting excited to complete and wear their Saltspring dress? Let’s hop to it and make some more progress today!
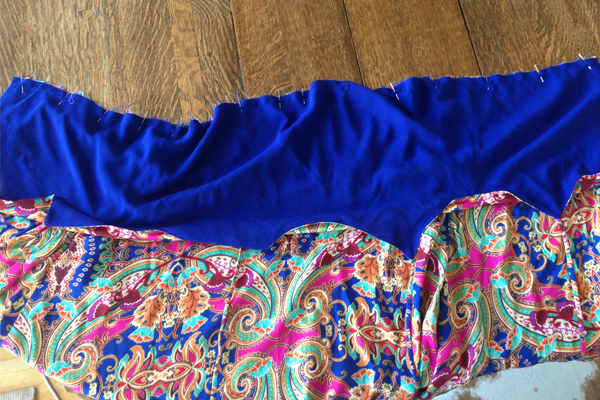
First up let’s pin our bodice to our skirt, with the right sides together and the bodice lining facing up.
Use as many pins as you’d like, and take extra special care to line up the side seams, center front notch, and center back. Our side seam allowance should be facing towards the center front, so that our pockets hang in the right direction.
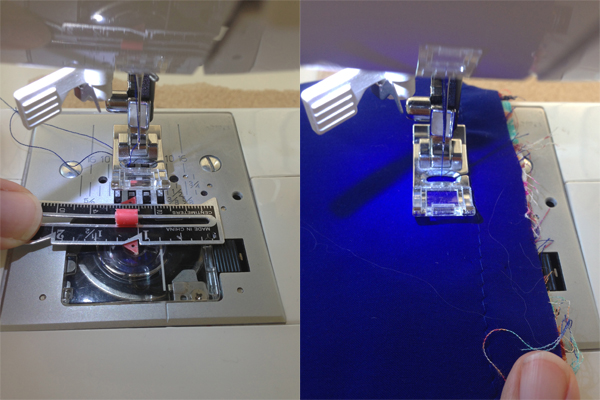
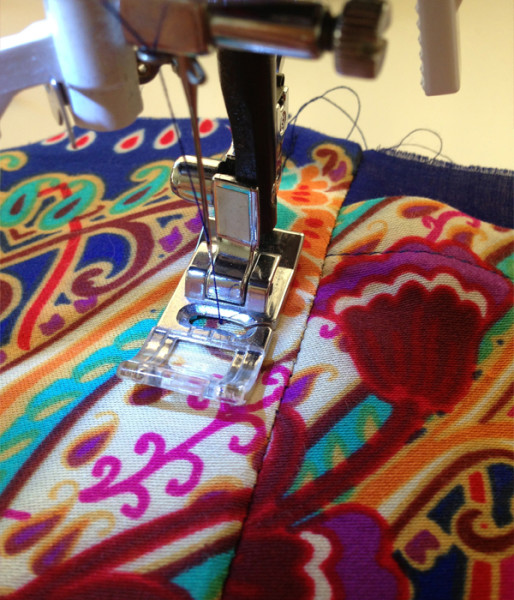
Next we want to sew this seam at a 1” (2.5cm) seam allowance. Since my sewing machine doesn’t have a marking to follow for 1”, I like to keep my eye on something to line my raw edge up with. In this case, I’m looking at the top left screw and lining up my raw edge in the middle of that. This way I know I’ll keep an even seam allowance all the way across.
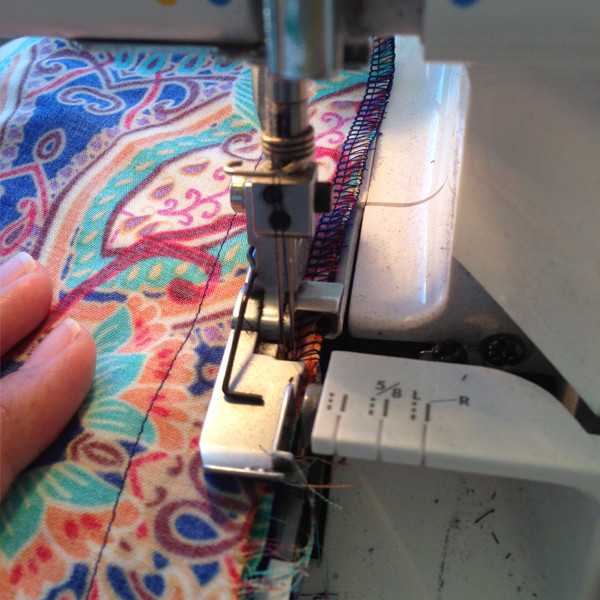
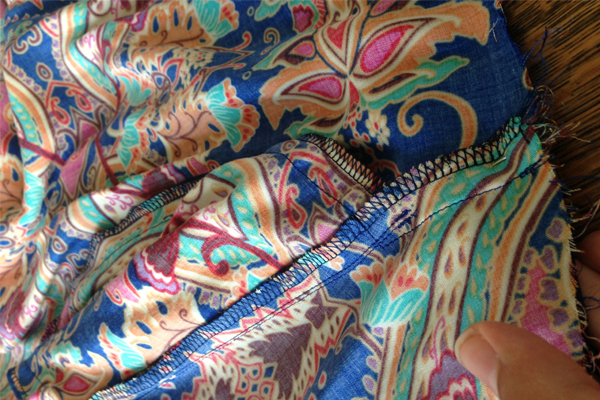
Now let’s finish these seam allowances together.
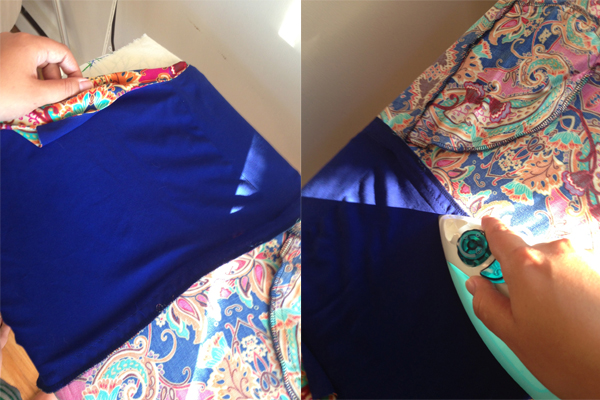
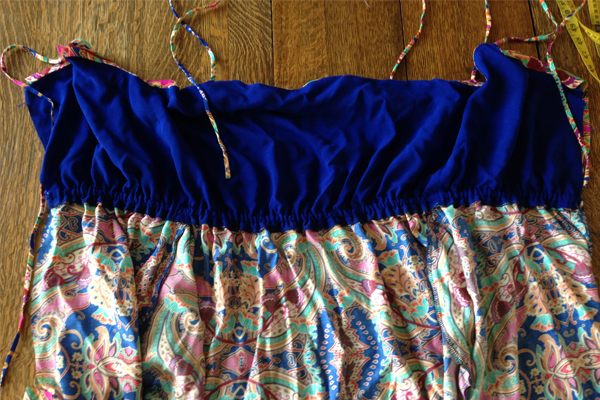
We’re going to press the waist seam down. This can be a bit tricky because our outer bodice layer is bloused, so it won’t lay flat. While I press, I like to pull up my bodice so that the excess fabric is at the top. This way there won’t be any creasing from the bulk of the blousing, and we can get this seam nice and flat.
To form the casing, let’s topstitch our skirt along the waistline, 1/2” (1.25cm) from the seam. It’s important to catch the seam allowance underneath, this will be the casing for our elastic!
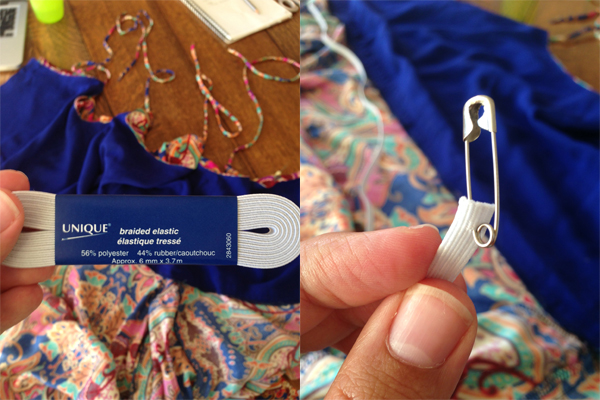
Using the elastic guide in step 14 of the pattern instructions, cut your elastic according to your size. Feel free to test this before you cut and adjust the elastic to be tighter or looser if needed. This is a great place to make the dress fit you exactly right.
Attach a safety pin to one end of your elastic, and slowly work it through the casing. About 3/4 of the way through, I like to pin the end of my elastic at the center back so that it doesn’t get pulled in and lost in the casing! Once you reach the other end, pin this end of the elastic in place at center back as well. Use your sewing machine to tack the elastic down at each side of center back.
To even out the elastic in the casing, grab each end and give it a few tugs. This will help to evenly distribute the gathers that are created by the elastic.
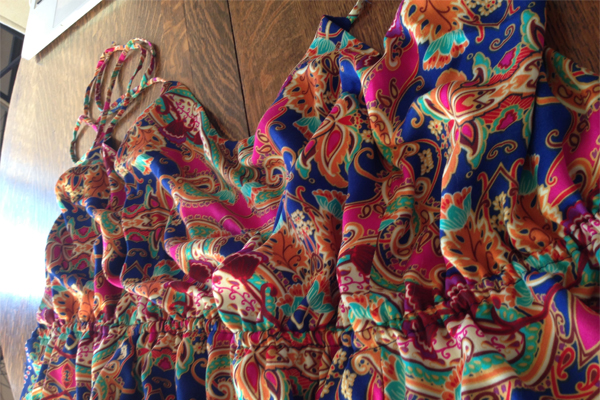
There we go! Our dress is really starting to come together. At this point we can even try it on with a couple of pins down center back to test the fit and admire our beautiful progress.
We’re going to tackle the center back zipper next. I’m looking forward to demonstrating, it’s really a clever method.
Happy sewing everyone!
Since I had it on hand from my Bombshell swimsuit, I used 3/8in elastic and it slipped perfectly into the1/2in seam allowance, also..have a great weekend!
After I have sewn the Bodice to the skirt and finished the seam, I need to know where to sew the 1/2″ for the casing. Do I sew the 1/2″ on the bodice or on the skirt side of this seam?
Thanks, It is all going together so nicely.
The pics look like the bodice side, but I did mine on the skirt side… the elastic is rather hidden now… :) I’d be interested in the answer too.
Hi Michelle! You did it correctly, it should be on the skirt side! Thanks for your comment :)
Hi Marie! You’ll need to sew on the skirt side of the seam. So your seam allowance is being pushed downwards and you are sewing along the skirt piece. All the best!
What kind of serger/overlocking machine do you have? I’m in the market for one since I sew on a treadle machine and it seems like it would be handy for some things the treadle can’t do.
Hi Anna! I have a Kenmore 2/3/4D! I’ve had it for like 8 years and it still runs great. I love having an overlock machine, it definitely makes life a bit easier!
I haven’t bought this pattern yet, but I look forward to getting it since I have all the others! Off topic, but do you think there might be a chance to post a Cambie Dress Sew-A-Long? I know it is the Sewaholic’s top seller!…..some of us might need some help getting it just right! Keep up the AWESOME work!
Hey Tara! There are no plans for a Cambie sew-along at the moment but I’ll keep your request in mind! In the meantime here are a couple of Cambie sewing posts that Tasia did:
http://sewaholic.net/sewing-the-cambie-dress-straps/
http://sewaholic.net/slightly-less-sweet-cambie-dress-with-a-straight-neckline/
http://sewaholic.net/sewing-inseam-pockets/
http://sewaholic.net/sewing-the-lining-into-the-cambie-dress/
Happy sewing!
Cheers!
This is a tip for when I work elastic through a casing. Before starting, I use a pen to mark each end of the elastic on the same side. When the safety-pinned end emerges from the casing, I make sure the marks on the ends are facing me to confirm that the elastic hasn’t twisted while being worked through.
Thanks June! Love this tip.
I used this tip and it helped quite a bit! Thanks!
I took a couple hours this afternoon to sew and I’m all caught up! I am really loving this sew-along! It’s making me think that I’ll pick my pattern based on finding sew-alongs now! Thanks again!
Thanks so much! I’m so glad you’ve enjoyed the sew-along. I personally also love following along for sew-alongs, it does make the pattern way less intimidating and more fun to sew! It’s like tackling a sewing project with friends to support you! Thanks again for joining :)