 Welcome to the first Belcarra sew-along!
You can click the badge to the left to see all of our Belcarra sew-along posts.
Let’s get started!
 If you haven’t pre-washed your fabric, you should! I always recommend to pre-wash fabric the way you intend to care for your finished garment. Fabrics usually shrink the most on the first wash. So washing it before we cut it ensures that we don’t have a lot of shrinkage after we’ve sewn it up.
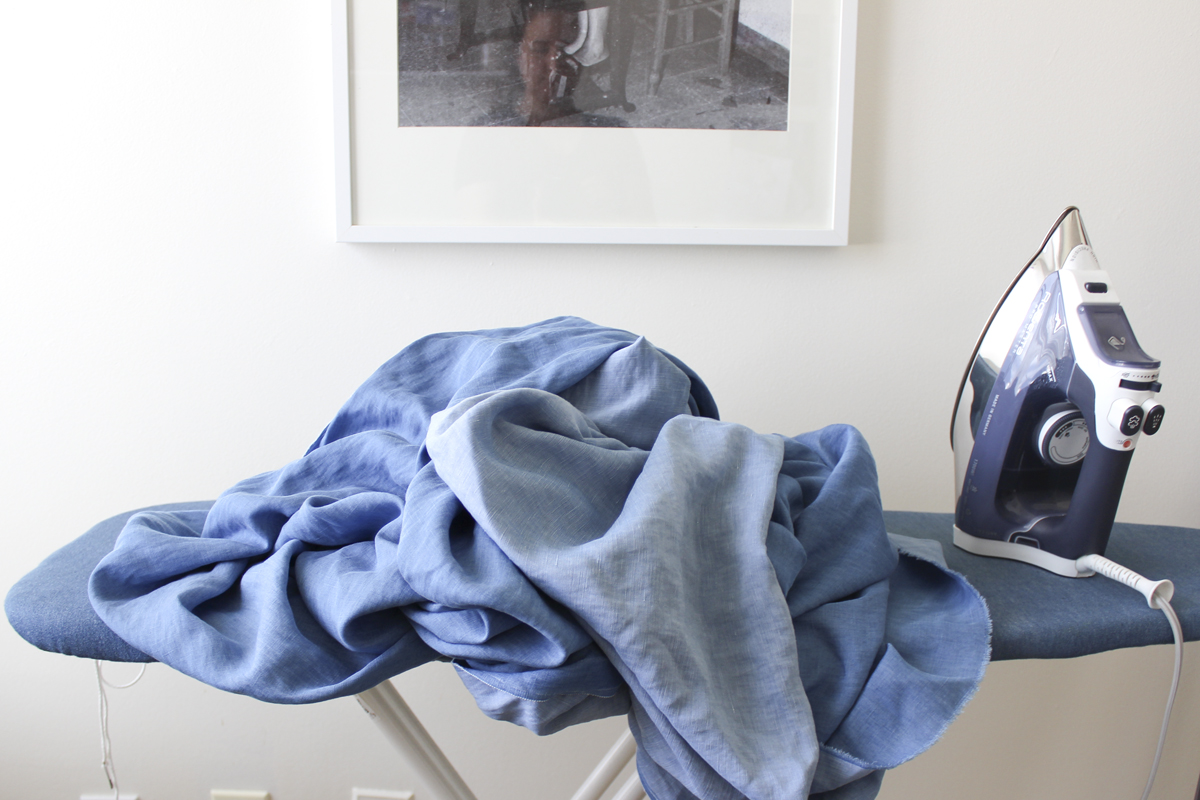
 Now let’s iron out all those wrinkles! For the sew-along, I’ve chosen a lightweight denim shirting, in a cotton/rayon blend. It’s really nice, I think it will make a great staple Belcarra blouse.
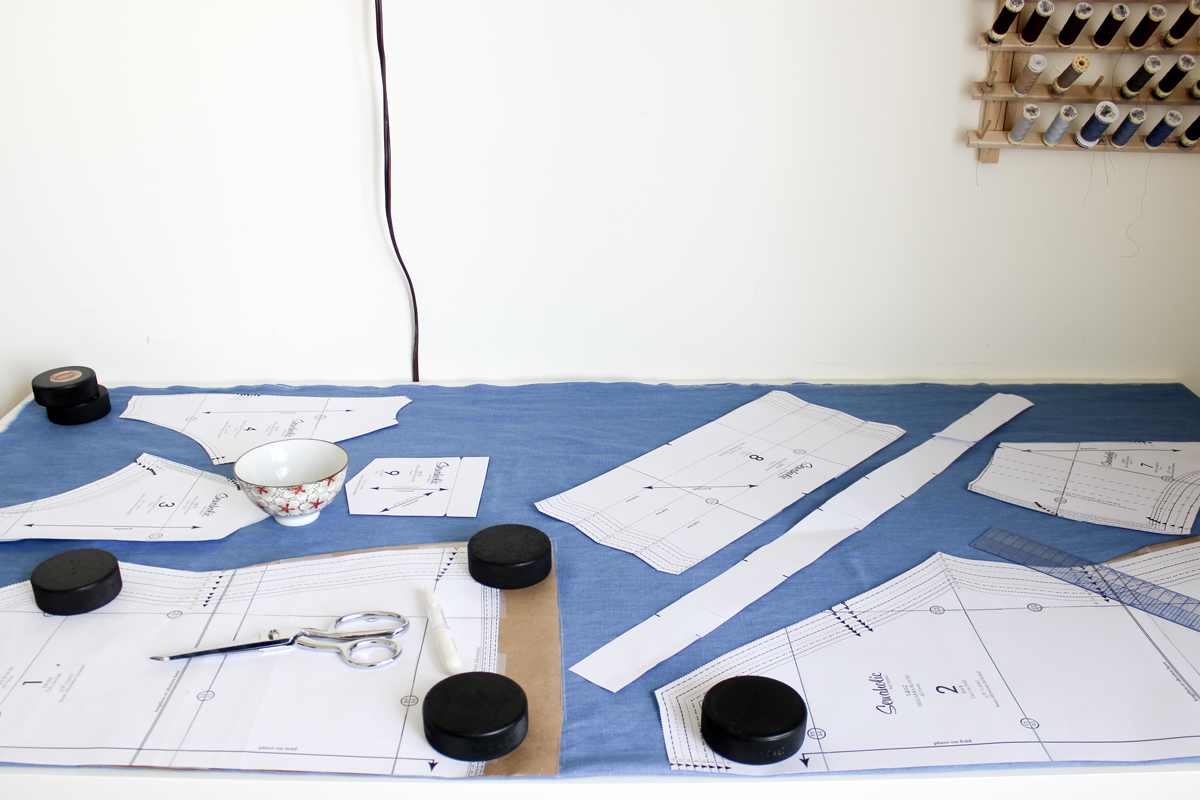
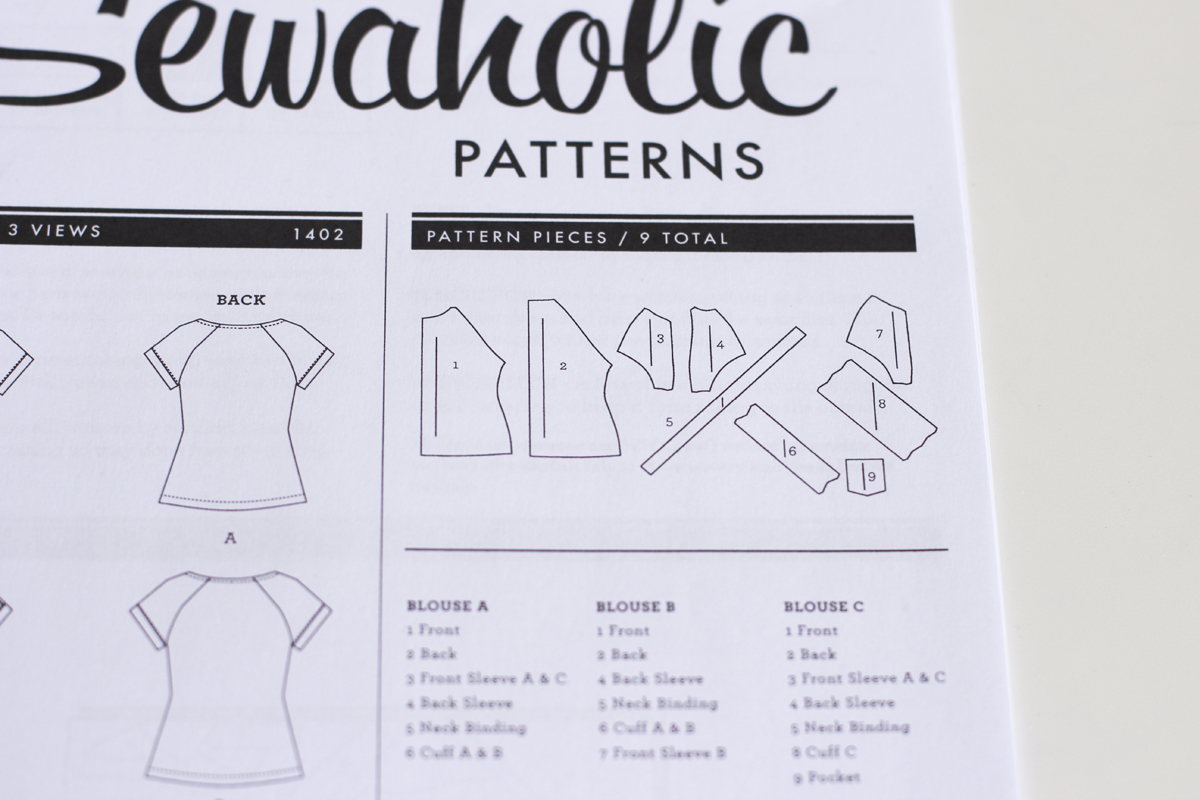 Okay so our fabric is prepped for cutting, now let’s take a peek at the pieces we are going to need. You can find the breakdown in your instruction sheet. I’ll be making view C. But not to worry, I’ll demo all the steps (like the tucks), I’ll just use a different fabric for the steps that don’t apply to my version.
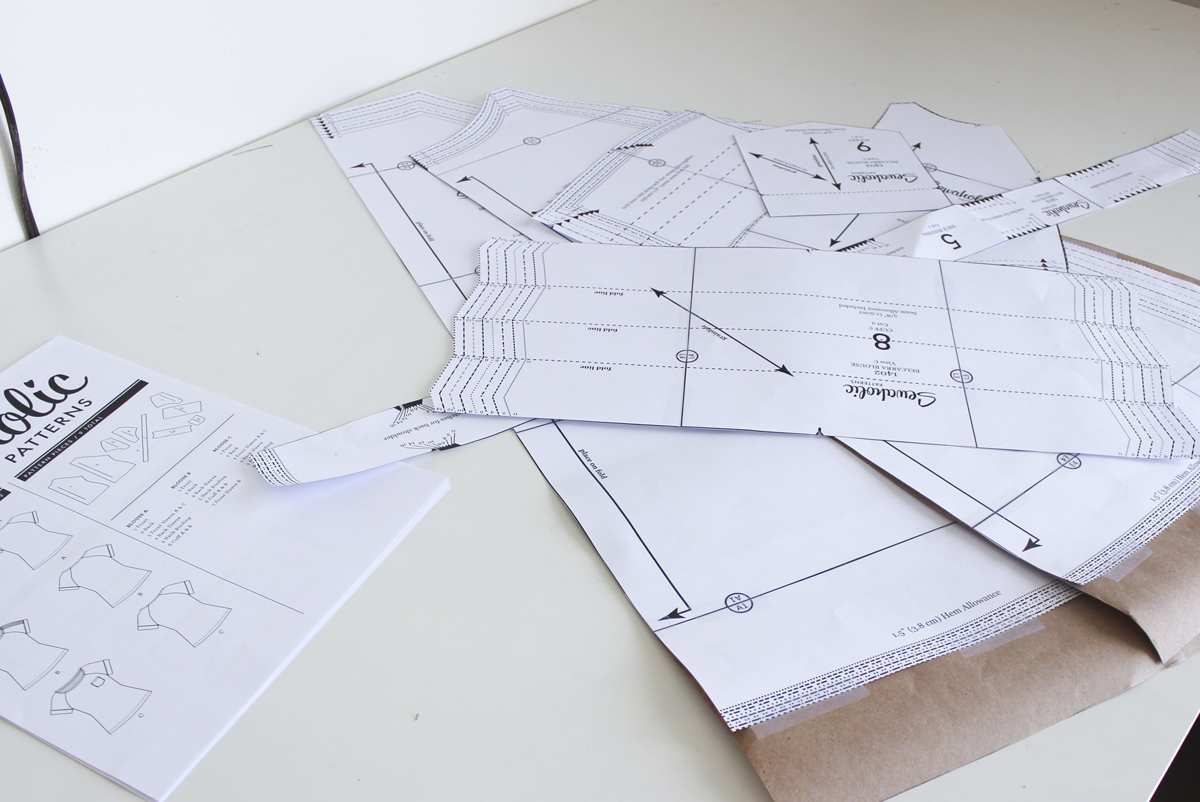 Let’s grab the pieces that we’ll need for our chosen view. After I tried on my muslin version, I decided I wanted a bit more room at the hips, and more length in my blouse. You’ll notice in the photo above from the brown paper, I’ve already made these adjustments to my pattern pieces and they’re ready to go. You also may have done a FBA, or narrowed your neckline, by now. If so, go you!
 Okay now let’s lay out our pieces on our fabric. You can refer to the cutting layout in the instructions, or you can wing it! We prepare the cutting layouts as a guide for two standard widths of fabrics (44-45″ and 59-60″), based on the largest size. You might have a fabric with a width in between those, or you may be a smaller size, so feel free to improvise if you can fit your pieces into less fabric or if you’d like to lay them out in different way. Just made sure you follow the grainlines.
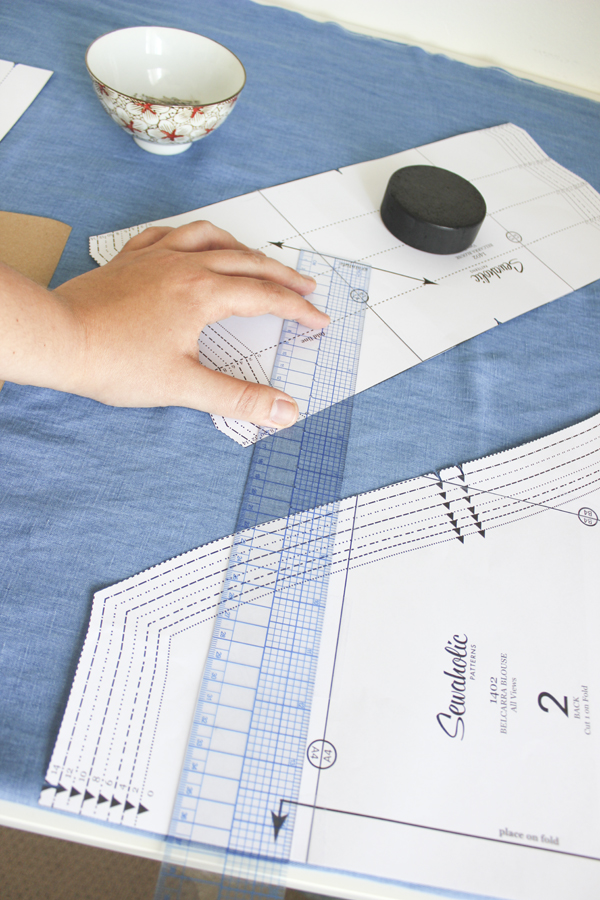 The most important thing is to make sure you check that the grainlines of your pattern pieces are lined up parallel to the selvedge (the edge) of the fabric, or the fold. I like to use a ruler and check a couple of points along the pattern piece grainline to make sure it’s equidistant from the edge. This takes a bit of extra time but it’s an important step. If your grainline is off, you might end up with a crooked side seam or a strangely hanging garment. It’s worth the extra effort!
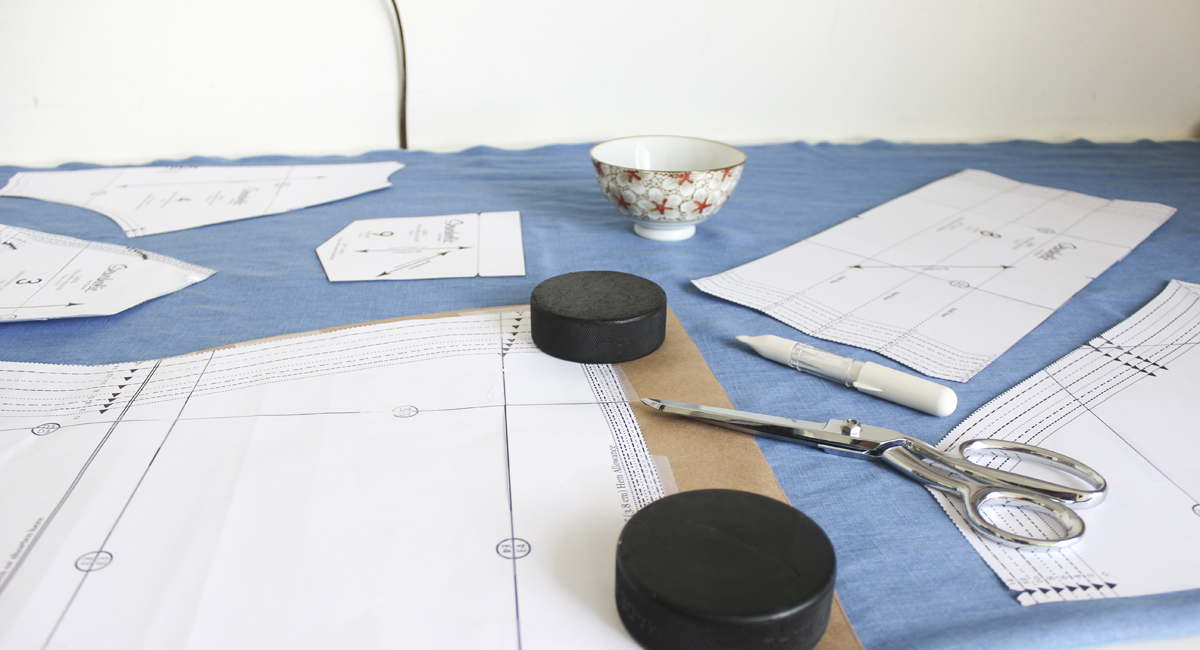 Once my pieces are laid out, I like to weigh them down, and then trace them with chalk. Then I remove my paper, put a couple of pins along the inside of my tracings so that my fabric stays in place, and then cut out my pieces! This is my favorite cutting method but there are tons of ways you can cut. Some people like to roughly cut out their tissue, lay it on the fabric, and then cut the fabric and tissue out in the correct size all in one step. This is a time-saver for sure! Or you might want to use weights and a rotary cutter. However you like to cut, go for it.
 Once your pieces are all cut, time to notch. You may already know this, but for anyone who does not: notches are just small snips or markings along the edge of the fabric. That’s what the triangles on the pattern piece are for, they indicate where you need to notch (or “snip”) your fabric. When we go on and sew, these notches will help us to line up edges properly, or they are points of reference so that we know what piece we are looking at (fact: double notches usually indicate a back piece). They are handy and important, so go ahead and notch each piece as indicated.
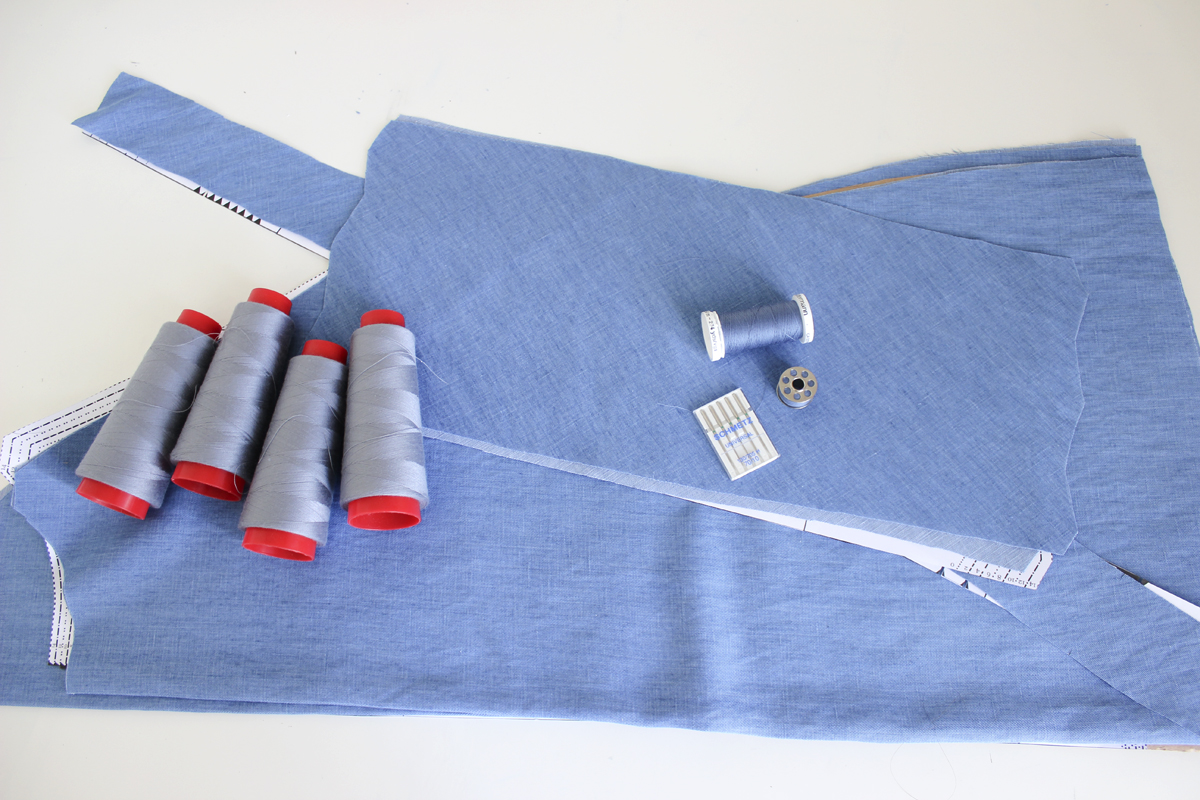 So our pieces are all cut out, and all we need is a couple of supplies. The Belcarra blouse doesn’t call for many supplies, just thread! If you are using an overlock or serger, you’ll need thread for that too of course. Now would also be the time to grab any extras you might be using. If you are sewing with lace, you may want to get some binding to finish your seams. If you want to add an applique or trim to your pocket, you can grab that too.
Now we’re all ready to go for our first sewing day. If you’re ready for it, make your way over to our second sew-along!
Thanks for doing the sew along! Would you explain why you prefer your cutting method? It sounds like more work than just cutting around the tissue.
Hi Sarah. It’s really a question of preference. If I was working with tissue I would probably just pin and cut it out. But since I am using thicker paper from the PDF pattern, I don’t like to use pins to cut because I find with the thickness of the paper the fabric will lift up from the pins and be less accurate.
Tried the chalk and weights cutting method as also advised in Alabama Chanin book for cutting out jersey. I imagined the chalk would pull and pucker the jersey, but it was smooth, right on the edge of the tissue paper pattern, and very easy to cut without pulling the fabric,having put pins in to hold the two layers together. Tailors chalk convert, thanks Caroline.
Yay! Glad to hear it :) No problem.
I hadn’t heard about the weights and chalk method before. I’ll definitely have to give it a try.
–C.B.
I usually do a forward shoulder adjustment for the sleeves but I haven`t done one for a 2-piece raglan sleeves yet. Any ideas would be most welcome.
Hi Maria, I would make a muslin first to be sure you really need this adjustment with this particular pattern. I’m not an expert with this fit adjustment but I would imagine that shaving off some of the shoulder from the front sleeve piece and adding it to the back sleeve piece would do the trick.
I’m so sad my pattern haven’t arrived yet, so I can’t join in. I ordered it a month ago :-(
Hi Anne, could you send us an e-mail at info[at]sewaholic[dot]net with your order #?
So sorry your pattern hasn’t arrived yet! Post can be a real bugger sometimes. I would be happy to sort this out for you.
I am very interested in the weights you use. Being a Canadian and living very close to Vancouver, I am guessing you are using hockey pucks!!!! My weights are what are handy, tuna cans.
I also like your choice of fabric, denim/rayon, very versatile.
Yes I am! Hockey pucks are my go-to pattern weights which I guess makes me VERY Canadian. They would great!
I will be waiting impatiently for June 3rd because I began sewing this last week and stalled out at the sleeve cuff/band. I can’t see why you had us leave 5/8 inch unsewn on the sleeve and cuff. I’m hoping there will be a photo that will make everything clear. In the mean time, I’m going to cut out a new one and try your tutorial for narrowing the neckline.
–C.B.
Nevermind. I decided to push ahead even if I couldn’t visualize what the instructions wanted me to do. And it worked! Love this pattern!
–C.B.
Hi Caroline, what type of chalk pencil (pen?) are you using. That looks a lot less cumbersome than what I’ve been using. Does it also come in darker colors for lighter fabrics?
Hi Serina! I use the Colver Pen Style Chaco Liner, here is a link to the amazon page:
http://www.amazon.com/Clover-Style-Chaco-Liner-White/dp/B0016ZZOEK
It’s my absolute favorite for marking and tracing on fabric, and it comes in many colors so works on both light and dark fabrics.