This post is to help you prepare to sew the Belcarra Blouse!
Choosing Your Size
Let’s take a look the charts for the Belcarra Blouse again. Our sizing is designed with the pear shaped lady in mind. That means smaller bust, narrower waist, and fuller hips and thighs. But that doesn’t mean the pattern won’t work for you if you are not a pear shape.
If you don’t fit exactly into one size, you’ll want to grade between sizes. The good news is, this is so simple with this pattern! All you have to do is adjust the side seams.
Example: Say you are a size 6 in the bust and waist, but a size 0 in the hips. Trace a size 6 for all of your pieces except the front and back bodice. When you get to the bodice pieces, all you have to do is trace between sizes below the waist. So trace the entire top part of the pieces in a size 6, but when you get to the waist, draw a line down to the size 0 at the hem. This method applies to almost any scenario, you can grade up or down between sizes at the bust, waist, and hip (or hem in this case, because the hem falls higher than your hips).
If your bust is on the fuller side, then you may want to consider doing a full bust adjustment. Which brings me to my next topic…
Full Bust Adjustment (FBA)
The dartless bodice of the Belcarra blouse could make it tricky to fit if you have a larger bust. Fear not! A full bust adjustment is a great option for you.
Sewaholic patterns are designed for a B cup size. Keep in mind that your cup size in pattern making may be different from your bra cup size. To figure out if you may need to do a FBA, start by measuring across your bust. Then measure your high bust (for this, measure above your bust, running the tape measure just under your arms). If the difference between these two is more than 2” (5 cm), then you are larger than a B cup, and you might want to do a FBA.
For this pattern, choose your size based on your waist and hip measurement. Next you want to figure out how much you need to add to the bust. There are a couple of ways you can do this:
- Trace your chosen size. With this method work with tissue or muslin. Pin your side seams together, and then drape the pieces over your body, lining up the side seams with the side of your torso. Measure the space between the center of your chest, and the edge of the piece. This measurement is how much you will want to add to the bust on your pattern piece.
- Or, look at the measurement that corresponds with the size you cut. Calculate the difference between that measurement, and your actual bust measurement. Whatever this amount is, divide it in two to figure out what you need to add to the bust on your pattern piece. (Note: we are dividing it in two because we are adjusting our pattern piece for one side of us, but when we cut on fold, this adjustment is mirrored and therefore doubled)
For this example, I have traced a size 14, and I am adding 1″ (2.5cm) to the pattern piece, which will add 2″ (5cm) to the total bust measurement.
Okay! So now that we know how much we need to add, let’s get to the pattern adjustment part.
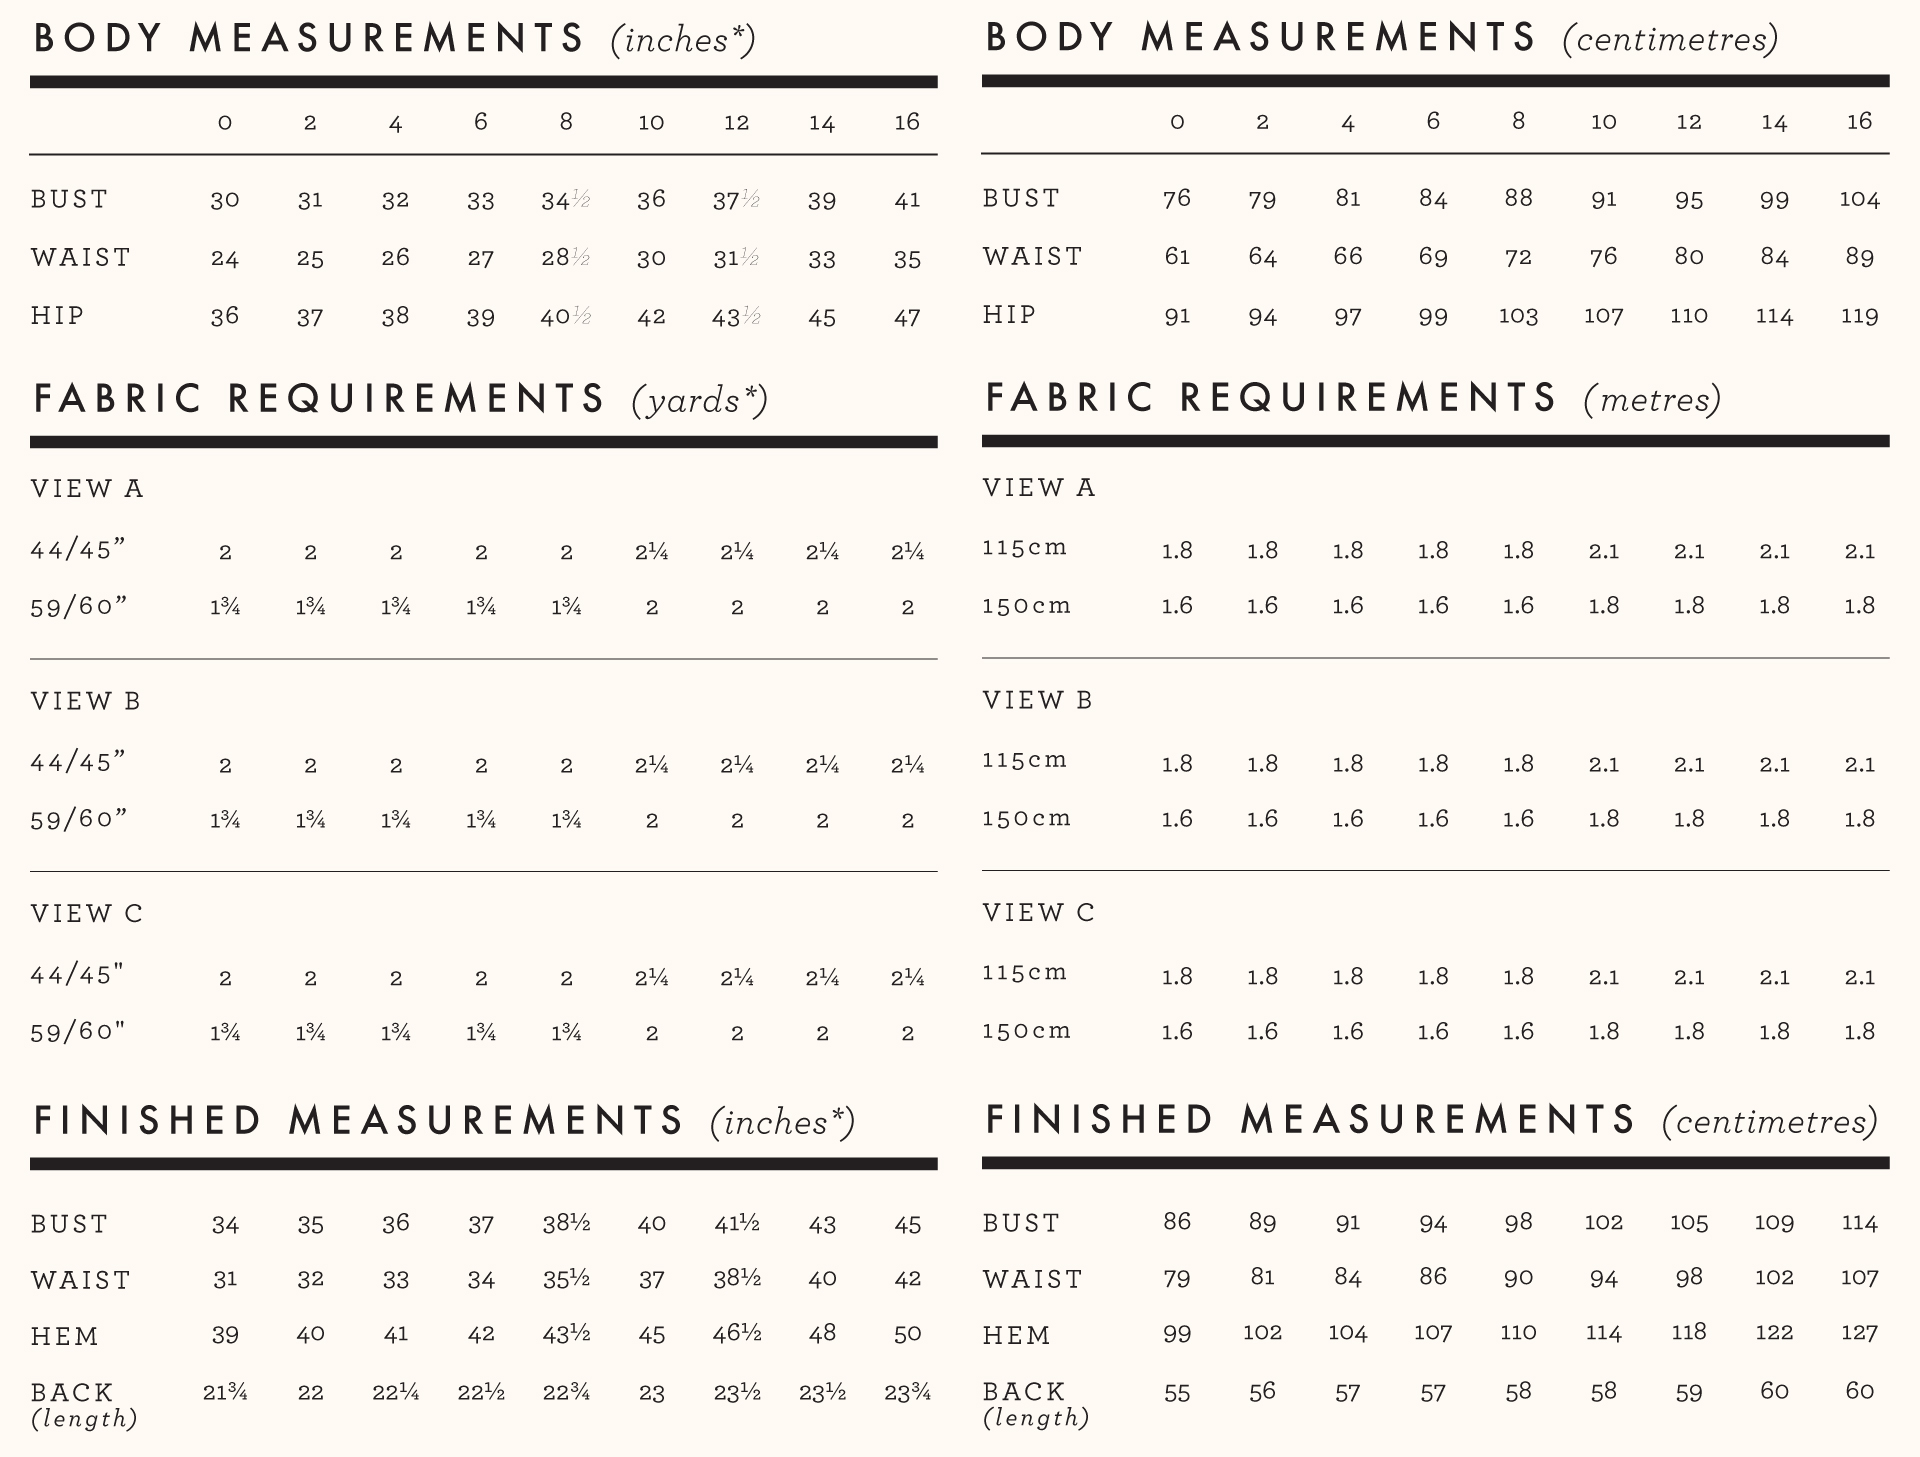
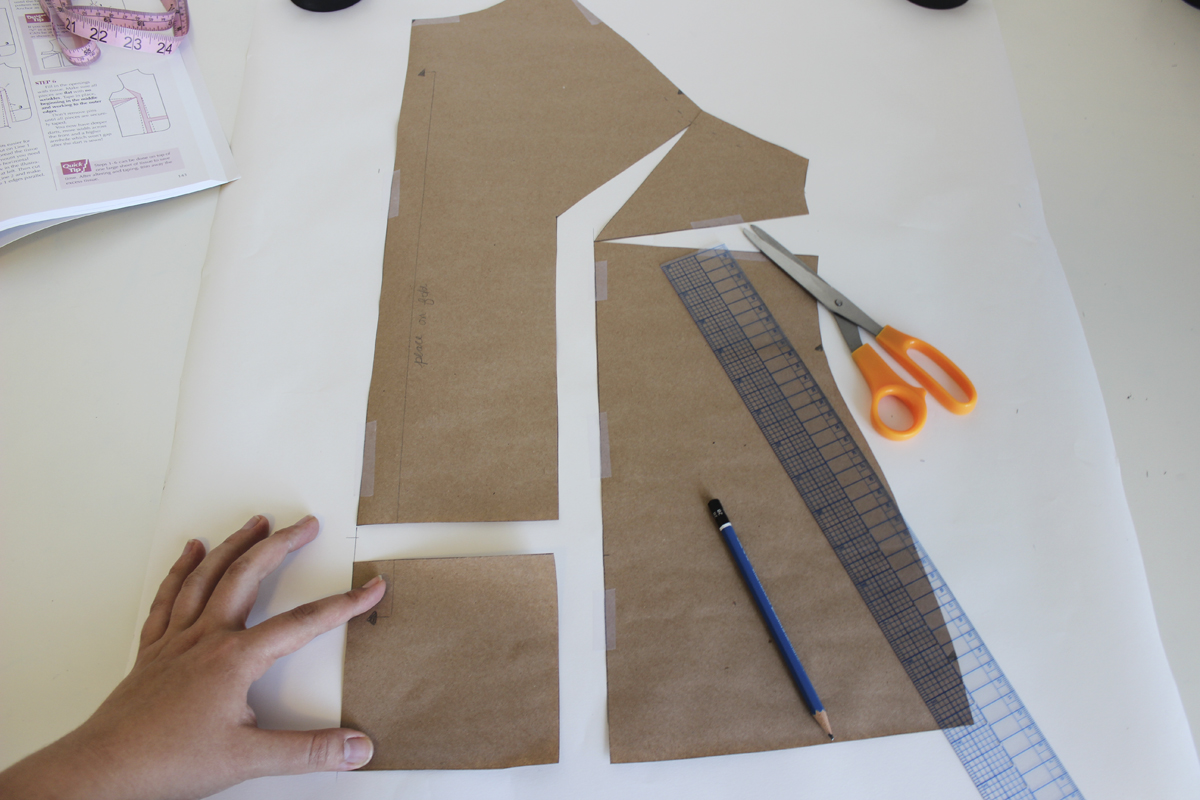
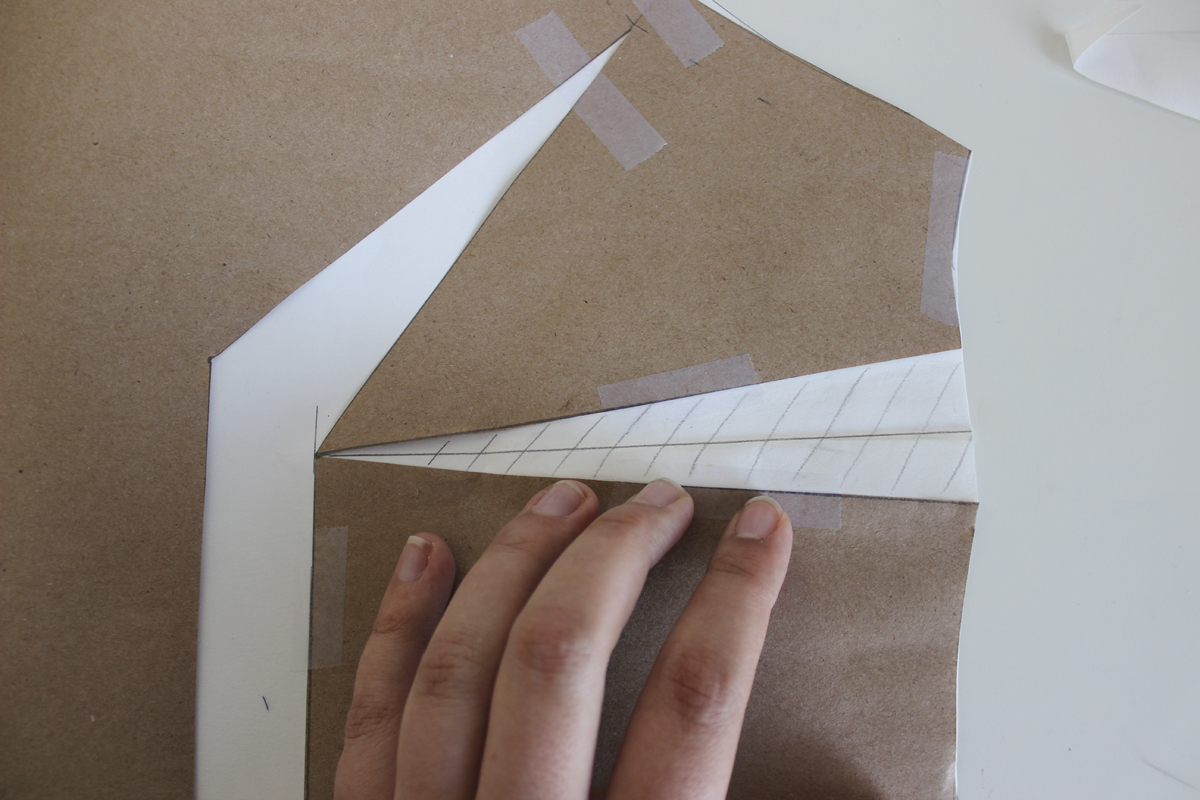
Begin by tracing your front bodice pattern piece, as shown above. I am using craft paper for the traced piece and white paper for the adjustments, so it’s easy for you to see.
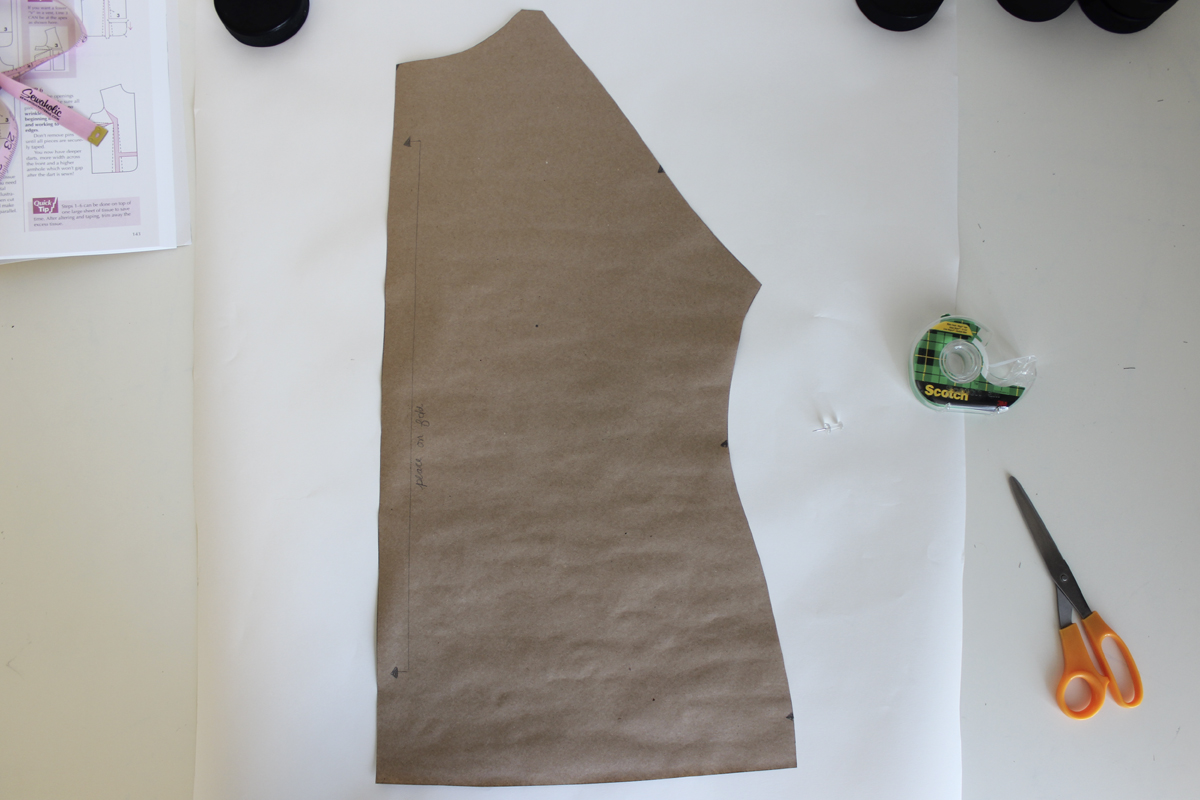
Take your traced piece and hold it over your body with the center front lined up with the middle of your body. Mark your bust apex point.

Draw your lines. You want one line extending down from the apex, parallel to the grainline. Another one extending from the apex to the side seam, where you want your dart to land. Another line extending from the apex into the armhole, about 1/3 of the way up. There is a 4th line that you will need to add near the bottom left side of the bodice – I forgot to add it here but you will see it below. Not important yet!
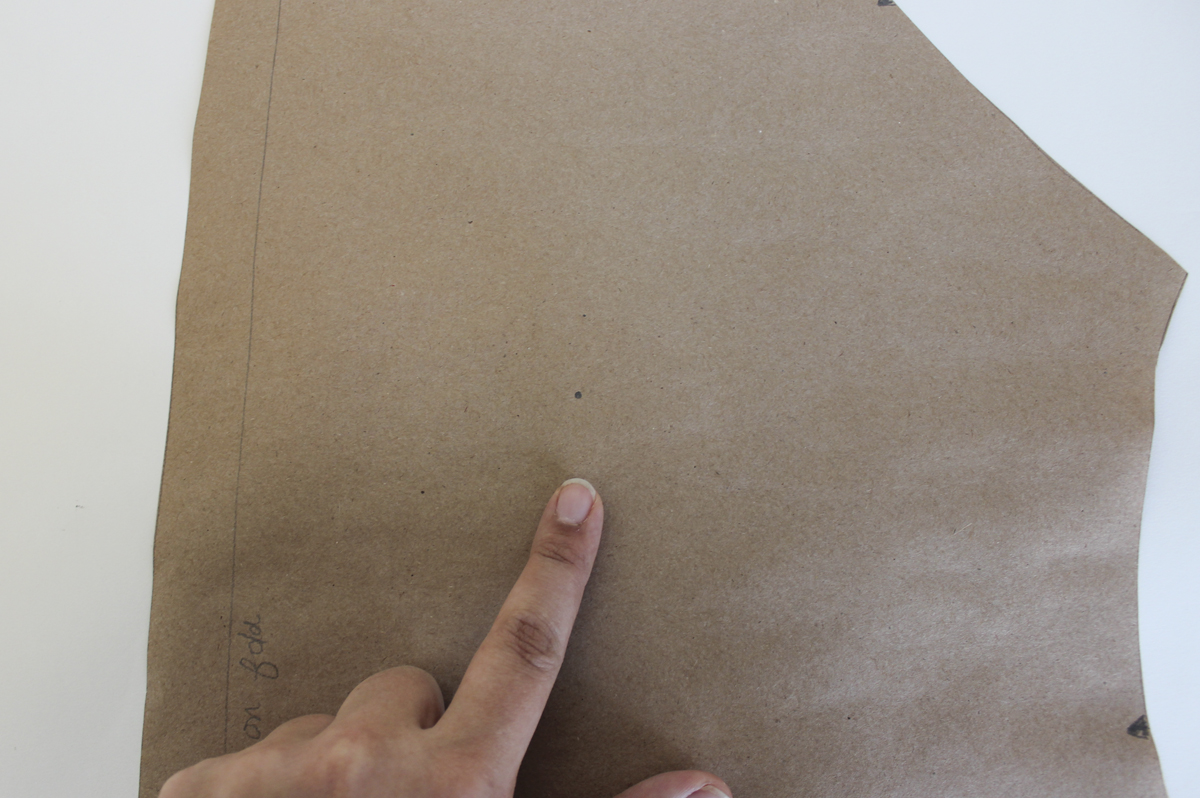
Slash along the lines you just marked. You can now tape top left piece in place. Mark your opening as shown above. I am marking a parallel line 1″ away from my cut line, because I calculated that I need to add 1″ to the bust on my pattern piece.
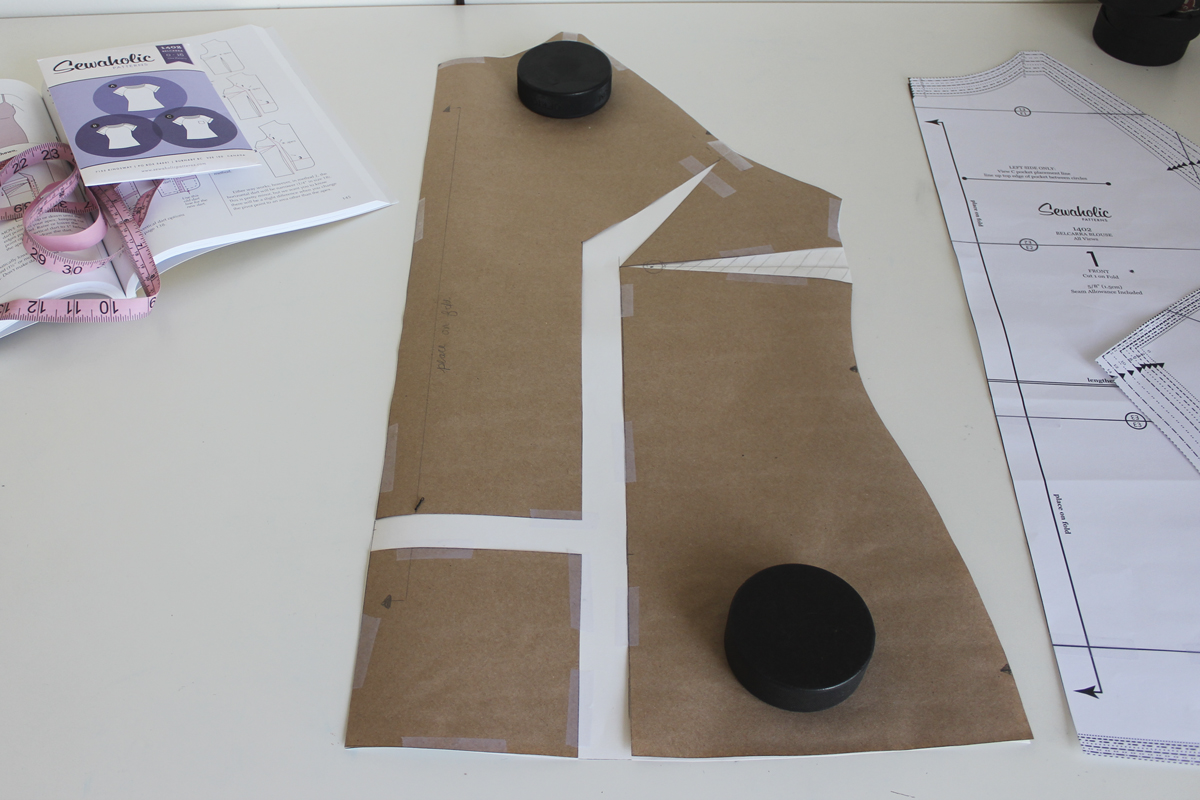
Now we will pivot and tape down our pieces as shown.
Top right section: the point of the piece lines up with the line we just drew, pivot so that the armhole is still intact.
Bottom right section: line up the left edge with the parallel line we drew.
Bottom left section: lower this so that it lines up with the hemline on the bottom right section.
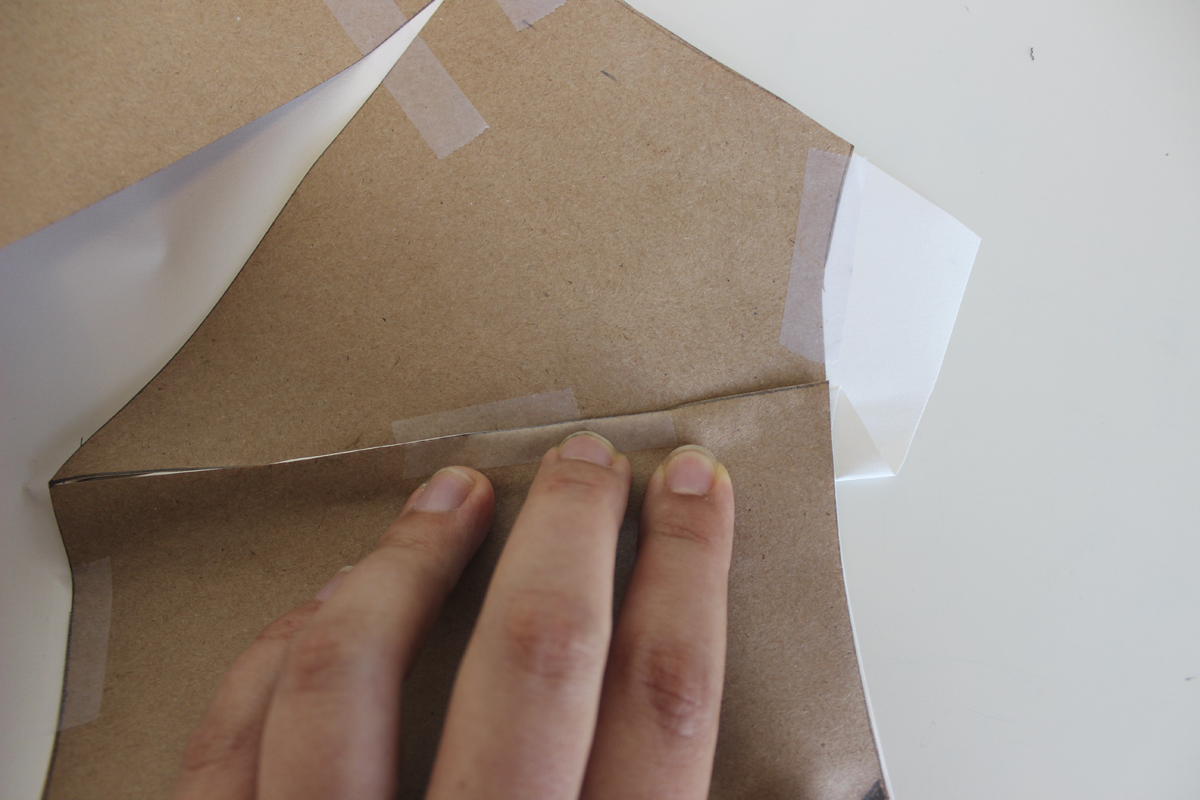
Now you can see, we’ve created a dart!
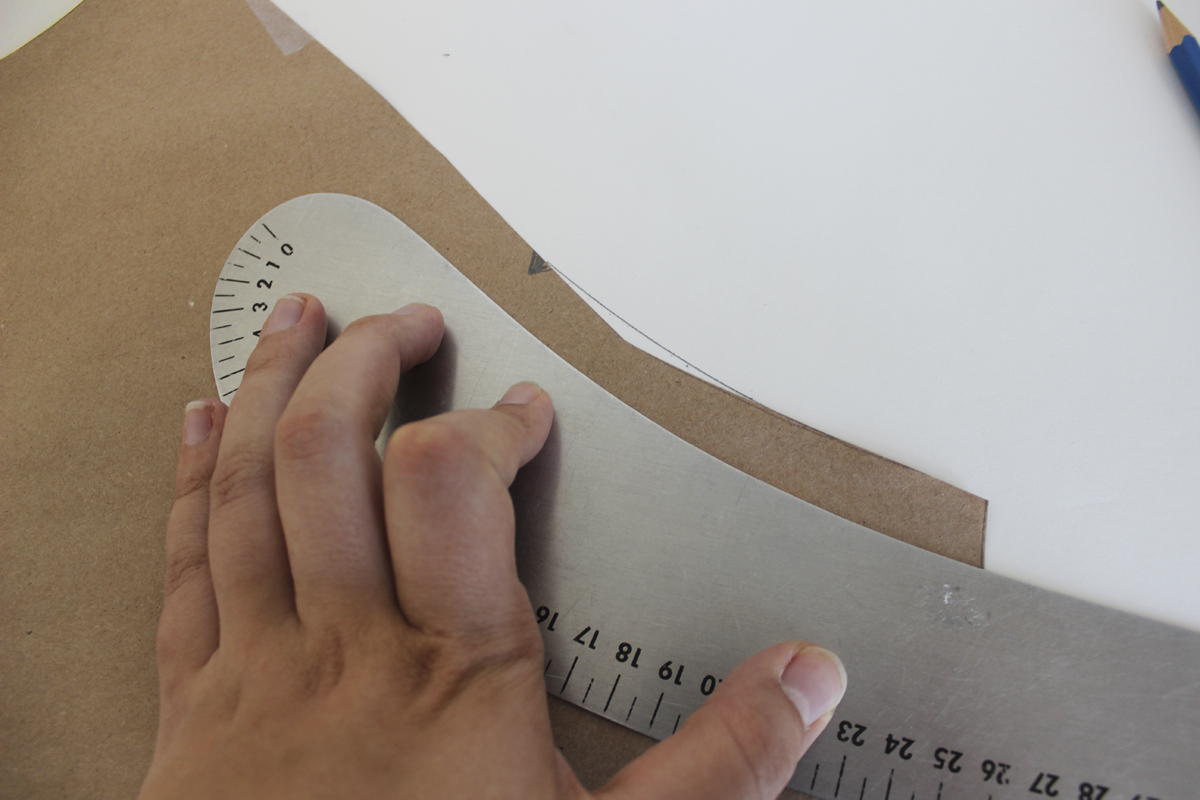
Now use a french curve to smooth out the armhole edge.
Trim off all the excess paper. I like to fold my dart when I cut the dart area so that the dart head has a little “hat”.
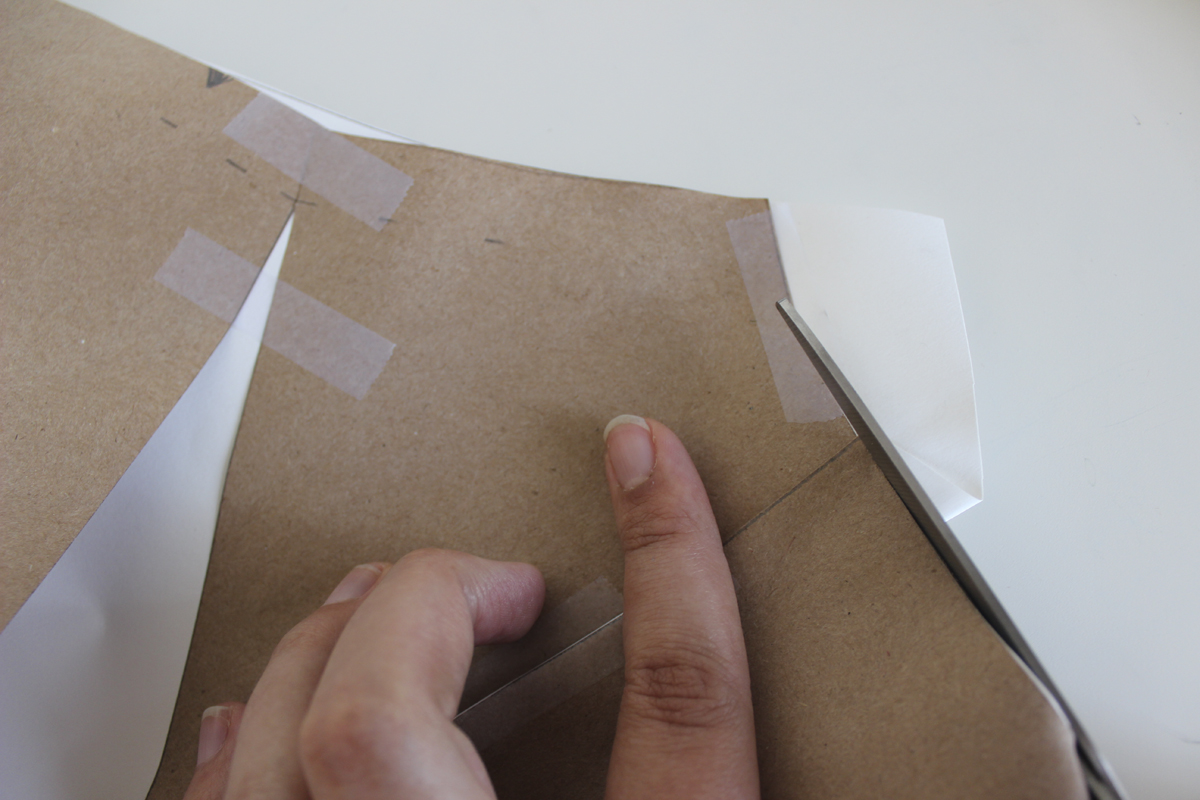
Like so…
Voila! The hat is very small in this case, but it’s there! I marked the dart so you can clearly see where it is.
Now our new piece is complete! You may want to raise your dart point, but it’s not necessary just yet. I’ve been referring to Palmer and Pletsch’s book Fit for Real People, and they actually suggest that you leave it where it is, and adjust later on if necessary after your first muslin.
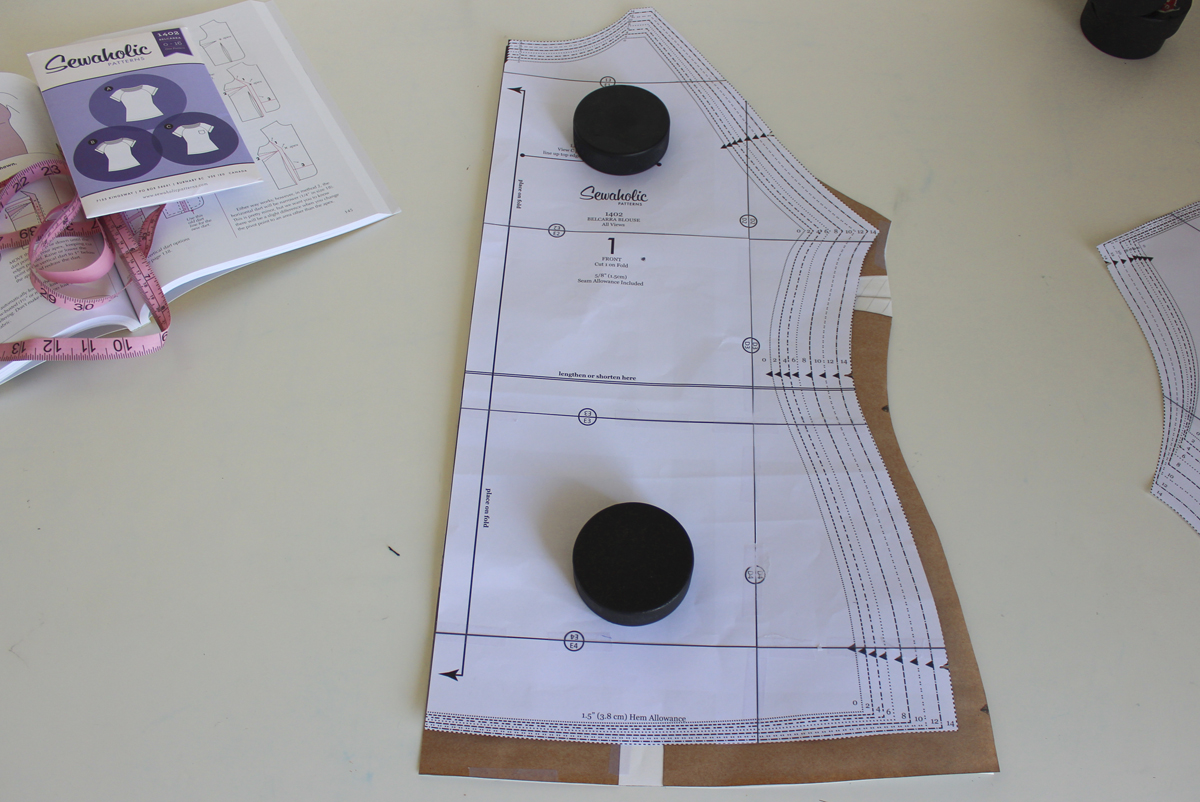
Here is a shot of the original pattern piece on top of the FBA pattern piece. You can see, there is more room at the side seam, and underarm, and it’s longer. Makes sense right? A larger bust needs extra room in these areas.
As with any and all pattern adjustments, I highly recommend you make a muslin/test garment. This way you can pinpoint any fit issues or small adjustments that need to be made, before cutting into your final fabric.
I’m hoping this will help you to get prepared to sew a beautiful Belcarra Blouse that fits you just right. If you have any questions or concerns, be sure to leave me a comment.
Okay, this isn’t really in reply to today’s post, but I figured I’d take the opportunity, when you’re already talking about fit, to ask about my main issue with the Belcarra. What do I do if the shoulder seam is … not quite on my shoulder line? I’m used to redrawing shoulder seams on pretty much all bodices because of my forward-thrust shoulders—but on the Belcarra, it isn’t quite as easy as that because the shoulder seams are shaped! Which is the main thing that drew me to the pattern in the first place, and I would love to have a bodice like that that fits me—but I don’t know how to get there. On me, the shoulder seam sits too far back on the shoulder and curves too much toward the front on the arm. Does that make any sense? If it doesn’t, I could take a picture for you.
So, the question is: How does one properly correct the shoulder seam line on the Belcarra blouse without messing up the lovely shoulder shaping? It would be awesome if one of you ladies could help me (and, potentially, other people with non-standard shoulder shapes) out with this!
Hi Jana! I think the best way to go about this would be to trim off some of the shoulder portion of your front sleeve piece, and add that amount to your back sleeve piece.
To figure out how much to add and in what shape (since you are also correcting the seam curving towards the front), you can wear your version that is siting too far back, and then trace in chalk exactly where you want the shoulder seam to lay. You can measure all along this chalk line how far it is from the seam, and use this as a guide to know how much to add/remove from the back and front sleeve pattern.
Hope this helps!
I am going to make a muslin this weekend and then start on my “real” Balcarra next week. Thanks for the quick tutorial.
I read this a couple of times but still not sure what you mean by the “hat”
Hi Mariann! The dart hat is just the little angled part of the dart that sticks out from the side seam on the flat pattern. We fold the dart to trim the side seam of the paper so that when we sew the dart on our fabric, the raw edge end of the dart lines up with the side seam. Hope this makes sense!
Got it. Makes sense. Thanks.
Thanks for the great tutorial Caroline! Even though I teach beginner sewing lessons I struggle with fitting! This tutorial is very clear and concise, much appreciated!
I do have a question, however. You said to choose this pattern by your waist and hip measurement. I noticed in the last picture when you overlaid the original pattern piece that the 1″ that you added on in the bust has carried through to the hips but the pattern should fit your waist and hips properly already, right?
Would you taper the pattern back to the original size for the waist and hips on the side seams?
Thanks,
Carley
Hi Carley! Great question. I’m leaving the extra room in this case just because I fear tapering in at the waist and hips might create some pull lines. The style of this blouse lends itself well to a little bit of extra ease. If you’d prefer to taper back to your original size, that is totally fine. There isn’t really a right or wrong in this case, just whatever you prefer. :)
I understood the oppoosite – that you choose this pattern by your bust measurement… I think it’s the Lonsdale that specifies using the skirt pattern by the waist and hips….
i have a question re the FBA. If you measure your bust and your high bust, and find out you need an FBA, which size do you choose? The high bust?
Thanks!
Me again! I’ll also just mention that if this was for a bodice that was joining up to a skirt, I would definitely remove the extra at the side seam. Example, the tutorial we did for the Saltspring dress: http://sewaholic.net/saltspring-sew-along-fba-tutorial-tips/
But in this case, since the top is on the more relaxed side and is not joining up to anything, I decided to skip that step. Hope this makes sense!
Help! I am not finding a BACK SLEEVE (All Views) for sizes above 8.
Thank you
Hi Carol! On the tissue pattern, it is below piece #7 Front Sleeve B and piece #9 Pocket.
I really should know the answer to this, but I don’t. Do you actually sew the dart in the shirt? Or is it just adjusting the pattern to give more ease? The original design is to not have any darts, if I’m correct. So would doing a fba add them to the finished product? Thx:)
Hi Ruth! That’s a totally valid question. Yes, we are adding a dart to the pattern and you will have to sew the dart. Since this is a simple style, our only option is to add a dart to get the right fit for a fuller bust :)
How would you do a small bust adjustment? The difference between my high bust and bust is just 1″ so an A cup and I usually have to make some sort of adjustment, just not sure on this raglan style how it works.
Hi Kerry, I have less than an A cup and it isn’t an issue for the Belcarra. It’s a loose style anyway and it looks fine on me. Make a quick toile to see whether you actually want to change anything before you look into how to do it? (:
Thankyou Jana!
Hi Kerry, in case you do have to do a small bust adjustment (which as Jana says, you likely wont need to): It’s the same concept but instead of spreading the pattern, you are slashing the same lines but instead overlapping the pieces. There is a great example of this on Christine Haynes’ blog, in case you want to visualize it!
http://christinehaynes.blogspot.ca/2013/11/emery-dress-sew-along-how-to-do-small.html
thankyou so much!
When Tasia asked a while ago for a wish list, mine was FBA tutorials specific to the pattern. I wasn’t going to make a Belcarra but now you’ve kind of made it impossible for me not to. :) I’ve downloaded the PDF and hope to get started this week.
Yay! So glad to hear it Melanie :)
I don’t have a huge amount of experience in adjusting patterns but one thing I have found is that the method of comparing high bust and full bust measurements isn’t always accurate in indicating whether you need a FBA or not. On me, my high and full bust measurements are only 1″ different, but I wear a C/D cup bra size and I always get a better fit with a FBA (the Colette ‘Laurel’ pattern, drafted for a C cup, fits me well, but most patterns are drafted like yours for a B cup and I have to adjust those). Just wanted to let people know they might benefit from a FBA even if the measurement comparison doesn’t say so!
Thanks Nina. That’s a good point, comparing high bust and bust to figure out if you need a FBA is not a hard and fast rule. Thanks for sharing your insight! I wish there was an easy way to figure these things out :) I think the best bet it to always make a muslin.
Hi Caroline, For me the difference between high bust and full bust is 2″. The bra cups which fits me are DD or E. Should I do a FBA?
I just want to add a note for anyone else who isn’t pear-shaped choosing a size. You may not want to grade down at the waist, especially if you have broad shoulders like me, because you might not be able to get it on. Normally with Sewaholic patterns I cut a size 6 on top and grade to a 0 at the waist and hips (I’m 33″/24.5″/34.5″), but with the Belcarra I cut a straight 6 for my first version/wearable muslin, and I don’t think I can go down any more in the waist and still get it over my shoulders. I will grade down at the hips for my next version, though. I hope this helps any other non-pear shapes out there!
Thanks so much for your input Chantal!
That’s a really good point! I have wide shoulders too, but a narrow bust, straight waist en narrow hips, and made a 4 but graded only to 8 at the waist, and back to a 4 at the hips. Still have to make a muslin and see if it fits though!
Hi Tasia,
Could you please tell me the name of the book pictured in this Belcarra Blouse-FBA Tutorial. Also, where would I get those great circular weights?Thanks in advance
Hi Natasha, the book is Fit for Real People, here’s the Amazon link:
http://www.amazon.ca/Fit-Real-People-Clothes-Pattern/dp/0935278656
The patter weights are actually hockey pucks! I love them :)
Nice tutorial! I will not need the FBA but it is a relief that the pattern can be adjusted for non-pear shaped women like me. I cut a 4 but graded the waist to 8 and then back to a 4 at the hem, to make it fit my straight body. Muslin is hopefully ready tonight!
Hey Caroline, when trying this tonight I found that it’s difficult to determine the bust point with the raglan sleeve. It’s really tricky judging where the neckline should sit.
My side dart was way too low. If I raised it much higher it would be cutting into the bottom of the sleeve and there was a lot of extra fabric under the arm (which leads me to think I cut too large a size). I cut a 14, I’m 38″ high bust, 41.5″ bust and 32″ waist… Added 3/4″ fba. I cut the sleeve fronts and sewed to the bodice and it looks like a potato sack :S
Any ideas?
Hi Melanie! You could try to angle your dart so that the dart apex point is higher up, but the end of the dart is still at the underarm. There is also a lot of shaping at the side seam so once you sew your shoulder and side seams the blouse will really take shape. And if you are finding the blouse too loose you may want to go down a size. All of these things should help but if you are still running into issues, take a couple of photos and e-mail them to me at info[at]sewaholic[dot]net and I’ll be happy to troubleshoot with you :)
Hi Caroline,
I had this exact same problem when sewing my Belcarra. I keep seeing that it is possible to rotate the extra fullness from the bust dart to the side seam or even a vertical dart, but the internet keeps pointing me to a defunct wedside. Fit for Real People is also not clear what to do in this case. Would this be something you know how to do?
Thanks!
Hi Maggie! I think you are thinking of spinning the dart? There is a pretty good example of that here that may help you to visualize it.
http://www.brensan.com/Garment/Techniques/BustDarts/BustDarts_Spin.html
You can use this method to transfer fullness just about anywhere. If you have the apex in the right spot and you want the dart to be transferred to a different spot, I find this is the easiest way.
Hi there,
I’m from Australia and trying to figure out what size to cut. I’m an Australian 12-14 and usually a US 10 (when I buy things online). When I do my measurements for the Belcarra, I end up with a 16 for bust and hips and off the chart for my waist!
I have quite wide shoulders and hips, but would not say I have a blocky shape – I still have quite a waist.
Is the Belcarra sizing in line with usual US sizing? Is there such a thing as usual sizing?
Any help with figure out what size to cut would be very much appreciated!
Hi Sarah – I’m so sorry that I missed this comment! If you are still wondering which size to choose, I can try to help. If I am too late, I apologize profusely!
If your waist measurement is larger than our size 16, check the “finished garment measurements” and see if that waist measurement might fit. There is quite a bit of ease in this pattern so it may fit fine without any adjustments. Otherwise, you could just add extra ease at the side seams just by smoothing out the curve to a more straight line.
Hope this helps! And I’m sorry again for the delay :)
Hello – Thank you for this tutorial- I love the pattern but I have a size D cup. I made a shirt without a FBA and it has excess gaping at the armpit/sleeve line. I tried the suggestions above for my second shirt and unfortunately the darts are comically under my bust by several inches.
I need to put the darts in the shoulder seam, not the lower shirt. Do you have any advice for that?
Thank you!!
Hi Alicia, Hm, I’m not positive but if you wanted to e-mail us a photo at info[at]sewaholic[dot]net I could try to help! I am wondering if perhaps you should be tracing a smaller size? Try choosing your size by your waist/hip measurements (if you haven’t already).
If you have already done that then shoot me an e-mail and I can try to work through this with you :)
Thanks!
Excellent tutorial and cute blouse.