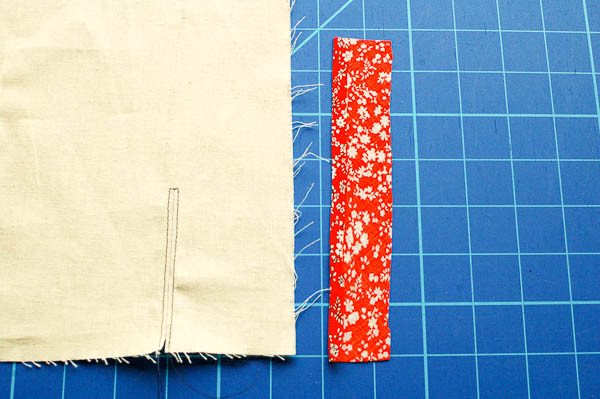
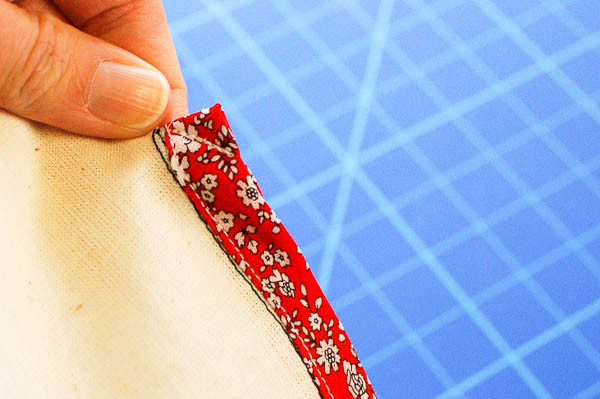
Another placket demonstration! Today, it’s the placket on the Oakridge Blouse. This type of placket is called a continuous bound placket, since it’s made from one piece of fabric and it’s bound around the opening. I sewed up new demo samples just for this post, so it would be easy to see. We’re sewing a bright red printed placket on a muslin sleeve. I hope this makes it easier to follow!
If you’re looking for a tutorial on the Granville Shirt placket instead, here’s a link to last week’s post: Sewing A House (or Tower) Tailored Shirt Placket
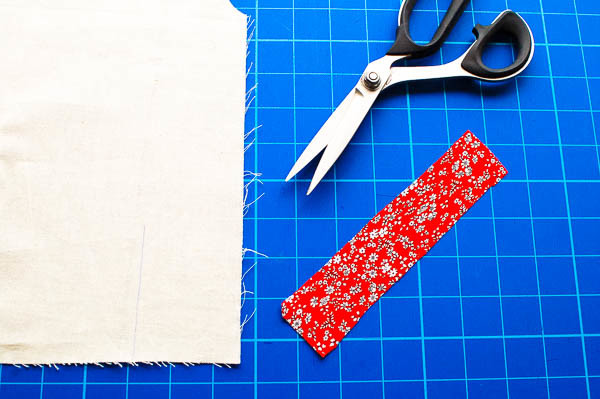
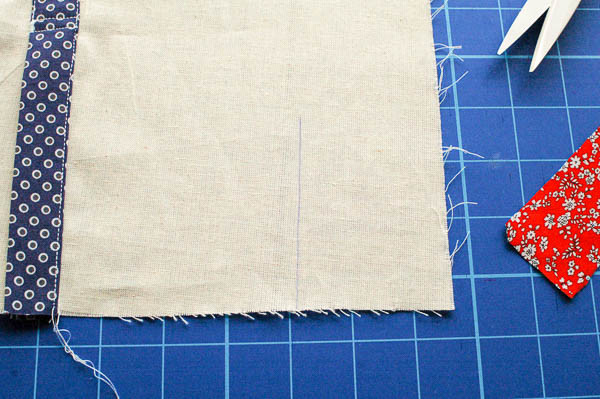
You’ll need your sleeve and placket, and you’ll need the placket placement line marked clearly on the RIGHT side of your sleeve.
Yes, I’m using the same sleeve from last week’s placket demo for today’s demo as well! So now I have this cute little sleeve sample with two different plackets on it. You can see the difference here:
One’s more subtle, one’s definitely more visible. One is good if you want your fabric to show, one is good if you want the placket to be barely noticeable. I find the tailored ‘house’ placket more masculine and more casual. I like the continuous bound placket for dressy garments and softer fabrics.
So to make the continuous bound placket, we’ll stitch around the placket line before slashing it. Sew about 1/8″ or less (2-3mm) around the marked placket line, as shown in the photo below.

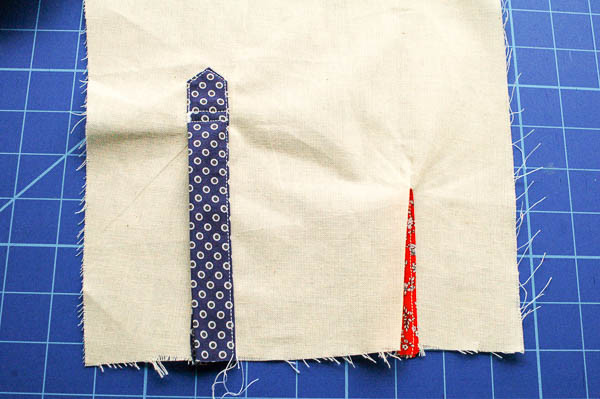
Then slash along the line.
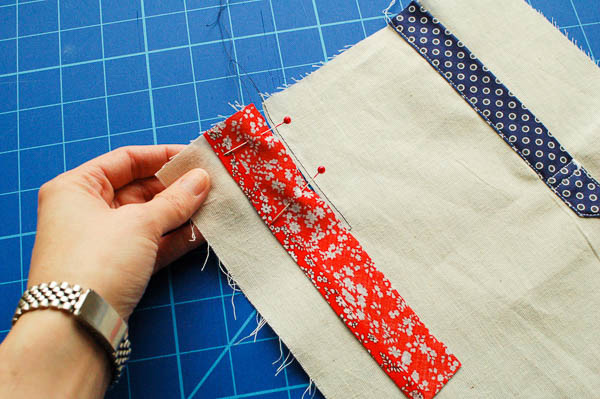
Press under 1/4″ (6mm) on one long edge of the placket piece. A little hard to see on the red-on-red but you get the idea.
Now pin the unpressed edge to the slashed opening, and sew with a 1/4″ (6mm) seam allowance. Sometimes I find it easier to pin only the one side, sew it, and then align the other side under the machine and sew. It’s up to you.
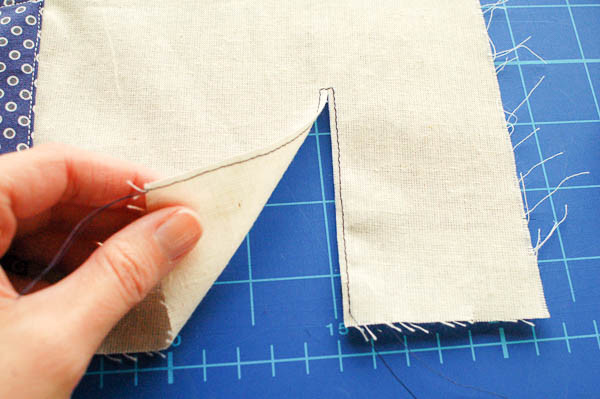
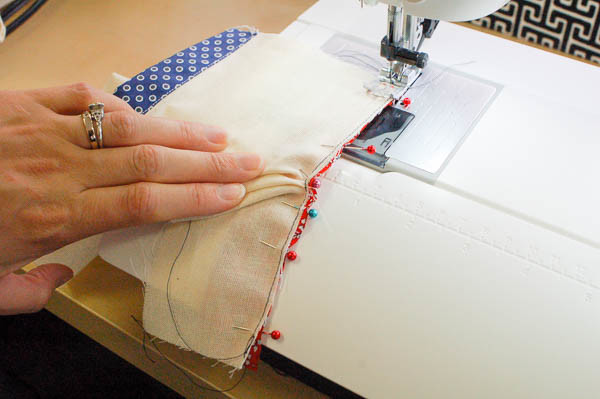
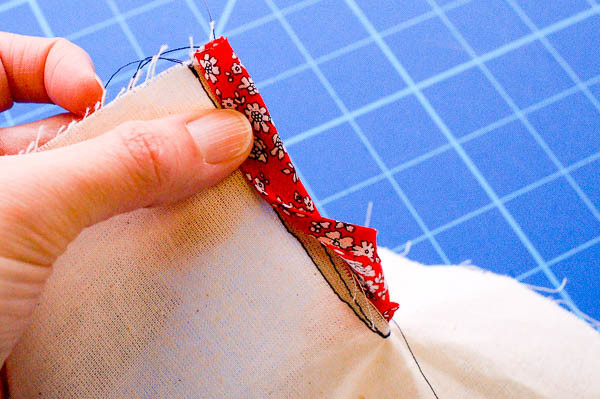
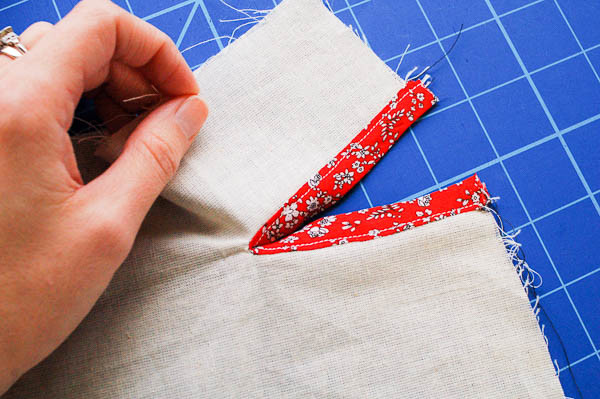
When you sew, sew with the slashed side up, that way you can see if it’s catching in the middle. At the middle, the slashed sleeve won’t meet the raw edge of the placket, that’s all right. It will look like mine does in the photo below.
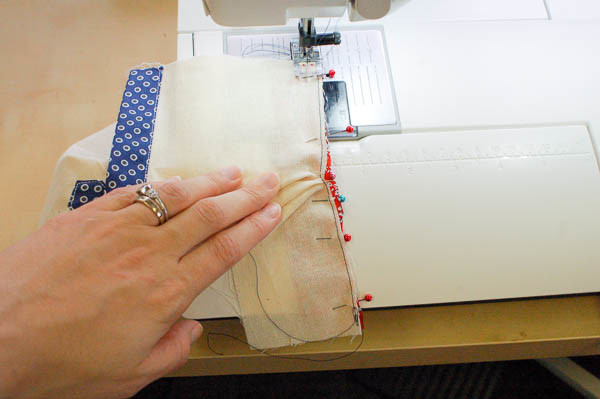
Another angle. You’ll end up with fullness in the middle since that’s your whole sleeve bunched up in there while the slash is spread open. Just make sure not to catch any of it, or you’ll end up with puckers.
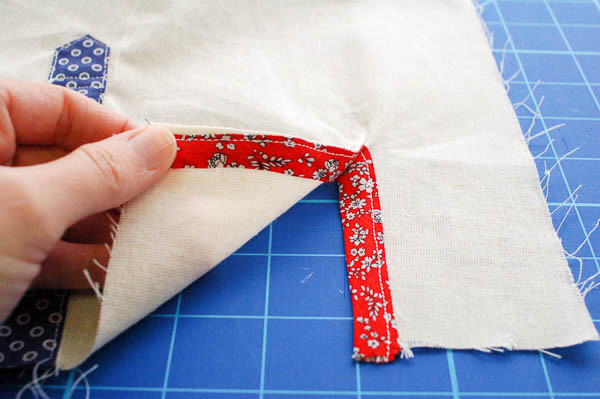
Press the seam towards the placket. Wrap the folded edge of the placket around the seam, and line up the fold with the stitching line.
Yours is going to look way better than mine since I’m using dark thread for the demo. Most likely, your thread colour blends well with your sleeve and it won’t be quite as visible.
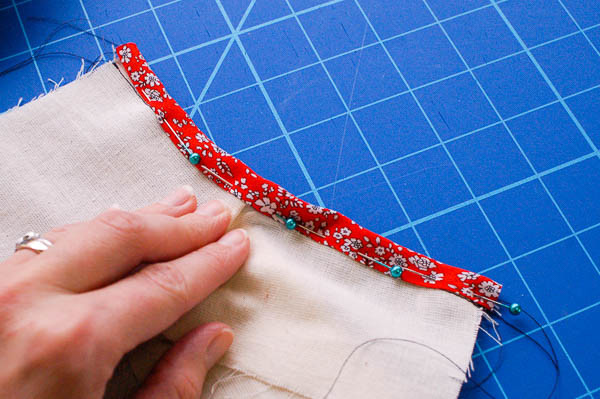
Pin this edge in place, in preparation for edgestitching. Then edgestitch it! (I switched to white thread here so it looked just a little better than black topstitching.)
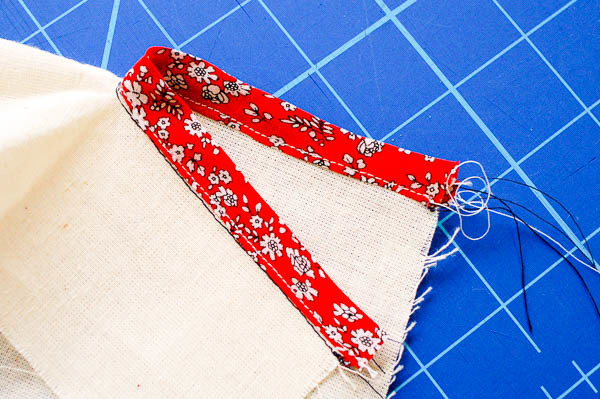
Last step! We want to keep our continuous bound placket folding in the right spot, so we’ll sew across the top corner to finish it off. Fold your placket so the raw edges of the sleeve are in line with each other.
Now sew diagonally across the top corner of the placket.
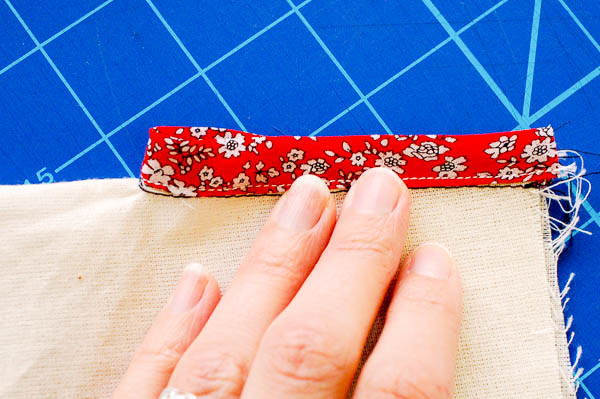
And we’re done!
Another look at the continuous bound placket, from a different angle.
Pretty nice, eh? Even with contrast thread and muslin fabric.
ps. Check out all posts on shirtmaking here!
Thank you! Much appreciated, looking forward to making a white lawn Oakridge for the summer.
Very timely post, I’ll be sewing my first oakridge next week!
I really struggled with this on my Oakridge, to the point where I haven’t finished it yet. It was dealing with the fullness at the mid-point of the placket opening that did for me, I couldn’t keep it aligned or avoid catching the sleeve. You make it look so easy in your walkthrough, do you have any more tips?
I’d say the biggest tip is to arrange the fullness of the sleeve out of the way of the placket stitching. If you look at the photos taken at the machine, where my hand is holding the fullness, it’s all bunched up in the middle and neatly away from the stitching line. Work with the sleeve side up, so you don’t catch any underneath your stitching. And know that the slashed sleeve opening doesn’t meet the placket edge in the middle, that’s the white part in the photo, it doesn’t reach the red placket edge. If you tried to make them meet, then you’d end up sewing more sleeve into the tip of the placket and cause puckers.
Hope this helps! If you have leftover fabric you could cut a test placket to get familiar with the construction first so it won’t affect the real shirt.
You might like this tutorial too: http://basicsewingtips.blogspot.ca/2009/10/continuous-bound-placket.html she sews a 1/4″ for the staystitching, so you can use that as the guide for your placket stitching. That’s actually a pretty good idea! I looked for other tutorials that might provide more tips, and thought the 1/4″ V-shaped stitching was a good one.
Thank you!
I have a men’s shirt pattern that I am trying for my husband for the first time, but I don’t like the way the sleeve cuffs are done on this pattern and I’m thinking of trying something different. This method looks quite easy to test out my drafting skills. Thank you!
Is this the same method as in the Alma blouse? I had some issues interpreting the instructions for that one. If it’s the same one, then I’ll have this tutorial if I make a long-sleeved Alma again.
Yes, it’s the same placket as on the Alma blouse.
Hi Tasia and gang,
Does anyone know of any good online resources for kids learning to sew? My 8 year old cousin is really interested and we want to encourage her, but lessons here don’t start until age 12. She just got a machine. Before that she was using gluesticks to make purses and things out of her old clothes! Any suggestions would help! :)
I have no idea! Sewing for kids is not my area of expertise. :) But I would imagine that the fundamentals of sewing are the same for any age, it’s just the projects that are different and possibly the approach. Locally, there are places that offer kids classes starting at age 7, but that won’t help unless your cousin lives in the Vancouver area. My friend is teaching her daughter to sew and she’s five, and I learned around that age as well. I learned from my mother, practicing by sewing doll clothes. Doll clothes are nice because they’re small projects and usually don’t have zippers or buttons, but snaps and velcro, and doll clothes don’t usually need seam finishing.
If I come across anything online that looks useful, I’ll let you know.
Thanks Tasia!
You’re a hero. Thanks for a picture-by-picture refresher. I couldn’t remember how to do this for the life of me.