Today’s post is all about how to insert elastic into casings, with tips for making it quicker and easier!
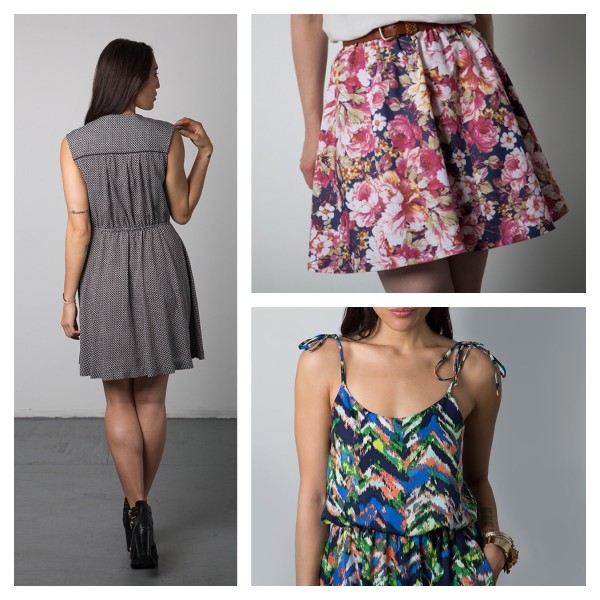
One of the first projects you might make as you learn to sew is elastic waist shorts or an elastic waist skirt, like our Rae Skirt. Several of our patterns, including the new Nicola and Harwood dresses, the Saltspring Dress, Tofino Pants, and the Yaletown Dress and Blouse also feature elastic in casings.
Elastic waistlines are an easy way to cinch in the waist of a garment, while still allowing room for movement and slight fluctuations in waist size. Using a casing is a good way to get the fit you want, rather than sewing the elastic directly to the garment. You can try on the garment while sewing and adjust the elastic to fit you exactly!
We’ve had a few questions on how to sew elastic into casings without getting it stuck. So today, here are some tips on making this step easier!
Tips for sewing elastic casings
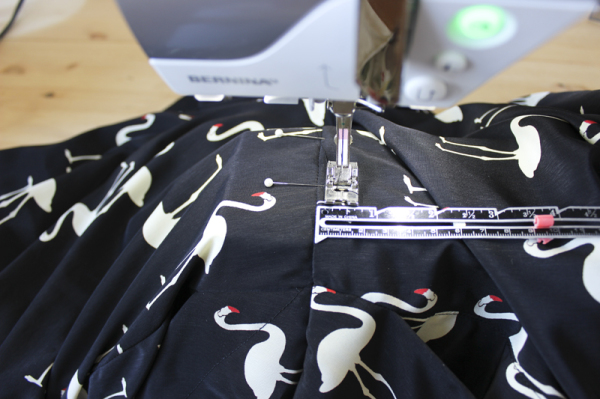
Sew the casing stitching accurately. This is the best thing you can do to make it easier for yourself later on. Often you’ll be topstitching on the right side of the garment, where it’s hard to see the stitch guide on your sewing machine. If that’s the case, stop periodically and use a seam gauge or tape measure to ensure you’re on track.
If the casing is on the edge of your fabric, then the accuracy begins with pressing, not sewing. Make sure you’re folding the edge under evenly, then when you edgestitch, your casing will be even.

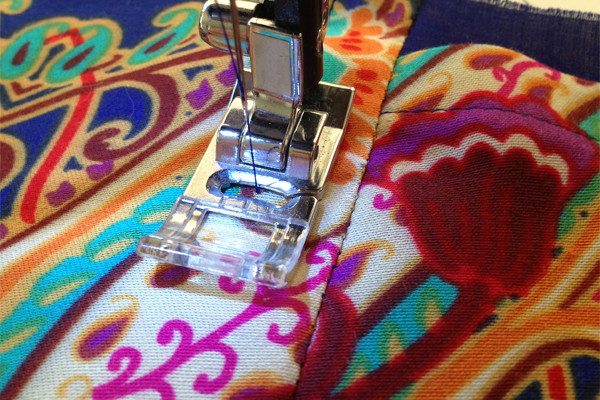
If you’re edgestitching a fold, use an edgestitching foot! This foot has a dull blade that rests against the fold of your fabric. Press your fold up against the edge of the foot, and it won’t be able to slide any farther. You do have to make sure the fold is right against the foot though.
If the casing is narrow, you can also shift your needle position so you’re able to use the edge of the presser foot as a guide. This will depend on your machine’s settings and the width of your foot. Or, eyeball the space between the edge of the foot and the seamline, and keep that consistent as you sew.
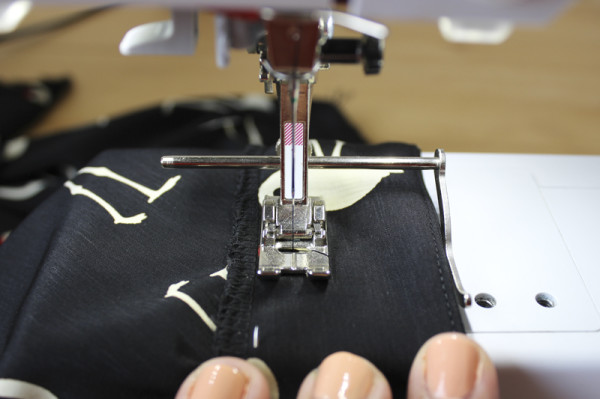
Or, use one of these! This guide lets you set a guideline that’s much farther away from your presser foot. Useful for very wide elastic casings, where it’s harder to eyeball the right distance.
You could also draw in the casing stitch line, but if you’re doing this on the right side of your garment, make sure your marking method is completely removeable! This would be good for something like the Minoru Jacket, where the casing stitching lines are completely separate from any seamlines or folded edges.
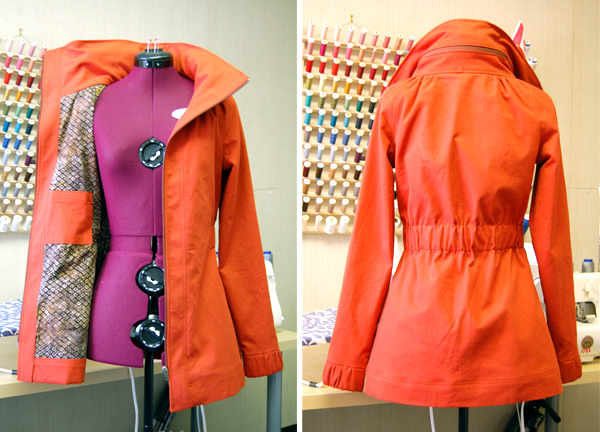
I thread-traced the stitching lines on the Minoru Jacket, and when I reached each stitch, I’d remove the thread tracing stitch instead of sewing over it. This is easier than if you sew through the stitching, although it is slower.

Tips for threading elastic through
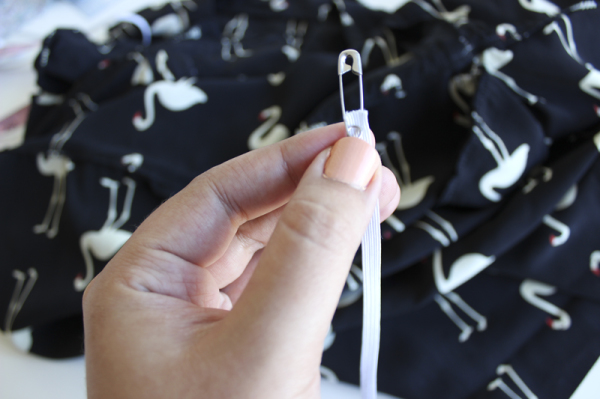
My go-to method is to use a safety pin. I pin through the elastic piece, then push the safety pin into the casing. You can feel the end of the safety pin and slide it forward, gathering up the fabric, then pulling the excess fabric back behind the pin. Work the safety pin through in this manner, inching it through the casing until it appears on the other end of the tunnel.
Troubleshooting:
- If the pin undoes itself while you’re working the elastic through the casing, you may be able to close it up again and keep going. Just be careful not to catch any of the garment fabric when you do. (If it’s close the beginning, I’ll often just pull the whole thing out and start again.)
- If the pin comes out of the elastic, you’ve pinned too close to the end and the elastic ends have unraveled. Pin further in from the end. You can also pin in and out through the elastic, rather than pinning just once. This is less likely to pull through the end of the elastic.

Make sure the elastic doesn’t twist inside the casing. Feel the elastic along the casing, starting at one end and sliding your hands across to the other end. Twist the safety pin to straighten it out, before securing the ends.
I’ve got a few elastic-turning specialty tools, but I still default to the safety pin. Anyone have a favourite tool that’s not the safety pin?
Tips for getting the seam allowances out of the way
One thing that can get in the way when inserting elastic is the seam allowances. If you’re able to cross a seam inside the casing, and you pressed the seam allowances of that seam open, it’s easy for the end of the safety pin to get stuck in the ‘pocket’ created by the seam allowance.
Before sewing the casing, get those seam allowances out of the way! Here are three ways to do that.
- You can glue down the seam allowances, using glue-basting. Check out this post on glue-basting for more information.
- Use fusible web, like Stitch Witchery, to glue the seam allowances down. Cut a small piece of fusible web, stick it under the seam allowances, and press. It works much like double-sided tape, except that you need to press it in order for the glue to work.
- If you don’t have either of these things on hand, baste the seam allowances in place. Remember to remove the basting later on! Baste close to the edge of the seam allowance, so that most of it is caught in place and there are no ‘pockets’ for the safety pin to get stuck.
Our beginner pattern, the Rae Skirt, includes tips on doing this to make it extra beginner-friendly!
Tips for getting it through if you didn’t do any of these things!
Carefully unpick the part that’s getting stuck, work the elastic through, and then re-sew that section of the casing. It’s most likely going to be the seam allowance that’s facing you, as you reach a seam that’s pressed open. When you sew it closed again, instead of backstitching, overlap your stitching by a few stitches on either side so it’s less obvious. Or ‘zero stitch’ in place when you start and stop, by reducing your stitch length down to zero so the machine stitches in one place (that’s where the ‘zero stitching’ name comes from) so there’s no visible overlap of stitching or backstitches.
Did I miss anything? Any elastic casing tips you’d suggest to beginners?
Edited to add more tips!
- If you have problems with your elastic twisting in its casing, stitch in the ditch through the elastic and garment at the side seams. You can even do this on a RTW garment if the elastic isn’t staying flat. Sew one side first, then stretch the waistband to distribute the fabric evenly, and pin the other side, then stitch in the ditch. If you have multiple seams, consider stitching in the ditch through more than just the side seams!
- Use a small safety pin for small casings, a bigger safety pin for wider elastic and larger casings.
This is one thing that is supposed to be super simple that sometimes drives me insane. Usually I want a really snug casing, cause it prevents the elastic from twisting while wearing the garment, but this is also when the problems appear. Making sure to sew the casing evenly all around is key. If all else fails you can always go for elastic that isn’t quite as wide, sometimes you might prefer it over ripping out stitches and pulling your hair ;)
“This is one thing that is supposed to be super simple …”
Tell me about it. The first thing I made on my own was a very simple Kwik Sew skirt. It had bad instructions for beginners that are used nowhere else, such as finishing the seam allowances before sewing the seams. I followed them. But I could not get the elastic through the casing.
I usually try to avoid using elastic. I think it makes the garment look cheap.
I’ve heard that some sewing instructors teach students to finish the seams first, since it’s easier to zigzag a flat piece than down a narrow seam allowance when they’re just getting the hang of sewing. If you’re not cutting anything off (ie. serging) then it’s OK, as you won’t lose any accuracy, but if you cut any off then there’s a good chance the seams won’t be accurate anymore. I can see both sides but I usually sew seams first unless the fabric frays a lot.
I can’t agree that elastic looks cheap, unless it’s exposed elastic, then maybe yes.
I’m iffy about elastic. In something like the minoru, it’s totally fine. In an elegant dress, I don’t really like to see an elastic waist. I don’t think it looks cheap, but I was taught that it was lazy ;) by my aunt ( practically couture seamstress) who taught me lots of stuff – like the trimming s.a. inside a casing. Aunty Bi used to trim any hidden seam allowances down to practically nothing… But I have loads of dresses with an elastic waist, because it sits so comfortably and gathers up better than say a drawstring. I practically always wear belts on top of elastic waists – or with more casual dresses, I attach a fake drawstring.
It is easier to finish the seam allowances while flat, but it’s not a good practice. Sewing is as much about fitting as putting the fabric under the machine. Even if you’ve made a muslin you may still need to make adjustments to the final garment, which is why you shouldn’t do anything to the seam allowances until the seams are sewn.
I agree, I think it makes the garment look cheap, too.
If you want to prevent twisting, stitch in the ditch along the side seams! Make sure the elastic is straight in the casing first, then stretch the waistline so the elastic is evenly distributed, and pin into the side seams. Then stitch in the ditch first on one side, then the other. (Or sew one side, then stretch the waistband to distribute the gathers evenly for the opposite side.) If you have lots of seams you could stitch in the ditch in all of them for even more security! Hope this is useful. :)
I prefer to use a bodkin to pull through elastic. Here’s a sampling.
I have one of these but don’t use it often. Thanks for the recommendation!
They cost $3. It’s a no-brainer.
Excellent timing–today’s plan is to rip the casing off a pair of shorts because part of it is sewn a little wonky and causing the entire elastic band to twist. Fun times ahead, friends, fun times ahead.
Oh good! I’m glad the post was well timed for your project. Hopefully some of these ideas and the reader comments make it even easier to do!
Do you remember where the fabric is from that you used for the saltspring dress? It’s gorgeous! I’m always looking for new fabric stores around metro Vancouver 😊
Which Saltspring dress – the one in the first image? For fabric stores in Vancouver, we recently put together a fabric store guide, check out this post for all the details including a printable guide! http://sewaholic.net/fabric-stores-vancouver-ultimate-guide/
I learned in a lingerie sewing class that it’s a good idea to trim seam allowances before sewing the casing. If you do so, it’s more difficult to get stuck with your safety pin since there’s less fabric to get stuck under (if that makes sense)
Thanks for your tips, Tasia!
That makes sense! The seam allowances inside a casing aren’t under any strain either, so you could trim them close and not worry about the seam. Thanks for sharing!
I use a slim bobby pin to pull through casings. Since the ends are rounded off they’re less likely to get caught on the fabric, or hooked onto the seam allowances. I cut the elastic a little bit longer than usual and work it into the weave of the elastic before pulling the entire thing through the casing.
I have never tried that, but I will if I remember next time! Can you feel the pin well enough to work it through?
Yup! I picked up this tip from a Kwik Sew pattern. It works especially well with slim casings that you pull narrow elastic or a drawstring through.
I too use a bodkin, and I clicked on the links provided above, and there is was! The first one! So I use this all the time now, after having a lot of issues with safety pins! However, to each his or her own! TFS, Annette
If you don’t have a seam gauge cut a notch in a bit of card and use that instead.
Ooh I have one of those seam gauges! Could never work out what it was for until now :)
I feel like I recently got a bad batch of elastic – two projects, PJ shorts and some casual shorts both have elastic waistbands. As soon as I wear them the elastic folds up inside (i.e. goes from 1 inch wide to half an inch!) So annoying. I’m not quite sure why its happening, as the channels seemed to be the right size. Might try stitching in the ditch at the side seams – good tip, thanks!
try getting non-roll for wider casings. It really makes a difference.
My #1 problem is that I stretch out the elastic as I pull it through the casing no matter how careful I am. The length of the casing does not matter. What I an doing wrong?
thanks
Susan shared a good tip in the comments about steaming it back to shape. Older elastic can lose its elasticity and never recover to its original shape, but as long as the elastic is still good, steaming may help!
Thanks for this post – the timing was excellent! I’m working on a Harwood right now, and was having a lot of trouble with getting my elastic stuck in the ‘pockets” at seam allowances – stitching them down and patience helped a ton!
Oh good! I’m glad the information was helpful and came at a good time for you.
One thing I found with SOME elastics. Some will stretch out when pulling through the casing and you think the elastic is ruined. If you steam (or wash and dry garment) the elastic will recover. I use steam from my iron as I want to be sure it’s just a recovery issue and not old elastic.
When I start the elastic I also put a safety pin at the beginning opening and safety pin the elastic to a spot outside of the casing so I can easily meld (sew) the two ends together when I complete a circle. Another way to not add bulk where the two ends meet is to sew one end to a square of fabric ( I usually zigzag). Then butt up the other elastic so the elastics “kiss”. Zig zag that end to the first end. Add more stitching until the two ends a very secure on the fabric square. Either cut the fabric to the elastic width or fold the fabric around the elastic and stitch closed. Trim any excess fabric.
Good call on steaming the elastic back to shape – that’s a great tip! Also, good suggestion about using fabric as a bridge between the two ends, rather than overlapping. I can see this being especially useful when using thick non-roll elastic, or if your garment fabric is thin and would show the overlap.
I’ve never used this method by pattern maker Kathleen Fasanella, but many people seem to like it. An easier way to sew elastic casings
The tip about how to deal with pressed-open seam allowances is GENIUS. I’ve never used a glue stick while sewing before but after reading your tips I think I will start!