We are super excited that this year we began to introduce PDF sewing patterns! With the last few new patterns, we have been able to offer a PDF download option as well as our usual printed patterns. We are also working through the existing pattern line, and eventually we would like to offer the instant download option for every pattern.
Personally, I love PDFs. I love having the option of reprinting instead of retracing. I love the instant gratification. And there have been times when my budget loved the lower price tag. Over the years, I’ve developed a couple of tricks that make the whole PDF assembly process quicker, and more efficient. I thought you might want to read about them! I snapped some photos while assembling my Yaletown dress & blouse pattern for the sew-along. Here is what I do…
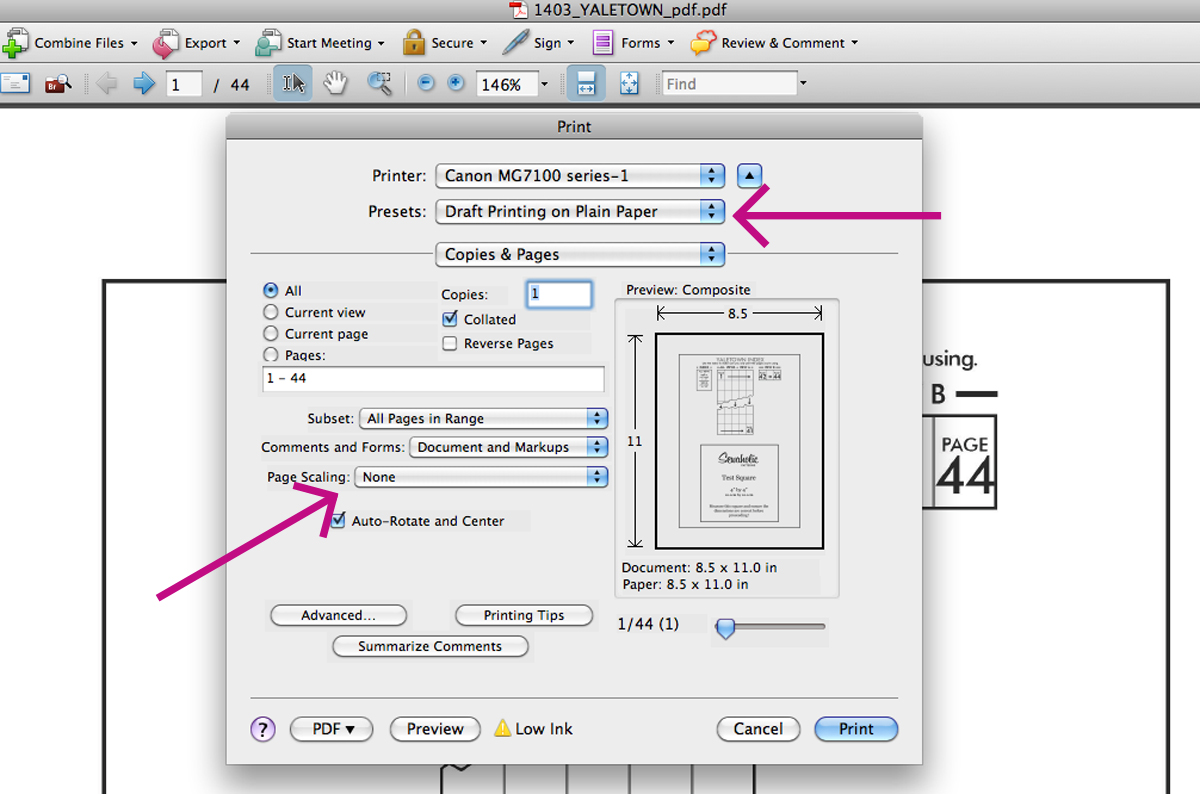
Print in draft.
When I print PDF patterns, I always print in “draft” mode. This uses much less printer ink, and it prints more quickly! The black lines come out a bit faded this way, but still totally legible.
Since we’re on the subject of printing, be sure to turn off page scaling! To be doubly sure, you can print the first page with the test square, and measure the square to make sure it is 4″ X 4″, before proceeding to print the rest of the pages.

Trim sparingly.
The pattern will print out with a border of empty space all around the page. It’s not necessary to trim off this border on all sides! I trim only what I need to trim. This means only top and left side for almost all pages. For the first row, you don’t even have to trim the top edge. And for the first page of each row, no need to trim the left side!

Keep a recycling bin at arms reach.
When I am working on a new project, I am the worst for leaving a trail of paper, fabric scraps, and loose threads. My only saving grace is keeping bins, bags, or boxes at arms reach to stash all of my scraps. Assembling PDF patterns is no exception. I try to keep something nearby to throw my paper scraps in as I go, so I don’t end up with a mess when I’m all finished.
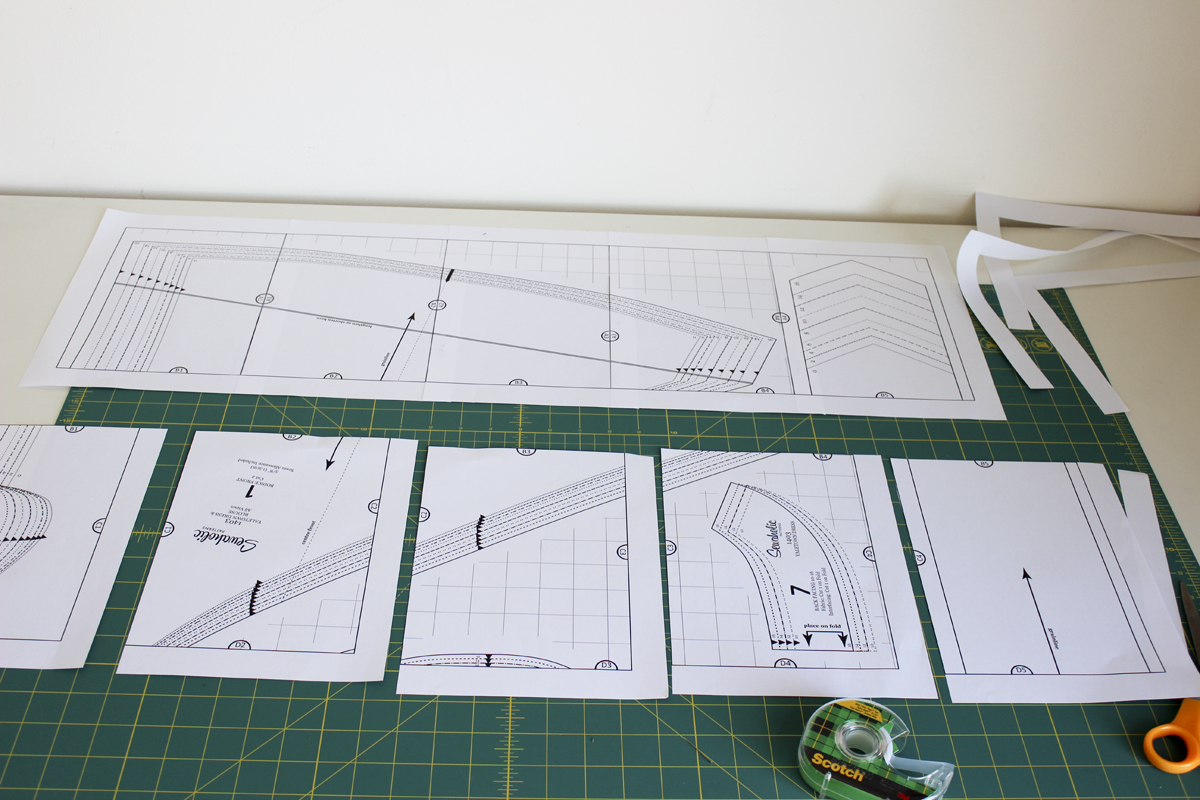
One row at a time.
The first few times I assembled PDF patterns, I would trim a page, tape it down, trim a page, tape it down. It was a lot of picking up scissors and putting them down, then picking up tape and putting it down. Such a time waster! Now I assemble one row at a time. I trim the necessary borders off one row, then tape it together. Then I trim the borders of the next row, and tape it to the row above. Things move much more quickly this way.
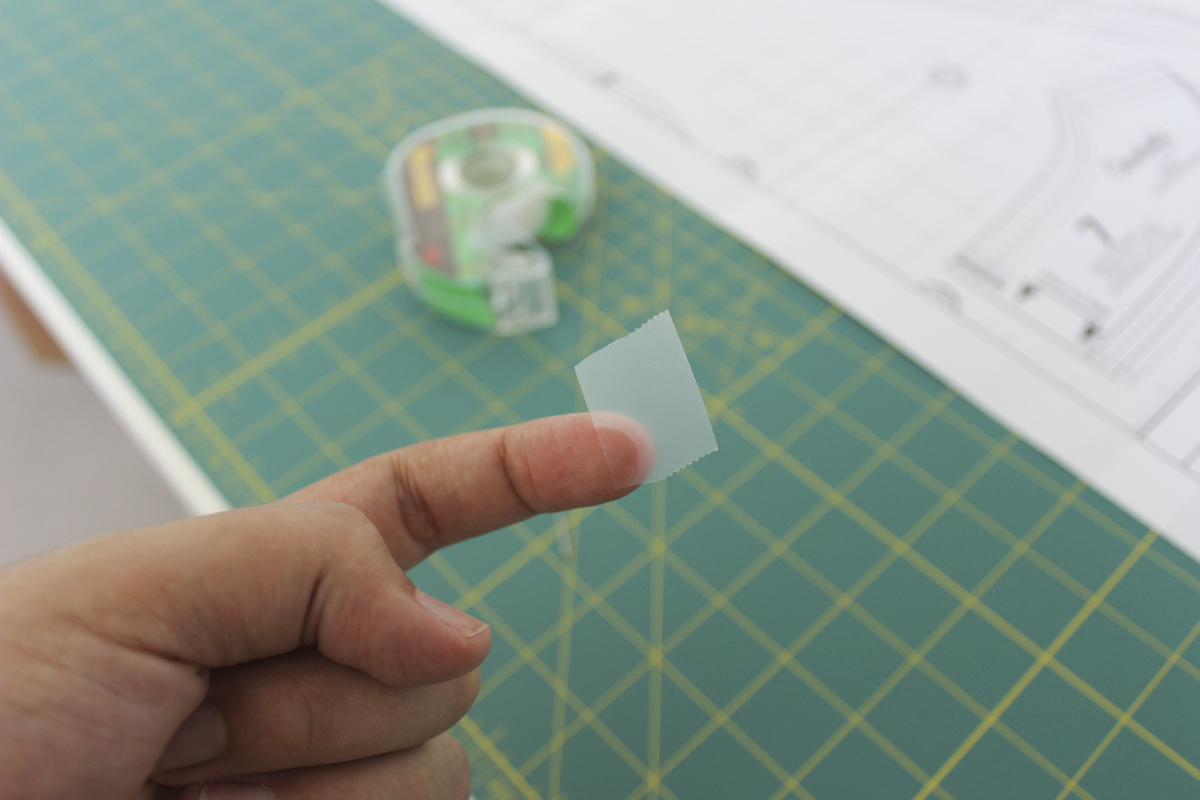
Small pieces of tape.
This is more of a money saver than time saver. It takes a lot of tape to assemble a 40 page (or more!) PDF pattern! But you don’t need long strips of tape to do the job. I try to make a conscious effort to use small chunks of tape, and my wallet thanks me!
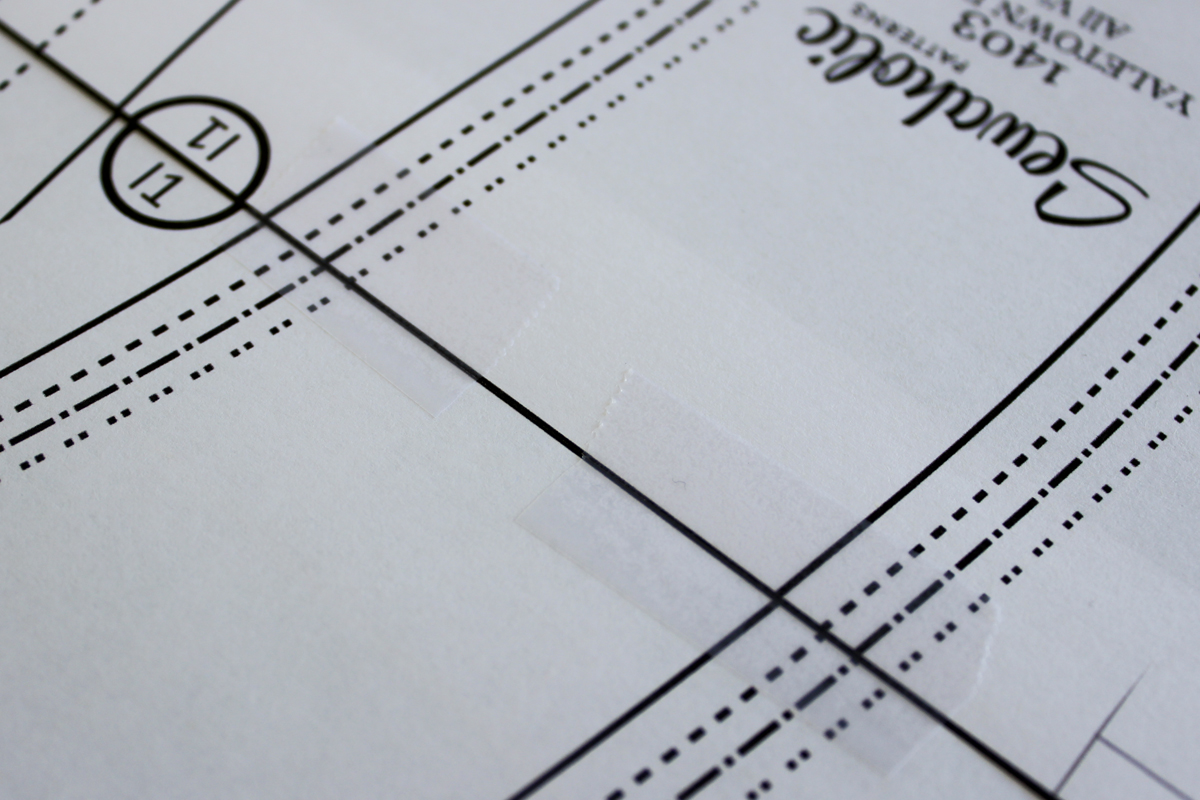
Strategic tape placement.
Who knew I would be talking about thoughtful tape placement today? Hah! But it’s true, there is no use putting tape in places that will get cut off later. When taping together the page seams, I try to place my tape inside or along the edge of a pattern piece, instead of in the dead space that will be trimmed off when I cut out my size.
Rough cut as you go.
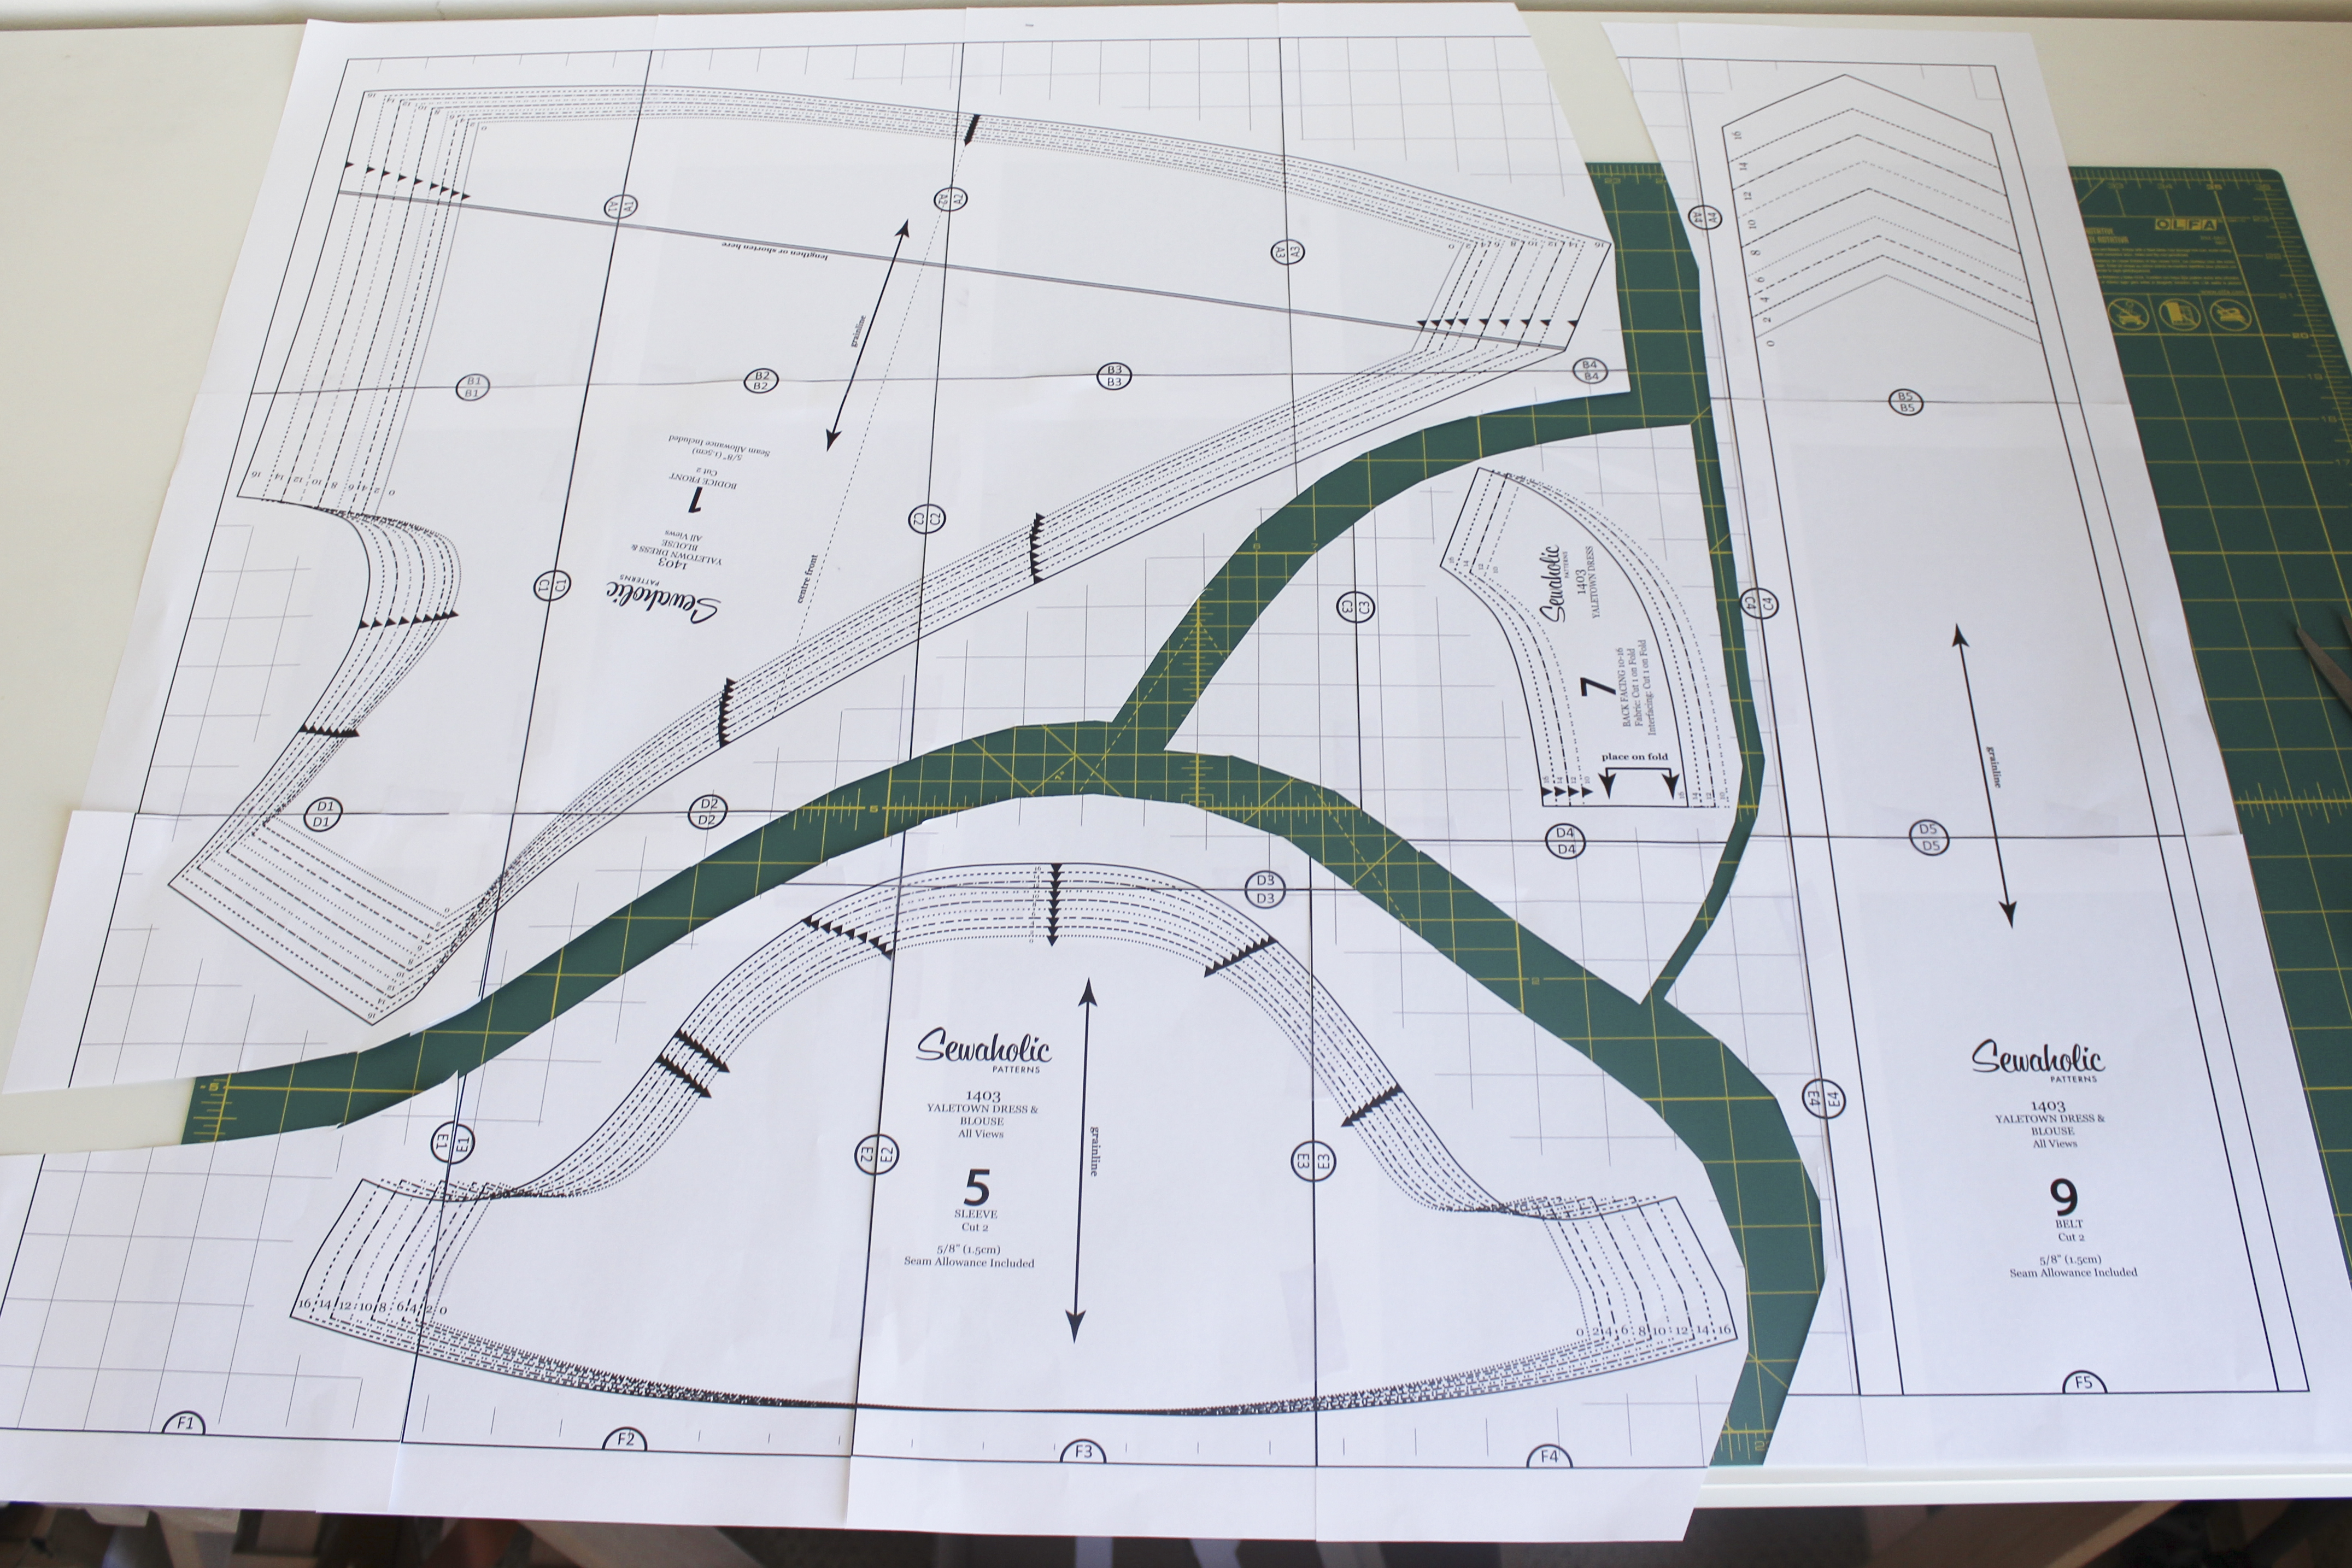
I used to tape together an entire PDF pattern (on my floor), and then cut out the pieces at the very end. It seemed like a big elaborate affair, because it meant monopolizing floor space for a good hour or so. But! There is a better way! Now, as soon as a piece is complete, I rough cut it out and put it aside. Not only does this save space, but it also means less trimming of page borders. Like in the example above, I don’t have to trim the top edge of the next row, because I have rough cut and put aside the sleeve piece. Win-win!
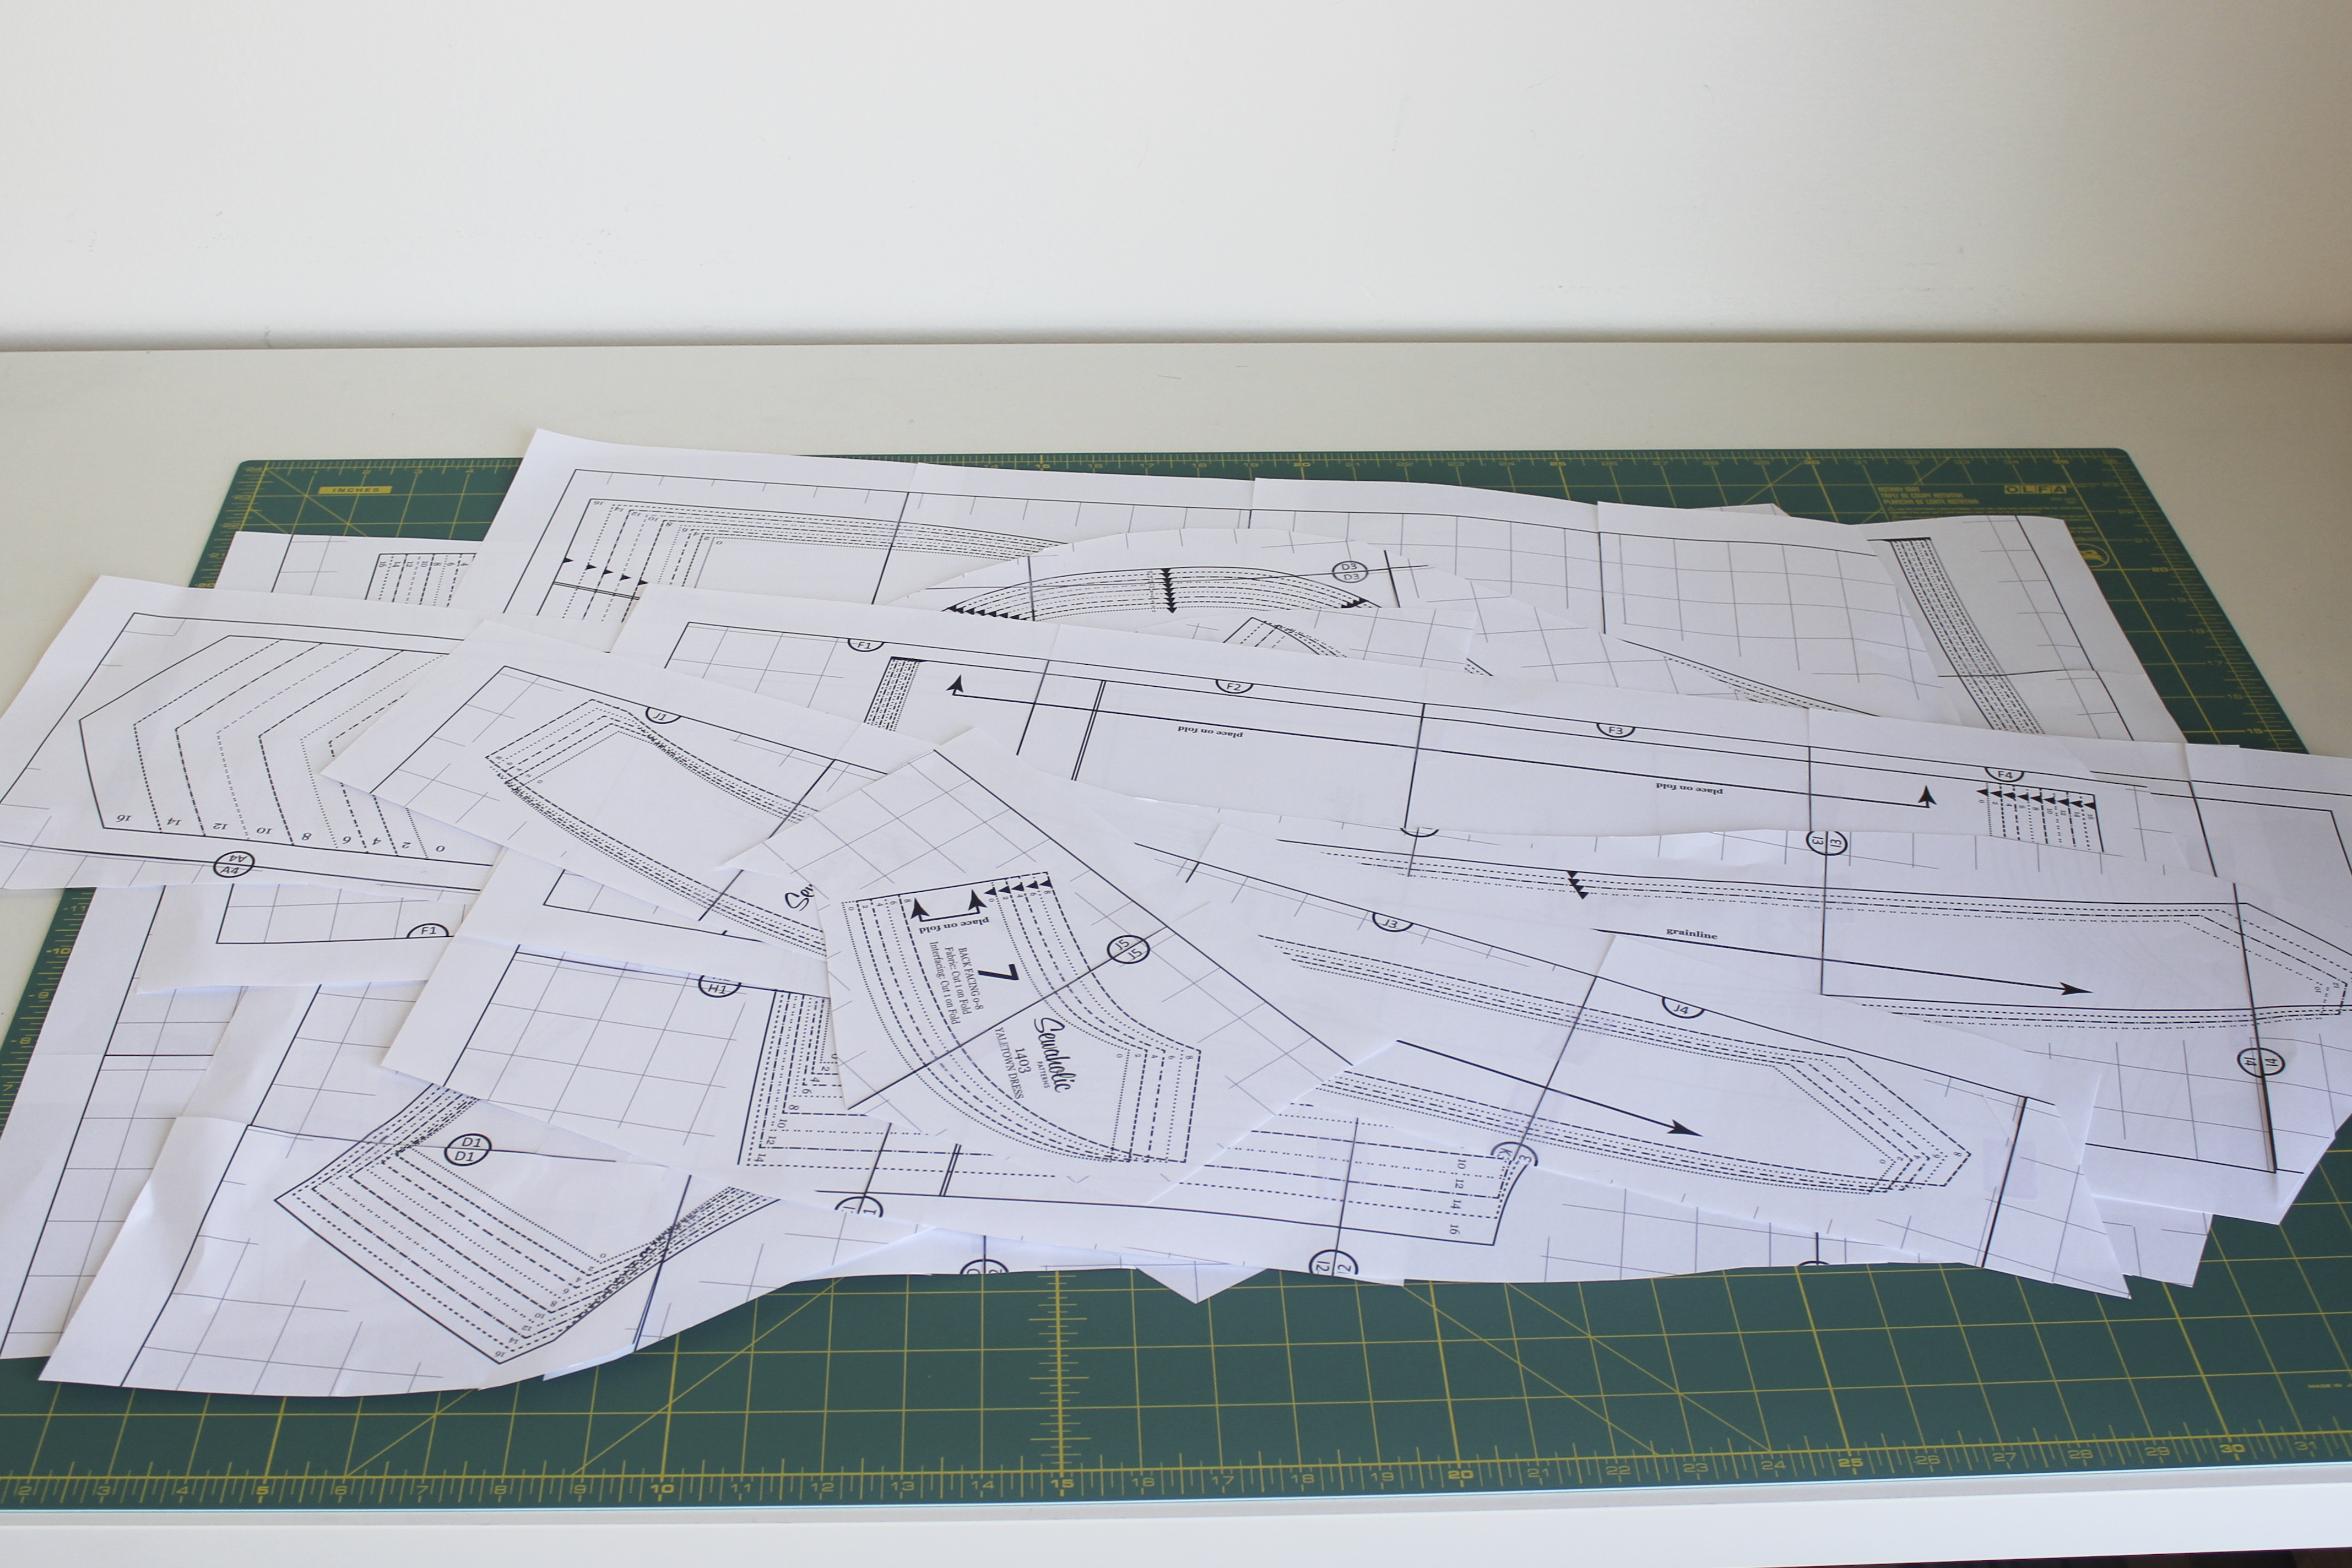
So when I’m all finished I end up with a nice pile of rough cuts, ready to be trimmed down to my size. Voila! PDF pattern assembly, without the headaches. At least for me!
Do you have any tips or tricks to add? Please do share!
I save my old blunt rotary blades so I can rotary cut PDF pattern paper. The blades still work fine on computer paper. I sometimes cut a few page borders at the same time with the help of a straight ruler, so the whole process is pretty quick!
you know it never occurred to me to do this! I’ve been bemoaning the fact i have no room for a guillotine for weeks. Thanks for the tip :-)
Thank you for explaining this. I felt uneasy about pdf patterns. But you’ve taken away the mystery for me.
I use a paper cutter to quickly cut straight lines. I appreciate your tip about strategic tape placement, and using small pieces, as I have been wasting a lot of tape. Also, I have never even noticed a draft feature on the printer. Having read your tutorial, I will embark on the next PDF with less dread. Thank you!
You do exactly as I do…. same paper trims and rough cutting, only missing one thing: when I put the tape I do it diagonally not perpendicular, because the tape breaks easily when place lengthwise.
You know, PDF patterns can be life-savers sometimes, but on the whole, I will always take a printed pattern over a PDF. Cutting out pattern pieces has always been my least favorite part of embarking on a sewing project, and adding all the extra work of piecing it together first is just like heaping insult on injury. I kind of hate it. I just want to get to the parts that involve fabric!
That said…these are some great tips. Every so often I do find myself suffering through a PDF, and this will make the experience that much less excruciating.
I hate piecing them together, too, and once I forgot to check the scaling and had to do it all over. I wish I knew a method for assembling the PDF on the computer. I would download it and seek a large-format printer.
I’ll continue tracing patterns, but I’ve saved these tips for the odd downloaded pattern.
Thanks.
We are working on adding copy shop versions of the existing downloadable patterns, so you could take them to a large format printer and have them printed on one sheet! We will do this for future patterns, and we’re working on adding this for the existing PDFs in our line.
I totally agree with you; my relationship with patterns, PDF or otherwise, is not one that I want to really explore! LOL! But occasionally I do “suffer” through them. And the tips here and in many of the replies here, are very very helpful! TFS!
I am always a bit torn when it comes to pdf patterns. I love how I can get the pattern instantly and just dig in to a new project, but I’m not a fan of having to cut and tape, and it kind if feels like a waste of paper. But then again, all patterns come on some sort of paper.
When I assemble a pdf pattern I usually cut top+side on all pieces that need it first, then tape one row at a time. Depending on how many pages I’m working with I might cut out some pieces as they get assembled, but usually I think it goes faster to assemble the entire thing and then cut.
Every time I’ve done this I’ll wake up the next morning feeling like I’ve had a real round at the gym. That’s what crawling on the floor gets me ;)
I usually need to use more than one size for my top and bottom, so I tend to trace off the relevant sizes from the original and blend them into a sewable shape. My teacher has taught me that getting a rough shape to start with is all that matters. Then you fit.
I was really happy that Sewaholic started selling PDF patterns and there are great assembly tips in this post. I did find the print frame rather small on the Sewaholic pattern I bought- Belcarra- this is in comparison to many other clothing PDFs that I have used. As a result, it did take a lot of pages to print considering the sleeves are short and there was a lot of paper wastage on the edges of every page. Just a little info for feedback! I was printing on A4 paper.
Hi Kerry! Thanks so much for your feedback! I’m replying a bit late here, but I did want to let you know that we’re working on having smaller margins on all future PDFs. So there should be less paper wastage moving forward!
All the best :)
PDF patterns actually save paper for me. If I buy a print pattern, I trace it out…so there are two copies of the pattern. With PDFs, I only end up with one paper copy of the pattern. Tracing vs. Piecing a PDF: 6 of one; half a dozen of the other. It’s all pattern prep to me.
Thanks for the tips!
I have found using a glue stick to join the sheets much easier than using tape. Swipe the glue on the bottom page, then place the matching page carefully on top .
I use glue sticks as well. MUCH easier to keep the whole thing flat, unlike tape.
Ohh, thanks. I propose another one method. Do you like?
http://sentarseacoser.blogspot.com.es/2013/09/patrones-digitales-olvidate-de-cortar-y.html
This is interesting Mary Carmen! I have not seen a PDF pattern like this before.
Great tips! Thank you!
Thanks for the tips, I am new to printing patterns (I usually buy or make my own), but I am starting a few workshops and online patterns are more cost effective, it’s just putting them together that takes the time.
Thanks for this. I picked up some tips!
I have printed out 3 PDF patterns to date and have mixed feelings. The second one was the Belcarra and I drew a schematic of the whole thing using the PDF pages on screen as a guide, so I knew exactly what was going to print on each page. I found this useful. When I came to the Renfrew I wanted to do the same thing as I wanted to mix the styles, view A round neck with View B short sleeves. The pattern tells you which pages to print for each view but I didn’t want to print out all the view B pages, just for the sleeves so would have liked to know which pages the sleeves were on. A schematic showing all the pages would have been invaluable. As it was I spent a frustrating few hours printing out more pages than I needed and discarding a lot of paper. I tape everything together and trace my patterns. I then have a roll of paper to store. Ok for my first three bit I may have to get a bigger drawer to store them.
Hi Jenny! Great point, a schematic would be helpful. I will put that on the roster to discuss with Tasia when she is back from holidays. Perhaps we can add that as a separate file to refer to if needed. Thanks for your suggestion! We will see what we can do in the future :)
I do what you do, without something for scraps, ending up with paper everywhere! Next time, somewhere for scraps :)
The more I use pdf patterns, the more I like them. I live in Sweden and shipping is expensive and takes forever. Pdf patterns are instant and cheap…
These are great tips! Thanks for sharing them,,
I have a tape dispenser ($3) that I got from Amazon that let’s me use just one hand..
http://www.amazon.com/gp/aw/d/B00006IF79
This simplified my taping and comes in great while fitting. Got the idea from Marta Alto in a Palmer pletsch video.
Painters tape! I use it instead of regular tape because it won’t tear up the paper if you pull it off. I always assemble and then trace and using painters tape allows me to store my pdfs instead of having to print again.
I always do a quick check of the layout before I trim the sheets and assemble them. Any border that doesn’t have a pattern piece overlapping it doesn’t get cut (unless it’s important for alignment). In the example photo you have under rough cutting, I’d cut out and tape all the pages for pattern piece 9, but not worry about attaching them to the pages with pieces 1, 5, and 7. I find it takes up less of my table that way, and goes just a little bit faster. It obviously depends on the pattern, but sometimes it’s a real time saver, especially in a pattern with pieces you aren’t using at the moment (I save the pages, so I can assemble it later, if I decide I DO want sleeves, etc).
Thank you. Thank you. Thank you. Your instructions are very helpful.
Similar to Andrea, I use a rotary cutter to cut off the page edges. Since i upgraded to a better rotary cutter, I use my old one just for paper cutting and move my dull blades to it from the fabric cutter. It saves so much time and effort from using scissors, and allows me to get some extra use out of the blades before throwing them away.
Right now is a great time to stock up on tape during the back to school sales!
Great tip, and so very true!
I like the rough cut idea. Am I the only one who, no matter how careful I am, cannot tape the entire pattern sheet together and have every line on every piece connect perfectly? It’s like a visual game of telephone where the accuracy drops with every row/column I add to the sheet.
One day it occurred to me that there’s no benefit, and a lot of frustration, when building the entire pattern sheet. All that matters is that the lines for each individual pattern piece should match up within itself. Now I study the schematic, figure out the page numbers needed for each pattern piece, and print enough copies of each page so that I can assemble each pattern piece separately. This approach doesn’t require a huge surface either (unless your pattern is for something big like a medieval tent or the next Christo installation).
No, you’re not! However perfectly put together the PDF is (and I’ve bought a few that weren’t) it alllllways happens. Such a drag. And I am a bit abal aboutgetting my patterns perfect.
I dealt with it same as you, plus I rought cut every pattern piece as soon as possible so as not to have a huge unwieldy pattern sheet.
I like to use a blade for cutting – like an exacto knife – much better than scissors, and more precise than my guillotine – a modern one with a hidden blade which means it is not so precise:(.
and a combo of glue stick or bits of magic tape.
but I still loathe the whole process….
I use metre-long (or yardstick) rulers to help match up the “grainline” of the printed edges.
I’ve found gluing to be better than taping, as then you can roll your pattern pieces or sheet if you are a tracer. It makes the PDFs so much easier to store.
I like pdfs as they are instant – shipping takes ages to Darwin -but I can never get the pattern to perfectly come together, so lately I only use pdfs for kids clothes or small things as the less pages, the more accurately they come together.
Have something really good on the tv while you do it! That’s my best tip of all. That and practise. I loathed PDF patterns the first few times I tried them, but after a few more, I just got so quick at it, I like them just as much as traditional patterns.
One last thing, it’s crazy-hard to get everything lining up perfectly, and I’ve learnt that actually, it doesn’t matter too much that it isn’t. Good enough is good enough by the time you have cut out your fabric, sewn and fitted it, a bit of paper buckling here or there in the assembled PDF pattern doesn’t matter.
Thank you for reminding me that good enough is good enough! Something my mother would have said!
I’m tackling my first PDF pattern tomorrow, so this came at the perfect time. So helpful! Thank you very much!
Great tips! I assemble PDFs the exact same way as you, only I cut all my edges first and then tape everything together, cutting out finished pieces as I go. (True confession: I actually prefer paper patterns though!)
I print a LOT of these things, since I use Illustrator to create all my own patterns, and the best tip I’ve discovered is to use a standard hole puncher at strategic points and intersections instead of having to trim off the whole edge of each and every sheet. Lining up intersecting lines inside a little hole works really well, and it makes little difference in most cases if there’s a little edge where you can’t see what’s underneath. I always print a thin-line registration border around every sheet on my own patterns and haven’t seen how everybody else creates their registration guides. But so far I haven’t found any that can’t be adapted to the punch-a-hole-instead idea. Here’s a link to what it looks like: https://db.tt/se9SlmqG
Uses a lot less tape too, altho the little paper circles can sometimes get out of hand:)
I just noticed how wide a margin there is on the example you’ve given; there’s much less on the ones I make myself since I’m setting it up and know what I can get away with on my printer. But it’s easy enough to trim off an overlap that’s really getting in the way. Hope some folks find this as useful as I do!
Hi David! I love your method! We are working on narrower margins for future PDFs, but they won’t be as narrow as the ones you show in your example. But I do love this idea, and it could work with just a bit of trimming. I’ll have to try it next time. Thanks for sharing that!
I liek the idea of rough cuts. So simple and so smart. I too have monopolized the entire floor for an hour to cut out pattern pieces. The rough cuts could also be applied when taping patterns too if you lay out the entire pattern before taping – just tape each piece and surrounding border and you get rough pieces too.
Also, I love the idea of a hole punch to line up pattern pieces quickly suggested by the previous poster to me.
PS I love all the sew- alongs you do on here Caroline. I’m looking forward to the Yaletown blouse/dress one in September.
A tip I picked up from Karen at http://didyoumakethat.com/ is to use masking tape (uk) – the papery-type of tape for masking off areas when you paint… that way it won’t misbehave if you have to iron your pattern. It is also really easy to tear by hand.
Awesome post!!! Yesterday for the first time, I felt comfortable assembling a pdf pattern following your directions. Thank you!!!