 Today we get to do some hand sewing on our Gabriola skirts! The badge to the left will also lead you to all of our Gabriola posts!
Let’s get started!
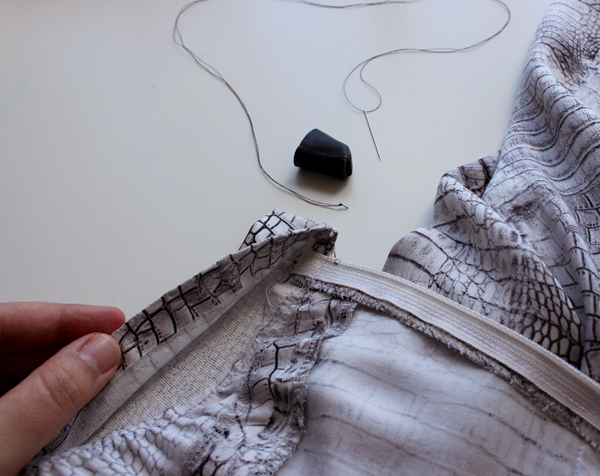
So what we’ll be doing today is slipstitching the inside of the waistband to the skirt waistline. This is my method of choice for lighter or more delicate fabrics, so I am using this method for my sew-along sample. There are a couple of other options, I’ll cover those afterwards! We’ll need a threaded hand sewing needle to get going.
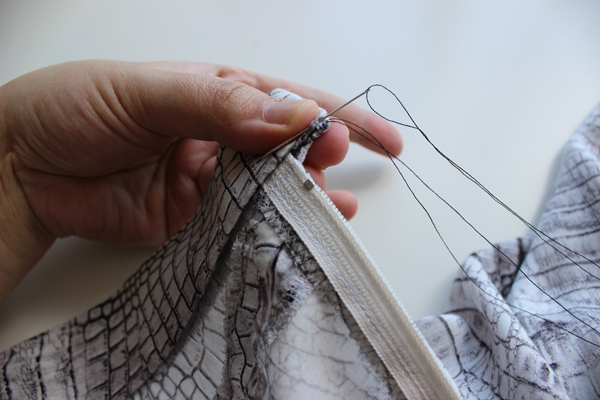
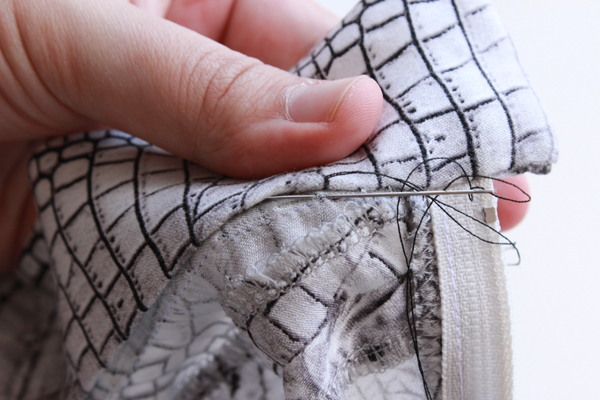
I don’t really like hand sewing with thread that is too long, it gets tangled and is harder to control. So I like to work from each end and meet in the middle, instead of try to use a length of thread that will get me all around the waistband. We want our tied thread end to be tucked inside the skirt, so we’ll begin by inserting our needle from the inside out, right at the corner.
Now for the first few stitches, where the extension and zipper are, I am going to be using a ladder stitch. It’s very similar to the slipstitch – the only difference is that you’re taking a longer (equal) bites of fabric from each edge. So once I poke my needle through the corner there, I squeeze my edges together with my fingers.
Then I’m taking a bite of fabric from the top fold.
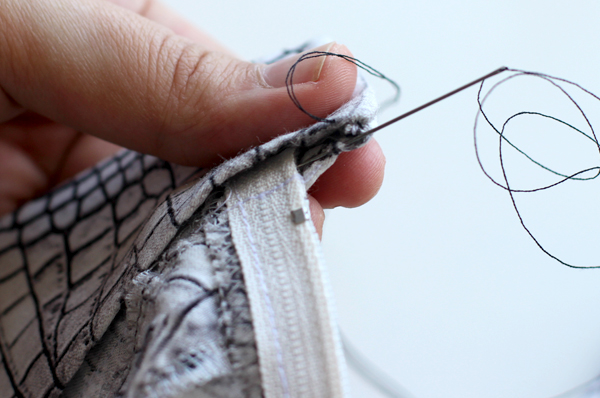
And the next bite of fabric from the bottom fold.
Continue your ladder stitch this way up until you get to the end of your zipper tape.
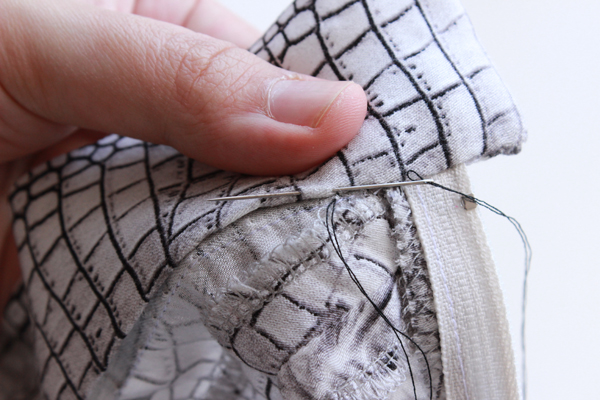
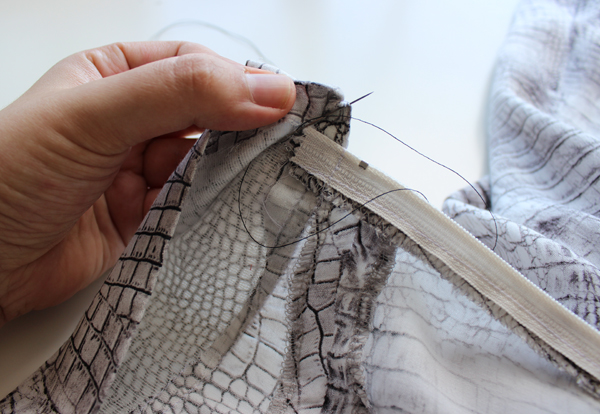
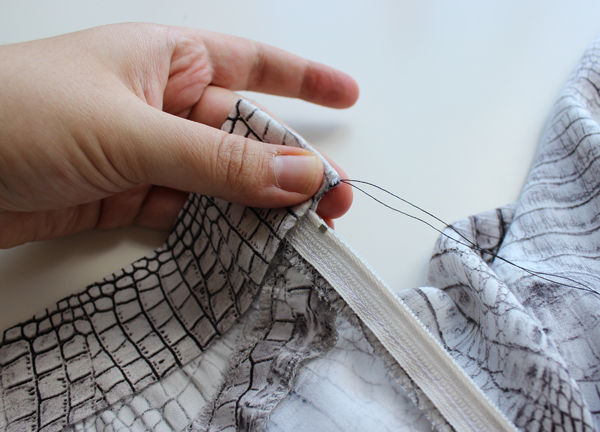
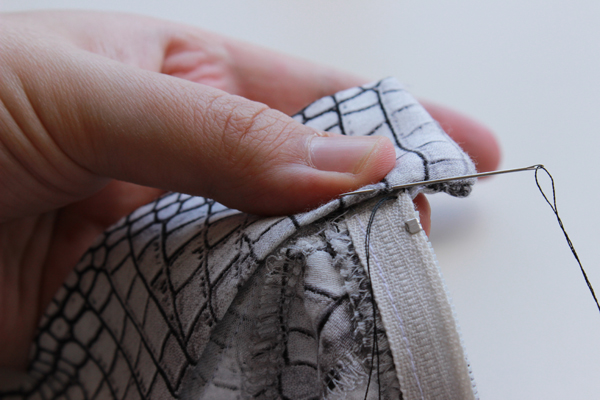
Now we’re going to start with our slipstitch! To slipstitch, we’re taking larger bites (a few millimeters) of fabric from the waistband fold…
And tiny bites of fabric from the skirt, right along the stitch line. Just a few threads, taking care not to poke through the right side of your skirt. As you sew you can pull your thread to keep things nice and taut. Just keep slipstitching in this way, larger bites from the waistband fold, tiny bites from the skirt.
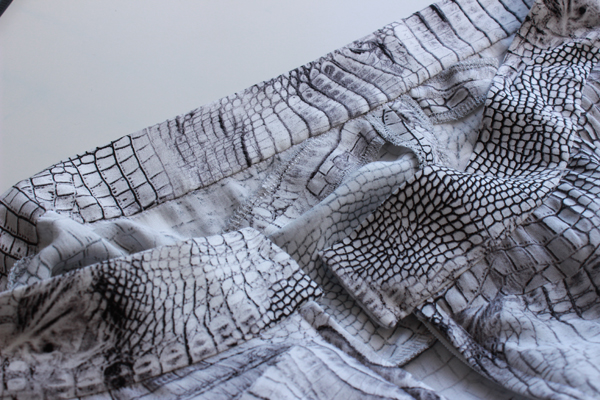
When you are finished give things a nice press, and voila! A nice clean waistband with no visible stitching. I really like this clean look.
There are a couple of alternatives to slipstitching your waistband. You could stitch in the ditch! I also love this method. My fail-safe way is to hand baste my inner waistband in place. As I am basting, I make sure that the fold of the inside of my waistband is ever so slightly below the stitch line. Then we use our machine, skirt right side up, and stitch quite literally in “the ditch” or seamline between our skirt and our waistband. As we sew in the ditch we are catching the inside of the waistband. The stitching is visible on the inside of the skirt, but on the outside it just disappears into the seamline crack. Matching thread is essential with this method!
If you are using a heavier/more stable fabric, you can also edgestitch all around the waistband – this will be visible from the outside and inside.
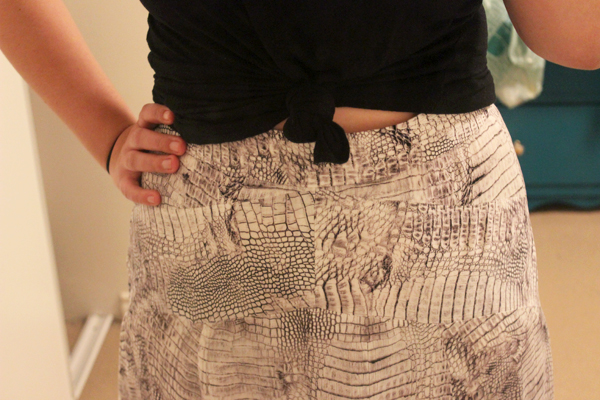
Once we’re done finishing the inside of our waistband, we can try on our skirts and admire our lovely waistbands. For this photo I just pinned the skirt closed, I was so excited to try it on!
Final thing to do today – hang your skirt up so that the hem can settle. By now we know we’re dealing with a lot of fabric, some of it on the bias. Bias fabric tends to “relax” which really just means it settles into place and hangs lower. We’ll need to let our skirts hang for at least 24 hours.
That’s everything for today! Just one more day of sewing coming up and we’ll be all finished. Happy sewing!
That looks gorgeous– can’t wait to see the full length! I’m excited to get started on mine finally.
Oh it looks wonderful! I just love your fabric. I’ve attached my waistband, and I’ve noticed while trying it on that the waistband stands out from my body a little bit on the top edge…I’m wondering if the next time I make this pattern (which will be soon,) I might try to hack the waistband pattern a little to make it dip down to a slight V in the front, kind of like the neck binding on v-neck t-shirt…do you have any thoughts on that? Also, I’m so petite that I’m thinking about cutting down the height of all the yoke pieces next time, just to make the scale a little better for me. It feels like the bottom of the yoke section hits a little low on me. I’m excited to have such a great pattern to try my hand at alterations on!
Hi Aspen – Sheryl made some great suggestions! How are your yokes fitting? You might be able to grade in a little bit at the waist to help with the waistband, it might just be a bit too larger for you. For this sample, to help out with the fit, when you attach your hook and eye or button, you can make the waistband overlap just a little bit more at center back. Not enough to bunch the zipper area but there is a bit of play room in there.
For your next try, I like Sheryl’s suggestion of making baby darts in your yoke. It will depend where the waistband is sticking out. If it’s at the sides you could just try grading in at the waist, if it’s at the back then the darts should help.
You could definitely cut down the height of your yoke pieces! Do so my slashing and overlapping down the middle of the pieces, and then smoothing out the edges (instead of trimming top or bottom). Hope this helps!
Gapping waistband? Maybe to big? Take a pic with u in your skirt and send a picture. I bet the ladies could tell you. I just got my pattern and haven’t started yet. But when I started my jeans, the back gapped, because I’m a little sway back and my waist and hip ratio is little more pronounced, so I made baby darts in my muslin in the yoke, then “remade” the waistband. Maybe you can do that? I’m on the road, so I can’t sew until I get home or look at the pattern. Good luck!
Thanks so much for your suggestion Sheryl – really great idea!
I finally finished my waistband last night, and I have a question… there is a gap between the top of my zipper and the bottom of my waistband. I have gone back and looked at the steps here, and it looks like your zipper hits the same spot as mine. Do you have a small gap, too? Could you possibly post a photo of the back of your skirt so I can try to figure out what I did wrong before I pull the whole darn thing out? thanks!
Hi Paula! I’d be happy to help. Could you send us at e-mail at info[at]sewaholic[dot]net so that I can have your contact info and send you a photo? Thanks!
Caroline and Sheryl, thank you for those great suggestions! My waistband issue is strange…I’ll try to take a photo of it. Basically, the size of it is correct, because the bottom edge of it, where it attaches to the yoke section, fits perfectly. But because my waist continues to taper in a little bit as it goes up, but the waistband is of course a perfectly squared off rectangle, the top edge of the waistband stands away from my waist. Does that make sense? Before I attached the waistband I played around in the mirror with it to try to find a way to make it work. And if I had it go straight across the back of my waist, but slant downward on each side of my waist to meet in the center front in a V shape the fit was lovely. And actually much more flattering on me, since my torso is very short and things that sit on my natural waist make me look stumpy. No idea how to pull of that kind of adjustment for my next make though.
Hi Aspen! Yes totally makes sense. I’ve found that this is happening with a few people. Not all waists are created equally, so a straight waistband wont necessarily work for everyone right off the bat. There are a couple of options. You could try going down a size at the waist. This will make things snugger, you wont have as much ease there but since the waistband will be tighter it should contour to your waist.
Or, you could try adding some mini darts at the side seam of your waistband to pinch out the excess.
Or, you could draft a curves waistband! The best tutorial I could find is here, except you would want it to be in one piece.
http://handmadebyheatherb.blogspot.ca/2013/09/pattern-drafting-101-curved-waistbands.html
But I’d be happy to help you along with that if you send us an e-mail :)
Hope this helps!
Ah! That tutorial is just what I need. Thanks so much for that! I have a really fun Ikat print I think I’m going to make my next one with and i’ll definitely give the curved waistband a go.
Awesome :) Glad it helped.