
Hi everyone! Another sewing day today for the Gabriola Sew-Along. We’re definitely in the home stretch now. Today we get to attach the waistband to the skirt!
Feel free to click the badge to the left to catch up on all things Gabriola Sew-Along.
So let’s get started!
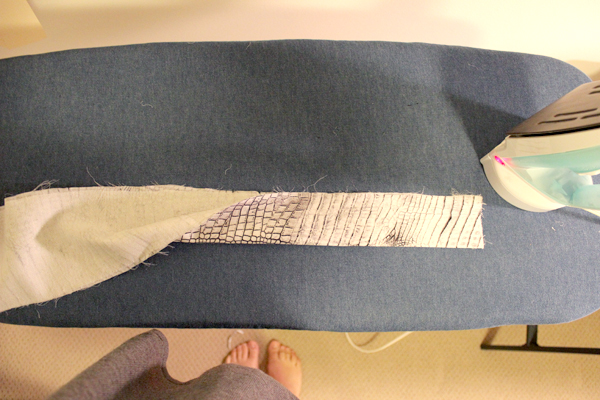
First we’re going to press our waistband in half, wrong sides together, lengthwise as shown.
Then we’re going to press up the long un-notched raw edge by 5/8″ (1.5cm).

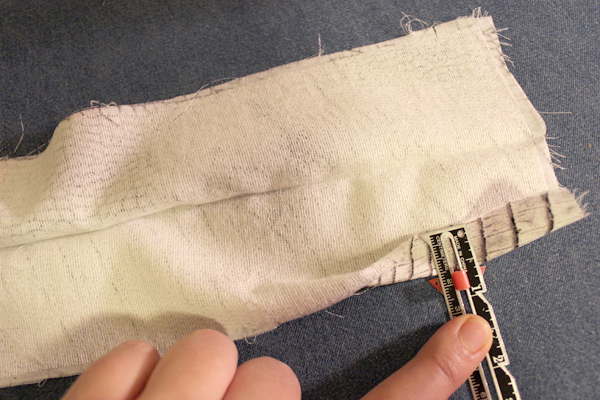
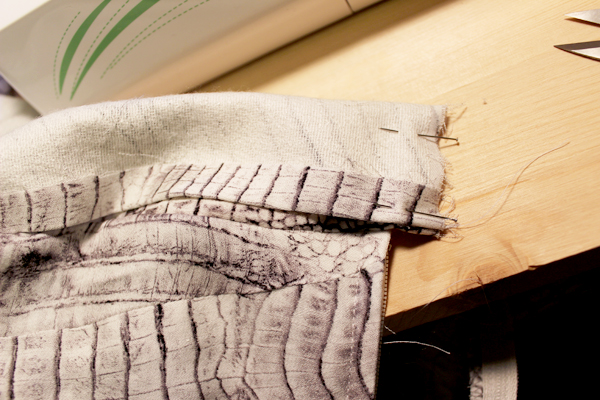
Like so! All along the edge. Next we pin our notched waistband edge along the waistline of the skirt, matching the notches. I missed a photo of that, sorry! You can refer to the diagram in step 12 of the instructions. There are notches at the edge of the waistband, line up those notches with the finished edge of the center back opening.

Now let’s sew along this edge at the usual 5/8″ (1.5cm) seam allowance.
Next we need to trim down our waistband seam allowance. Don’t trim too much, I usually don’t trim down to less than 1/4″ (6mm).
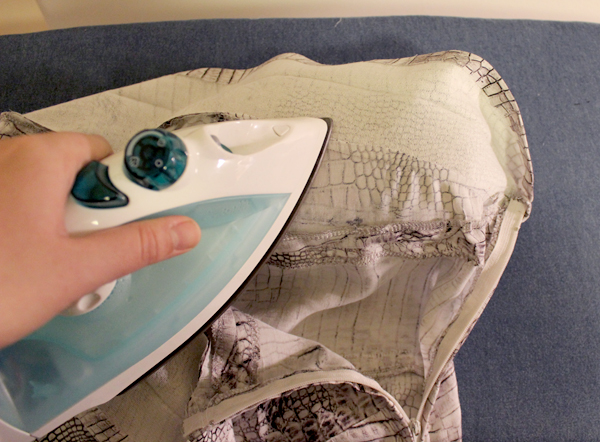
Now we’re going to press this seam allowance up. I usually use a tailor’s ham for this portion, just because it gives me a bit more control to press small areas at a time.
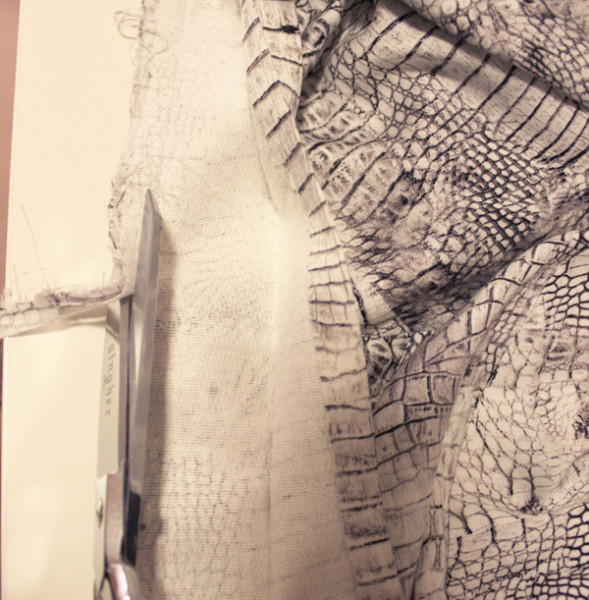
Because we have pressed up our unnotched edge, and pressed our waistband in half, it’s easy to see the fold line here. So we want to fold back our waistband, right sides together, and pin along the short ends. Pin the pressed seam allowance up to keep it in place.

Sew across, at 5/8″ (1.5cm) from the edge. Make sure you’re not taking too much of a seam allowance and sewing in line with the zipper edge. There will be a bit of an overlap in the waistband for our closure. Repeat on the second side.
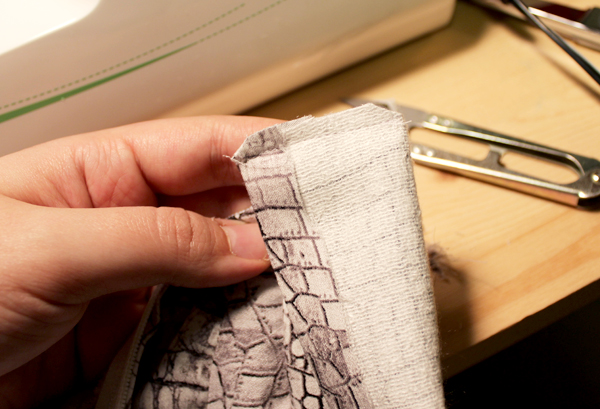
And lastly let’s trim down our seam allowance like so! Now we can turn our waistband right side out.
Next, we’ll do some hand sewing, and I’ll talk about some other finishing options for our waistband. In the meantime, be sure to let me know if you have any questions. Happy sewing everyone!
Hi all,
Was able to catch up today and have a couple of questions regarding fit….I cut out size 16 as that was closest to my size (actually about 1/2″ shy of my waist measurement, generous through the hip) and my fit is way off in the waist….alot, maybe 4-5 inches total. I also have funky side seams where the yokes meet the skirt panels. The seam goes off at a weird angle right at that seam. I was able to steam the seam a bit and that helped and I reduced the waist/hip using a hip curve and the side seam improved somewhat but I am wanting to understand what I did wrong before putting together my actual skirt. Thank goodness, these issues are with a muslin and not with my $10 per yard fabric!!
Anyway, any ideas on what may have happened or what I might be doing incorrectly?? Has anyone else experienced fit issues? Any suggestions or comments would be appreciated.
Also for the shorties out there (5’2″ and under) the skirt finishes very long. Even though I shortened at the shorten line, I still ended up cutting off well over 2 inches at the bottom and could even do more. Last question….what will it change if I don’t shorten at that line but just take it all off the bottom???
Thanks for any help!
Judy
Hi Judy! What fabric are you using for your muslin? If you are using a lightweight, slippery or very drapey fabric, it may have stretched out a little bit during construction because some of the seams are on the bias. A good ironing with steam should help!
Regarding the side seams – we haven’t had any feedback about the yoke seams at the side seam, if you have a photo I would love to see it! That could help me to visualize what you mean and help you work through it. If you wanted to do that you can e-mail us at info[at]sewaholic[dot]net and we’ll be happy to help!
Shortening the skirt – if you take all of the length out at the bottom, the flare of the skirt will begin lower. The skirt panel pieces are designed to flute out which gives the skirt a fuller look at the bottom. The only difference with cutting length only at the hem is that the “curve” of the flute will begin lower. It’s really your choice! :)
All the best!
Hi Judy! It sounds like you may have sewn the two yoke panels together along the side seams, instead of along centre fronts. That would give you a weird angle, instead of a straight centre front seam with a regular-looking curve at the sides. Could that be the issue? (Try lying the pattern pieces next to each other the wrong way, and see if that re-creates the look you had.)
Hope this helps!
For shortening the skirt, it wouldn’t change too much if you hemmed it at the bottom as opposed to the lengthen-shorten line. Overall, you’d end up with a slightly less flared skirt as Caroline mentioned, but if you’re on the petite side that may not even be noticeable.