Today I’ll show you how to sew in the zipper. We’ll take the facing-zipper unit we constructed yesterday, and sew it into the skirt. This post has a ton of photos, which will help you follow along at home. Nothing we’re going to do is particularly hard or challenging, it’s just different from how you normally put a zipper in.
Let’s get started. If you finished the steps in yesterday’s post, you should have something like this on your work table:
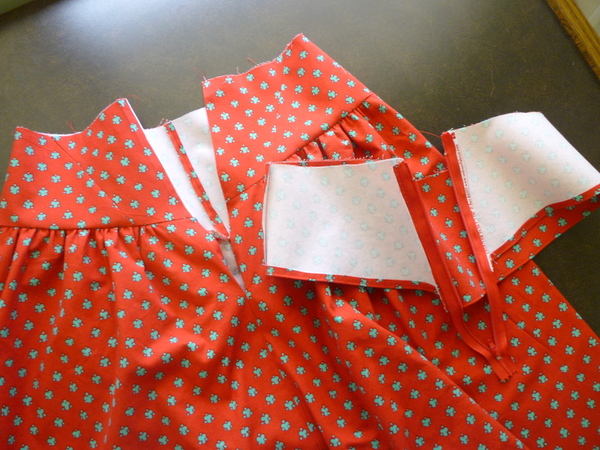 We’ll turn our facings inside-out like in the photo, with the interfacing side facing us, and the zipper tab facing us too. Turn the skirt so it’s right-side up, just like the photo.
What we’ll do next is sew the zipper to the skirt. It just so happens there’s a facing attached, too! So we’ll sew one line of stitching that connects the whole thing along the zipper opening.
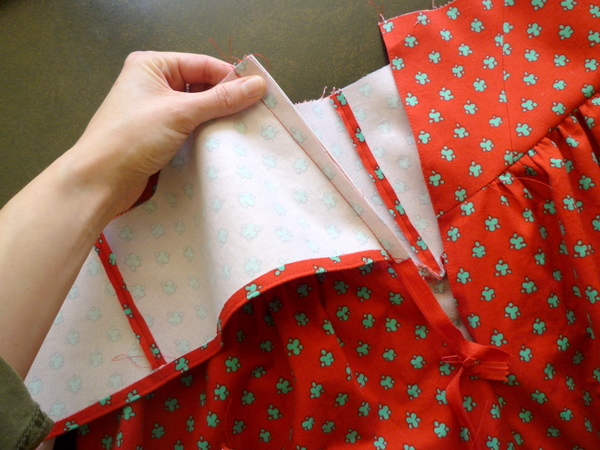 We’ll pin the facing to the centre back opening. The great part is the stitch line that holds the zipper to the facing is going to be a guideline for sewing our next seam. See – easy!
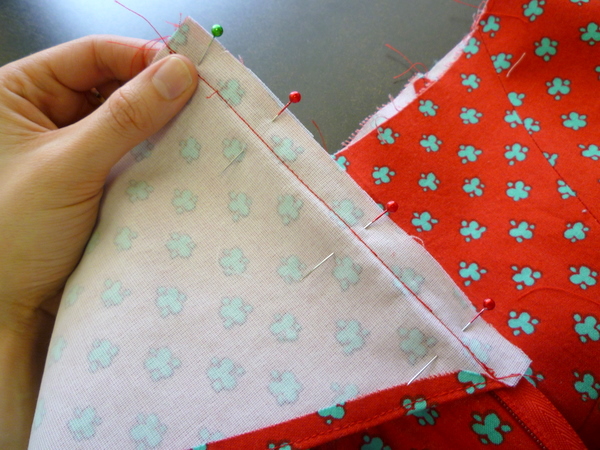 If you’ve finished your edges, and removed any of the seam allowance, there’s a little trick to follow. On mine, I’ve removed about 1/4″ by turning and stitching my centre back seam allowance. So I’m going to align my facing with the imaginary raw edge that would be there, if I hadn’t trimmed it off!
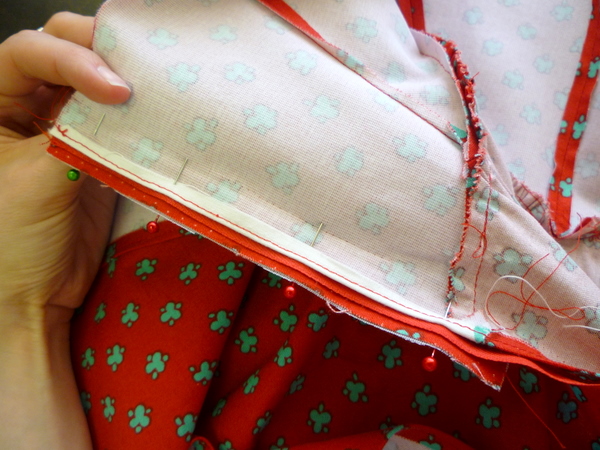 This is hard to put into words, so take a look at the photo above. If that turned-and-stitch edge was unfolded, it would line up with the skirt waistband perfectly, right?
Now, we’ll sew along the original stitch line. Poke your needle through the original stitch line, and sew exactly on top of it.
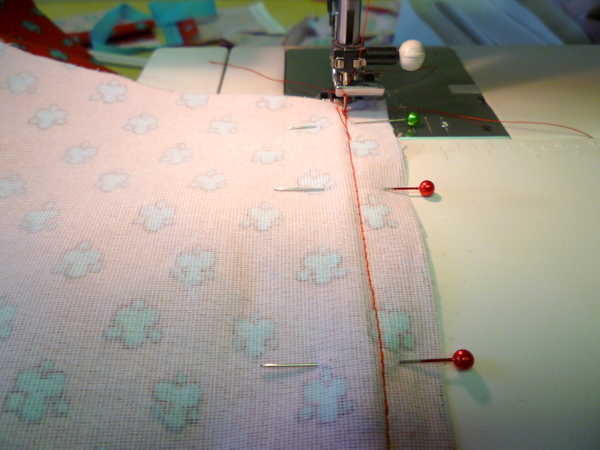 Once the facing ends, sew all the way to the end of the zipper in a straight line. (If you have lining, yours will look a little different, as you’re attaching lining to the zipper too. )
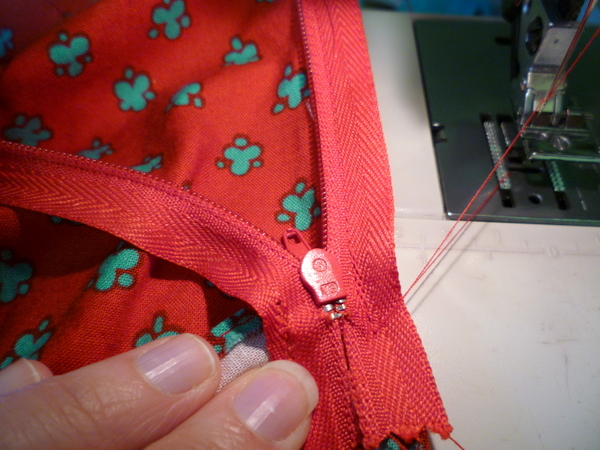 After one side is sewn, sew the other side too. Wrap the facing around the skirt like so, making sure it’s not twisted, and sew the facing-zipper unit to the other side of centre back.
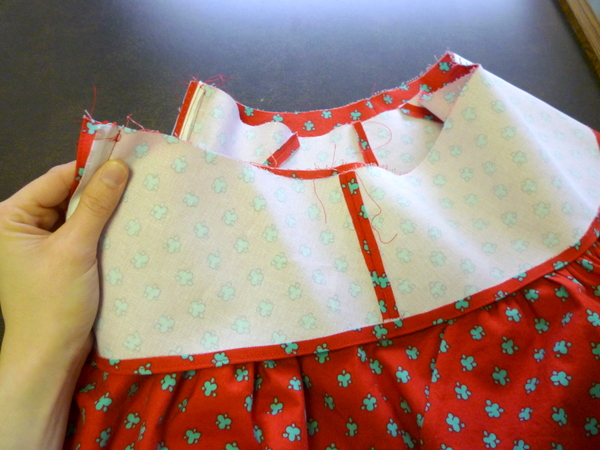 Pin and stitch this seam in the same way.
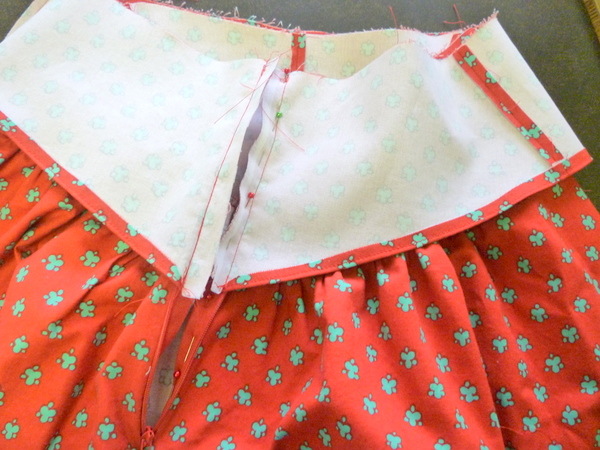 Still with me? Now, we’ll sew the top edge of our skirts. This is going to create nice corners at the top of our zipper!
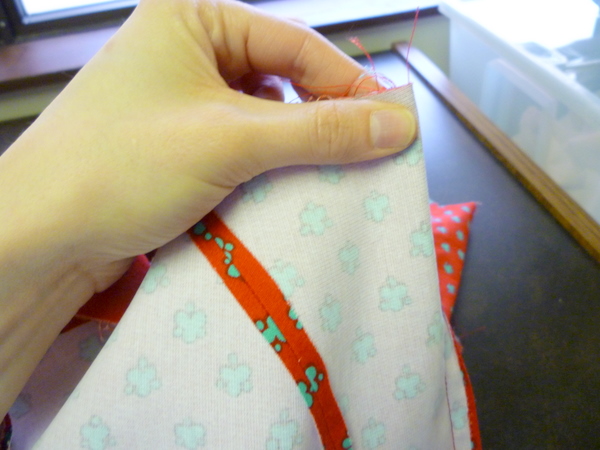
This part is confusing, so watch closely. Fold back the skirt facing at the notch, wrapping the zipper tape seam allowances towards the back.
Here’s what it looks like from the front:
 And here’s what it looks like from the back:
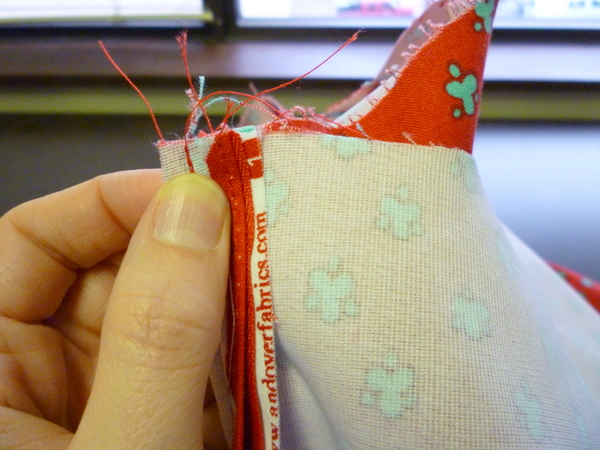 There’s about a quarter inch of extra waistband folded towards the back in this photo. If this is confusing, keep reading until the end so you can see what happens next. At the end of this post, you’ll be a master of this new technique!
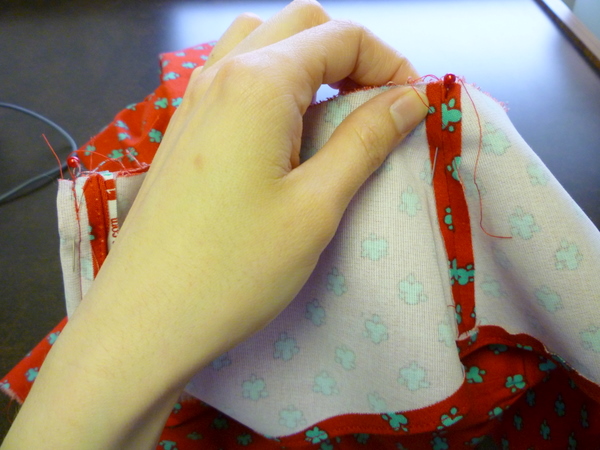 Pin all around the waistline, matching sideseams, getting ready to sew the top edge. Repeat the folded-back waistband at the other side of the zipper.
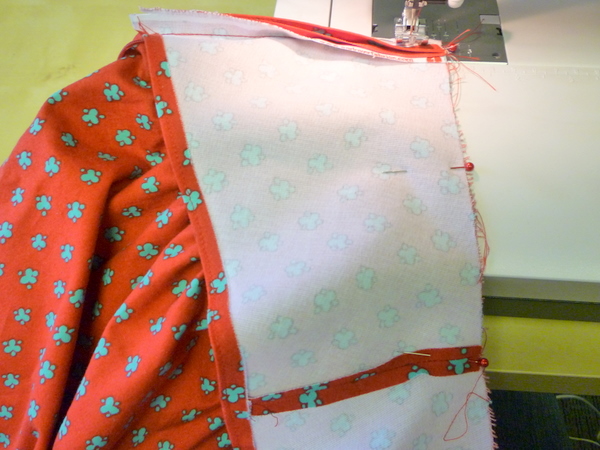 Sew the top edge of the waistband, taking a 5/8″ (1.5cm) seam allowance.
When it’s all done, it will look somewhat like this:
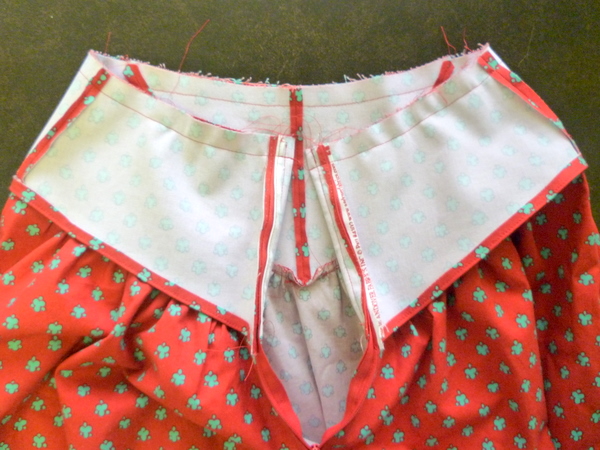 We’re almost ready to see it all come together!
Before we trim the extra seam allowance, let’s check to make sure our zipper tops line up. (If not, we’ll go back in and sew down the one that’s too high, and check again…)
Turn the waistband right-side out, tucking the extra seam allowance into the corner as best you can. Can you see how it’s going to work now?
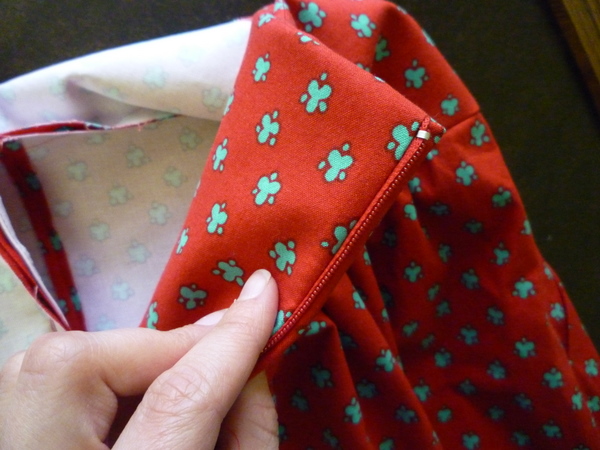 Zip up the zipper and check if the ends line up:
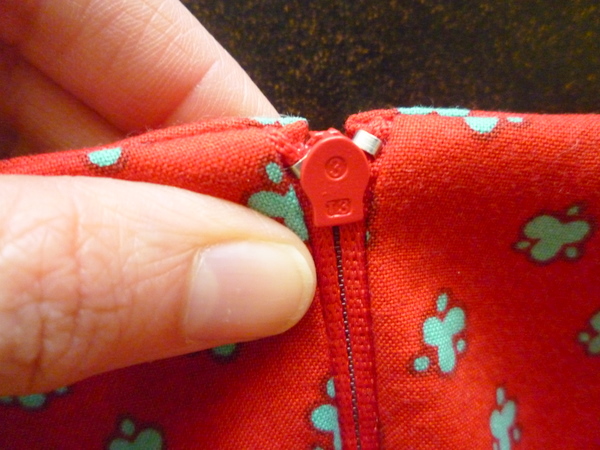 I think they do! They’re a smidge off, but not enough to re-do the zipper. Yay!
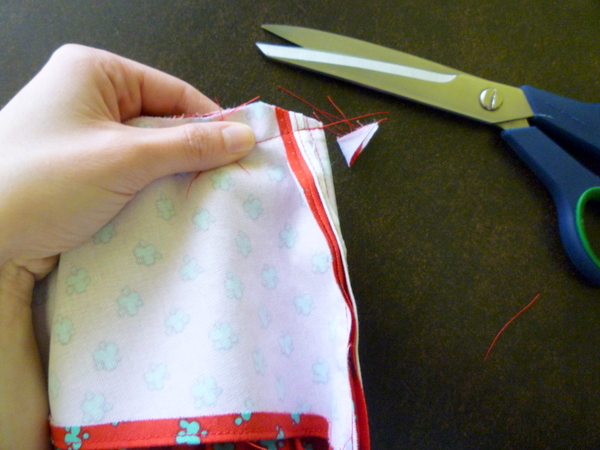
Trim the corners diagonally to reduce bulk.
 Before trimming the waistline seam, there’s one last step. Let’s sew more twill tape along the waistline seam so it doesn’t stretch out. If you skip this step, your skirt will look fine, but it may stretch and loosen around the waist as you wear it.
Just like we did on the pockets, sew the twill tape to the waistline, stitching down the middle of the tape:
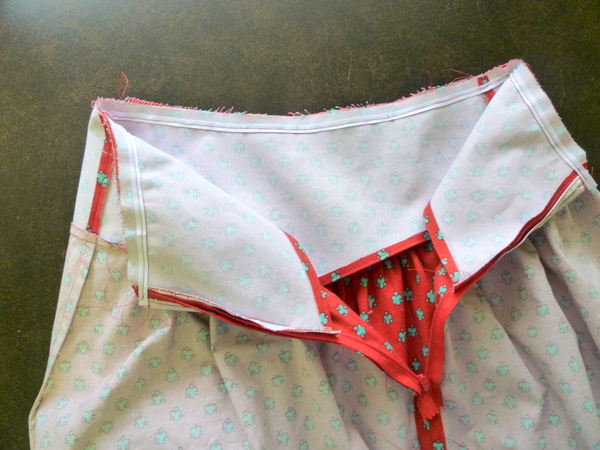 Trim along the edge of the twill tape, and turn waistband right-side out.
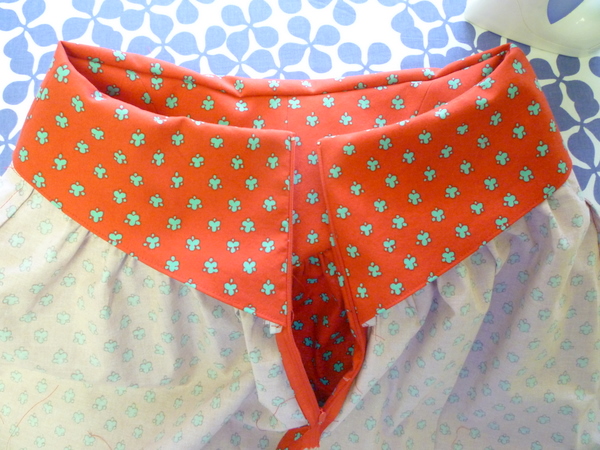 That’s it for this post! In the next post, we’ll understitch the facing, topstitch around the zipper, and secure the facing to the skirt.


excellent! That’s not QUITE how I did mine, but I can see how it works now! Yay for a new technique!
Wow! That looks so nice plus no hand stitching! :)
What a great post!!
Thanks for sharing and have a wonderful saturday too :D
http://alicecloset-sewing.blogspot.com/
Genius! :) I was 99% sure I understood the instructions, but its so much easier to see with real photos! I’d best get on with my revising, so I don’t feel guilty when I get sewing later :)
Ashley x
What a great way to install the zipper! Thanks!
After going through 4 yards of lining I have decided not to pursue lining the skirt and proceed with the zipper. At some point can you discuss fabrics for linings and how to deal with slippery fabrics – both cutting and sewing. (It was suggested to me that I make my own starch by boiling rice and soak the fabric in the liquid to make it less slippery and then wash it out afterwards)
But in terms of everything else all is going quite well and I can’t wait to try this new method for zipper installation!
Thanks Tasia. The results look really neat. It’s also nice to get a Saturday post from you. Bloggers posting over the weekend are sometimes a bit thin on the ground!
I mentioned ages ago that I was curious about your zipper technique. Now I can see it is more or less the same as shown in Kathleen Fasanella’s tutorial, but in a slightly different order. Kathleen’s tutorial is based on how zips are sewn in by the garment industry. The tutorial is at http://www.fashion-incubator.com/archive/centered_zipper_construction/ I have to say I think I prefer the order Kathleen uses because it is possible to get a fully constructed skirt, excluding lining/facings to try on if you aren’t bothering with a muslin (as I rarely do). I also use this method for dresses for the same reason.
Your method is a lot better than that used by most of the pattern companies, but I think Kathleen’s construction order is easier.
I’m not involved with the I’ve website mentioned here – just a fan of the tutorials.
Julie
thanks for sharing a new technique, I will look forward to trying it.
Thanks for all the pictures. From the instructions in the pattern alone I would never have managed this step.
This is utter genius Tasia! Seriously! And look how clean it all comes out. It’s really beautiful too. Completely love it! I’m getting very excited to make up my own version if only for the fact that I get to thy your zipper insertion!
xoxo,
Sunni
Yay! Thanks everyone, I’m happy to have something new-ish to share! Learn something new every day, right? I know it helps to have more photos, there’s only so much you can cram into the sewing instructions!
@Joolz: Thanks for the link! I hadn’t seen this tutorial but it’s very similar, perhaps even in a more logical order than the way I did it. Thanks for sharing! (Going to try that way next time and see how it turns out..)
@Marge: Oh no! Lining is a pain to cut, that’s for sure. Sorry you had such trouble with yours! I’ve never starched mine or done anything to stiffen the fabric – just lots and lots of pins, and slow, careful cutting. Thanks for the post suggestion! I’ll see what I can put together.
@Sewingdina: I don’t usually post on the weekends, but wanted to catch up to the original sew-along schedule! It’s not that i don’t have anything to say over the weekends when it comes to sewing :)
Hey Tasia, thanks for the tutorial…I’m having some trouble with this, though. I’m curious about how to handle the end of the zipper. Is the zipper stopper supposed to be visible? Are you using a standard zipper, or an invisible zipper? I’ve been trying this with a standard zipper, but the bottom, near the stopper, just gets puckered and snagged. I’m having a really hard time! Any help would be greatly appreciated. :-)