I wanted to follow up today with a few ways to reduce the amount of fabric required.
You might have looked at the yardages and thought, “Wow! That seems like a lot!” That’s what I thought when I calculated the requirements but it’s true, that’s what you need to make the blouse the way it’s designed. There are a few tricks and tips you could try, to reduce the amount of fabric used, so I thought I’d share them with you!
Here are some suggestions and ways to use less fabric for your Pendrell Blouse:
 1. Cut fabric open.
Most cutting layouts are done on the fold. This is because it’s less work to cut out two pieces through a double layer of fabric, rather than cutting two pieces through a single layer of fabric. Also, it ensures that both pieces are cut exactly the same size. However, you can squeeze more pieces on your fabric if you cut it open, as a single layer. Just don’t forget to cut the ‘Cut 2’ pieces twice!
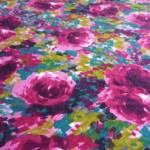
Another cool benefit to cutting your fabric open, is that you can choose where the print is placed on the garment. For example, if you have a very large floral print, you can make sure that you don’t end up with two big flowers centered over the bustline! Or if the print has large sections of different colours, you can choose the part you want closest to your face. It does give you greater control, as well as allow you to fit the pattern pieces more closely together.
 2. Use bias tape.
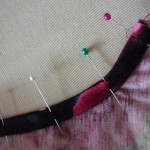
In the blouse pattern, I’ve included pieces for self-fabric bias binding. I like the look of self-fabric binding, and I wanted to make sure you had enough fabric to cut the strips if need be.
However, if you have a gorgeous piece of blouse fabric that’s not quite enough, use bias tape instead, or use a different fabric for the bias strips. Maybe there’s something in your scrap bag that might work? Bias binding uses a TON of fabric and there’s a lot wasted because of the diagonal pieces. I like the look of self-binding best, but it’s not the only way to go!
 3. Cut the ruffles on the straight grain.
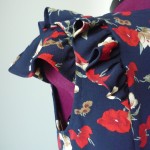
For View B, I’ve placed the seam ruffle and sleeve ruffle on the bias. Why? So they drape nicely, it’s definitely my favourite look. And if you use a stripe or plaid, the ruffles will have pretty diagonal lines!
But if you’re short on fabric, this is one place you can try cutting the ruffles on the straight grain. Simply line up the fold line along the straight grain, and ignore the marked grainline.
 4. Shorten the blouse.
I love the super-long length of the Pendrell blouse. It reaches to approximately hip length, depending on your height, which makes it easy to tuck in (and stay tucked in!) If you are looking to save fabric though, there’s easily room to shorten the blouse. Especially if it’s your second time making the blouse or you’ve made a muslin first. Take a look at your first blouse, and pin up the hem to the new, shortened length. Now measure the amount you’ve pinned up, and shorten each pattern piece by this amount.
Another way to figure out the shortened length is to measure the length of a blouse you like, from your closet. Measure the centre back length, from the base of the neck to the bottom of the hem. Now take a look at the finished Pendrell Blouse length (on the back of the pattern envelope). Subtract the new blouse length from the finished blouse length, and deduct this amount from your pattern pieces before cutting them out.
Remember, cutting layouts are a guideline. There was a great post on the Colette Patterns Blog called ‘The Truth about Cutting Layouts’, explaining why pattern layouts aren’t perfect. She says it so well! There’s a reason why you can often get a better, tighter layout than the diagram in the pattern instructions.
I hope this helps! Please ask away if you have any questions.

Interesting post, and I am looking forward to the pattern.
Tasia, you are so incredibly considerate of your readers/buyers and thinking about what they’ll want/need! Definitely a sign that your business is going to be very successful, I think :-).
You can really save tons of fabric by laying out in a single layer. The reason manufacturers do this (I was taught) is because it also allows for the economy of cutting out several layers of a size at once, which makes complete sense, and I’ve squeezed things on to far less fabric than advised by a pattern that way. Like you mentioned, I really love the precision of placement this allows you as well. I appreciate anything that makes cutting a pattern out more engaging, because admittedly it’s the point where I often get hung up.
@lap: You’re exactly right! In factories they stack layers of fabric on top of each other, even different colours of the same fabric, and cut through all of the layers at once using an electric cutter. It looks like a saw of some kind, with a long vertical blade. I’ve seen them cut stacks several inches thick!
I debated showing the fabric cutting diagrams as open layouts but thought it would be too confusing since it’s not the standard way, and too hard to do at home on small tables. But I wanted to mention it as a possible solution! Especially if you splurge on an amazing fabric, you want to be as economical as possible :)
@Jessica: Thank you! It’s easy to think of what you guys might want or need, I just think of what I’d like to know, if it were me! It’s nice to have the blog as a quick way to share information and tips.
Hi Tasia – I’ve already ordered the pattern!! what fun I’m going to have getting ready for the holidays with my wonderful new Pendrell top!
This helps amazingly, and also makes me happy since occasionally I do this (to avoid the big flowers on the bust type situation!).
In the future, if you ever do talk about bias binding, can you offer any advice on how to attach it without making the right side of the garment taut. I think I’d have to show you photos of what I mean, but I’m constantly attaching bias binding, thinking I’m doing the right thing, but when I top stitch it goes all taut and doesn’t sit flat. BTW I’m really bad at explaining myself in sewing terms… perhaps I’ll go google! xoxo
Hi Veronica! I know what you mean about the bias binding – after you stitch it, it stands up in a ridge, instead of lying nicely against the body. Without seeing your example, I’d say maybe trimming the seam allowances narrower might help? I trimmed mine to 1/4″ before turning the binding in and edgestitching. It may also be the shape of the armhole or neckline that you’re following.. OR, you could try hand-basting the binding before you topstitch? It’s more work and a bit tedious but it might help the bias binding lay flatter. Hope that helps! If anything else comes to mind I’ll let you know :)
fabulous ideas! i love hearing why you chose to cut something (like the ruffles on the bias for better drape), since i’m so new to sewing it gives insight (from experience) that i don’t have yet :)