Hi everyone! Today I’m going to talk a little bit about how you can line your Gabriola skirt.
I’ve been experimenting with making a chiffon version! Of course it needs a lining, and I decided to do a partial lining that will hit me above knee length. In this post, I’ll demonstrate a great technique for adding a lining to the skirt.
So let’s get started! With this method, I am attaching the lining to the skirt before we insert the zipper. It’s going to give us a nice clean finish for our zipper opening.

So we have the skirt shell, up until step 10. All of our seams are sewn, our center back seam is also sewn below the circle marking, and the center back seam is pressed open. Zipper opening is also pressed under by 5/8″ (1.5cm).
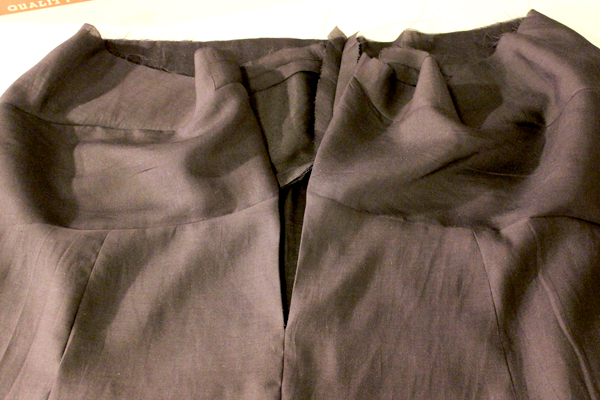
I cut the same pieces out of lining fabric, and sewed them up in the exact same way!

We are going to attach the lining to the skirt shell, along the zipper opening edge. So let’s work one side at a time. First I pinned my lining to my skirt shell along the left side of the zipper opening, right sides together.
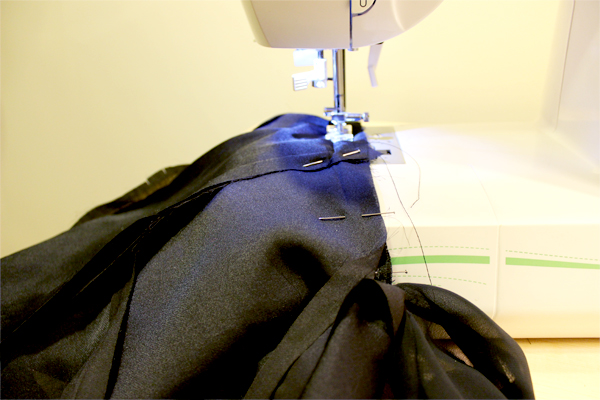
Sew along this seam at 5/8″ (1.5cm). We are going to stop right where the zipper opening ends.
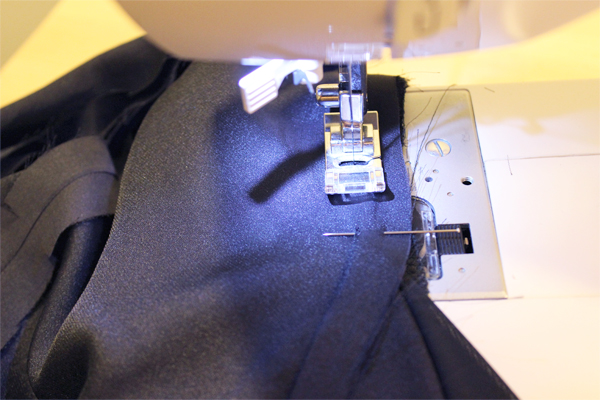
Here’s a close up of my stitching. I am going to stop sewing right where my pin is. This is the bottom of the zipper opening and it’s where my center back seam begins.
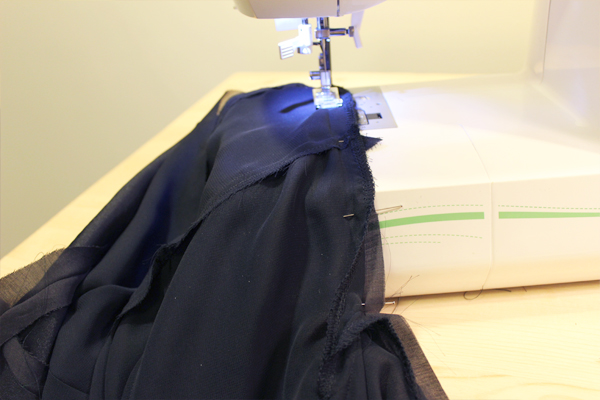
Pin and repeat the exact same thing for the other side.
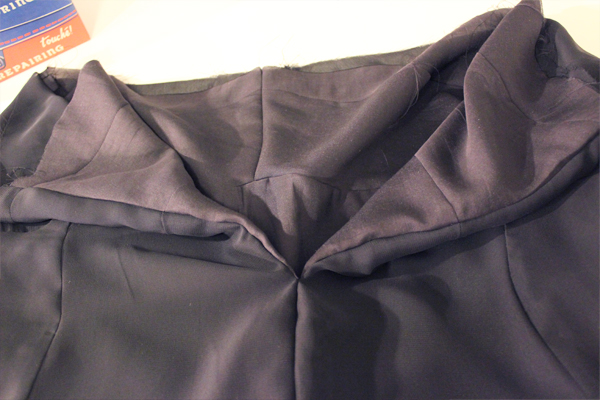
When I turn my skirt lining in, it looks like this! Just needs a good press and I am ready to pin my zipper in place.
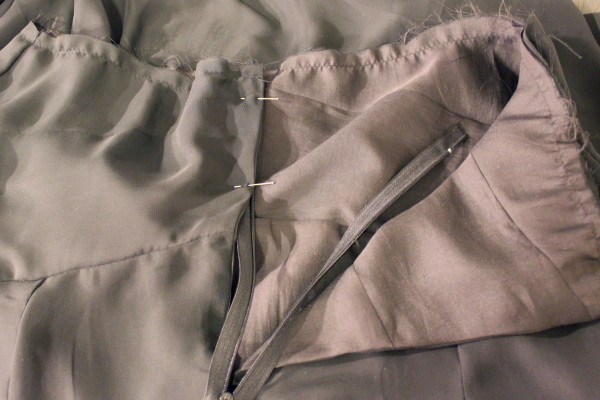
There we go. You can see here I have basted my lining and shell together along the waistline. This will prevent them from stretching out and allows me to treat the two layers as “one piece” when I attach the waistband later. I’m ready to start pinning my zipper in place!
With this method, the zipper is exposed on the inside of the skirt. If you would prefer your zipper to be enclosed in the lining, then you can prepare your lining in the same way, but hand sew it to your skirt after the zipper has been attached. Press under the seam allowance on your lining zipper opening edge, and then slipstitch it in place around the zipper opening.
Back to the sew-along tomorrow, where we’ll be putting in our zippers. Happy sewing everyone!
Hello Caroline Amanda,
Thank you for the Gabriola tutorial posts. They will definitely come in handy!
Would you tell me approximately how much fabric you would need for a knee length version? I intend to sew the maxi but a knee length skirt is much more practical for me. Since you have lined the chiffon skirt to the knee you may have a fairly good idea.
Thank you,
Dale aka Sox
Hi Dale! I purchased 1.5 meters of lining and it was plenty. I cut above knee length, so to be safe, I would purchase 2 yards of fabric if I were you.
Well, you pretty much confirmed my experience with chiffon. I made an infinity scarf toile out of some chiffon that, as you so aptly point out, frays like crazy. I had intended to do some version of french or flat felled seams, but my machine chewed up the fabric to the point that I was not willing to subject the poor fabric and do any more damage. The saving grace is the fact that an infinity scarf can be poured and twisted so as to hide any flaws or imperfections, of which there are plenty!
A question or two…did you use a special needle in your machine, did you lower the feeder foot and did your machine start to pull threads that essentially puckered fabric I hadn’t even gotten to yet?!?!?
Hi Pam! I used a new universal size 70/10 needle (I would have probably preferred a size 60/8 but I did not have any on hand). Unfortunately my singer does not have the option to lower the feed foot, that I know of! My machine was pulling threads, puckering the fabric, and generally just chewing it up. I experimented lots with tension, stitch length, etc, and eventually found a bit of a sweet spot, but definitely not perfect!
I just finished a tie front vintage inspired blouse and used chiffon for the first time. I found that using a fresh needle helped as well as double checking that I had my machine on the right tension. Having a bottle of fray check also helps control the fray situation especially for buttonholes. I did experience the pucker effect but found if I tugged the fabric apart gently it laid flat again and unpuckered. The blouse was fairly simple design without too many seams though. After looking at the Gabriola skirt pattern I’m not in a hurry to torture myself with chiffon just yet lol
Must get myself a bottle of fray check! I have found the tugging the fabric gently helps with the slightly puckering seams, as well as giving things a nice press. I think the combination of (cheap) poly chiffon in a solid + all of the seamlines ended up looking messy! Any and all imperfections are glaringly obvious. Oh well! I’ve chucked it aside for a few days… we’ll see if I can convince myself it’s worth completing. :)
I haven’t sewn with chiffon much myself since, well, it is a headache in the making. But, I read somewhere that spraying the edges of the fabric pieces (that you’ll be sewing together later) with ironing starch (and ironing them of course) can help get nicer seams with less effort. It washes out later, so you’ll just have to toss in the wash before you can wear it, but it should stabilize the fabric for the sewing part.
Thanks for this tip Hanna! I am definitely going to try this – I heard (below) that fray check spray will also work similarly.
Hi Caroline, I’m really enjoying the sew-along although I’m a bit behind ;-)
I have a question, how would you attach the lining if you didn’t have a waistband? I drafted a facing since I don’t like waistbands and was wondering how you would put in a lining then? Thank you!
Hi Susanne, great question! So if you are using a facing, you can attach the lining in the exact same way. When you are sewing on the facing, treat the skirt and lining as one piece. After you attach, trim and understitch your facing, you can turn it into your skirt, and even slipstitch it in place to the lining layer only (instead of top stitching) so that you’ll get a clean finish and it wont show from the outside!
Hi Caroline, thanks for this. I’m not lining this version but what materials would you recommend for lining chiffon? Would a cotton voile work? Thanks.
Hi Barbara! I used a poly/cotton blend that I found at a local fabric shop. It’s matte on one side and shiny/satin-y on the other side. Any kind of satin lining would work, or even a rayon bemberg would be nice. My worry with 100% cotton voile is that it might get static-y and cling to the chiffon a bit. Something with a smooth surface like a satin will avoid that. Hope this helps!
Thanks so much, this really helpful.
Oh chiffon, you have broken me! Seriously, I have a seasonal gig hemming chiffon dresses, and it’s not that bad. it just needs time and patience. Grain up when you lay out. Sharp needle, small stitch hole on the presser foot, stay on grain as much as possible, overlock edges as soon as possible. To the latter, leave big seam allowances when you first cut, overlock right away with some distance to the edge to cut off. If you are keen on a hand-rolled hem, and you’re not getting to it right away, keep that wide seam allowance to stabilize your future hem edge.
Given those parameters, it’s not so bad. You gotta hang to hem, especially when it ventures into the bias. It’s a fluid substance, and if you give yourself time and space while working with it, it is a beautiful thing.
I love all of your tips! Never thought the presser foot hole size would be a factor, but looking back I can see how that would have helped me! Thanks for sharing, much appreciated. Makes me want to give chiffon another go…. maybe!
In the interest of saving time I would love it if Sewaholic would have issued a lining pattern with it. It wouldn’t have all the piecing because it wouldn’t show. It would be the same shape without it. I am contemplating doing it myself. Any suggestions on how best to divy it up into pieces. I’m thinking taping it together and cutting center front on fold, with top pieces and side skirt already attached. And same with back (including top pieces and side skirt).
What are your thoughts on underlining chiffon? I’m thinking that’s what I’m going to try. Obviously it will change the look and feel a bit, but might be worth avoiding what seems to be a fiasco!
I made a chiffon version, with French seams, and lined it with a full cotton voile lining. It works really well and we’ve not had any static – so far. I was surprised to see you didn’t use French seams on your chiffon skirt, given the transparency. I have to say, I’ve never seen an invisible zip put in like this, what does it look like when it’s all done?