
Today we’ll do another bite-size sewing step – sewing the bodice layers together.
Let’s get started! If you haven’t done it yet, trim your seam allowances down to 1/4″ (6mm) on the sideseams and centre front seam.
Some notes on trimming:
- Our seam allowances were originally 5/8″ (1.5cm) on each side, now we’re taking them down to 1/4″ for less bulk. To make it really simple, aim to be cutting your seam allowances in half, so they’re half as wide as they were before trimming!
- On centre front, stop your trimming just above the circle marking, where the stitching stops.
Line up one bodice on top of the other, aligning the top edge with the right sides together.
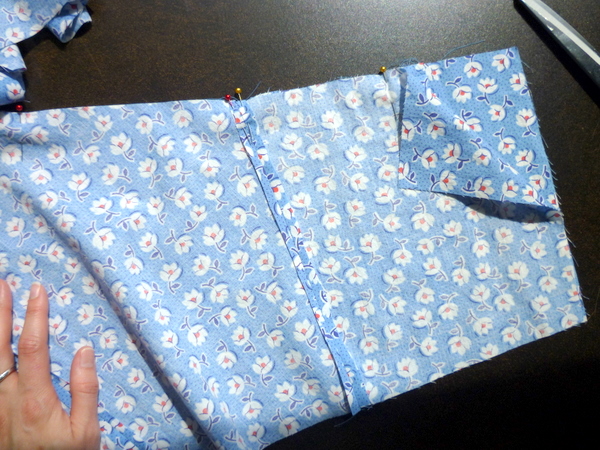
Pin all along the top edge, up and down the straps. Put in as many pins as you need to feel comfortable.
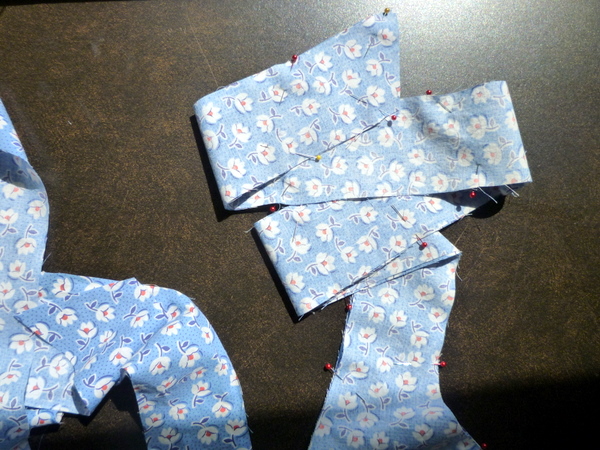
When you get to centre front, pin the layers together as shown. We’ll stop our stitching just short of the previous stitch line, then move to the other side and start stitching. 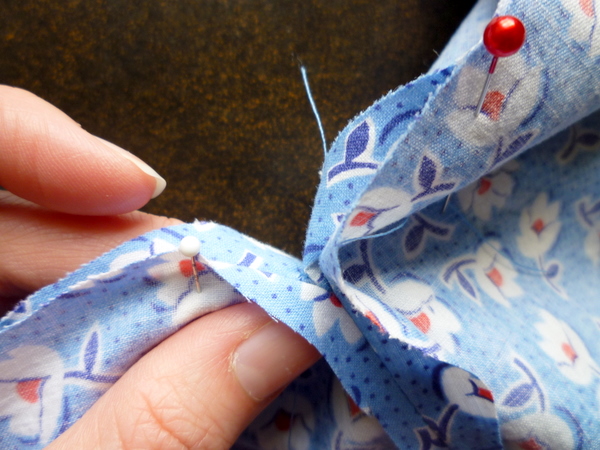
In the instructions, this was the hardest step to explain and draw! I hope it makes sense now that we have both the photos and the instruction diagrams.
Starting at one side of the bodice, at the back, sew top edge of bodice. Pivot at the ends of each tie, and when you get to centre front, stop just short of the previous stitching. This next photo is a little blurry, but I think you can see where the previous stitching ends and where we’ll sew to!
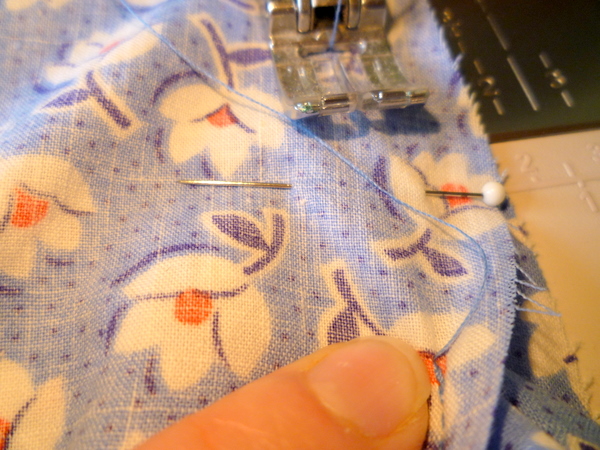 We’ll keep sewing till about 1-2 stitches before the line of previous stitching, where my finger is. (If you run over the previous stitching, you’ll get a pucker at centre. If that happens when you turn yours right side out, just remove the stitch causing the pucker and re-sew it smoothly.)
Backstitch, and clip threads. We’ll take our project out of the sewing machine, and re-position it on the other side of centre.
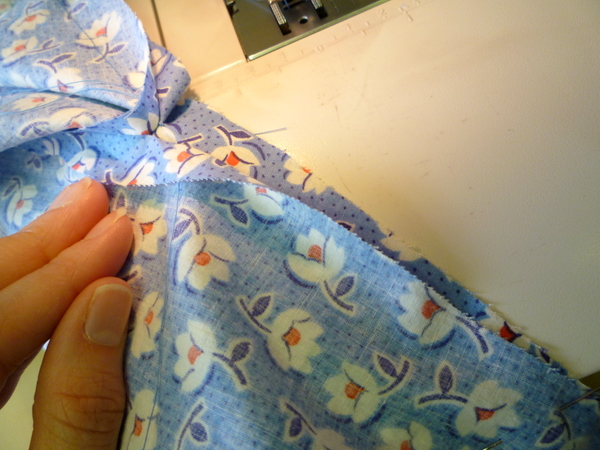 See the stitching on the left side of the photo? We’ll sew up the right side now. Poke your needle as close as possible to the previous line of stitching, starting where the centre front stitching ends. Then lower your presser foot and sew the top edge, all around the straps, stopping at bodice back.
Tips for Best Results:
- At the pointy ends of the straps, pivot with the needle down, lifting your presser foot and turning the fabric, then lowering the foot to sew.
- Sew one or two stitches across the pointy ends, so it’s easier to turn and poke out your corners. I’ve sewn two stitches across in the photo below.
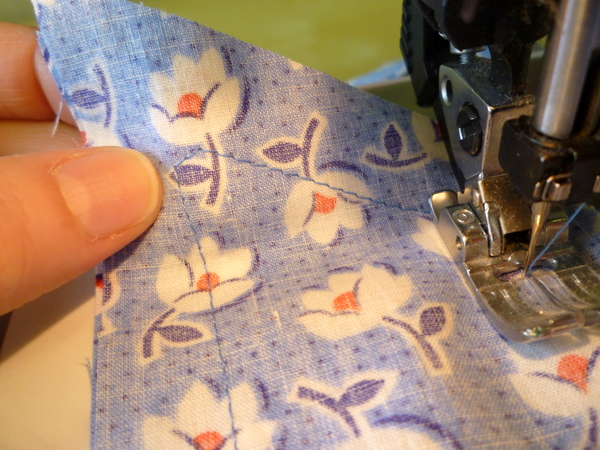
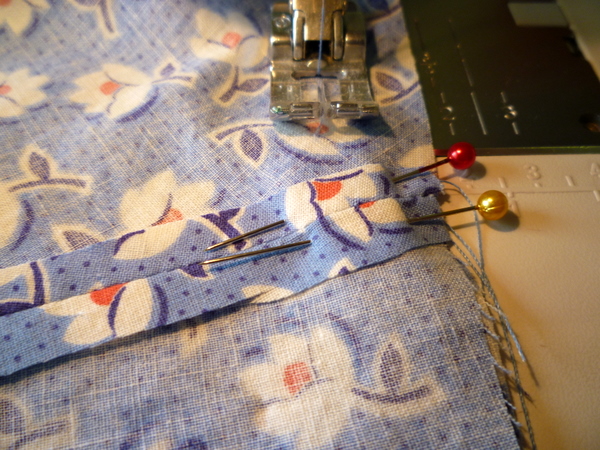
- When crossing another seam, pin both sides of the seam allowance down, so one doesn’t flip out and get sewn down in the wrong direction. (I hate when that happens!)
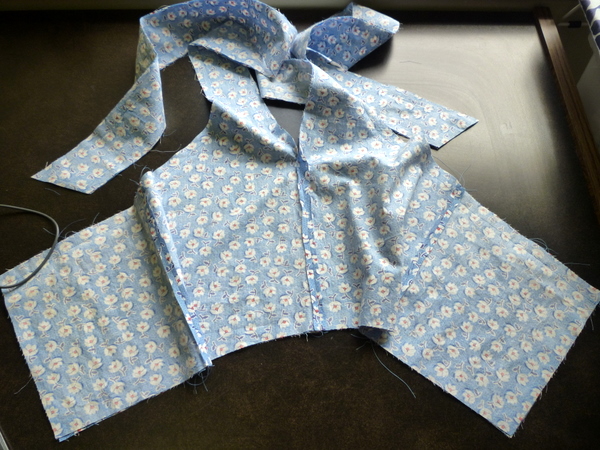
That’s it for today’s sewing! Here’s what your project should look like, at the end of today’s steps:
 Tomorrow I’ll show you how to add stay tape to the bodice edges as it keeps the edge lying nice and flat to the body. It’s optional, of course, but it will help the dress maintain a smoother, stronger edge over time!

Hi Tasia
Could you do a quick picture showing the stitching starting on the right hand side? I’m sorry, but I still don’t quite get it… Should I start the second side 1-2 stitch lengths from the centre seam stitching?
I haven’t started my Lonsdale dress. I am still waiting for my fabric to arrive from Denverfabrics (their shipping is as slow as Christmas). It is supposed to be here tomorrow so maybe I will get started this weeked. I am following your posts everyday–they will be a definite help to me when I finally get started.
I made a Lonsdale muslin at the weekend as I am terrified of sewing with fashion fabric without a practice run! I was a bit anxious about how I would get on sewing ‘on my own’ so to speak, but I needn’t have worried as your instructions were wonderfully clear and easy to follow :) I am really pleased with how the muslin turned out – I love the style and can’t wait to start my actual dress (I’m running a bit behind but hope to catch up at the weekend!). Even though i managed the muslin solo i will definitely be sewing along…All your extra hints and tips are really helpful and just make the finished garment so much more polished – thank you so much!
as usual Tasia, great tutorial.
I’m curious about the stay-tape solution! Might add it to my next Lonsdale.
I can’t wait to start on my dress. I have the fabric prewashed and ready, but I have another wip I really want to finish first. Hopefully I’ll get that done soon and can join in! Your posts are making me more motivated and the ones who have finished already have such gorgeous dresses.
@Vicki Kate: Hi Vicki Kate! Yes, start the second side 1-2 stitch lengths away from the previous stitching. The previous stitching we’re talking about is the centre front seamline.
It’s better to have a teeny gap between the stitch lines, than it is to stitch over the seam and create puckers. A little gap will be covered up by the knot, or you can easily slipstitch it shut later on.
It will hopefully be clearer when you have a three dimensional piece of fabric in your hands! If you’re still unsure, baste it first, then turn it right-side-out to check. If it looks good, then go ahead with the permanent stitching!
Hope this helps! If not, let me know. It was hard to photograph and hard to draw this step!
@Rachel: Great! And by the time your fabric arrives, you’ll be able to quickly flip through the posts and only read the ones you need. It’s a pain waiting for something to arrive, but at least you have a fun reason to check the mail! :)
@Kat: You’re welcome! I’m glad you like having the sew-along posts as back-up, it helps to see everyone’s questions, and of course the step-by-step photos! I’m learning to knit and I wish there were step-by-step photos for the things I’m working on, it’s a lot of trial and error!
@Corinne: Thanks!
@Doortje: I have it on my black dress, and now that I’ve added it to one dress I want to add it to all of my future dresses. Anything that extends the life of our handmade garments is a good thing!
@Caroline: Excellent! It’s an easy sew, you’ll be able to catch up quickly when your WIP is finished. Especially if you’ve been reading along the whole time!
Tasia, I’m planning to sew my straps in place, rather than sew in loops and tie them in a bow. Would it make sense to sew all along the top edge, except between the notches for the loop, and then sew the straps in place between the layers once I’ve tied the knot and adjusted as needed? I’m thinking I’ll either slip stitch them in place, or top stitch where the straps are added. Do you have any suggestions or recommendations?
I’m just a wee bit behind as I wanted to start in muslin since I don’t have enough fashion fabric to spare an unfortunate cut. But, I’m happy to say that I tried on the bodice last night, and it fits beautifully. The waistband is supposed to fall right at our natural waistline, correct? Now to cut the fashion fabric and repeat the last few steps!
@Ella: Hi Ella! That’s exactly what I’d do – sew the top edges, leaving a space for the strap on either side of the back. Follow the rest of the steps as we go, leaving that hole in the top edge when we understitch, and then poke your strap end in the hole, adjust, and sew it in place.
I think the notches for the loop are slightly closer together than the width of the strap – so perhaps make your opening a little bit larger than the notches. I measured my sample and the finished straps measure 1 1/2″ wide, while the notches are just over 1″ apart. So leave an extra 1/4″ or more on each side of the notch. (You can always sew up the opening later on if it’s too big, but it’s hard to squeeze the strap into the hole if it’s too small.)
@Amy: Awesome!! That’s wonderful to hear, that it fits you just right! Yes, the waistband falls at the natural waistline. (Perfect for belting!)
Thanks Tasia, that is great feedback!
@Ella: No problem! Happy to help!
@Tasia:
I check out the sewalong posts every day, still learning a lot! I’m definitely going to try stay tape on my second Lonsdale (first already finished!) Especially because it is a weaker cotton fabric (better drape but less stiffness,there is indeed more chance that it is going to stretch out overtime.