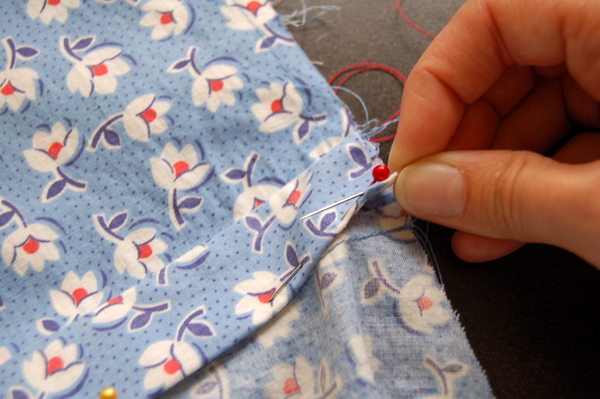
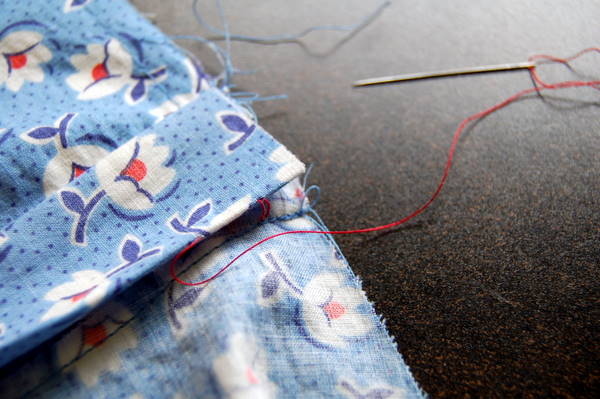
In case slipstitching is new to you, here’s a quick step-by-step demo on how slipstitch! In order to secure the inner waistband to the dress, we’re going to slipstitch it in place. This is a nearly-invisible hand stitch, often used when there’s a folded edge to sew invisibly in place. You’ll see this stitch used for hemming as well.
You’ll need:
- hand-sewing needle
- thread (just pull a length from your sewing machine!)
- your project with the edge to slipstitch all pinned and ready
First, thread the needle. I’m using red thread so it shows up better in photos! Use matching thread on your project though, so it’s even more invisible. Tie a knot at the end of the thread.

Poke the needle through the folded edge, about 5/8″ (1.5cm) from the end.
 Take a tiny bite of fabric on the dress side, about 5/8″ (1.5cm) in from the end. It should line up more or less with where your needle comes out of the folded edge.
 Now, bring your needle back into the folded edge, very close to where it came out of the fold the first time. Poke the needle into the fold so it comes out about half an inch away.
 Pull the thread to bring the edges closer together.
 Repeat these steps over and over again, keeping them spaced evenly as you go. Pick up only a few threads of the main fabric, but feel free to take big bites out of the folded edge.
Do you have any slipstitching tips to add?

I sew it from the opposite end and move to the left. Am I backwards? Or does it have to do with being left or right handed?
@Laurie: Hi Laurie! It doesn’t matter which way you work, from left to right or right to left, whichever is most comfortable. I worked this way but I’ll often work with the fold facing up as well.
In my couture class we were instructed to baste after pinning in order to have more control. It takes maybe a minute. The key thing is not to baste too close to the edge. You need to be able to maneuver the hand sewing needle in and out of the fold for the slipstitch.
Unlike the catchstitch, aka the cross stitch, the direction doesn’t matter. Americans tend to sew away from themselves. Although I’m an American, the best, usually foreign-trained teachers I’ve had always sewed towards themselves as Tasia is doing in the photo. They said you could better see your work. I sew towards myself.
Because only one stitch is on the needle (as opposed to a running stitch) and this is a permanent stitch, use a short needle. (A teacher once laughed when he saw me sewing a hem with a millinery needle. :-) ) Some people would use beeswax on the thread because this is permanent stitch. There are videos on the web showing how to run the thread over the cake of beeswax and iron it in a piece of paper.
Instead of a small “bite,” I would pick up only a thread or two from the garment. For a heavier fabric, two threads. The stitches can be every 1/4″ or every 1/8″ depending on the fabric.
It’s important not to sew too tightly; if done correctly, the stitch “slips” out of sight at the very end.
I know it’s not popular, but if you are sewing by hand, I strongly recommend using a thimble. You can damage the nerve endings on your fingers.
@Reader: Thanks for the tips! The beeswax is great to strengthen the thread. (And I really tried to pick up only a thread or two, but this fabric is a tightly-woven cotton, it was hard to do!)
Oh yes – I know why I could take more than just a thread! I’m taking bites out of the seam allowance fabric, not the main fabric. So I could get away with taking bigger bits of fabric, knowing it wasn’t going to show on the right side.
@Reader: I’ve never really used a thimble before – would you put it on the pointer finger to push the needle through the fabric? I think I have one in here somewhere!
I wished I had a thimble the other day, when I was handpicking a zip and got to the bit where the bodice joined the (gathered skirt) – lots of fabric, lots of force required to get the needle through, eye end of the needle slips and goes diagonally into my finger. That was about four weeks ago and I can still see where it went in.
I wouldn’t have minded so much but I was unhappy with the final result and I know I won’t want to wear the dress until I re-do the zip…
Tasia, can’t wait to get my pattern,. The thimble traditionally goes on the middle finger of your sewing hand. Get a thimble that has a ridge and indent in the top and good “dimples” on the side, Once you get used to using one, you won’t want to hand sew without one. I also like using a finger cot on my forefinger when handsewing. It really helps grip the needle. I do agree with reader, the shorter needles really help. I have been known to use a quilters between when I know I need tiny invisble stitches.
I prefer leather thimbles and tend to wear one on my middle finger and one on my thumb. There’s a bit of steel embedded under the fingertip that you use for pushing the needle through the fabric, and the grippy surface of the leather is great for tugging on the needle if you’re having trouble getting it to pass all the way through a series of running stitches. Plus these thimbles have a moon-shaped opening at the tip so you won’t have to worry about your fingernails being mashed against the end of the thimble! Here is my favorite brand: http://www.amazon.com/Leather-Nimble-Thimble-Metal-Medium/dp/B0018N2FT2/ref=sr_1_5?ie=UTF8&qid=1313089271&sr=8-5
Hi. I’m completely new to sewing and I think I’m being a bit thick here.
I’m afraid to say that I’m still confused as to how to slip stitch.
The pictures all show the needle over the fabric so I can’t tell where I’m meant to be placing it.
I’m sure that its a wonderful tutorial but for me as a complete novice it’s all confusing.