 Hey everyone! Let’s get that muslin fitted and make our changes, so we can get to the good part – sewing our real skirts!
First thing to do: try on your muslin. I like to try mine on with and without heels, just to get an idea of what it will look like all dressed up!
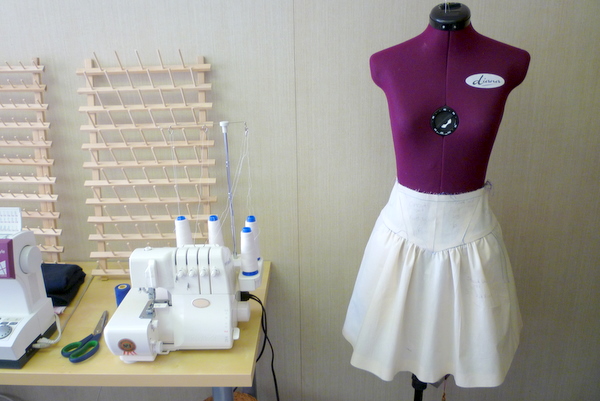
Let’s run down the different things to check. We’ll look at several important areas of the skirt, decide if anything needs adjusting, and go from there!
Waist
Before fitting the waist, first decide where you want the skirt to sit. I like mine to sit at the natural waist, to accentuate the smallest part of me! You might want yours to sit slightly lower on the waist. Once you’ve decided where the skirt should be, let’s work on the rest!
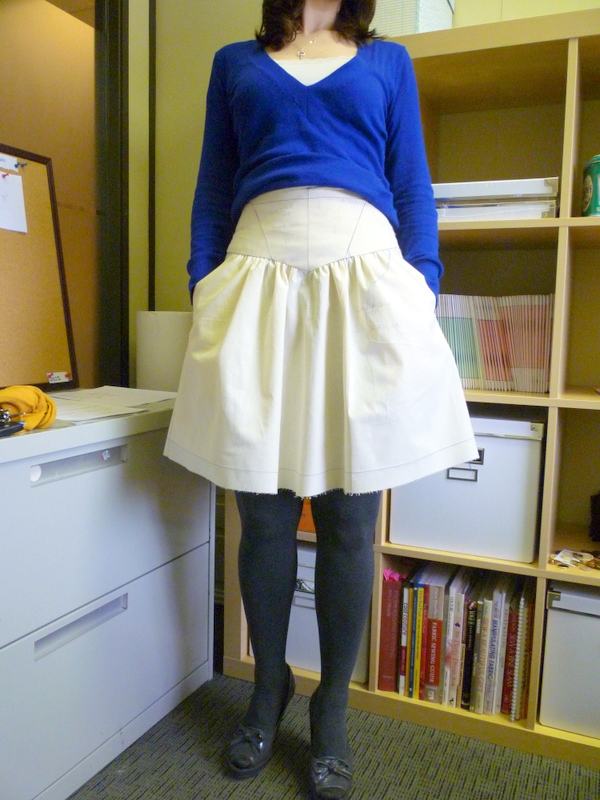
On me: my skirt hits right where I want it, at the natural waist. So I can work on the rest of the fit, knowing the waist is correct!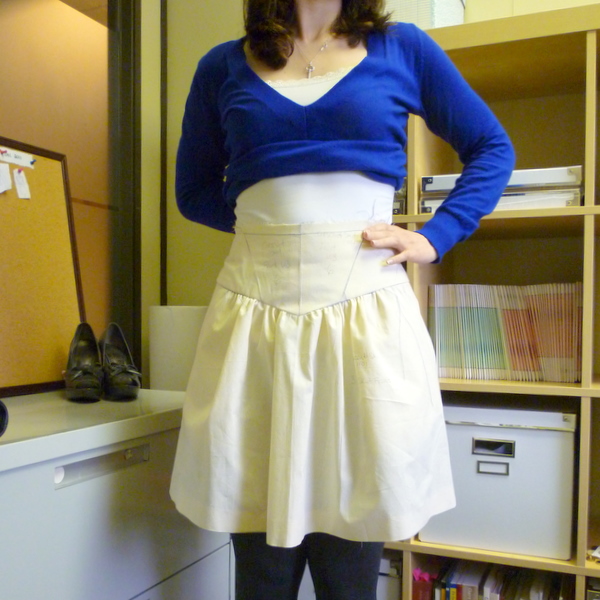
Adjusting the Waistband
A good fit on the waistband will make the rest of the skirt hang well. If you need to adjust the skirt waistband, the best seams to adjust are:
- Centre Front seam
- Sideseams
- Centre Back at the zipper opening
It’s best if you leave the curved seams alone, or the look of the yoke will change. Also, any changes you make to the waistband, you’ll have to make on the facing as well, and it doesn’t have any curves seams!
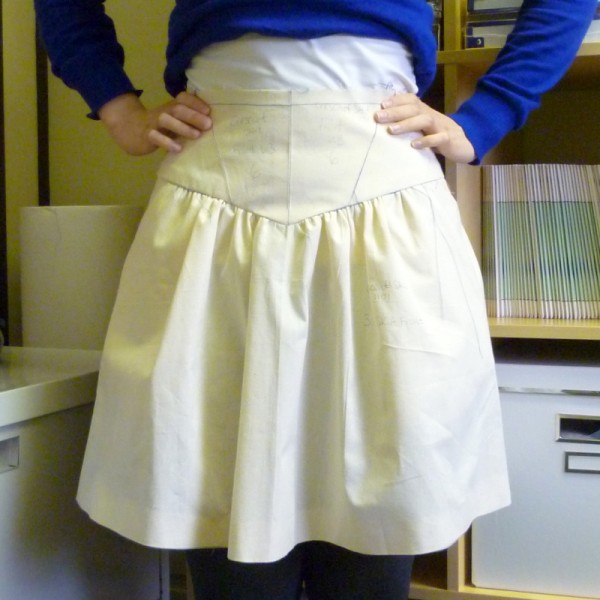
On me: I’m happy with the fit of the waistband! It appears I haven’t changed size and the curve from the waist down to the high hip fits right, no puckering or straining.
Hip
In this skirt, the hips are generously full. Once the waistband fits, you shouldn’t have to make any changes to the skirt pieces! If you do take in or let out the waistband, I’d suggest leaving the skirt panels as-is, and just having slightly more gathers or slightly less gathers. Unless you are making major changes to the waistband, keep the skirt pieces the same!
Pockets
Put your hands in the pockets. Are the pocket openings comfortable? If you dislike pockets, you could sew them shut. Or remove them, and add the pocket section back on to the skirt front.
Length
Finally, how’s the finished length? We have the hem allowance pressed up, if it starts to fall down put a few pins in the hem to hold it up. This is why it was important to decide where the skirt should sit on the waistline, as that will affect the hem length!
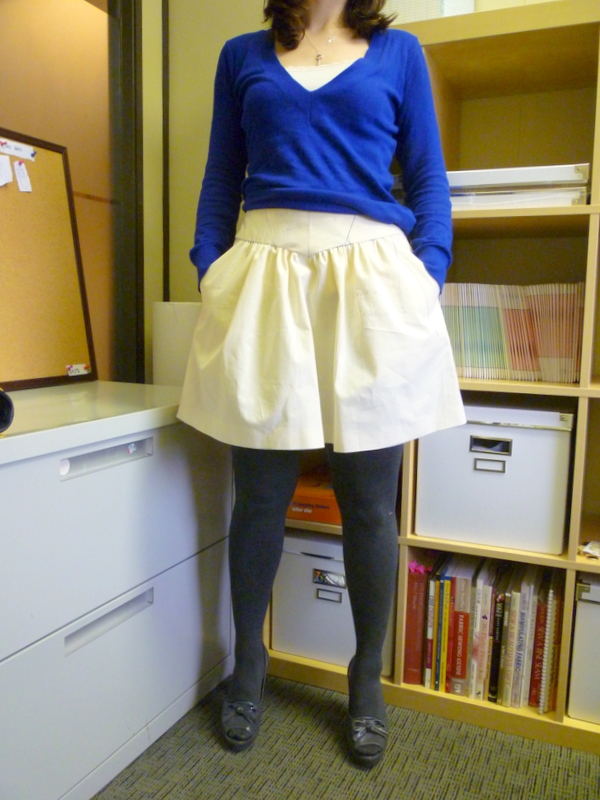
On me: I feel like it could be a touch longer. I love the flirty, playful original length but now that I’m biking, I’d like an extra inch or two of coverage. Especially for days when I’m not wearing tights.
Overall Style
One of the great benefits to making a muslin first is the chance to make sure you really like the style. When you sew, you don’t have the ability to try before you buy. (You do have the ability to adjust the fit, colour and fabric though, so that’s a trade-off I can live with!)
Picture the muslin in your chosen fabric. Do you still love it? Do you want to go ahead with the sewing project?
So now what?
Let’s make the adjustments to the muslin, and try it on again.
If you need to take in the seams:
- Turn skirt inside out, and try on, taking it in with pins until the fit is right. Remove pins on one side of the seam, and slip off the muslin. Draw in the new seamline with pen or fabric marker. Stitch the new seam.
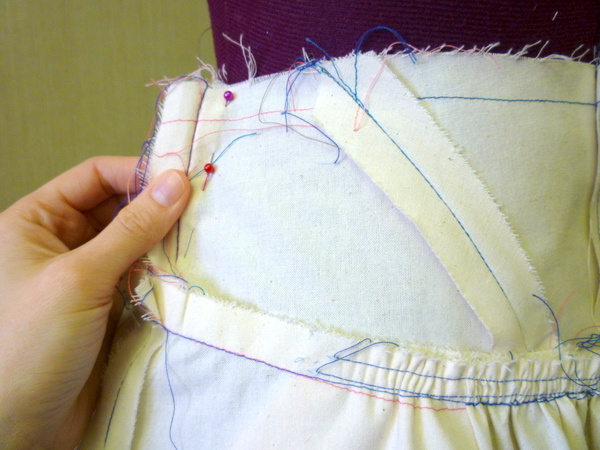 If you need to let out the seams:
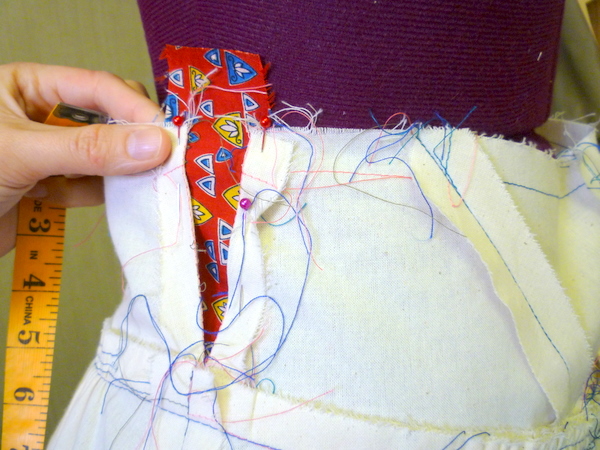
- Unpick seam, and pin new seamline in place. Remove pins on one side of the seam, and slip off the muslin. Mark new seamline and stitch the new seam.
- If the amount to let out is greater than the seam allowance, add a piece of scrap fabric in between the seam and pin in place. Sew this piece of fabric to the opened seam allowance.
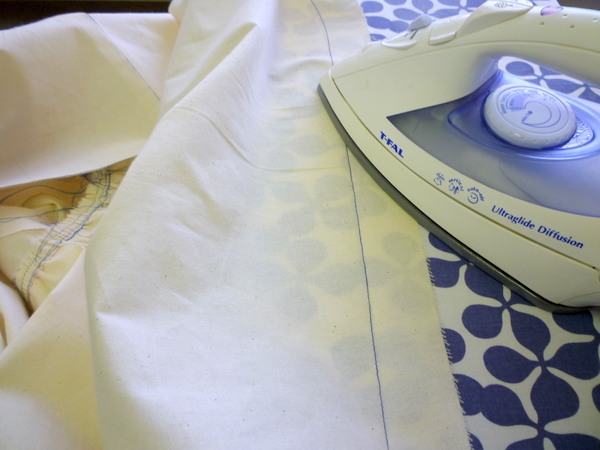
 If you need to shorten the skirt:
- Easy! Just press the hem flat, measure the amount to shorten the skirt from the original stitched hemline, and press up the new hem amount.
 If you need to lengthen the skirt:
- Press the hem flat, extending the hem allowance. Is that long enough? If not, you can add more to your real skirt, but you won’t be able to see the effect on your muslin.
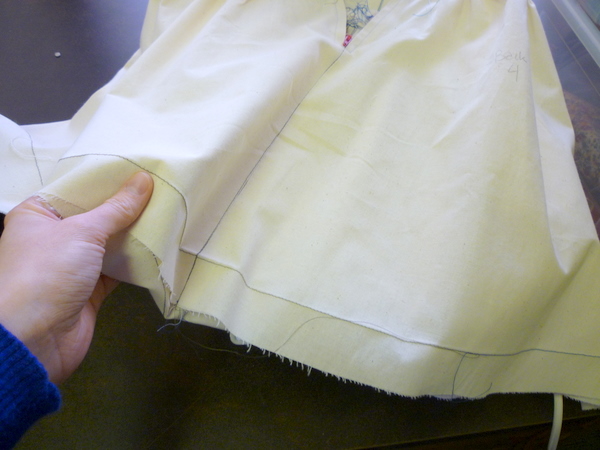 On me: I unpressed the hem allowance, and tried on the skirt again without any hem. That’s the length I want! So I’ll add the hem allowance to my pattern pieces before cutting the skirt.
If you’re wanting to do the same thing, here’s a shortcut – write on your pattern pieces how much to add, and just cut the skirt pieces that much longer when cutting your fabric. So in my case, I want to add 1 1/4″ (3.5cm) back on to the skirt length. I’ll pin on the pattern piece, measure down 3.5cm, and cut!
If you have a good memory, this is fine! If you’re forgetful and are likely to cut off the extra, better add some paper to your pattern pieces.
Try on, and decide if any more changes are necessary. Repeat until the muslin fit is just right!
One last step before we start the real skirt…
And that’s transferring these changes to our pattern pieces. If you have no changes, that’s great! You can get to cutting right away.
For the rest of us with changes, you can do one of two things:
- Copy the changes from your muslin to the pattern pieces
- Use the muslin as your pattern pieces
If you’re wanting to copy the changes from your muslin to your pattern pieces, simply measure the difference from your new stitching line to the original stitching line, and add/subtract this amount from your pattern. Repeat for anywhere you need to take in or let out!
NOTE: If you’re altering the waistband, make sure to make the same changes to the waistband facing as well!
I don’t usually suggest using the muslin as a pattern, only because muslin has give and may have changed shape if you’ve tried it on. Your muslin may have ‘grown’ as you’ve worked with it, and your skirt may end up too large if you use it as a pattern! Ask if you have any questions!

“NOTE: If you‚Äôre altering the waistband, make sure to make the same changes to the waistband facing as well!”
I’m SO glad you said that! I had a sewing session with my friend today as we’re making the crescent skirt together. We just muslined the waistbands and mine was fine but we let hers out slightly at the side seams and didn’t even think to make the same alterations to the facings. Thankfully we haven’t cut the fabric yet, that’s scheduled for our next sewing date. Phew!
Tasia: I’d like to “flatten” the skirt in the back just a little. I love the “bell” look on the skirt and on other people, but on me, it’s not as flattering. My back is kind of a straight line down from the neck to my waist and I think the bell shape accentuates that. I don’t want to get rid of the gathers altogether, just reduce them a little. So, I’m planning to shorten the width of the gathering area just on the back and take in the side seams a little. Does that make sense to accomplish what I want? Thanks!
Thanks for doing this post! This is the hardest part of sewing and it’s so helpful even just to be reminded what to check.
Question (and I haven’t muslined anything yet because I’m a binge seamstress and know that once I stitch something I want to try it on and mess with it right then so wanted to wait until I read this post before starting, so this is just theoretical): at what point on the body is the hipline supposed to hit? That is, are the gathers supposed to start at the hipbones, above the butt?
And relatedly, what if one wanted to shorten or lengthen the yoke? Or would you not advise that?
I’m definitely a pocket-hater in bottoms – skirts, pants, dresses. The spot where items sit in the pockets is always at (or just below) the widest part of my thighs, and I also have fairly large quads so the front of my legs is not a place where I have a lot of extra room.
This sew along was very helpful to see how the pocket was designed – it looks pretty easy to add back in that little triangle of fabric on the skirt front and eliminate the pockets.
My muslin is done (and in the Flickr group). I first thought I would have to take it in at the sides, tried it on the musin, turns out it would sit higher (on my waist) and I prefer the look of the skirt a little lower on me. So I think I’ll just take it in a tiny little bit (with a slightly bigger seam allowance at the sides). Can’t wait to get started with the real thing.
Hey everyone!
@Rachel: Yay! Good save! How fun that you’re sewing it together with a friend – sounds like a good time to me!
@Lauren R: Hi Lauren! You’re on the right track. I’d reduce the back *between* the gathering circles. Simply slash and overlap your pattern piece, and re-draw the top edge and hemline. Want me to demonstrate or does the words explain it well enough?
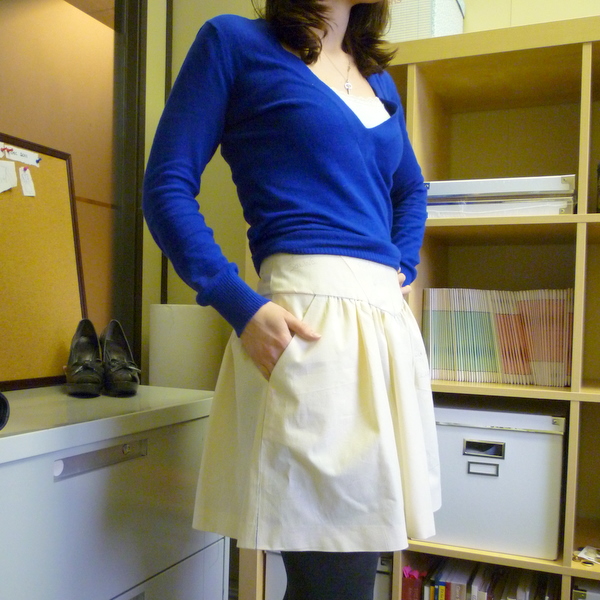
@daiyami: You’re right – the gathers are supposed to start above the butt. Imagine instead of the gathers, there would be a 3″ dart from the bottom edge of the waistband, down towards the butt. The gathers are there instead of the dart (with a little extra fullness.) Depends on how long your butt is too (a weird thing to think about, I know!) but generally, unless you have a very short rise, the waistband covers the top 1/3 of your waist-to-hip area and the bottom 2/3 of your waist-to-hip section is covered by the skirt part. That sounds more confusing that it is!
If you look at the side-view photo of me, you can kind of see how the gathers are poofed out by my butt. The gathers start where low-rise jeans would just begin. :)
@edenz713: I’m usually a pocket-hater if they’re obvious, if they gape and pull, or if you can see the outlines of everything in them! I carry my weight on my upper thigh and sense it’s going to get worse the more I ride my bike!
I like these because the gathers hide what’s in your pockets. I have this massive set of keys now because of the office and I can hide my keys in these pockets without anyone knowing. :)
But you’re definitely right, these are easy pockets to cover up, by filling in the triangle on the skirt front. Do you want to see a demo on how to do it, or are you confident in doing it yourself? Just give me a shout if you want me to do a tutorial! :)
@daiyami: Oops, forgot to answer on the yoke question. Well, you could shorten or lengthen the yoke. It would depend on your body, but there’s two ways you could do it:
1. extend the yoke pieces to be longer, tacking on extra length at the bottom edge
2. slash horizontally and add the extra length between top and bottom, keeping the edges the same
Probably I would suggest option 2, that way all of the pieces still line up, and you get your extra length added evenly. What will happen is the measurement that was meant to be 5″ down your body, is now 6″ down your body (if you added an extra inch). You may want to add extra then, around the bottom of the waistband, in order to fit a wider section of your hips. I would suggest making a mock-up in muslin to be sure the fit is right and the curved seamlines still look good with the extension and re-drawing of the yoke lines, but it works theoretically. Good luck! :)
@julia: Great! Sounds like you have it all figured out and can get started cutting! :)
Thanks, Tasia!
My muslin is done too (mostly!). I’ve also discovered the skirt sits a bit higher than I would usually wear so will let out a tiny bit and I’m going to add some length. I’m making view A but need to cover up my knobbly knees…! Your explanations and photos are great by the way, really clear and simple to follow. Thanks!
Thanks Tasia, I’ve never sewn with a muslin before so these posts are really handy.