This tutorial was originally posted on Sew, Mama, Sew. I’m reposting it here so it’s easy to find.
Today I’m showing you how to change the centre back invisible zipper closure to a centre front button closure. I can’t take credit for this idea though! A reader of the blog, Colleen, emailed me to ask about modifying the Cambie to have a button-front, and I thought it was a brilliant way to change up this pattern. So when I was asked to come up with a modification to the Cambie it was the first thing that came to mind. Thanks, Colleen!
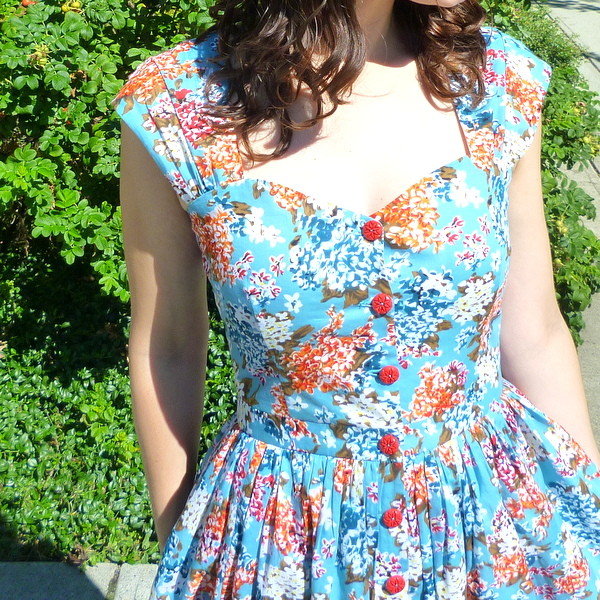
I will show you how to modify the pattern pieces, how to sew the button-front version of the Cambie, and show off the finished dress. It’s a long post, but all of the information you need is here.
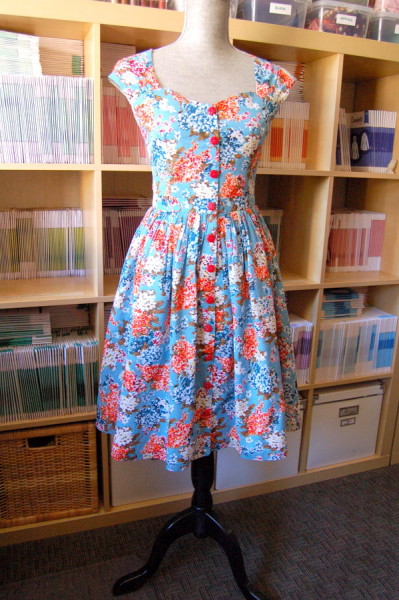
Let’s get started!
Basically, we are REMOVING the zipper opening at the back, and ADDING a centre front opening with an overlap. The front was originally cut on the fold, now the back will be cut on the fold.
Pieces you will need:
- Waistband
- Bodice Front
- Bodice Back
- Skirt Front
- Skirt Back
You won’t need the pocket or sleeve pieces. If you are planning to trace your patterns, trace them off before starting the steps below. I’m demonstrating with View B, the full gathered skirt version, but the steps are the same for either version.
To remove the CB (Centre Back) opening:
Measure and remove the seam allowance from the Back Bodice, all along the centre back. I drew in a line 5/8″ (1.5cm) away from the cutting line, that will be the new line to place on the fold.
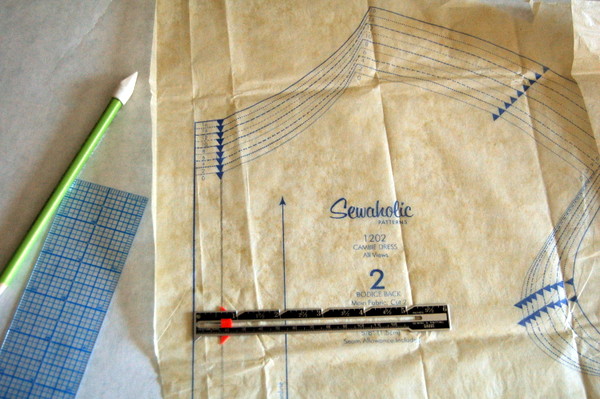
If you don’t want to cut your pattern piece, simply fold under the seam allowance along the 5/8″ (1.5cm) line. You might find it helpful to pin the folded pattern piece in place so you remember not to unfold it!
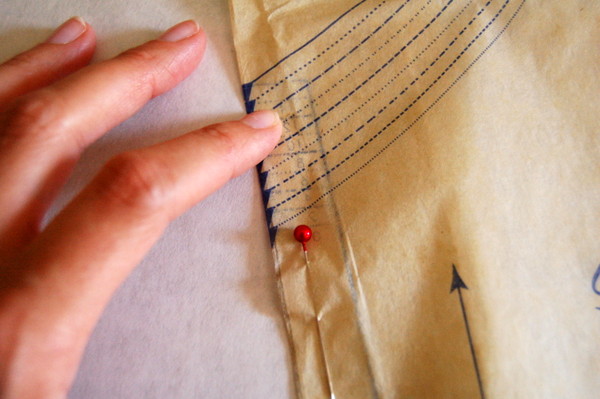
Measure and remove the seam allowance from the Skirt Back. The centre back is the side with the double notch, not the two single notches for the pocket opening. Again, draw in a line 5/8″ (1.5cm) away from the centre back cutting line, and fold under the extra. Because this piece has a straight edge, it’s easy to do without damaging the pattern piece.
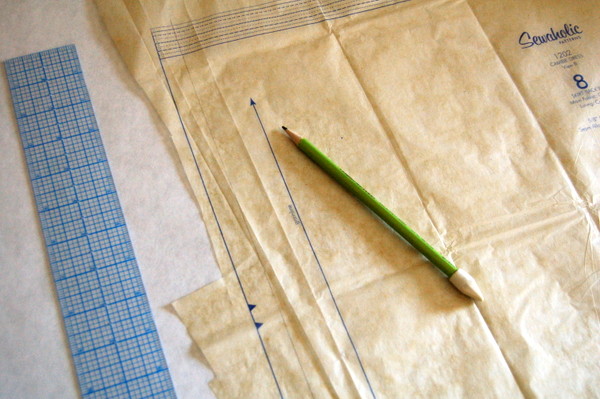
Both of these pieces are now “Cut 1 on Fold.” (See notes about cutting, as the Skirt Back piece may not fit on your fabric.)
To add the CF (Centre Front) opening:
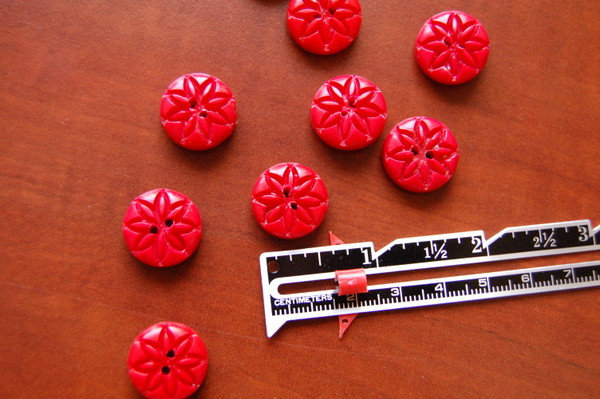
That seam allowance that we removed from the back? We’ll add it to the front. But first, we’ll add an overlap for the buttons. How big should the overlap be? It should be the same as the width of your button. Pick your buttons first. I’m using these little 5/8” buttons, so we’ll add an extra 5/8” to both sides of the centre front opening. (It doesn’t matter how many buttons you are adding yet. You can decide that later on.)
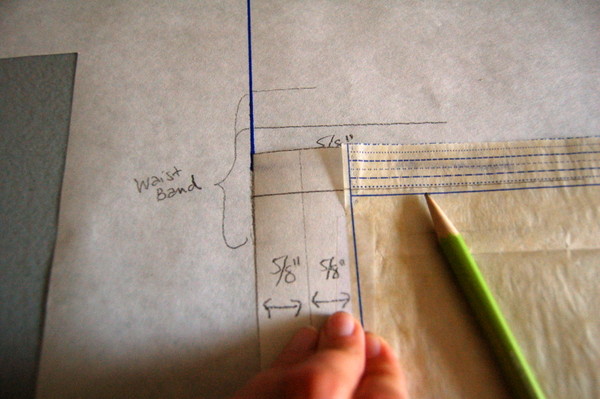
Tape an extra piece of paper to the Bodice Front piece, and draw a line 5/8” away from CF, parallel to the original fold line. Draw this vertical line longer than the bodice, above and below the top and bottom edges.
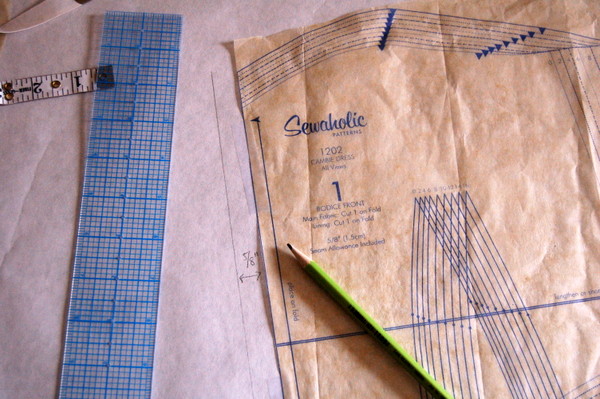
Now add back the 5/8” seam allowance on the outside of the 5/8” line. Extend this line up and down, past the edges of the bodice.
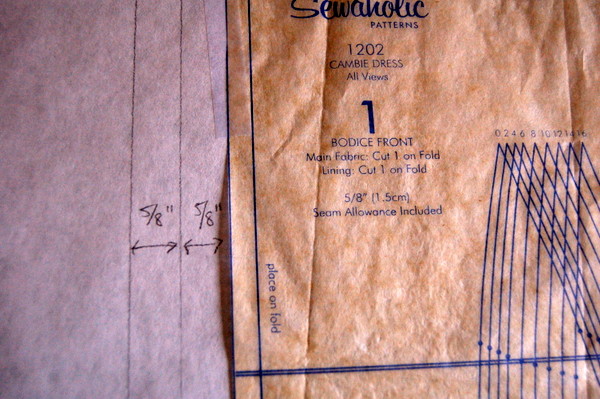
Draw in the top edge. For the sweetheart neckline, this is going to be really easy to sew. We’ll be able to round off that curve on either side of the opening without having to sew across and clip to the point, and when they overlap they’ll create that heart shape!
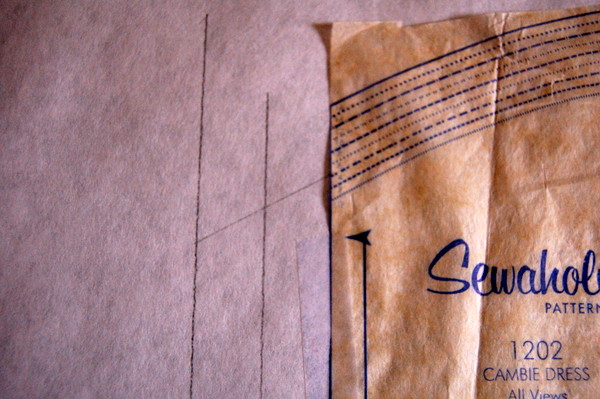
Square off the bottom edge.
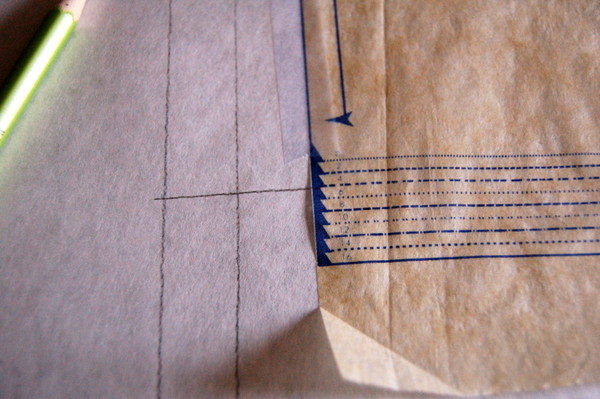
Repeat for the front skirt piece, adding both the overlap 5/8″ (1.5cm) or the width of your button, and a 5/8″ (1.5cm) seam allowance to the centre front edge. Square off both the top and bottom edges.
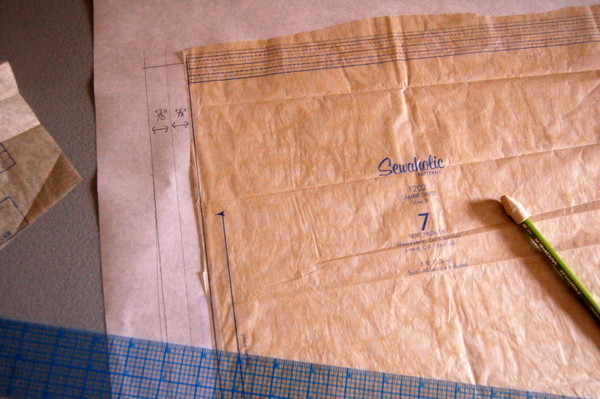
Cut out these new pieces with the extension. These will now be Cut 2 rather than Cut 1 on Fold.
Adjusting the Waistband
For the Waistband, since the opening is getting rotated to the front, you could simply turn the whole piece around so the seam allowances are at centre front. However, then the side notches won’t line up. So we’ll do it properly, removing the allowances at the back, slashing and adding them to the front.
First, draw a line through the centre front notches, as shown.
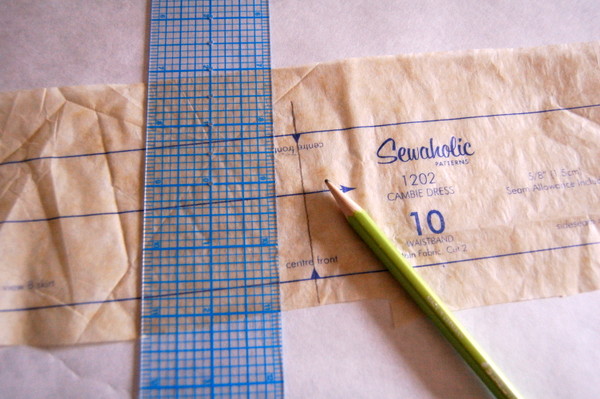
Now, cut along that line. You now have two halves of a waistband. We’ll tape them back together along the centre back, so it’s back to being a single piece! But instead of taping them together along the cutting line, we first need to remove the seam allowance.
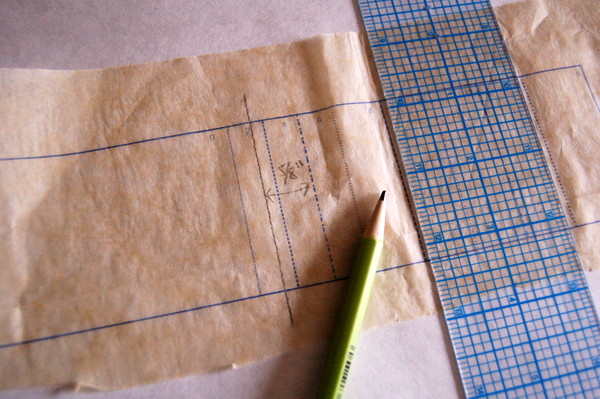
Draw in the 5/8″ (1.5cm) seam allowance on both ends of the waistband piece.
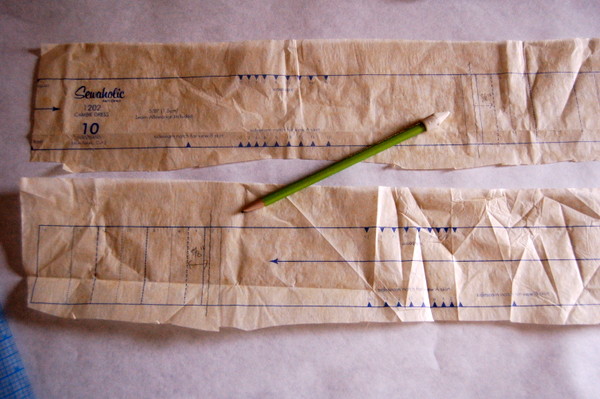
Cut along one of these centre back ends, along the new line you just drew. Overlap the cut edge on top of the other side, lining up cut edge with drawn line.
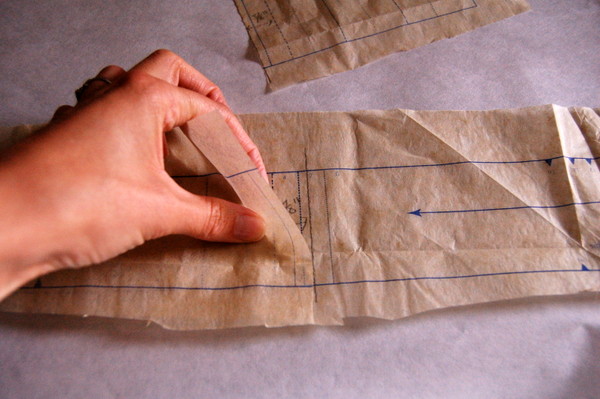
Tape in place. The last thing we need to do is add the overlap and seam allowance to the centre front – that’s 5/8″ (1.5cm) for the button, 5/8″ (1.5cm) for the seam allowance. Add this to both ends of the new waistband piece.
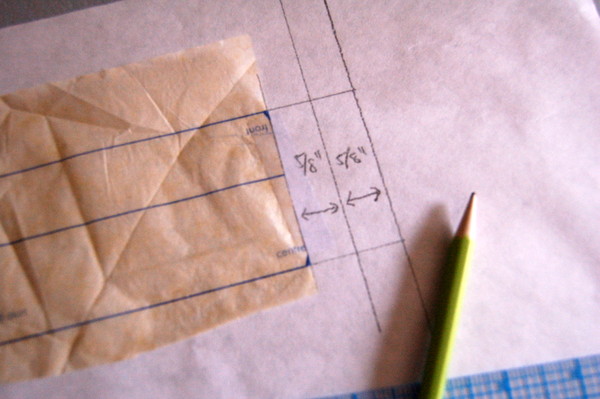
Cut out the new waistband piece. This is still a Cut 2 piece (not on a fold) but the opening is in the front, with an overlap added.
Making a Facing Pattern Piece
In order to finish the centre front opening, we’ll need to add a facing to the edge. You could just use the lining to finish the edge, but it may stretch out from buttoning and unbuttoning. Plus, if your lining doesn’t match perfectly, you’ll see a peek of the lining at the edges. A facing will match the garment fabric, support the buttonholes better and keep our centre front edge straight and crisp.
Trace off the new front bodice piece along the neckline, centre front edges, partway down the side seam, and partway along the bottom edge. You don’t have to use a thick pen like I did, I did it so that the lines show up in the photographs! Make sure there is a long length of paper below the front bodice as we’re going to extend the facing all the way to the hemline. (If not, that’s all right too, you can tape extra paper below to make it long enough!)
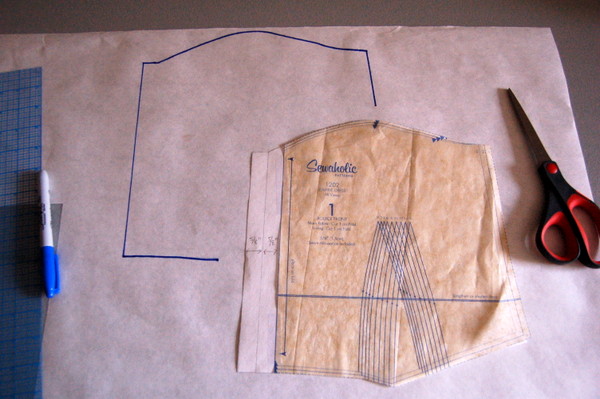
Draw a line 5/8″ (1.5cm) above the lower edge of the bodice, partway along the edge. This is where the seam will fall when we sew the waistband to the front bodice. We’re going to use this line to line up the waistband, so our facing will cover the front bodice, the waistband, and the skirt front, with no seams.
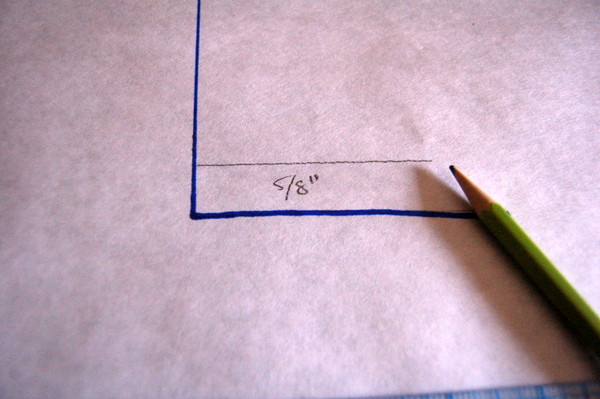
Draw a line on the waistband piece, 5/8″ (1.5cm) below the top edge. Now place the waistband piece on your paper, lining up the seamline of the waistband piece with the seamline on the bodice. Each piece will extend 5/8″ (1.5cm) onto the other piece, as if a seam was sewn.
Trace the waistband piece down the centre line, and extend the horizontal lines about 4″ (10cm) away from centre.
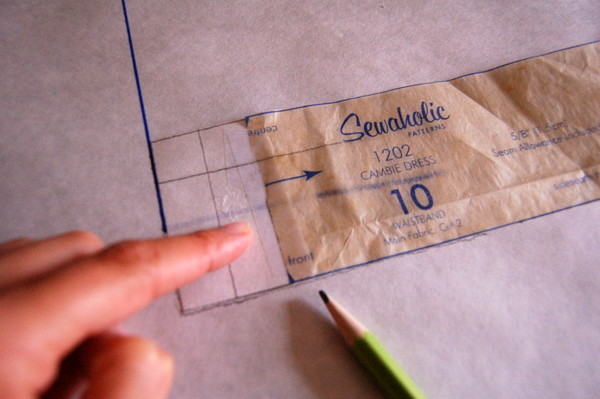
Draw a line 5/8″ (1.5cm) above the lower edge of the waistband, all the way along the edge.
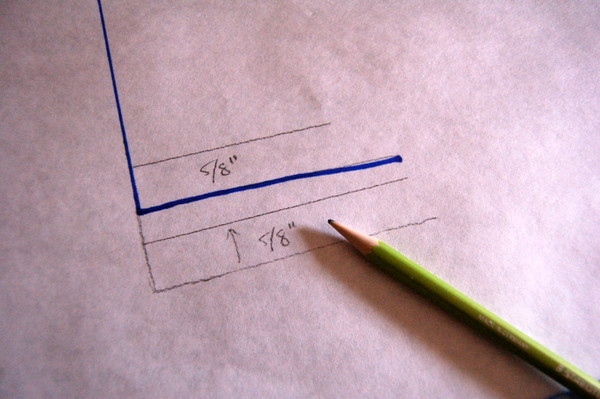
Draw a line on the Skirt Front piece, 5/8″ (1.5cm) below the top edge. Now place the Skirt Front piece on your paper, lining up the top of the Skirt Front piece with the line on the paper you just drew.
Trace around the Skirt Front all the way down the centre line, extending the lines along the bottom edge about 4″ (10cm) away from centre.
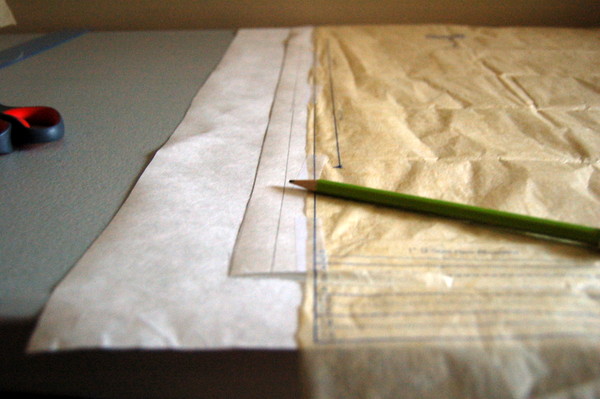
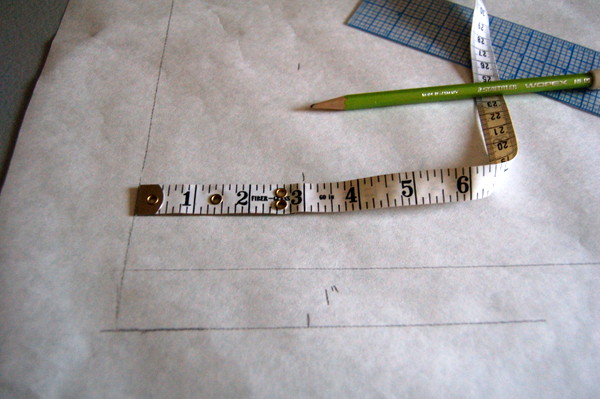
Add between 2-3″ (5-8cm) to the outer edge, all the way down the centre front line. I added 3″ (7.5cm) along centre front and at the sideseam, and 2″ (5cm) along the top edge. Also, note that the lower edge has a 1″ (2.5cm) hem allowance along the Skirt Front. When we sew the facing to the centre front opening we’ll have to remember to sew with a 1″ (2.5cm) seam allowance across the bottom edge of the facing.
I free-handed the curves along the top edge, you can do the same or use a curved ruler to smooth them out. This will be our facing cutting line. At the side seam, make sure that the lower edge is square to the side seam edge, for at least 3/4″ (2cm).
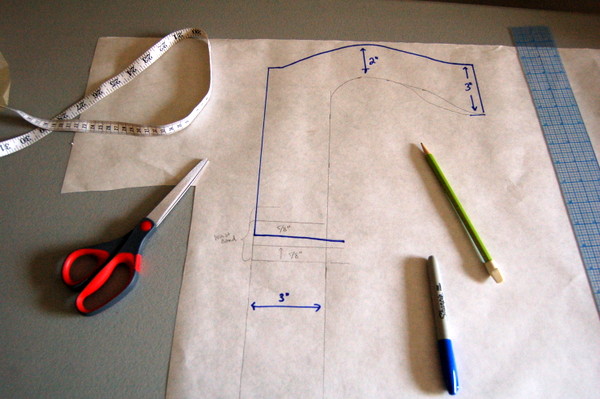
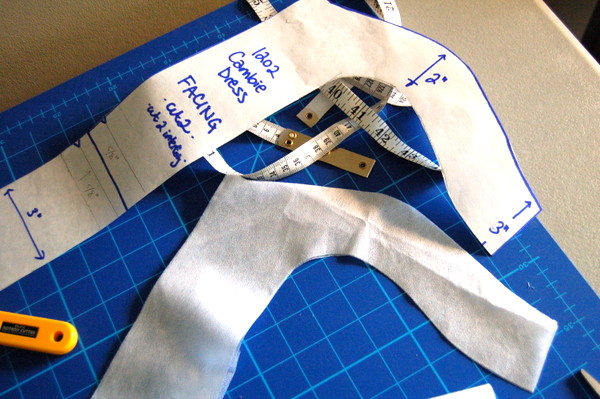
Cut out this piece. This will be our facing piece. Label it with Cambie Dress, Facing, Cut 2, so that you know what it is later on! (Looking at the piece now, I think I’d make it an even 3″ across the top edge, as it’s a little too curved. Or reduce the side seam part to 2″.)
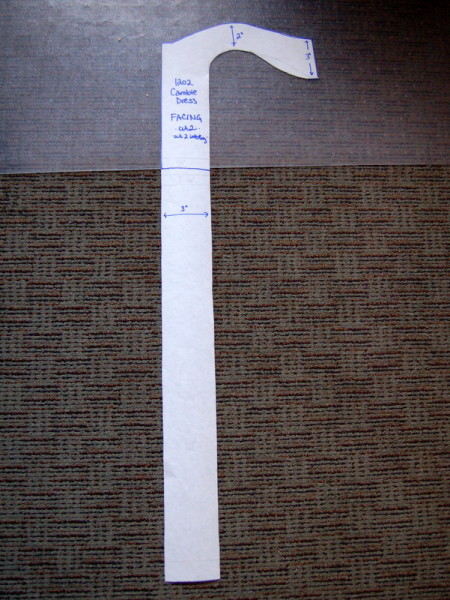
To keep things simple, I’m going to simply sew my facing on top of my lining, like we do with the Thurlow front pockets, and keep the lining pieces the same. There’s already quite a lot of information for this post and I want this modification to seem fairly simple to do on your own!
Cutting
Cut the pieces according to the new instructions, cutting the Skirt Back and Bodice Back on the fold.
The Skirt Back piece is very wide, and it was much easier to cut two of them that it will be to fit this wide piece on a fold! If your fabric is narrow, or if you are making anything but the smallest sizes, you might have to keep the seam allowance on the Skirt Back and sew the centre back seam shut. It won’t match to a seam on the bodice or waistband but that’s all right. I wasn’t able to fit my Skirt Back piece on the fold so there will be a centre seam down the middle of my skirt back. It’s so fully gathered that it will hardly be noticeable!
For the new facing piece we made, cut 2 from the garment fabric, and cut 2 from sew-in or fusible interfacing.
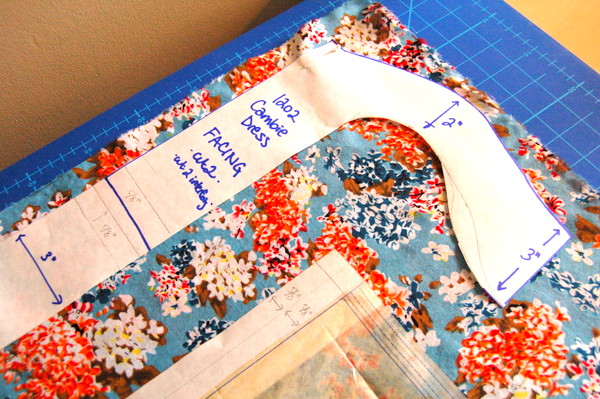
I also decided to add notches on the facing piece, where the waistband seams will fall. That way it will be easier to sew this very long piece to the centre front evenly.
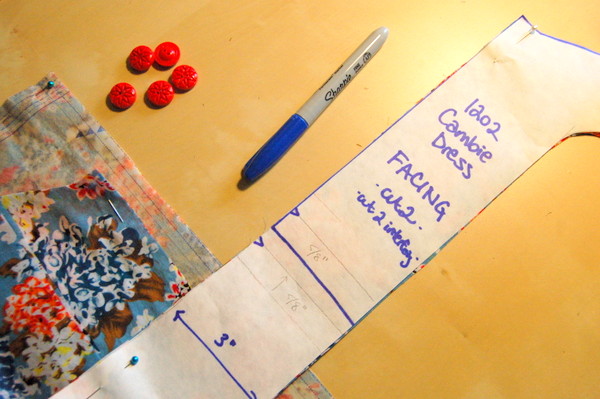
And I changed the shape of the facing slightly, shortening the long end at the side seam to 2″ from 3″ – that’s down to 5cm from the original 7.5cm.
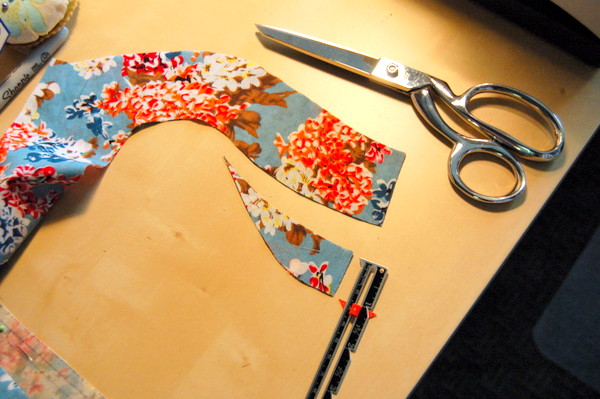
Sewing the Button Front Cambie
We’ll change a few things in the order of our sewing on this version. Follow the instructions as written, except for the following changes.
Before starting, fuse or baste interfacing to the wrong side of both facing pieces. Finish the inner raw edge of the facing.
Follow the sewing instructions, completing steps 1 through 11. Your bodice will have the fold at centre back, and the opening at centre front, so it will look different from the diagrams even though the sewing steps are the same. For the skirt, if you have a centre back seam because the piece wouldn’t fit on the fold, sew up the centre back seam, finish the seam allowances and press open. (I also skipped the pockets because the fabric is semi-sheer and I didn’t want them to show through.)
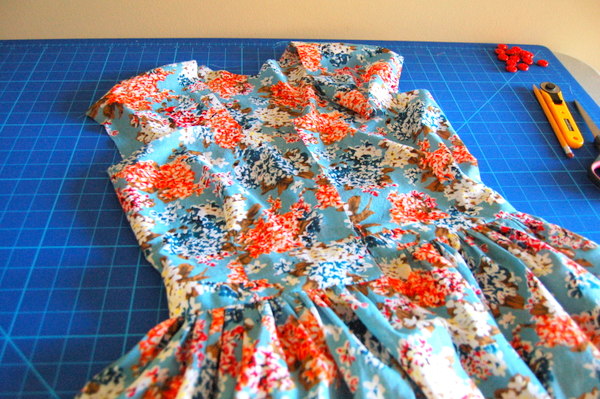
To make it even better, stop the gathers about 3″ (7cm) away from the centre front. This will give your buttons a flat place to sit. I didn’t and it was all right, but if I were to do this again I would push the gathers away from centre front.
When you get to Step 12, that’s where things take a different turn. Skip step 12. Complete Step 13 to construct the lining, but leave the side seam open about 3″ from the top edge downwards.
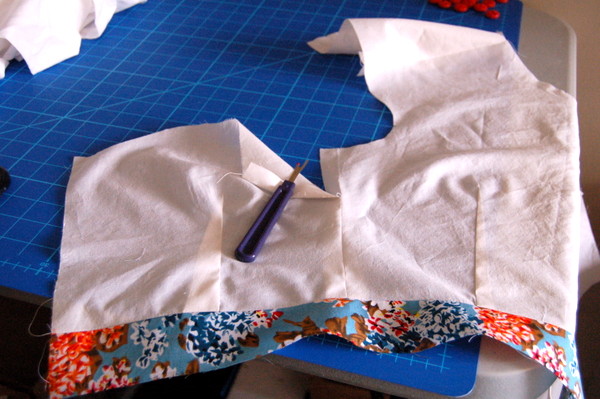
Once the lining is constructed, pin the interfaced facing RIGHT SIDE UP on top of the lining, also RIGHT SIDE UP, lining up the raw edges along the neckline and centre front. Baste the facing to the lining along the top neckline, centre front, and side seam edge. Edgestitch the facing close to the finished edge. (Also, I’d suggest hemming the lining before sewing the facing to the lining. I didn’t but it would have made it easier.)
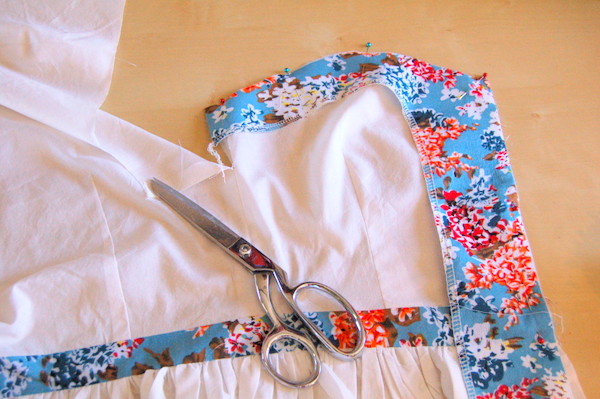
Sew the remainder of the side seam in the lining, enclosing the side seam edge of the facing, and press it open.
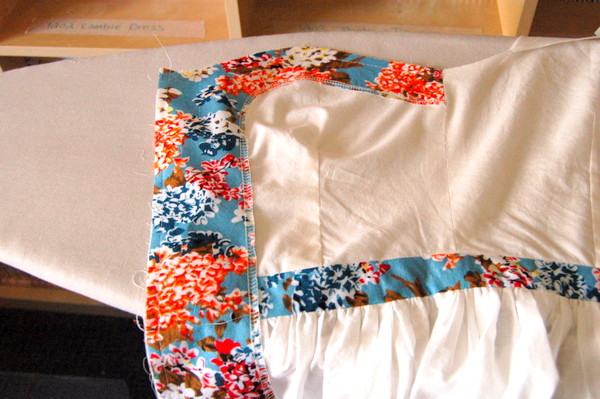
Now, pin the lining to the main fabric, RIGHT sides together. Start at the top corner of centre front, and work down the centre front. Pin all along the neckline and armhole. Sew the lining to the dress as in Step 15, but also sew down centre front.
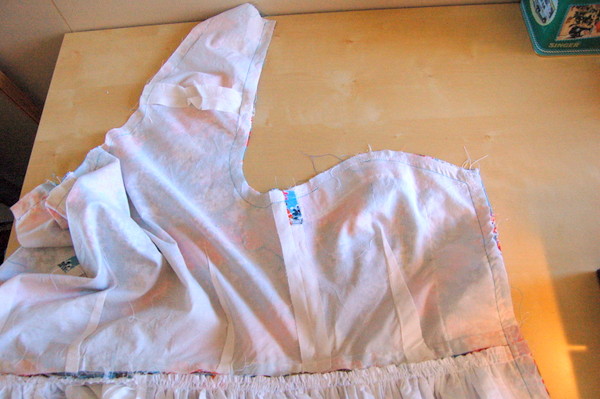
Sew across the bottom edge of the facing with a 1″ (2.5cm) seam allowance.
Trim seam allowances, clip curves, trim diagonally across corners, like in Step 16. Turn dress right side out and press well. Understitch the facing along the centre front opening, and as far as you can around the neckline. When you turn the lower edge of the facing, it will bring the rest of the hem up by the 1″ (2.5cm) hem allowance, making it easy to press up the hem the right amount!
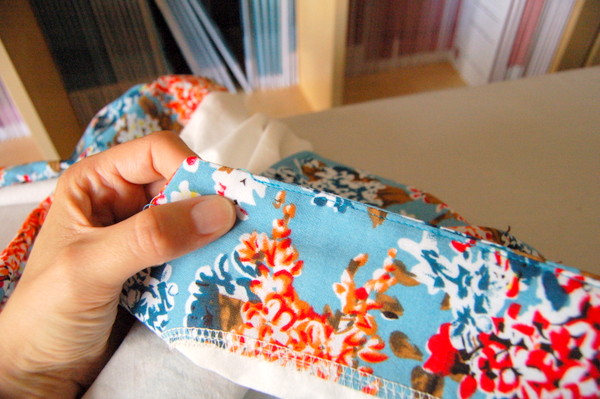
Follow the rest of the sewing steps 17 through 19.
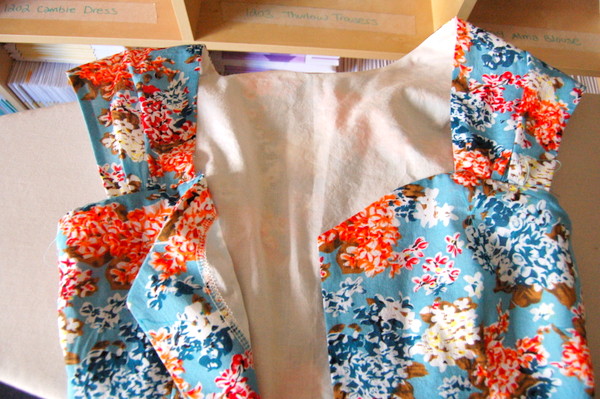
Determine how many buttons to add, and mark the placement. You will absolutely want one button centered on the waistband.
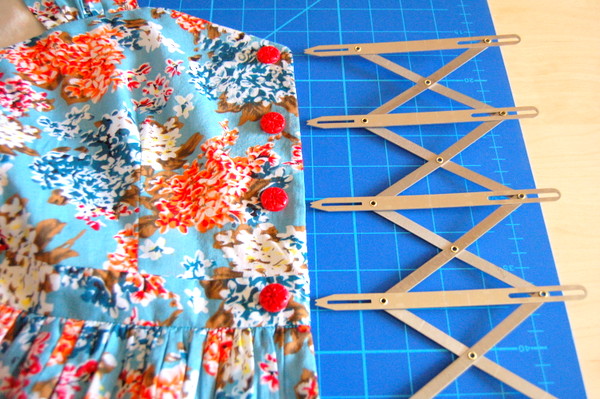
Make buttonholes on the RIGHT side of your dress. Sew the buttons to match on the LEFT side of your dress.
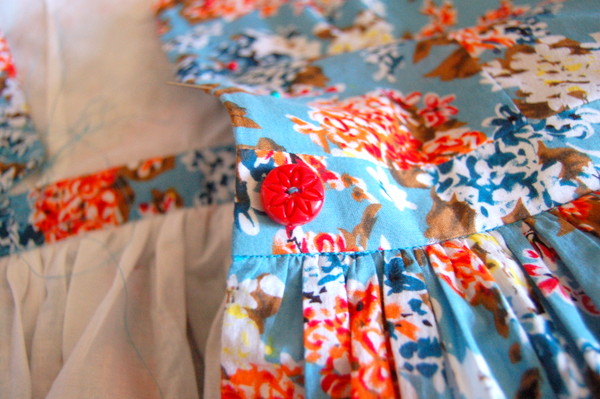
And we’re done!
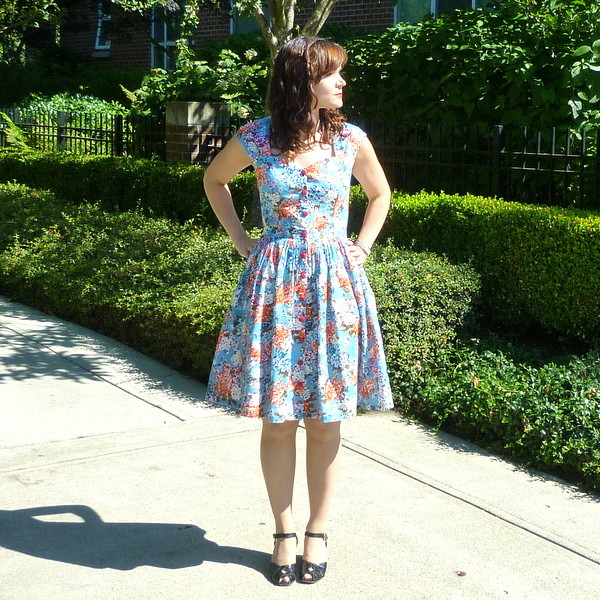
How cute is this version of the Cambie Dress?
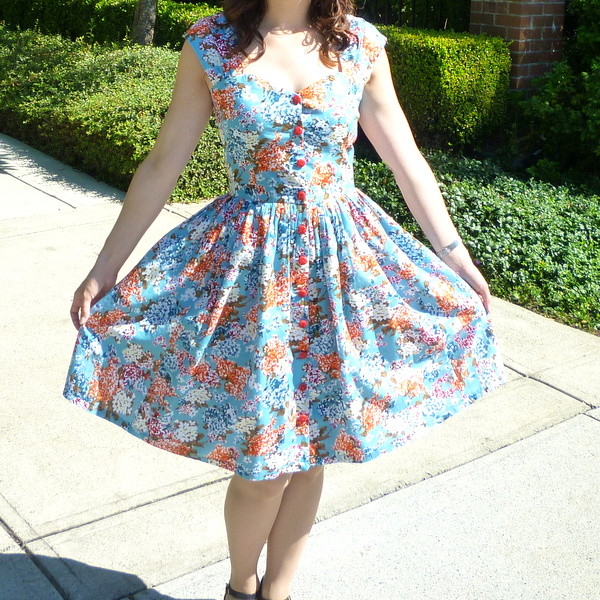
Here’s the back view.
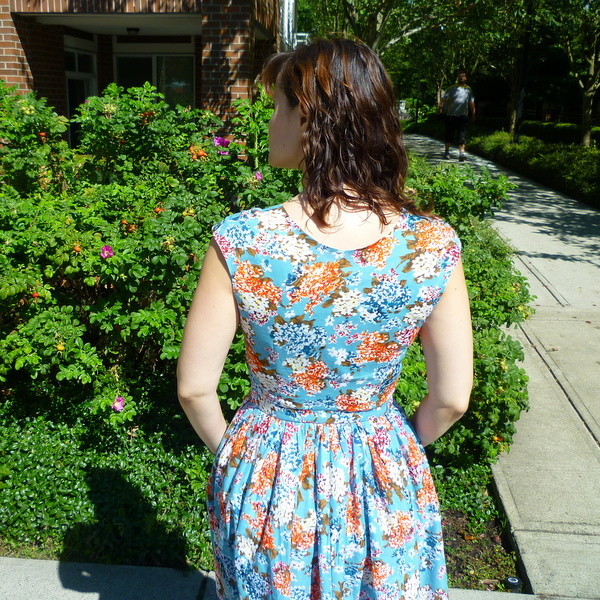
Like this idea? Pick up the Cambie Dress pattern here.

Awesome!!
Thanks for this again Tasia, it’s a lovely adaptation.
I always thought the Cambie would be really cute with a button front :)
What a great look. Love the fabric and especially the complimentary buttons. They look like jewelry for the dress. You are such an articulate seamstress. Great pics, tips and tricks. Tricks and treats! Just in time. And…you look adorable in it.
It all started because my daughter sent me a picture of this dress from Modcloth and wanted me to make it for her (she’s beyond asking me to BUY it for her because though I love Modcloth dresses the Make this Look column from the old Sew Weekly made me realize how easy it was to work with a pattern to come close to the original). Anyway, one look at this dress and I saw the Cambie which I love and has pockets! Thank you so much, Tasia, for the shoutout and your wonderful instructions. The dress was a complete success!
http://www.modcloth.com/shop/dresses/brunch-with-buds-dress-in-florets
I like wery much your blog! All cclothes you make are beautifull. I would like to say you something! Its possible you insert he translate gadget in your blog?
Manu thanks your sewing lessons!
Thanks Julita!~ I will see if I can figure out how to do that, thanks for the suggestion!
Great tutorial! Can I ask about the button placement gadget shown in the photographs?
Yes, it’s this! http://shop.afashionablestitch.com/product/simflex-expanding-sewing-gauge
Thank you so much for the link. Can’t wait to give it a try. I love gadgets that help get the job done!
How pretty. I love the red buttons on that fabric. Very clear instructions.
I really like dresses that button down the front. Love the fabric!
Lovely adaptation. I too need to know about the button gadget thingy (technical term there!) Never seen one before and I have almost every gadget known to dress-making, available in Australia.
It’s this – http://shop.afashionablestitch.com/product/simflex-expanding-sewing-gauge – and it’s awesome! Useful for button placement or pleats or anything you need to measure evenly!
I know the buttons are the cutest, but I ADORE this dress from the back even more… it’s just got a lovely shape! Espech on you!
What a lovely dress! I absolutely love the fabric? Can I ask where it is from?
It’s from Fabricland here in Vancouver, a cotton voile print. Hope this helps!
Hi Tasia,
This is an awesome dress. Could you tell me how many metres would I need to get a dress stitched till mid calf. I am 160 cms. I live in Sydney and the fabrics and dress makers are expensive. So don’t want to throw a lot of many. Rough estimation is good for me.
Many thanks
Swapna
Hi Tasia,
Thanks for this great tutorial!
I’ve just finished my version of it and blogged it here: http://schnitterling.de/2014/03/19/fruehlings-cambie/
I absolutely love it!
Cheers,
Meike
Hey Tasia
This dress is just gorgeous. I saw a lot pictures of this dress and i just love it. But through your version with this buttons it becomes even more cute. I will definitely saw a Cambie Dress as well.
Another question: What’s the name of this measurement with which you are measuring the gaps between the buttons and where can i get this? This is awesome.
Best wishes,
Eva
Ah! It’s a Simflex Expanding Sewing Gauge – like so http://www.nancysnotions.com/product/simflex+expanding+gauge.do
It’s really awesome, if you sew a lot of things that have buttons. You can also use it for pleats and other evenly-spaced things, it’s a handy tool!
Can I ask what you are wearing under the dress for that perfect amount of volume?
Nothing except the dress itself! It’s very gathered and there are two layers, skirt and lining, both in a cotton fabric so they have a bit of volume.
Well, and undergarments. That came out racier than I planned. :) But no petticoat or anything!
Still giggling with the above comment, teehee :)
I have a question too, I find it hard to wrap my mind around this: if you added just the width of the button to both sides of the centre front, then wouldn’t the buttons need to be sewn on the edges of the finished centre front pieces? Obviously not, as I can see in your photos, but how can that be explained? Also: how much space did you leave from the edge of centre front to the buttons and the button holes?