Can you make the Granville Shirt sleeveless? Of course you can!
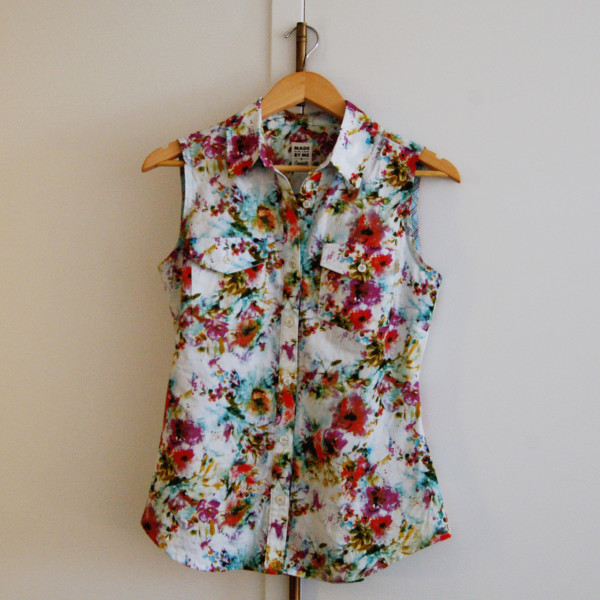
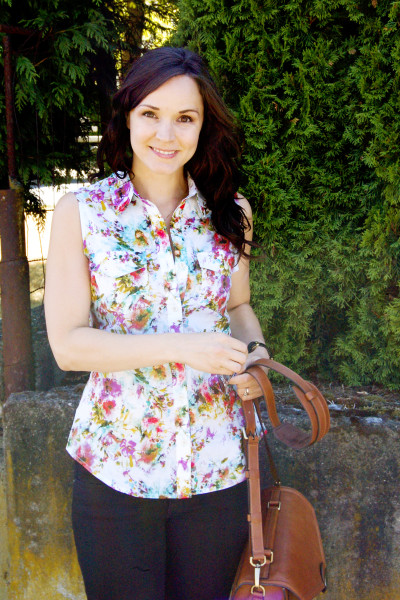
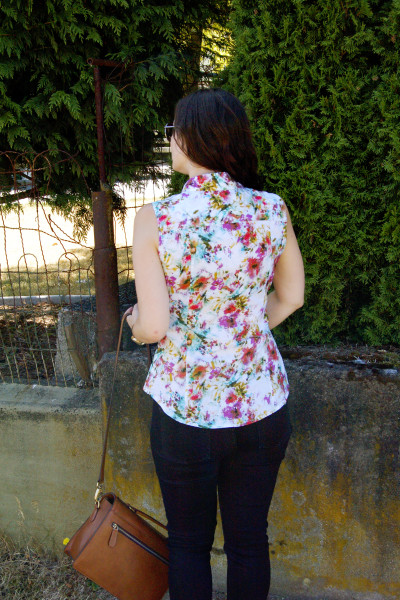
For the armhole binding, I used plaid bias binding since I’d ran out of the floral voile.
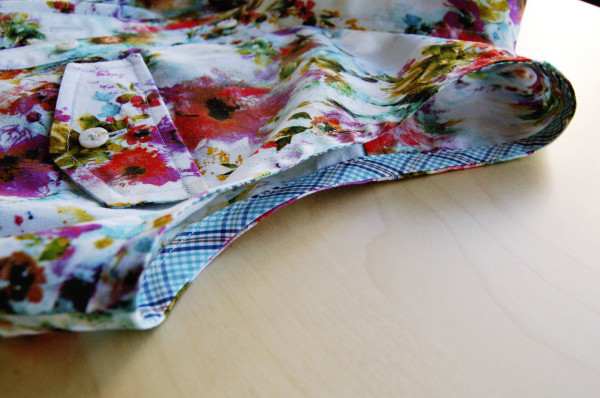
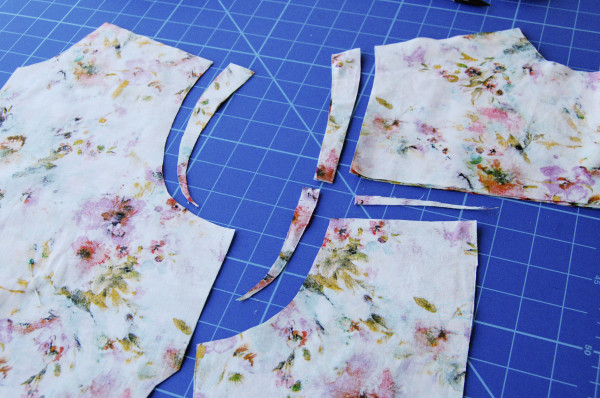
Here’s a good tutorial on how to change a shirt with sleeves to a sleeveless version on the Grainline blog. That’s pretty much what I did here! I took 1″ (2.5cm) off the shoulder and took about 1cm (3/8″) out at the yoke line. (I arranged the cut pieces where they used to be in the photo below, so you can see where the changes happen.)
I did sew on the armhole binding with a 1/4″ (6mm) seam allowance, using the unfolded edge of the binding as a guide. So if you’re planning to use a different seam allowance on your armhole, plan accordingly. Using a narrow allowance like this is nice because you don’t have to trim as much.
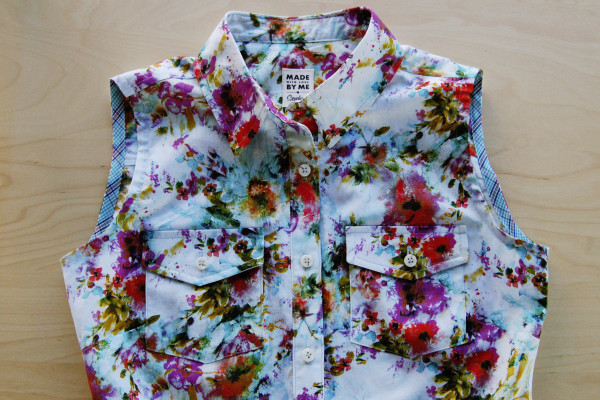
The chest pockets are my favourite part of this shirt. Even though they don’t stand out in the print, I like having them there. It draws attention to a smaller chest and gives you somewhere to put money, a card or other flat items.
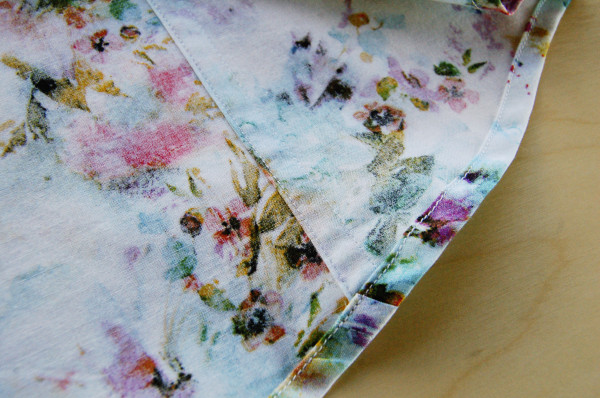
I did flat-felled seams on all seams for a clean inside finish.
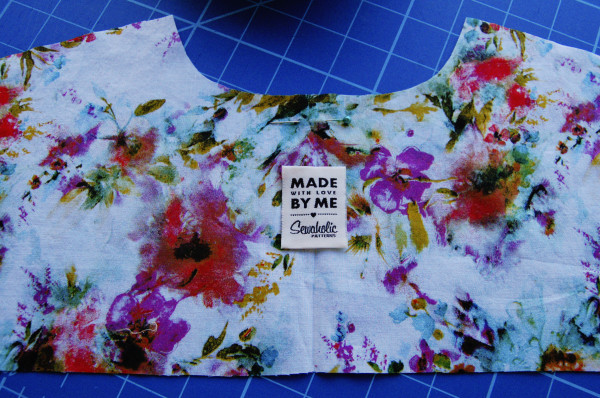
I put a ‘Made by Me’ label on the yoke. This is a good place for a big wide label. If you decide to add one, make sure you take seam allowance into consideration. I put a pin where the neckline seam would be so I could place the label accordingly.
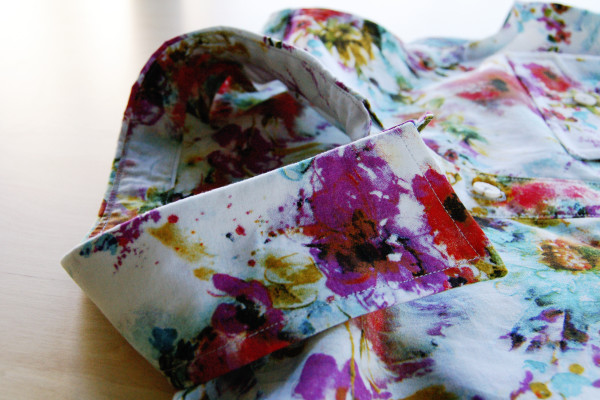
The collar looks nice, as I followed the instructions in David Page Coffin’s shirtmaking book for this version as well. This makes it roll nicely around the neck without creases in the top layer of fabric. I used sew-in interfacing for the collar and bands, finishing it with plain white buttons and white thread.
This shirt would also look great layered under a sweater, with just a peek of the floral collar showing. I think a white sleeveless version would be so lovely in the summertime.
ps. Check out all posts on shirtmaking here!

Tasia, don’t you need to raise the underarm for a sleeveless version? I would have thought the armscye would be larger to accommodate a sleeve. So without the sleeve, the armhole will be too big, particularly at the underarm, and leave one exposed.
It didn’t make a difference here, possibly because I sewed on the bias trim with a 1/4″ seam allowance. This is a fairly slim-fitting sleeve, it’s not dropped or loose cut so that’s part of it too. Of course if that’s a concern it would be easy to raise it up, and if the extra height isn’t needed then trim it off when sewing the bias tape.
AFAIK, the armscye is almost always smaller when there is a sleeve. It seems a bit counter-intuitive, but you want sleeves to fit really closely to the arm/underarm so you have full range of movement (I’m sure you’ve worn a top where the underarm sleeve seam was too low, it’s hard to raise your arms).
For sleeveless tops, having the seam too high makes it feel like it’s digging in, and it looks nicer a bit higher on your shoulder.
Thanks for linking up the grainline tutorial – it’s been something ive been on the lookout for for a while! Your shirt looks really pretty too – perfect for summer!
Hi Tasia, this is such a gorgeous shirt! I’m so glad you posted this as I was wondering if the Granville would work as a sleeveless shirt!
Just wondering – roughly how much fabric did you use? Thanks! :)
I’m not entirely sure since I used leftovers, and was able to place small pieces on oddly-shaped scraps. I have a piece that’s 1.2m that I’m planning to use for a sleeveless version (size 4), so depending on the size you make and the width of your fabric, and if you have to match stripes or patterns, that might give you a starting point? Next time I’ll measure the amount of fabric I used. :)
Sleeves + placket + cuff take up a lot! Of course if you wanted matching bias binding then you might use up the same amount cutting bias strips.
That’s great, thanks Tasia :)
I love the touch of bright plaid in the bias binding on the armholes. Such a fun little detail!
That is a lovely shirt…. but I’m in love with your gorgeous handbag!
It is actually a camera bag, disguised to look like a purse! It’s nice eh? Plus, padded shoulder strap for comfort.
This shirt is just gorgeous! Love the fabric, it’s so perfect.
This is brilliant. Especially because once you get the pattern fitted perfectly to your body (if any adjustments are needed…) then you have even MORE options. Summer weather here we come! (er, too optimistic?)
It looks like summer here today! 15 degrees and sunny :)
Doesn’t look like summer or spring here yet! It is about 6 degrees and not sunny, but snowing (again!). Ah well, gives me something to do inside I suppose! but in all seriousness, love the sleeveless look! And it has got to be very nice to wear it when it is warmer out! TFS, Annette
15? 6? I don’t even remember what those feel like – it feels like -29 here in southwestern Ontario!
Beautiful, I love the combination of the fabric and the pattern.
I love the shirt and the fabric is gorgeous! Yummy, I want!
Oh, that’s cool. I just got my Granville on Friday, so I’m itching to go.
Question, though: Why do you need to take a bit from the yoke for the sleeveless version? (this is to fortify my nerdiness quotient for the day)!
It’s because there’s extra room added for the sleeve, and if we just remove the sleeve and make no other changes, then the back armhole would stick out. Taking a bit out helps it to curve across the shoulder blade and brings the armhole in a little. Jen explains it in the linked post as well!
Fantastic shirt! The plaid gave it a lot of interest.
Holy flip Tasia this is so pretty! I’ll admit I had a whole lot of other sewing plans but you’ve just bumped another Granville to the top of my list…
This is just gorgeous, I love the pattern and can’t wait to make it myself
What a lovely sleeveless blouse. I love it! You’re swaying me more and more to attempt a blouse. Love the material and the look.
This shirt is so pretty! I just cut my Granville muslin and hope to sew it this week and if it works I have so many ideas for shirts! And you just added another one!
I love that fabric!
Wow! So beautiful, Tasia!
Tasia, what do you do to keep placket button holes from puckering? I’m having the hardest time! Is it an interfacing issue, or tension..? Thanks!
What do you mean by puckering – is the buttonhole stitching sucking the fabric in to create a pucker? That’s what I am picturing. It may be the tension, on my machine you release the top tension a little so the threads are pulled to the back more. It could also be the interfacing, if it isn’t firm enough the fabric may be too light, but I’d imagine loosening the top tension could fix that. After all you want to be able to sew buttonholes on thin fabrics and not have to use super stiff interfacing on every project.
Try loosening the top tension and see if that works! All machines are different, but that might be a good starting point. Maybe change the needle, if it’s not sharp enough to pierce the fabric it may be poking it into the bottom of the machine. And definitely make a few tests on the exact same fabric/interfacing mix so you know what it will look like on the final project. Hope this helps!
Hey! This lovely sleeveless shirt looks familiar! Not only familiar, but it is fresh, spring-like and very lovely! Now I have a better understanding of the time factor involved in taking a pattern from the idea stage to production. That would be an interesting post Tasia!
I know eh? It does take a long time for design ideas to turn into a finished product. I feel like I may have talked about it already, but maybe I just think I did? :) It is an interesting post idea for sure!
Interesting post idea by Sue @ A Colourful Canvas, and I like it too. Hint, Hint, Tasia!
Lovely! I’m working on two Granvilles right now and can envision a whole bunch more with and without sleeves. It’s a wonderful pattern. Beautiful fabric too :)
That watercolor-looking fabric is gorgeous! Thanks for posting the tutorial– I think it’ll be a great way to use up some of my wovens on some summer tops, once I’m not pregnant and can actually start sewing with those again.
Do these instructions work for making the Oakridge shirt sleeveless as well? I’m thinking a sleeveless version with the bow would be extra cute :)
They should work! The only thing you might find is the armhole gapes a little at the back since you can’t take out the sliver at the yoke. (You could add a dart but it’s an odd place to put one.)
Hmm odder than having it gap? I’ll have to try it out soon :)
It’s usually that an armhole dart like that is rotated into the neckline, or eased out. You don’t often see a dart pointing to the middle of the back armhole. :)
Also do let me know if works out! :)
I was just looking at the pattern instructions…where is there a yoke? Or maybe I don’t understand what a yoke is lol
Ah sorry! What I mean is: on the Granville shirt, there *is* a yoke, so you’re able to take out a little where the yoke meets the back. On the Oakridge, there is no yoke, so you can’t make the same adjustment. Does this make sense now? Sorry that my comment wasn’t totally clear.
Yes, I get it now! I’ll do some experimenting and I’ll post some photos to your Facebook page when I get around to finishing!
seeing amazingness like this makes me want to sew for me and not just kids.
Thanks for the inspiration
So I got around to making a sleeveless Granville and, well, I bloody love it. I now have to decide how many sleeveless blouses one can get away with having
Never too many! They’re great for layering. I want a classic white one for wearing with summer skirts. :)
I screwed up the sleeves on mine, so now its going to be sleeveless :) Didn’t mirror the plackets right :/ Lessons learned!
Clearly, you’re just one of those gals that looks cute in EVERYthing. I love visiting your website.
But see, I’m a glutton for punishment. Knowing good and well that I won’t look like you in it I am GOING to make the Granville AND the Granville sleeveless.
Thanks for doing you, Miss Tasia.
Cheers,
Lyric
Thank you! :) If you don’t love sleeveless blouses on their own, they make great layering pieces under sweaters and jackets. No sleeves to bunch up inside the top layer’s sleeves!
Hello,
I am in the process of making my first Grainville shirt and am stuck at step 9, the Yoke instructions. Can someone help? Is there a tutorial on sewing this shirt? I have followed the instructions where it says to pin the front of shirt with the outer layer of yoke at shoulder seams and sew. Since there are 2 yoke pieces, the second yoke, the one for the inside of back of shirt, I have left it loose. Then, I am confused with the instructions regarding sewing the other yoke with shirt sandwiched in-between. Can pictures be provided? Thanks for any help.
Hi Rupal! We haven’t posted a tutorial on sewing the yoke yet, but I can add it to the list of tutorial requests for the future! It is a bit tricky to visualize if you haven’t done it before. This post on the Grainline blog illustrates the ‘burrito’ yoke method well: http://grainlinestudio.com/2014/08/22/alder-sew-along-day-8-yoke-method-2/ hope this helps in the meantime!
Thanks Tasia! I used your tips and it worked out really great. Beautiful pattern, I will definitely make it again.
http://helenscloset.ca/2015/07/17/my-first-button-up/