Here’s a fun plaid-matching challenge: can you match the plaid on the sleeve placket to the sleeve?
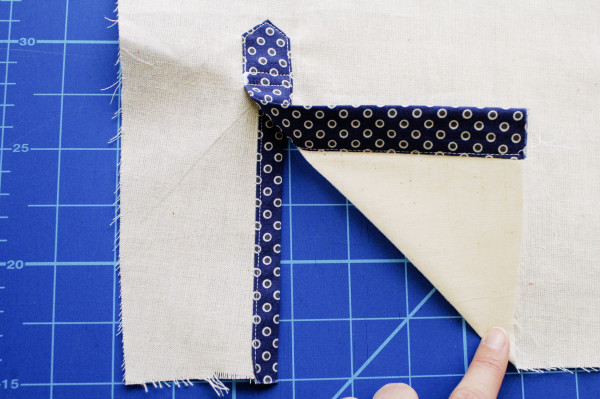
(image from our tailored placket tutorial post)
Yes! You totally can. You just need to figure out what part of the sleeve placket piece is the one that shows on the right side.
This is for the plaid Granville shirt I’m sewing – read previous posts here:
- Sewing A Plaid Granville Shirt: Deciding What to Cut on the Bias
- Cutting the Granville Shirt in Plaid Fabric
Cutting the Plaid Sleeve Placket
First, read our tutorial here to ‘watch’ the sleeve placket construction in action. You can see that it’s the wider part with the pointed top that forms the wide tower placket, and of that section, it’s the outer half that ends up on top. My first instinct was to line up the centre of that part, between these two lower notches, on the same plaid line as the placket cutting line. Let’s see if that is correct.
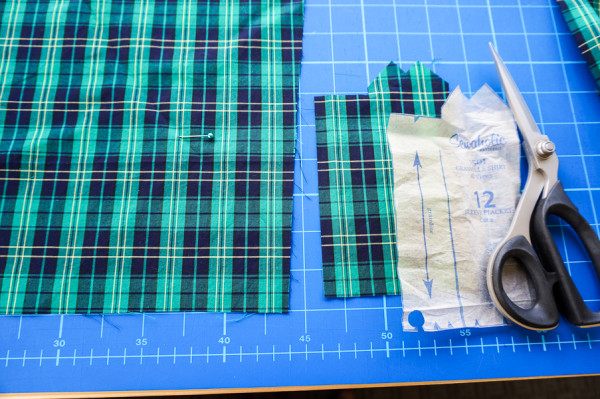
This is our plaid sleeve, and the pin marks the top of the placket placement line. It falls along the very thin navy stripe that’s in the middle of the yellow stripes.
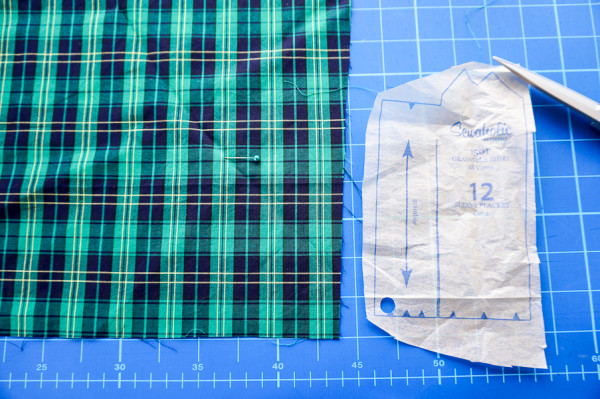
So then, the placket will be centered over this line like so:
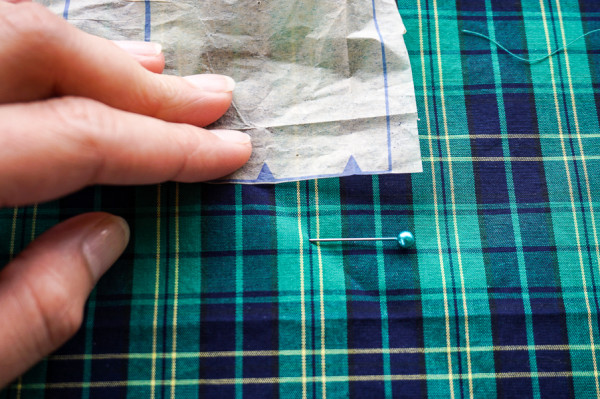
If you’re wanting to match something complicated, and it’s hard to puzzle out in your mind, make a mockup and walk yourself through the construction with basting or pins. If it’s a small piece like the placket, it’s easy to recut if you guessed wrong. It’s just fabric and often the learning lesson is more valuable when you work through the problem in three dimensions.
Sewing the Plaid Sleeve Placket
To sew the placket, follow the tailored sleeve placket tutorial here, with some additional guidelines on doing it in plaid:
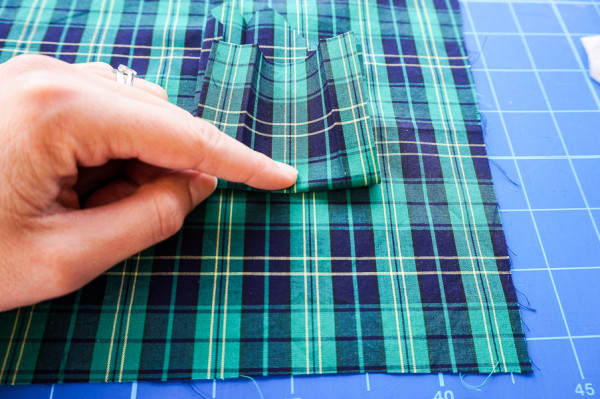
When laying the placket on the sleeve piece, make sure the lines of the placket are parallel to the sleeve plaid lines. In the photo below, I’m lining up where the green line meets the navy line on the placket, to the very thin navy line between the two yellow lines on the sleeve. I’ve lifted up the placket piece to check, and as I position the placket piece, I make sure it’s lined up all the way to the hem. It looks wrong, as the plaid isn’t matching from placket to sleeve, yet.
When sewing, make sure you’re sewing straight along the plaid lines. It’s almost easier than sewing along markings in a way, you don’t need to draw in the lines if you can use the plaid lines as your guide. Along the top edge, I’m aiming to keep the stitching just inside the navy part, and along the lower edge, I’m stitching just outside that thin navy line.
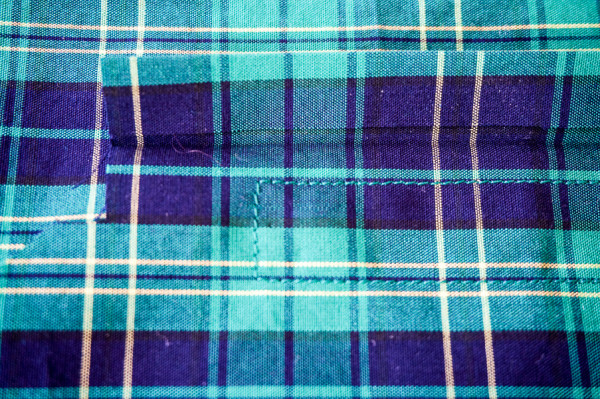
Moment of truth: in order to check, I need to slash the opening. Ok, I’m prepared to redo it if it looks bad. Here we go…
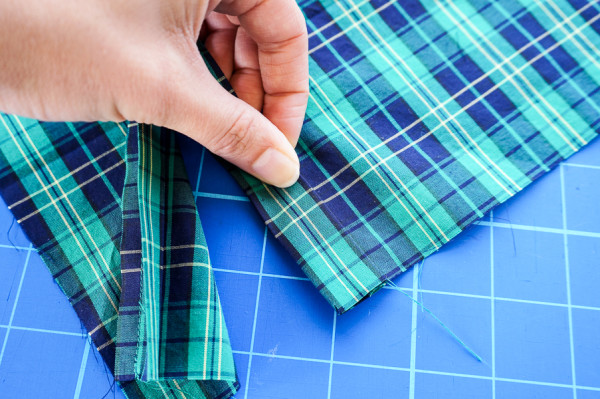
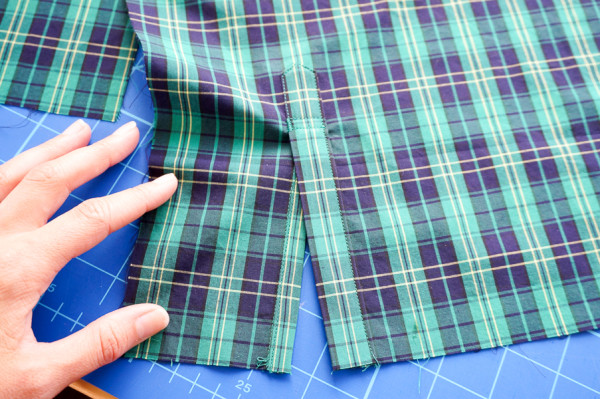
As the placket part is turned back, it lines up with both the horizontal plaid lines and the vertical plaid lines. Success!
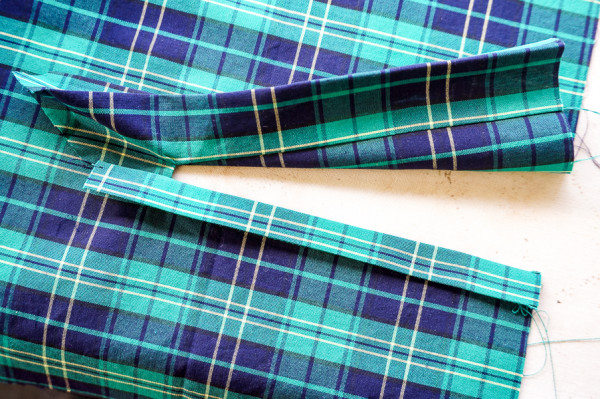
It even matches on the smaller side of the sleeve placket, less important but still very nice to see.
What is smart to do though, is make sure you know how to cut your second placket if the first one works out. That’s one benefit of always photographing your work for tutorials – you can look back at the photos to cut the second one the same! I cut my sleeve plackets one at a time, but used the photo reference to cut the second one.
So there’s a tip: photograph your first placket, even if you aren’t writing a tutorial, so you can cut placket #2 the same.
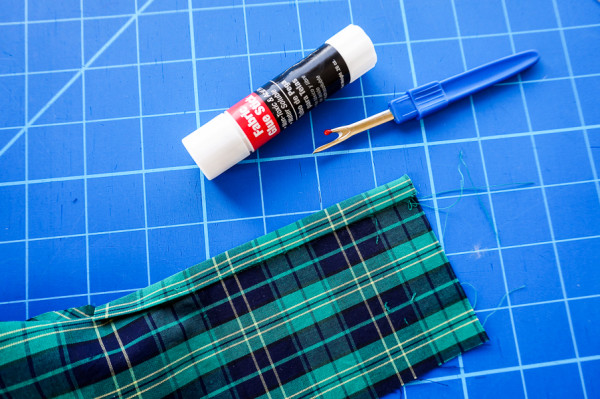
When you edgestitch the placket, use glue to keep it in place. I got confident and started sewing without basting! The presser foot can pull the layers apart, making them not line up, if you’re not careful. Glue prevents that from happening. More on glue-basting here.
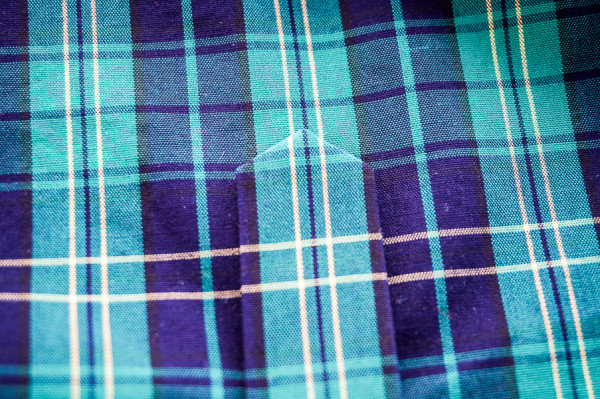
When you press the point of the tower, make sure it’s centered over the middle plaid line. (Like this photo below, but better. My yellow lines at the top tip look like they’re off a little, I think it’s just the 3D nature of the placket and if it was pressed flat they’d like up. Either way, make sure yours do!)
Definitely glue-baste the tower side of the sleeve placket. That’s the one that will show.
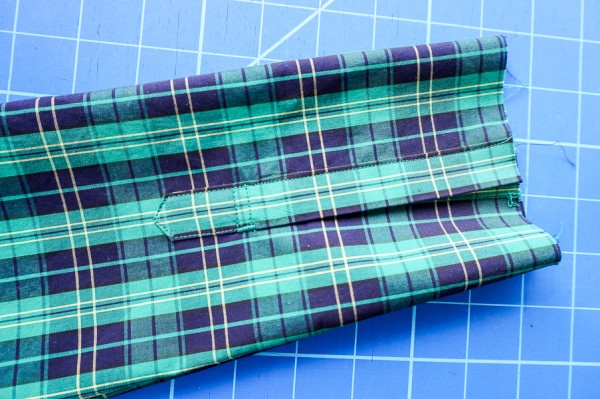
Here is our finished, plaid-matched sleeve placket!
What do you think? Pretty good!
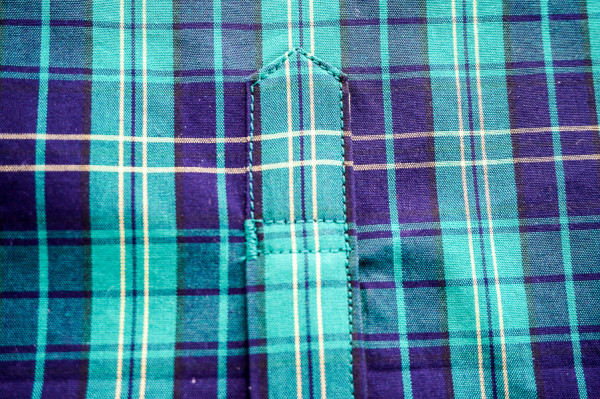
It’s not 100% at the tower end but then again, we are looking at it extremely closely. I’d be impressed if someone else had sewn it or if I’d seen it on a ready to wear shirt. Now, the goal is to sew the second one exactly the same or better!
ps. Check out all posts on shirtmaking here, and get the Granville Shirt pattern here!

Love the work with the plaid. Terrific job. I think that garments look better if the plaids, flowers, or whatever is lined up. Sometimes it is not possible.
The sewing work is beautiful.
I agree. These are the extra efforts that make our sewing projects look even better and more professional.
Nice job! And I love that particular plaid!
Thank you so much! It’s a good plaid eh? Not too rustic, not too preppy.
I love this…it looks so professional when the sleeve placket is matched
I agree! It’s the sort of thing that would cost a lot extra in garment manufacturing, but takes only a little bit longer when we do it ourselves.
Wow, Tasia! Great match! Very inspiring. I finished my first Granville in a giant floral print…. this makes me want to make a plaid one next.
Thanks! I was excited to make a plaid one for fall. A giant floral print is an excellent choice too!
Oh wow, that is totally awesome! I have never made a tower placket before, just a continuous one, but this is making me want to sew one in plaid and match it perfectly!
Thank you! I like this type of placket better on a tailored shirt… we have a tutorial when you’re ready to give it a go!
I did do this once before, and it was a real mind bender! Can’t wait to see your shirt, I love the fabric.
Thank you! It is, right? It helps if you’ve made the pattern before because at least there’s something to reference.. but still there’s always a moment where you wonder if it’ll work out!
Oh I was such a chicken and did a bias strip placket finishing on my checked Granville, I couldn’t face a dodgy outcome! This looks great, hope your second one turned out just as well!
It’s okay to go with the method that gives you the most confidence, not a bad approach at all! Now if you wanted to try it this way, you have an idea where to line things up. :)
It’s not about the clothes as much as the fun making them . . . congrats!
I agree, I love it when the construction is just as much fun as wearing the final item!
Amazing! Such a good job, it blends into the shirt.
I recently bought the Granville shirt pattern and have been thinking about sewing it up in a beautiful plaid flannel i bought. I havn’t thought about the placket! If you cut the cuff on the bias how should you cut the placket?
Up to you! If it were me, I’d sketch it out to see how it looked both ways.. or arrange the fabric like a sleeve and cuff, so you get an idea of what it might look like in your specific plaid design.
Probably I would cut the placket to match, so it blends into the sleeve, and the bias cuff is the focal point. But either could look good!
This looks really good! For me it’s very important that patterns either match, or are deliberately arranged in another way. For the sleeve placket (or front pockets, for that matter), I would probably cut it on the bias to avoid the matching issue (and it also looks cool!)
This is the most delightful post I’ve read in a while. I’m all about the details and absolutely love that you took the time to think about this. Keep up the great work! :)
Ah, thank you! :) We’d get along great then, because this is my sort of sewing. I love fiddly little details and putting extra attention into the things I sew.
What kind of sewing machine do you use?
I use a Pfaff mostly – either a Pfaff QuiltStyle 2042 (2003) or my Pfaff Quilt Expression 4.2 (2013). You can see a photo at the bottom of this post here! http://sewaholic.net/the-machine-i-learned-to-sew-on-bernina-530-record/
Totally worth the time! Looks great :)
Wow, what an amazing attention to detail! I agree that it takes an extra mile to make sure that the entire pattern/prints look organized on the finished product. I never really bothered looking too keenly on that level of detail but after reading your post, I think I will check all my patterned clothes for QA!
It looks amazing! I just made a long sleeve dress with a sleeve placket using striped placket. I was pretty happy with myself when I was able to match the stripes across the placket. Your placket is so pointy and professional looking too – I’m a beginner at sleeve plackets, so mine don’t look quite as nice.