Hi everyone! I have a fun pattern modification to share with you today!
I have made a ton of Thurlow shorts but I had not yet made a full length pair because the flare leg is not my style. But I love the fit of the Thurlows in the parts that count – hips, waist, crotch. And we all know it’s not easy to find a good fit in these areas! So why not do a simple mod to the fit of the leg to make them work for me?
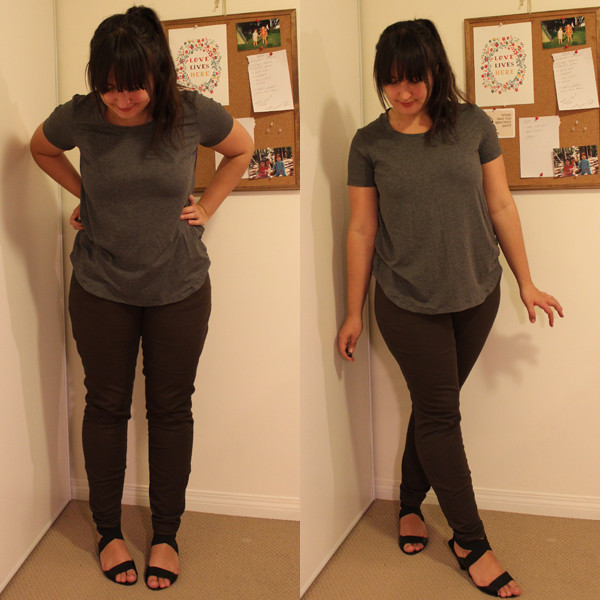
They turned out great! The fit I went for isn’t skin tight – I wanted them to be skinny but not make my legs look like they were being suffocated. A nice “relaxed” slim fit. I think I achieved it. So let’s talk about how I adjusted my pattern!
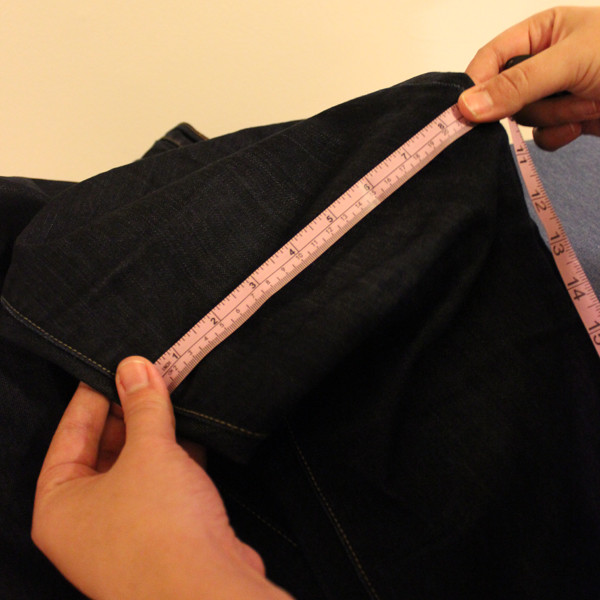
I decided to use my favorite pair of RTW jeans as a guide. They are definitely my most “lived in” jeans. I wear them all the time and I know I like the fit through the leg. So I started by measuring at 4 different points through the leg, and recording the measurements for front and back. You can see in the picture above. I am measuring the front, from seam to seam. Be sure to measure straight across, perpendicular to the grainline of the fabric.
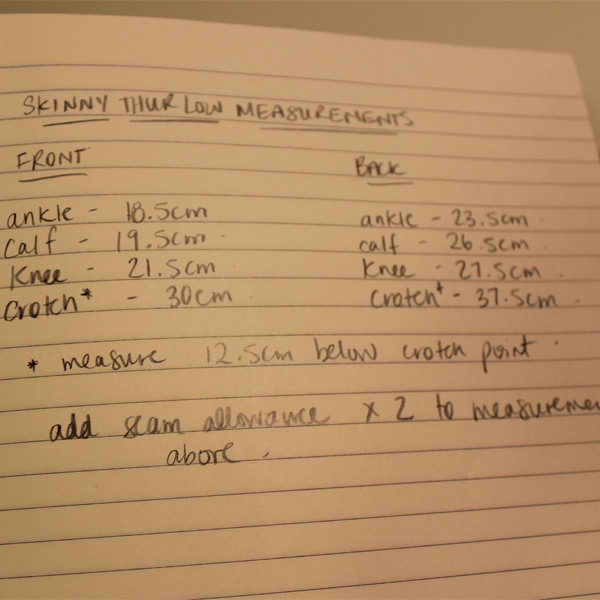
The most important points to measure are the ankle, calf, knee, and crotch. You can mark these points with a pin at the side seam of your pants so you are sure you’re using the same point for both front and back. For the crotch, I didn’t measure right at the crotch point, I went about 12.5cm (5 inches) below it. Remember you will have to add seam allowance (times two) to these recorded measurements.
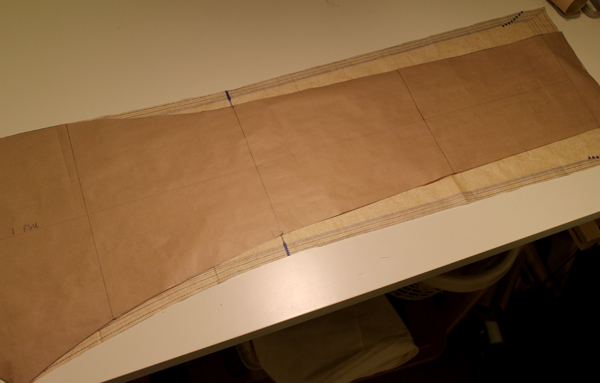
Here is what my front skinny pattern piece looks like compared to the original tissue pattern. First I traced the original piece into kraft paper. I transferred all my markings. Make sure that you are tracing your grainline exactly where it is, it’s right in the middle of the leg and we are using this as a guide when we transfer our measurements.
Next I traced my lines across the leg. Then we want to transfer our measurements. You want the grainline to be the center line along your pattern. So when you adjust the leg fit, say you want the knee point to be 20cm wide on your front piece, then you mark at 10cm on each side of the grainline. Makes sense?
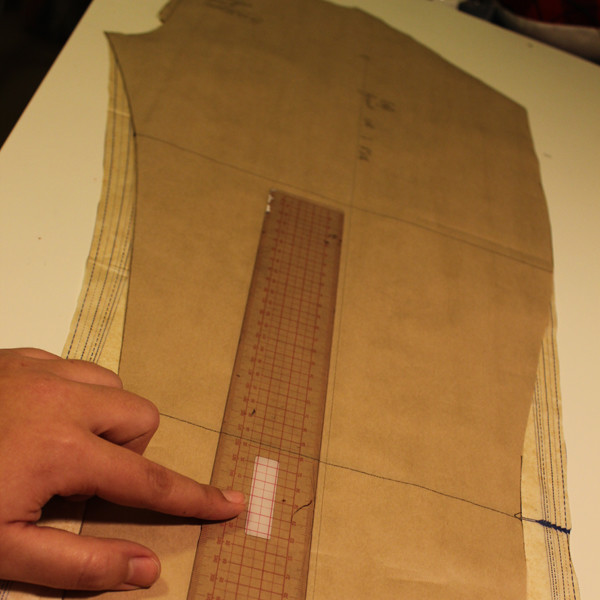
When you are connecting your markings, think about the curves of your legs. Going from your crotch to your knee, you want your line to be a nice concave curve that tapers in towards the knee. But from the side seam, it will be a convex curve that then tapers to the knee. You can see this in the photo above.
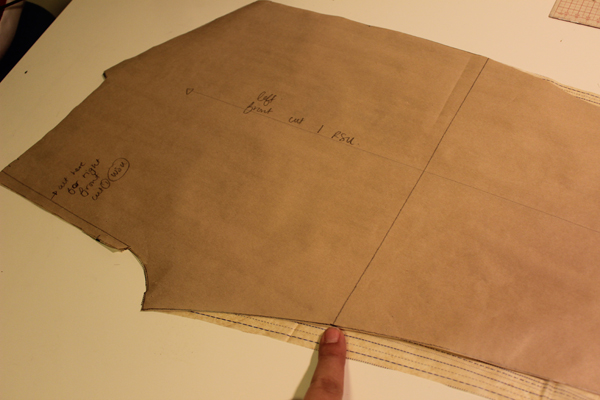
Based on my measurements, I tapered it in at my inseam from the crotch. That’s okay, since I’m slimming the fit I don’t need that extra room in there.
When I sewed my trousers, as soon as my leg seams were sewn up, I tried the pants on. I ended up tapering them in even more from my calf to my ankle, because they weren’t quite as slim as I wanted. If you wait to finish your seam allowance along your side seams and inseams, you can easily adjust the fit a bit after your first try-on!
Voila! That’s how I achieved my slim Thurlow trousers!
You could use this same method to adjust the leg fit however you’d like. For my next version, I’m picturing a bit of a looser cigarette trouser style with a nicely pressed front crease. Or how about a super wide leg? These are all really easy adjustments that will help us to make the most of our pattern.

I’m just now experimenting with this! I finished a first pair of slim Thurlows (not skinny, just slim), modified using the slash and overlap method, which worked okay, but I didn’t start the slashing high enough and subsequent adjusting on the fly resulted in some distortion of the grainline. My problem is I don’t have a pair of pants to model off of, which is why I need the Thurlows to work out so bad! Thank you for posting this tutorial!
No problem Kelly! I’ve never tried this adjustment by slashing and overlapping, but I can imagine the grainline would get tricky at that point! I’ll have to try it sometime. Thanks!
thanks for the info! i made a slim cropped thurlow a few months back and i left most of the tweaking for after they were mostly sewn up… i made endless adjustments before i was satisfied! i’ll come back to this post when i try again for sure! btw, are you using a stretch fabric here?
Hi Lisa! Yes I am using a cotton spandex twill fabric. I hope this helps you out for when you give it another go :)
This is so awesome! Can’t wait to try this out :)
Yay! So glad you enjoyed :)
Hi,
I love skinny pants, what a bother that during my last fabric trip I couldn’t find any winter stretchy fabric.
Because don’t do like me and make skinny pants out of non stretchy fabric, big fail :-)
Hi Kate – Funny! I totally have made that mistake myself, only happens once! :)
I too have made this mistake, And so kind of laughed when I read this. Note, I said kind of…! LOL! You live and you learn…!
Thanks, this is a great idea; I’d love to make a pair of skinny jeans to actually fit me! Thnkas for passing this idea on :)
I’m glad you enjoyed it! Thanks :)
Thanks for the information! I’m excited to try this out, and I’m assuming I’ll need some stretchy bottom-weight fabric…any recommendations?
I recommend a cotton or cotton blend with spandex in it. Like a stretch cotton twill or sateen!
Love this! Thanks for the tutorial!
So glad you enjoyed it! :)
Great tutorial, simple alterations make all the difference
Oh yeah – thanks for posting this info, so very very helpful. I’m too afraid to make pant adjustments, cause I just don’t understand all the curves well enough yet. I’m so gonna do this :-)
This is so cool! I hadn`t thought about making the Thurlows for the same reason, now I might try this way!
I’d love to see the looser version with front crease as well! Very “Audrey” style, maybe with ankle length?
Thank you :)