
Hey everyone! We’re trucking along with our Saltspring dresses today.
Need to catch up? Click on the pink badge for all of our Saltspring posts to date!
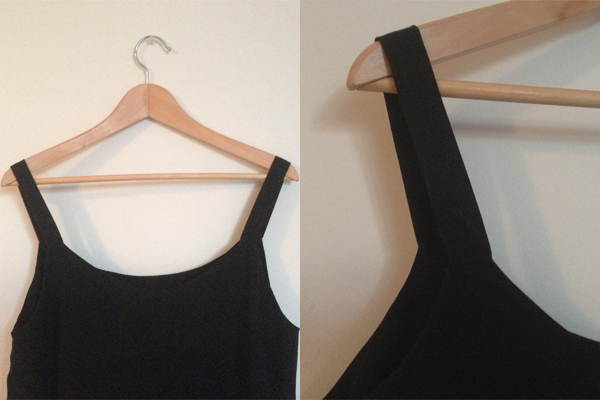
Today it’s all straps, all day long. Let’s get started!
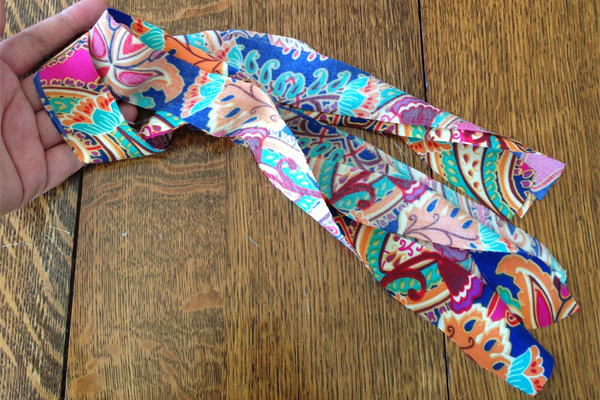
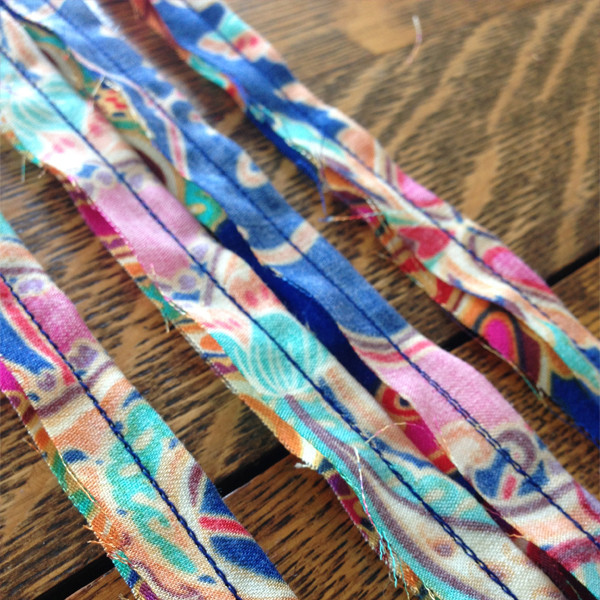
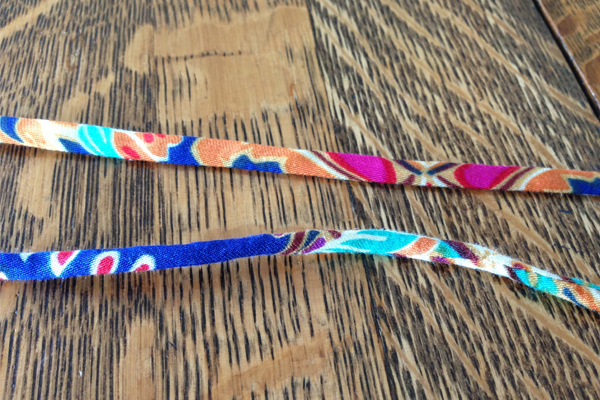
First we’ll be working with our strap pieces, so let’s grab those suckers.
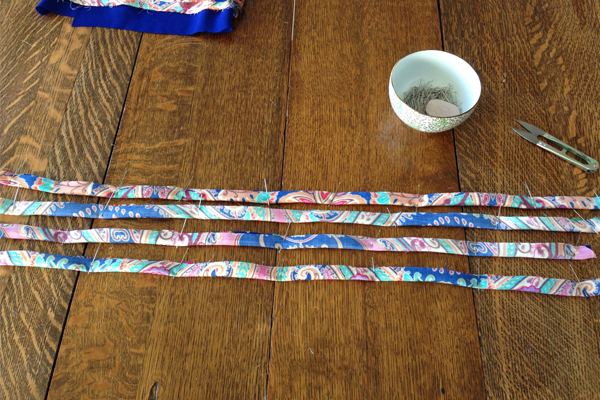
We’ll need to start by folding the straps in half as shown, right sides together. It’s easy for long pieces like this to move around and fall off grain. I like to use lots of pins to be sure my pieces are perfectly lined up when I feed them through the machine.
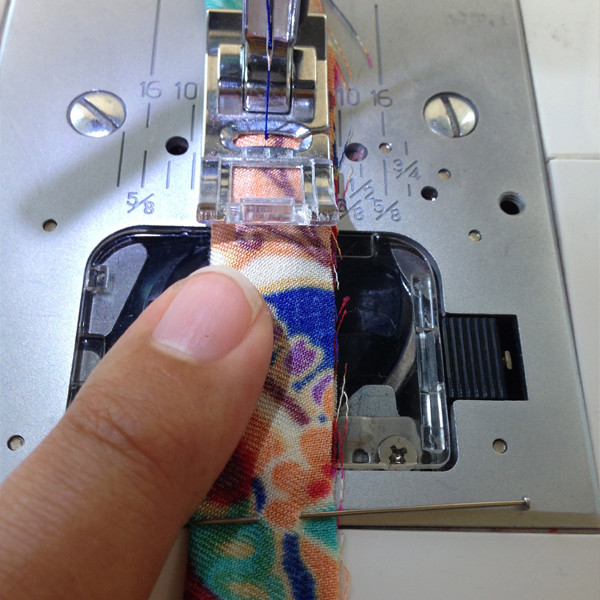
Now let’s sew our seams. When we sew, we want our fold to be on the left side, and our raw edges to be on the right. Now let’s not get too concerned about where the raw edges line up on the right side. It’s important that the stitches are an even distance away from the fold. I like to look at my foot and line my fold up with it. I’m sewing with a 3/8” seam allowance. So I line that up, then I look at where the fold hits my foot, and I try to keep it lined up that way!
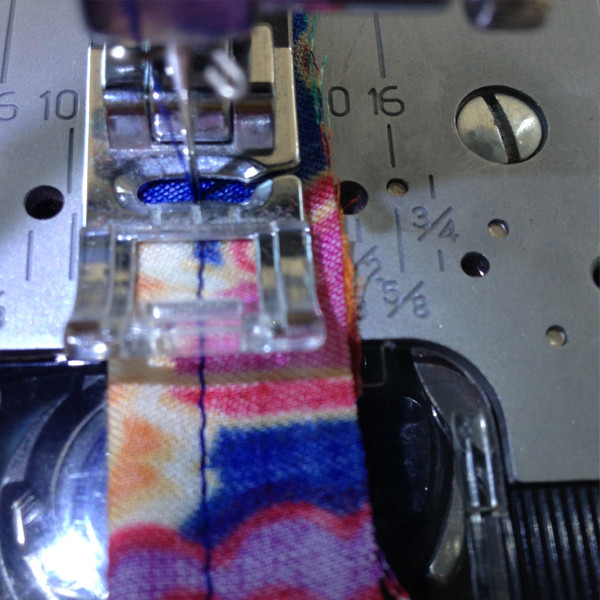
We suggest sewing the seam twice for extra strength. There is lots of stress on the seams when we are turning these straps right side out. Not to mention when we wear and wash this dress, the last thing we want is for the seam to snap, and then everything unravels. This is like a strap insurance policy. The second seam is easy, just line your first seam up with the center of your foot and sew slowly!
Okay, so now you need to repeat that 3 more times. Don’t fall asleep!
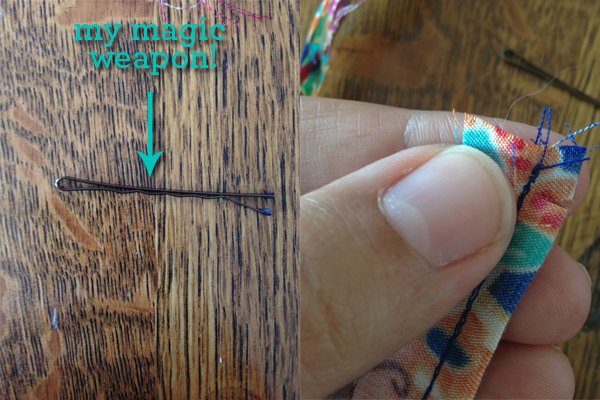
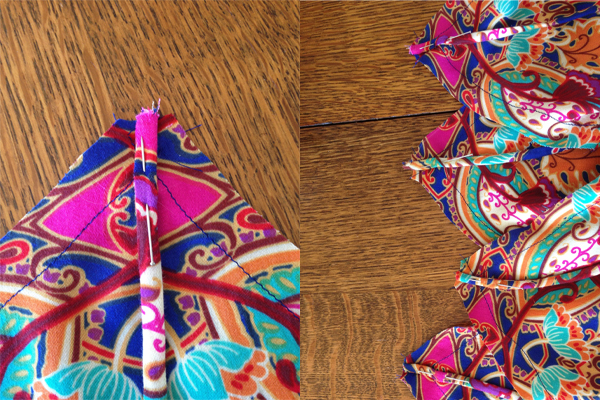
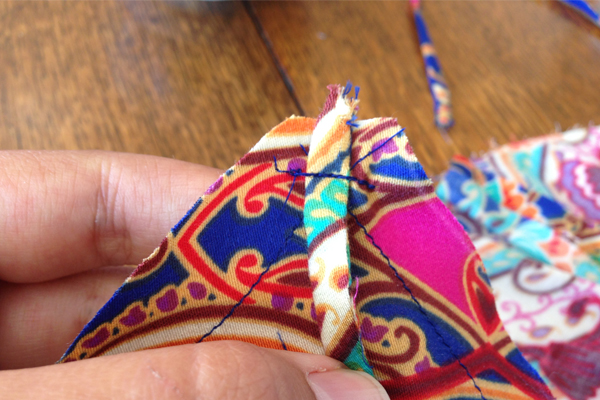
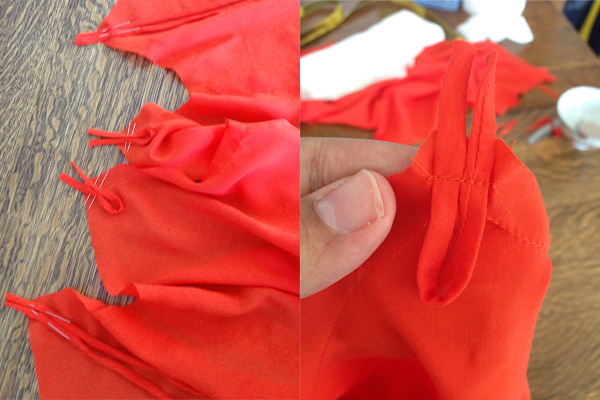
Now it’s time to turn our straps right side out. I have a really good trick for this. A bobby pin! Do you guys have tons of these all over your home? I do, and they work so well for this purpose. I start by making a snip on the fold side of my seam.
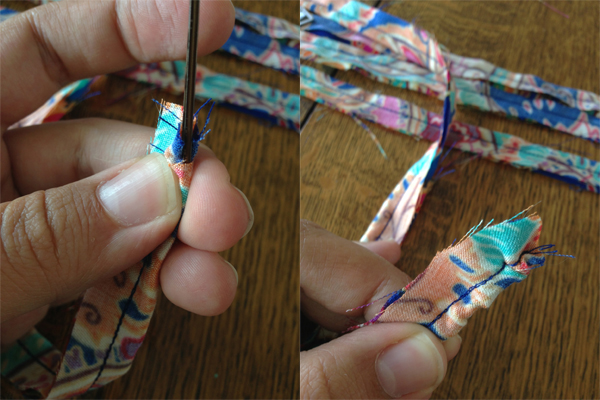
Then I need to catch this little loop I cut. So I feed it between the ends of my bobby pin, and then push both ends of my bobby pin into my strap.
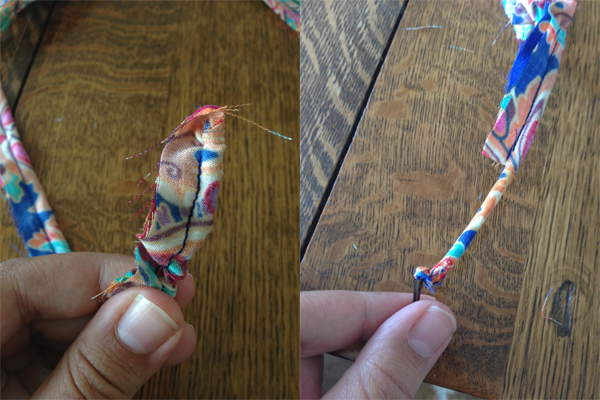
Slowly pull down the bobby pin. It can take a little bit of coaxing at the very start, but once you get it going, it will feed through quite easily. See in the right picture? Bobby pin pulling my finished strap out the other side! And this only took a minute.
Here I wanted to show you how the strap looks before and after pressing. You can see my ironed strap at the top, it’s flatter and straighter. If you want to leave it un-pressed, it will just be a bit rounded, and it might curl a bit. Whatever you prefer! I went with pressed.
Now let’s stitch our straps down so that they don’t move when we attach the lining to the bodice. You can use your staystitching on your bodice as a guide, and line up your strap in the center. Pin it down and repeat for all four straps.
There it is, nice and simple, just a quick stitch across to keep it in place!
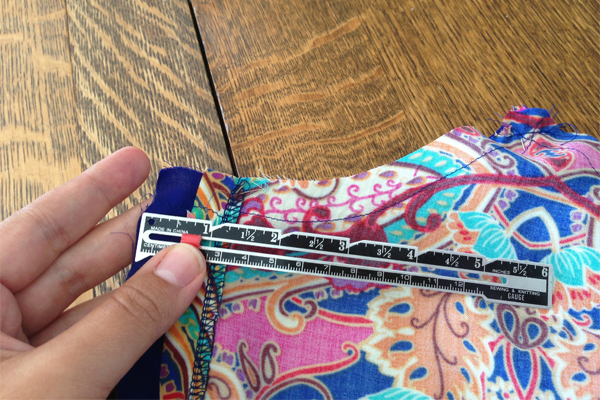
Now we’re ready to attach the lining to the bodice. Now remember how we turned and stitched the center back of our bodice pieces? This will make sense when we get to the zipper. But for now, we need to be sure to let the bodice lining extend an extra 5/8” (1.5cm).
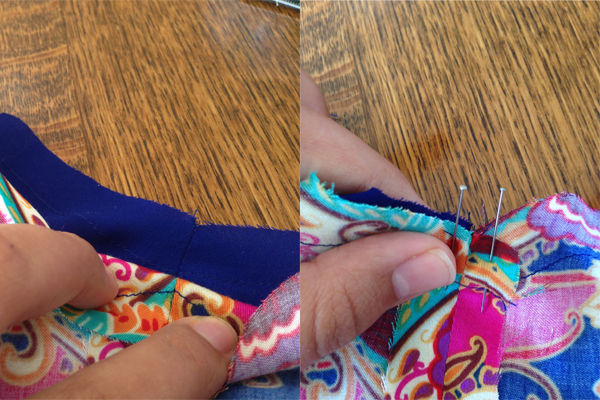
Line up your bodice with the lining, right sides together. Pin along the top edge now. When we hit our side seams, make sure to line up the seams nicely. I like to put a pin really close on either of the side seam to be sure it will line up when we sew.
Now it’s time to sew all along this top edge. I think I was so concerned with taking tons of strap pictures, I didn’t take any photos of sewing this seam. Oops! You can follow the handy drawing in step 7 – sew all along the top edge with the usual 5/8” (1.5cm) seam allowance, pivot at the strap to sew across, then pivot to continue. Maybe your staystitching wasn’t perfectly inside the seam allowance, but don’t worry too much if you cross over your staystitching. You can always unpick it if it shows from the right side after you sew this seam.
We’ll stop here today. For the next post, we’ll be working on understitching and finishing this bodice!
How about strap variations?
We’ve had a lot of questions about strap variations. We love the ties at the shoulder, but there is definitely lots of room for cool strap alternatives! I wanted to try doing a little loop at the front, and a double strap coming from the back that could tie in the front. I think it came out great!
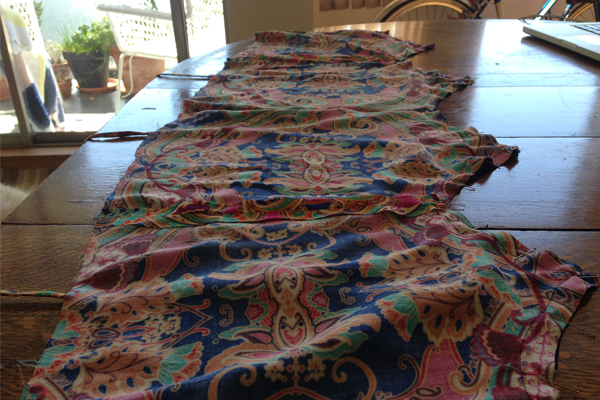
You can see a couple of photos of my process here. I used the same method as above to make four straps. Since they are plenty long, I just clipped off a bit from each, and used two of those small pieces to create my loops. Once you pin that all in place, proceed as normal!
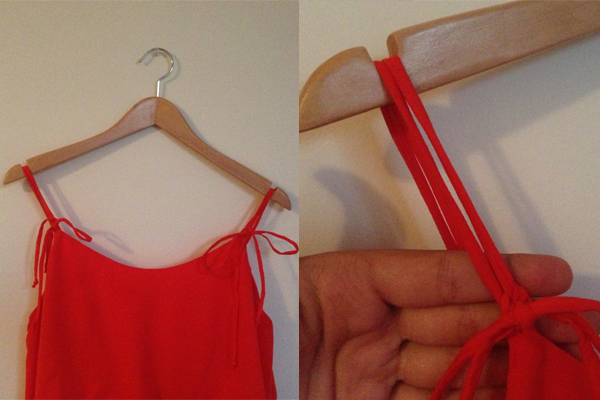
Having the ties in the front means that they wont get in the way of a purse sitting on your shoulder. They also wont be hidden if you wear a little cardigan with your dress! The double strap adds some interest and hides a bra a little bit better than a single strap.
I also made another variation of the Saltspring that I haven’t revealed yet (SHH!). But I really wanted to show you guys these straps right away. I wanted to experiment with a thicker strap that did not tie. I absolutely love how it turned out. All I did was cut one long strip of fabric. I made mine 2 3/4” (7cm) by 30” (76cm) and used a 3/8” (1cm) seam allowance. After sewing this I turned it right side out, pressed it, and cut it in half to make two straps. I tried on my bodice and then pinned my straps at the length I wanted, and marked the length. I used these markings as a guide when I sewed my straps in place.
So are there other variations we could do? Yes! How about braided straps? We could make some extra straps and braid them together. We could also make thicker straps as above, but make them longer and have them tie at the shoulder. I also love the idea of a slightly thicker double strap that doesn’t tie, like my black version above, but a bit thinner and two of them side by side! There are tons of possibilities and this is a fairly easy mod that can make your dress more unique and personal!
So that’s it for today. If you need to, you have the weekend to catch up, and we’ll pick things up on Monday. Have a wonderful weekend everyone!
If you want the right side of the lining fabric to peak out in back, should you line up right side bodice to wrong side lining before sewing together?
Hi Janice! Yes if you are concerned about that, you can sew your wrong side of lining to the right side of bodice. You might want to also sew you lining side seams wrong side together, so that your seam allowance isn’t showing on the inside of your dress. All of that being said, if you sew the dress as originally intended, your wrong side of lining really won’t peek very much, if at all. So you may not need to reverse things. It’s really up to you and the fabric you want to use!
Thanks for participating :)
hmmm now I can’t decide what straps I want to make!!
Oh I love the idea of braided straps! Thanks for this tutorial. I’m going to go with the double wide straps you suggested.
My lining doesn’t extend the 5/8s so I think I will have to slice my lining to add more extension. I tried taking in the front fabric, but then it was too tight. I have super slippery fabric so I must have skewed it while cutting. No worries it will be in the inside….
I was super pumped to try on the bodice with the wider straps – it is taking shape! Woot woot.
Hi Michelle, I’m glad you were able to figure things out! It is important that the lining extends for when we get to the zipper part. :)
All caught up! Super excited for Monday! :D I bought a Rayon pattern fabric, but when I asked for Rayon, the lady at the fabric store suggested I get something else as Rayon isn’t great to sew with. She didn’t explain why not. So far it is going great for me though! I tried to find a fabric as similar to yours as I could! :D
Hi Chrystal! Thanks for joining us :) Rayon can sometimes be a bit finicky. It tends to wrinkle, shrink, and if you are working with a Challis, it can be a bit fragile. BUT, rayon is super soft, breathable, and drapes gorgeously. :) I personally love it and love working with it!
Are the thicker straps cut on the bias?
Hi Stephanie! No, the thicker straps were cut cross grain just as you would cut the skinnier straps. You could just as well cut them on grain, it wont make a bit difference. But I would not suggest cutting them on the bias, they would stretch out and then you wouldn’t have a great fit. Happy sewing!
Hi Caroline. I’m a bit surprised that you don’t trim any excess fabric (seam allowance) before turning the straps right side out. Would you maybe do it on thicker fabric or would you advise against trimming ?
Thanks for your help.
Hi Anne! Great question. Because the fabrics we suggest are mostly lightweight, you’re right, we don’t recommend to trim the excess seam allowance. This is mostly because we want our straps to have a bit of body and lots of strength to them. If we trim the seam allowance, we’re risking the fabric fraying when washing and our seams potentially coming apart. If your fabric is a bit thicker and you feel it might be too bulky, feel free to trim some of the seam allowance off – whatever you feel comfortable with! Happy sewing :)
Thanks ! Without your advice, I think I would have trimmed it with about any fabric, thinking I ‘had’ to. Now I know better. Thanks !
I am thinking of doing braided straps. Since I am using the rayon challis, it is beginning to fray at the edges. I am concerned and think I should finish off all the fabric edges now before I go any further. I edged the bodice back and it came out great. I have not used my serger in years so I just choose a zig zag pattern from the regular sewing machine for the edge stitching. Your thoughts on waiting to edge stitch
Hi Marie! Definitely! If your edges are fraying and you are concerned, then I totally agree, you can go ahead and edge stitch your pieces. Better to be safe than sorry! Another quick tip: when we trim down seam allowances later on in the sew along, don’t trim too close to the seam, and you could even trim with pinking sheers to help prevent fraying. Thanks for your question and happy sewing!
While I’m not making a Saltspring, I’m loving the strap variation idea. A four strand braid would make a nice flat wide strap with lots of interest. The straps could also attach with buttons or do an X back or Y back configuration! The Y back might be tricky since you’d have to redraft the back.
Hi Kelly! Love your idea for the X and Y variations. There are so many possibilities! Thanks for sharing.
This is exactly why I love Sewalongs! I’m a little late to the game, and am only starting on my straps tonight, but I spent about 10 minutes fighting with a fancy loop turner before I turned on my computer to see what you suggested. A bobby pin does the trick!! Thank you, Caroline, from keeping me sane in my sewing room this evening! THANK YOU thank you!!!
When I sewed up the dress, I had a lot of difficulty turning the straps. It was turning the very first part – where you mention above that it might need a bit of coaxing. I eventually got that first part to turn easily by using a drinking straw and I blogged how it worked in case anyone else struggles with this – http://sewmentalmama.blogspot.ie/2013/06/how-to-turn-narrow-dress-strapseasily.html
Do you have an updated link? Because this link doesn’t work, and a Google search turns up nothing.
Hi Jennifer, here is the updated link:
http://sewnbyangela.blogspot.ie/2013/06/how-to-turn-narrow-dress-strapseasily.html
Ugh, no matter what I do, I can’t get those straps to turn. I tried my loop turner and the hair pin method.No luck. I’ve never had such a problem turning straps before, but I’ve also never tried turning straps this narrow. I really want the spaghetti strap look for my dress. Any suggestions on what I can use instead of these straps? Because I really can’t get them going. Thanks.
Hey Jennifer, so sorry you’re having issues! I’ve turned straps with tricky fabrics and I always find the trick is to go really really slowly, especially for the first half.
Try the suggestions in the new link above, and let us know how you make out.
If nothing works you could consider using ribbon instead? I think it’s a really cute look and you wouldn’t have to worry about turning anything :) best of luck!
Caroline, thanks for posting the updated link :-)
Hello Jennifer, I got so frustrated trying to turn chiffon straps – they nearly had me in tears!
Give it a try using the drinking straw ( http://sewnbyangela.blogspot.ie/2013/06/how-to-turn-narrow-dress-strapseasily.html ), the narrow straps are worth the effort.
Hi Caroline,
I have finally gotten around to making the Saltspring dress and I am loving your tutorial. The alternative strap options are awesome, I have chosen to use the thicker strap. I am so looking forward to finishing my dress so I can wear it while we still have summer down here in the Southern hemisphere. Thanks again