
Hello sew-alongers!
If you need to catch up on previous posts, you can click the pink button. Easy peasy!
Today we’re going to start sewing. We will prepare our bodice and bodice lining by staystitching the neckline, sewing the side seams, and doing some edge finishing.
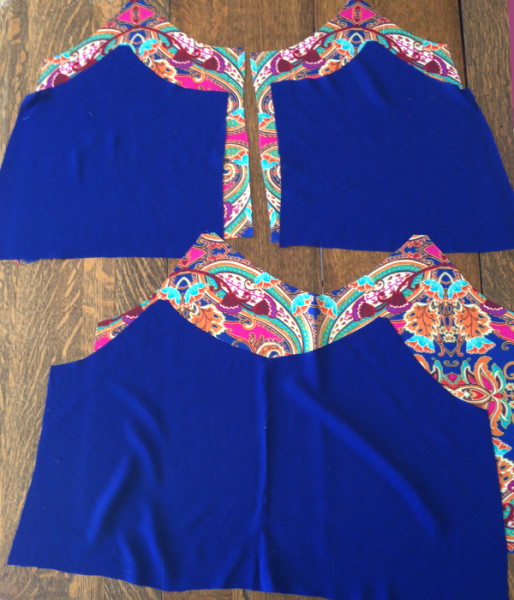
So first let’s pull out the pieces we need. Today we’ll be working with the pieces labeled 1 (bodice front), 2 (bodice back), 7 (bodice front lining), and 8 (bodice back lining). You can see here I am using the print for the bodice shell pieces, and the royal blue fabric for my lining. The pattern calls for lining in the same fabric as your shell, but I went with a contrasting fabric. I’m a rebel like that! But it’s mostly so you can clearly follow along.

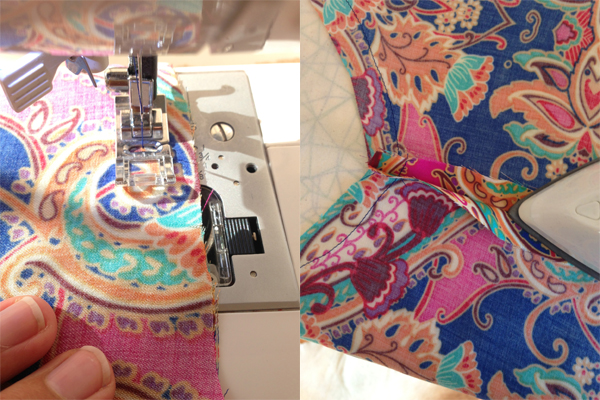
First step is staystitching. Because our top edges are curved, they could stretch out and warp while we sew our dress together. Staystitching these edges will help to stabilize our pieces. You can leave your staystitching in after the dress is finished. So let’s go ahead and staystitch our top edges. As you see in the photo above, I am staystitching just inside 5/8” (1.5cm), and I’m using a standard stitch length of 2.5.

Be sure to staystitch following the direction of the arrows in your diagram on sewing step 1. We are staystitching from the top area towards the side seams, and then the top area towards the center, meeting in the middle on the front pieces. This is going to keep our edges on grain, and they wont stretch out or warp while we are stitching. It seems futile, but it is important!
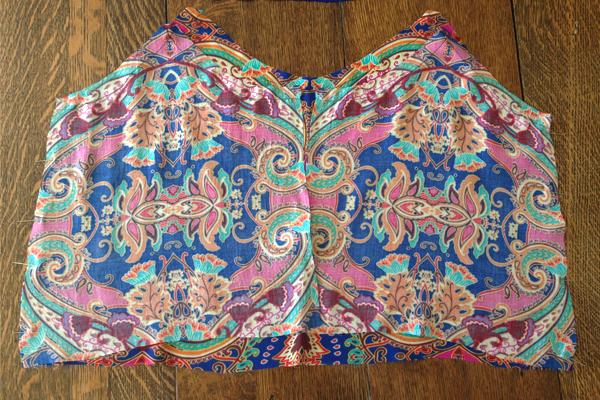
Now let’s pin our bodice front to bodice back, right sides together, along the side seams. You can use your notches to help you to line things up.
Let’s sew the side seams at our usual 5/8” seam allowance. Then press these seams open. Repeat for the bodice lining!
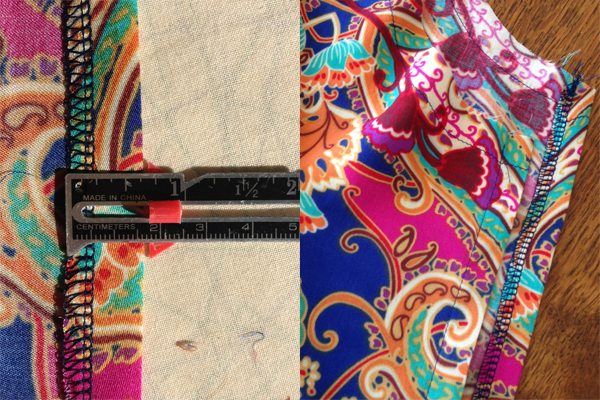
Last step! Because of the way the zipper is constructed, we need to prep our bodice center back edges. Our lining pieces will stay unfinished for now. So let’s finish our center back edges – I overlocked (serged) them. Then we’ll turn this edge under at 5/8” (1.5cm) as shown, and press. Finally we can topstitch this edge at 3/8” (1cm).
Okay, let’s stop there today! Next, we will sew and attach our straps, and we’ll look at some great alternative strap options.
Any questions? I’m here to help! Ask me in the comments!
Thanks for the post! Quick question, would it be a big deal if I didn’t press my side seams open but rather serged and trim them together? I just spent a half day of hell rethreading my serger in the right colors and getting the tension adjusted – but my fabric is so delicate, I need two layers for my serger to work!
When I staystiched my bodice and lining – it got wavy. Not sure why. I loosened the tension and the length of the stitch and still got wavy. I understitched the lining, turned it inside out and pressed – the waviness didn’t really make a difference since it was mostly captured between the lining and the bodice. How do I prevent that on my next version of this dress?
Hi Jenny! The waviness is normal when staystitching curves as we are. It’s the fabric raw edge that stretches out slightly when we sew around the curves. The stitches keep things from stretching where it matters, but the edges can still stretch a bit which creates those waves. Try pressing with some steam and see if that shrinks up a bit! If not, it’s really not a big deal, as you said the waviness doesn’t make a difference once the bodice layers are sewn together and understitched.
I have my muslin made, my fabric and notions and pattern ready. But I’m waiting to see what you’re going to suggest for alternate straps. I need something less…young. SO I may copy another pattern for the shoulders and straps….
What should I do to finish the center back edges if I don’t have a serger? Do I just skip that step and press instead?
Not every serger is pain to thread, especially the newer ones. I think if you take the time to practise and learn how to thread properly, and re-thread it each time from scratch (not the silly tie onto the old thread method, how can you learn if you cheat each time?) then you will be fine. If only feels like pain becasue we are so used to only threading one spool on a normal machine. On an overlocker/serger you thread 2, 3 or 4 threads but it still only takes 30 seconds!
If you can save up or laybuy/HP then investing in an overlocker/serger is great for your sewing. If you do go looking to buy, ask the assistant to show you how to thread and give it a go yourself. It does feel weird and awkward when you first try it but different models thread in different ways. My Bernina 1150 has a thing I can flip down to help me. Make up your own mind which model is “easiest” to thread.
Until then you can zig zag your raw seam edges or just use pinking shears. Some sewing machines have a faux overlock stitch – on my Elna it looks like a zig zag stitch between two rows of straight stitch. It’s very slow, a normal zig zag will be fine.
Tying the new thread on doesn’t work anyway – the knot gets in the way.
I totally agree – it’s terrifying the first couple of times you do it, and it’s fiddly, but use your manual and you’ll be sweet. And use long nose tweezers!
Without an overlocker/serger, I usually turn the raw edge over 5mm and sew it down. You just have to remember that your seam allowance is then only 1cm, not 1.5cm.
Hi Anne Marie! We have some great suggestions for you here in the comments. Thanks so much everyone! There is a great post on Sew Mama Sew about seam finishes. http://www.sewmamasew.com/2008/05/seam-finishes-simplified/. They wont ALL work in this case, but you could do the following ones: straight stitch seam finish, zig zag edge, pink, stitch and pink. I think we have some awesome options in the comments here. :)
http://createquiltsew.wordpress.com/
Be thankful you don’t have a serger – they are painful to thread! I shouldn’t complain! I have an air thread serger on my lifetime wishlist. Before I had a serger, I followed Christine Hayne’s 3 step zig-zag finish…it looks quite nice.
http://www.craftsy.com/blog/2013/05/seam-series-zigzag-and-3-step-zigzag-seam-finishing/
Caroline may have other suggestions! I am still a newbie.
I love my serger! Yes they are a pain to thread, but with some practice it gets easier. Hang in there>>
tying the knot on my thread always works for me and I wouldn’t call it “cheating” – it’s a time saver. My machine came with a guide and it’s great to use for small rolled hems as well.
Just started my Saltspring using the Girl Charlee “Feathers” fabric- my first time using a knit