 Today we’ll take the bodice we finished during the last sew-along, and sew the waistbands to the bodice. To give you an idea of what’s next, we’ll then make up the skirt, attach the skirt to the waistband of the bodice, sew in the zipper and hem it up. We’ll have a dress within a week!
If you haven’t yet, apply fusible interfacing to your two waistband pieces. Arrange your bodice so the RIGHT SIDE is facing upwards. You can tell the difference, because the understitching is on the inside. (If you can see the understitching, flip your piece over!)
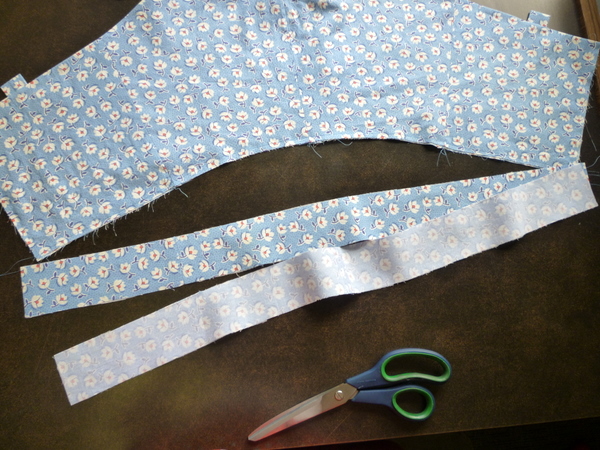
Take one of those waistbands – if you prefer the colours of one over the other, take that one – and pin it to the bottom edge of the bodice. Line up the ends and match notches to sideseams.
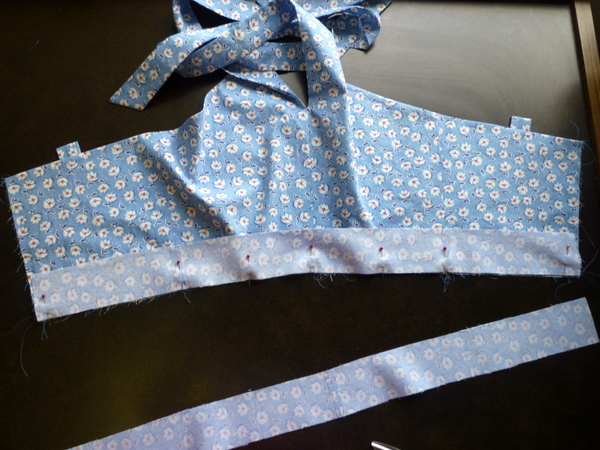
Sew waistband to bodice, taking a regular 5/8″ (1.5cm) seam allowance. Now flip your piece over, so the INSIDE is facing you.
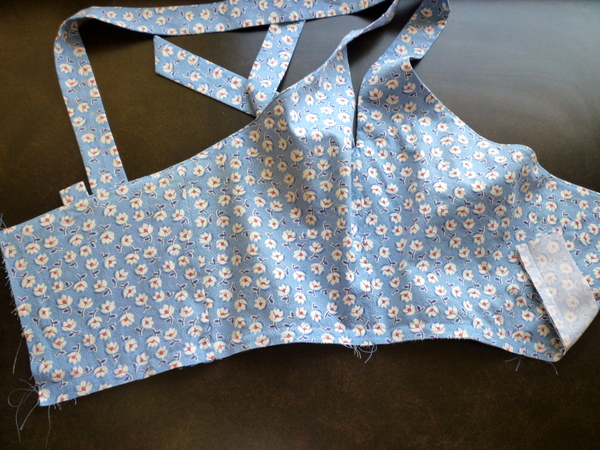
Now pin the second waistband to the lower edge. We’re basically sandwiching the bodice between two layers of waistband, but it’s easier if you sew them one at a time, especially if you’re somewhat of a beginner.
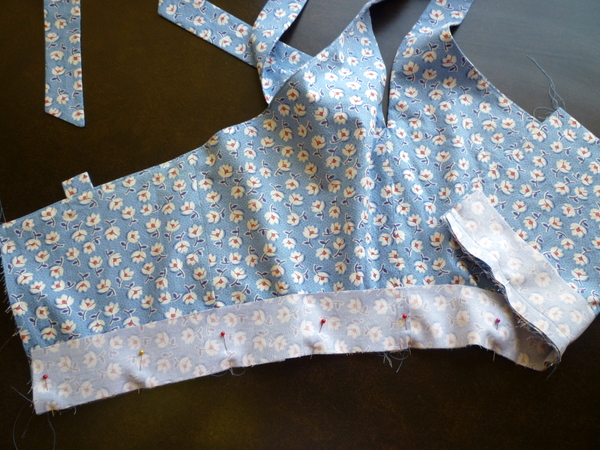
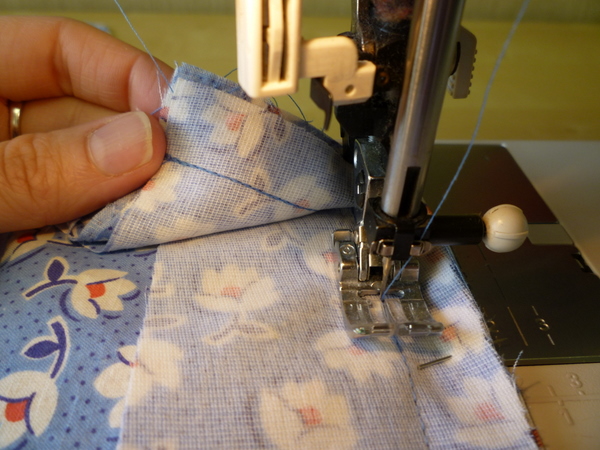
When you sew the second waistband to the bodice, sew exactly on top of the first row of stitching. See how I’m sewing right on top of the previous stitching line?
Trim seam allowances down to 1/4″ (6mm).
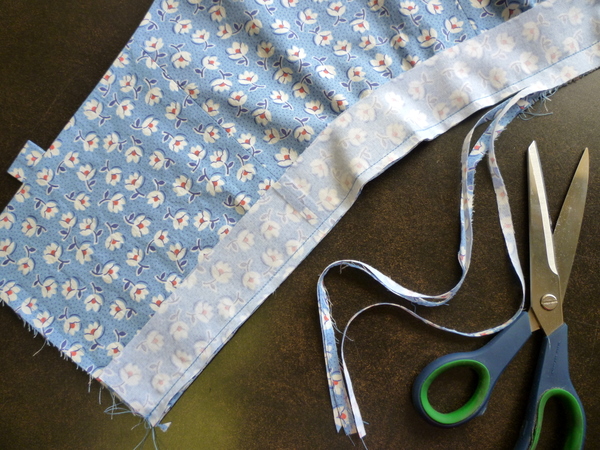
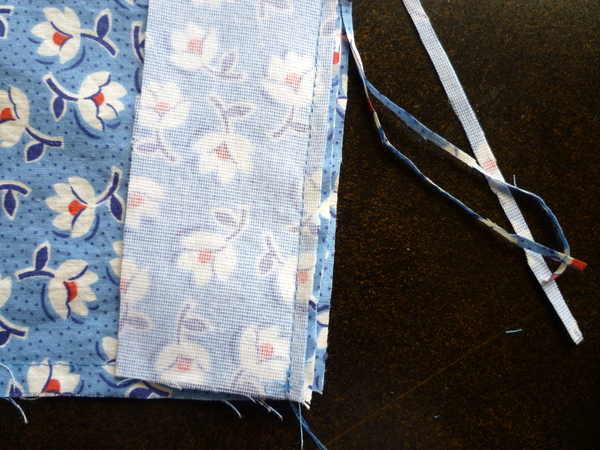
For a really nice result, trim the seam allowances to different lengths. Make the layer that’s closest to the front the longest, and shorten all of the other layers progressively. (This is called grading your seam allowances!)
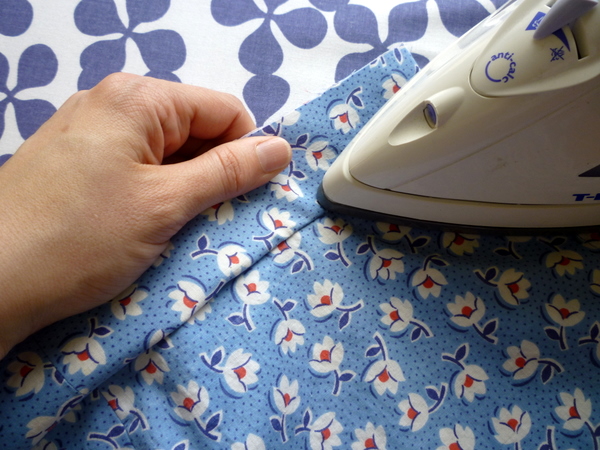
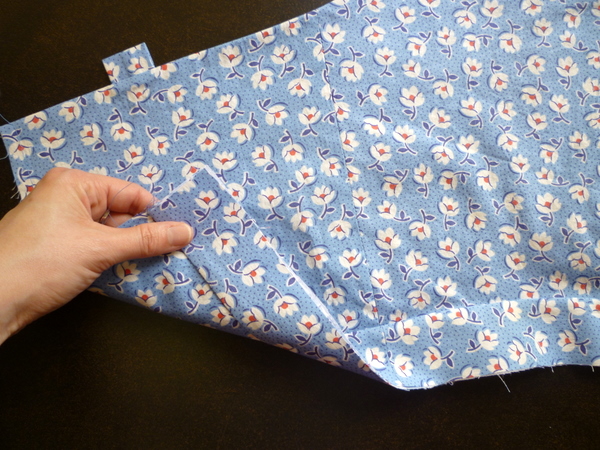
Press both waistband down. I found it helpful to pull the waistbands while ironing with the other hand, and that’s what I’ve tried to demonstrate in the photo below!
 Here’s what it looks like, after pressing:
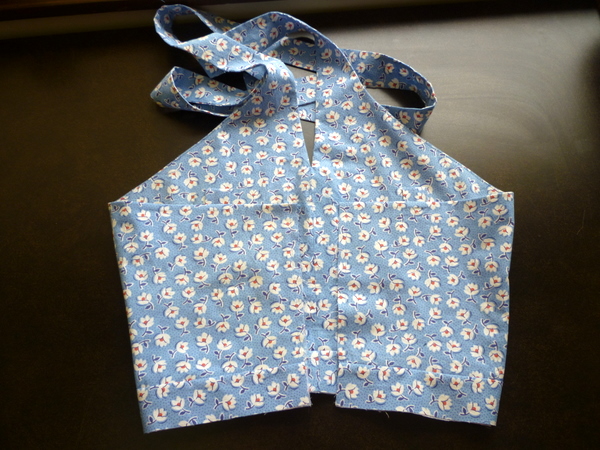
 Let’s admire our bodice so far! We’ve come a long way in the last week.
 Next, we’ll put together the skirt and sew the whole thing together!

Oh, it looks so pretty and therefore inspiring!! I have cut all of the dress, underlining and lining. I have procured a zipper, but I lost my thread! I am debating whether to use something close so I can keep going or run out and buy more.
I remember you mentioned a while back that you don’t like invisible zippers. When I took a class with Susan Khalje, she said she no longer uses them either, but I for got the reason. Will you be posting about that? The main thing I like about invisible zippers is that, well, they are invisible! The fabric I am using is an unusual color and I can’t find anything close enough. hmmm… starting to ramble, so off I go to the sewing room!
@RobinDenning:
I just finished my second Lonsdale today (view B with the longer skirt!) I love invisible zippers and there are lots of tutorials for how to do it. I documented the steps on my blog, how I assembled the two layered bodice with an invisible zipper. (I kept the waistbands at this step separated, that’s the only but main difference.)
I’m all caught up! Hooray for a Sunday of sewing!
Hi Tasia, I have a question regarding the skirt pieces. The finished garment measurements (from waistband to hem) on the envelope back indicate that there should be a 12″ difference between view A and view B, but on the pattern tissue there’s only a difference of 9″. Am I missing something? As you know I’m making a second version of the dress now (view B in navy crepe back satin) and I had to add 8″ to the pattern piece in order to make the skirt floor length on me, and I’m only 5’10”!
@RobinDenning: Hi Robin! I don’t like invisible zippers because I don’t find them as strong in my garments. (Perhaps because I am more bottom-heavy, and my zippers have more strain on them than someone with smaller hips…) I also find it more challenging to line up crosswise seamlines with invisible zippers. And the last reason I prefer regular zippers – they come in 9″ lengths! At my local store, invisible zippers come in either 8″ or 22″ lengths, and I need the 9″ zipper on skirts so they’re easier to get on and off over a larger backside. Even though I can’t always find the right colour zipper either, I don’t mind if the zipper teeth show a little, as long as it’s mostly hidden while I’m wearing the dress.
I’ll only be showing the regular zipper in the Sew-Along, but it would be easy for someone to substitute an invisible and follow along with the same directions!
@Doortje: Thanks for sharing – your dress is so pretty! I’ll have to post a round-up of finished dresses soon!
@Amy: Awesome!
@Tabatha Tweedie: Hi Tabatha! Let me double-check and let you know. I just saw your finished dress and it’s stunning! Well done!
@Tasia: I guess we are lucky here in Holland, invisible zippers come here in many different sizes. The regular size that shops carry are the 22 cm (8.7 inch) and 60 cm (23.5 inch) ones. I used a 40 cm (15.7 inch) zipper on my Lonsdale dresses. I guess, they like to round off the numbers, due to the inches/centimeters difference.
@Tasia: This is my all-time favorite dress pattern! It has such a flattering shape and really easy to sew. I don’t think this was my last one for this summer…
@Doortje: Ah, I see! I also figured regular zippers might be easier to find around the world, although it seems invisibles are just as common now!
@Doortje: Thank you so much! That’s awesome to hear this pattern is your all-time favourite. You’ve got plenty of time before summer ends to make another version – I can’t wait to see it!
Tasia, I’m getting caught up and will be attaching my waistbands tomorrow (forgot to bring interfacing with me!). Is there a reason for attaching all of the layers together? I’d like to keep mine separate to allow me to sew my straps in place after attaching the skirt, since I won’t be doing a bow in the back. What would be the downside to attaching each waistband separately to the inside and outside layers?
@Ella: Hi Ella! Sorry for the slow reply! I like to attach all of the layers together, as it helps the bodice lie flat and smooth. Then there’s only one seam, whereas if you sew two seams, that’s a little more bulk in between the layers.
You can do it, it won’t affect the fit of the bodice, it just may be a little more bulky, and the layers could shift. Sewing them together as one keeps them from separating or shifting!
Hope this helps!
Hi Tasia,
I am a bit behind with my dress but was hoping to get caught up and complete it by tomorrow. I have one question though – I am attaching my waist band and when I match up the one end to the bodice, the waist band is short by 1/4 inch on the other end. I went back and made sure I cut the right size on all the peices and then measured the seam allowances to make sure I didnt mess up in sewing the bodice together and everything looks okay. Do you know what I might be doing wrong or am I safe to recut the waistband peices and add a 1/4 inch to them? Or can the bodice be gathered slightly to fit to the waistband length (it doesnt look like that has been done in any of the steps)? Thanks! Other than that, I have loved sewing the dress so far and have seen what others have completed (Amazing!!). I can’t wait to finish it!! :)
Stacey
@Stacey: Hi Stacey! Yay, I’m so glad you’ve enjoyed sewing the dress this far!
A quarter inch is not a lot to be off, which is good! It could be as simple as a slight cutting problem, or the fabric might have slipped while the pattern piece was pinned, or maybe when the interfacing was fused, it shrunk the fabric piece. Either way, you can either recut the fabric piece, or pin the waistband to the bodice at each end of centre back, and that extra 1/4″ will ease in between the ends. I hope that makes sense! If you pin the ends, then match the sideseams to the waistband notches, the extra quarter inch should just about disappear without having to gather the bodice.
Hope this helps!