Hi everyone! I have a surprise for you today – a guest post! The cheerful and talented Sunni from A Fashionable Stitch kindly offered to write up a tutorial on how to add shirring to the Lonsdale Dress. Did you see her beautiful turquoise polka-dot version earlier this month? It’s so pretty, and the shirred back looks super comfortable! Now you can add the same stretchy elastic back on your dresses, too!
I’ll let Sunni take it from here. Thanks so much, Sunni, for writing up this helpful tutorial!
Hi Everyone! Sewaholic asked me a little while ago to do a tutorial on how I did the shirring on my Lonsdale dress. Let’s get down to business, shall we?
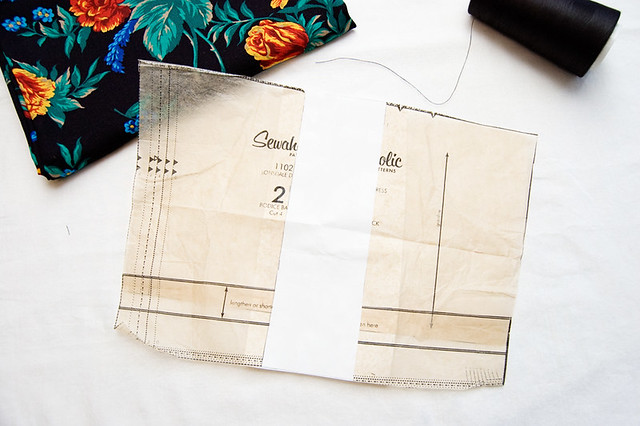
To be honest with you, the shirring wasn’t really my idea – its an idea that I stole from Gertie and her Blog for Better Sewing. The dress that she shirred the back panels on, looked nearly identical to the bodice back panels on the Lonsdale, so I went for it. For the sake of simplicity and rather than having you jump around and read various tutorials, I’m going to consolidate everything I did right here, right now. To start, you’ll need to add a couple inches to your bodice back panel. Slash it right down the middle and add 2 inches to the pattern piece. Now its time to cut. Pretty easy right?
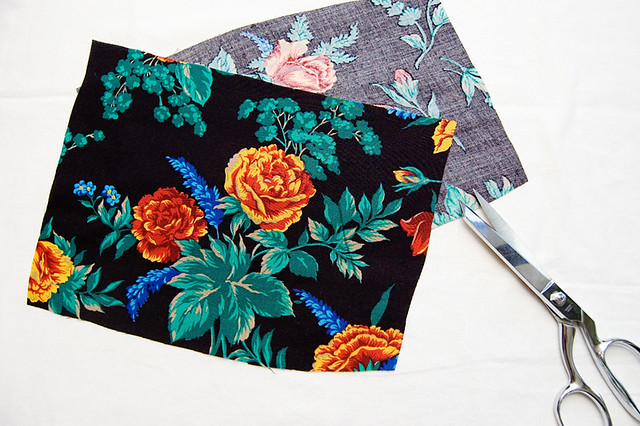
You’ll need to cut two back panels from your fashion fabric. Now, depending on the thickness and weight of your fabric, you might need to cut 4 panels instead of 2. When I stitched up my Playdate Dress, I found that the linen was quite thick and the shirring worked great on one thickness of fabric, but was practically non-existent on two. For this example, I’m using a thrifted rayon challis and since its such a thin and lightweight fabric, I could double the thickness and still have a great shirred look. In this latter case, I merely cut the 4 panels and stitched the top seam allowances togther and started shirring. If you are working with one thickness because the fabric is too heavy when its doubled, you’ll need to hem up the top edges. You’ve got 5/8″ to work with, so give that a good hem and start shirring!
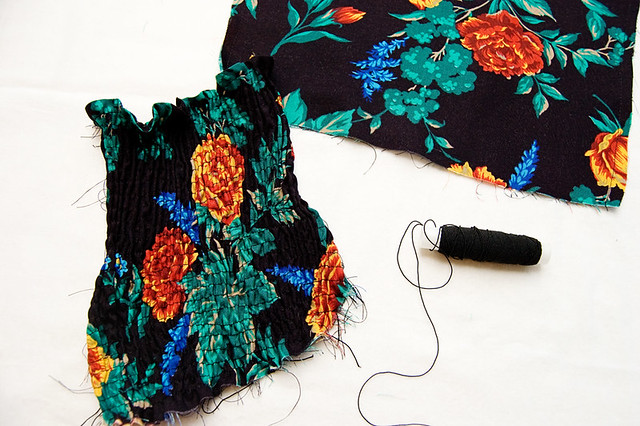
To shir, you’ll need elastic thread. It’s fairly easy to find over by the elastics in your fabric store and usually comes in white or black. Sometimes you can find it in the thread isle where it comes in a few different basic colors too. Next, you need to hand wind the bobbin with the elastic thread. Try to leave it loose as you wind, or in other words don’t wind the thread tight. Insert that into your machine and you’re ready to shir. Before you dig into shirring the back panels of your dress, I recommend testing a piece of scrap fabric. You’ll need to try a few rows and you might need to adjust the tension. But before adjusting the tension, adjust the stitch length. Usually a longer stitch length gives you more shir whereas a shorter stitch length gives you less. Then, from the right side of the back panels start stitching 1/8″ – 1/4″ away from the top edge, from side to side, and repeat this process 1/4″ away from the previous line of stitching all the way to the bottom of the panel. Once you’re done, steam it so the elastic shrinks back into shape and you’re ready to stitch the back panels to the front bodice.
A few things to keep in mind:
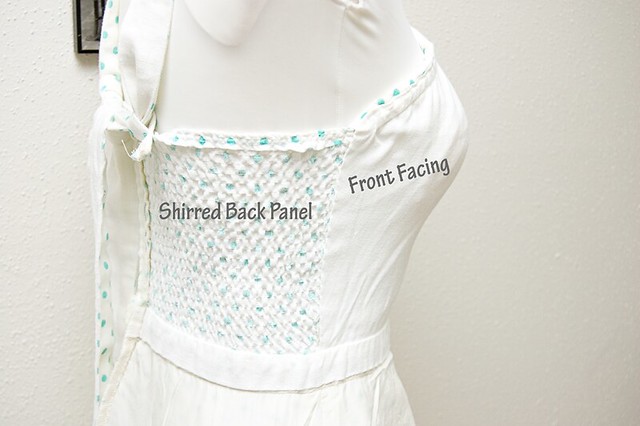
This alteration to the dress eliminates the facing for the back panels and it will now make the back panels shorter (by the 5/8″ used for the hemming of the top edge) than the front panels. The above photo shows that I kept the front facings and eliminated the back facings and after stitching the back panels to the front panels I then stitched in the facing on the front and then slip stitched the front facings to the back panels at the side seams. You’ll also find that the tabs in the back that hold the ties will be applied after you’ve done all the shirring. Hopefully this gives you an idea and jumping point from which to do your own shirring on the Lonsdale!
Happy Shirring Ladies!
xoxo,
Sunni
Thanks again Sunni for sharing your shirring tips and tricks!


Thanks for the very informative tutorial. I have a question for you. At the beginning and end of each row of shirring, did you just do a few stitches backwards and forwards in the normal way, and was that enough to anchor the elastic thread?
Great tutorial, Sunni! :) I just cut my Lonsdale out, and am somewhat kicking myself for not having accounted for shirring the back panels as I had wanted to after I saw your version. But oh well–I’ll just save it for later! hehe. Thanks for sharing your tips on how you did this (and Tasia for having her guest post)!
The shirring is so pretty – a nice contrast to the rest of the dress.
I just fell in love with this pattern while I was sewing my version.
Beautiful work Sunni and Tasia!!
@Sally: Hi Sally!
Yes that’s exactly what I did on mine. I also left the threads about an inch long and then trimmed them once everything was in place. When I was finished shirring one of the panels, I stretched it a little and then steamed everything back into place.
@Sunni: @Sunni: Thank you Sunni! I will give it a try!
Love this take on that lovely pattern…now to find it, and find time to make it up!