 Hi everyone! Here’s the next installment of the Crescent Sew-Along. Our next sewing step, after sewing the pockets, is to reinforce centre front.
Mine is marked with a pin, a lazy marking technique but it works! (As long as it doesn’t fall out.) We’ll stitch through this circle marking with very tiny stitches in this step.
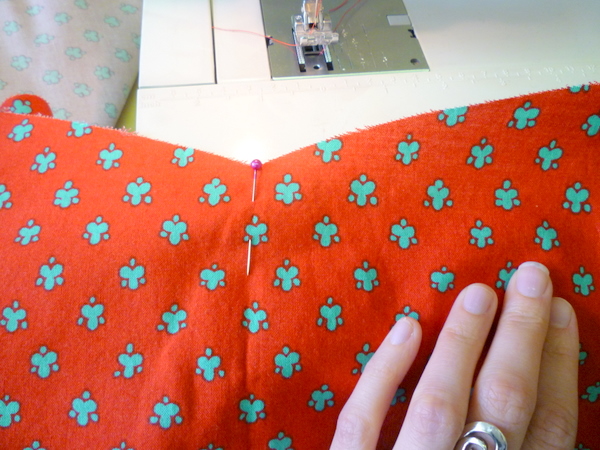 Why do we do this? It’s so that we can clip at centre, and push each side of the seam allowances apart, to get a better ‘V’ on our waistbands. If we didn’t reinforce, our clip could pull and fray and end up way lower than we want it to be!
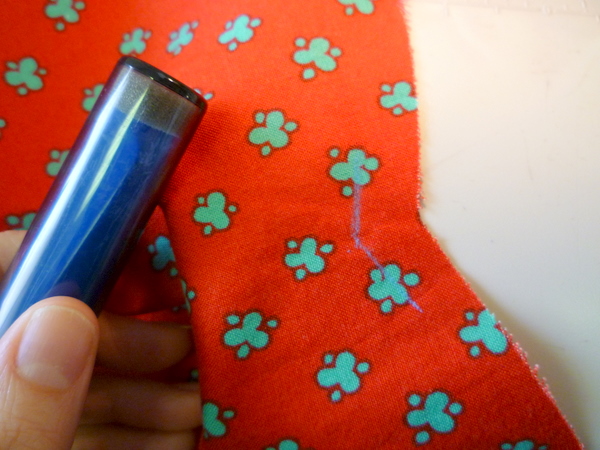
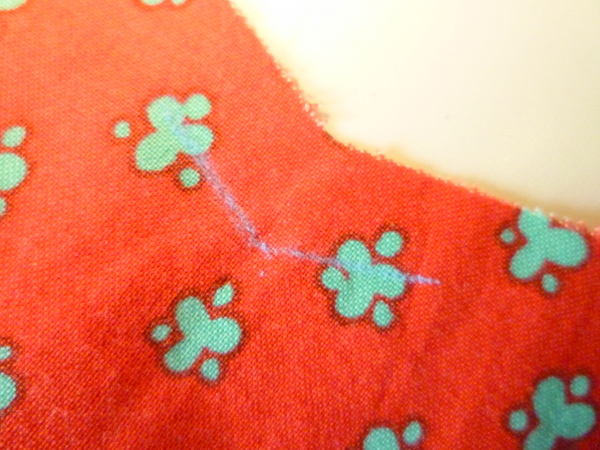
Now, we’ll draw in our stitching lines with chalk. I find it’s a lot easier to stitch on either side of the marking if the lines are drawn in. Takes only a second, but makes it so much more accurate!
Draw a line about 1″ (2.5cm) to the left and 1″ (2.5cm) to the right of the circle marking, parallel to the top edge. It should look like a little ‘V’ when you’re done.
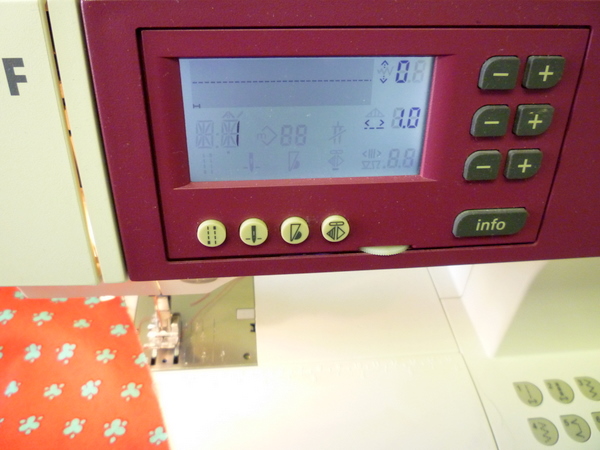
 Now, set your sewing machine to a very small stitch size. On my machine, I’ve set it to stitch size 1. (Normal on mine is 2.5 – so if your machine is set up differently, aim for about half the size of normal stitches.)
 Place your needle into your fabric, starting at one end of the ‘V’ marking.
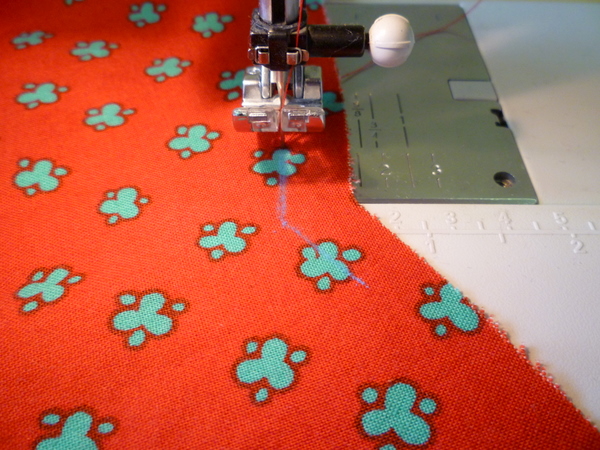 Put the presser foot down, and stitch to the middle of the ‘V’ marking. Stop with the needle down in the fabric, and lift up the presser foot.
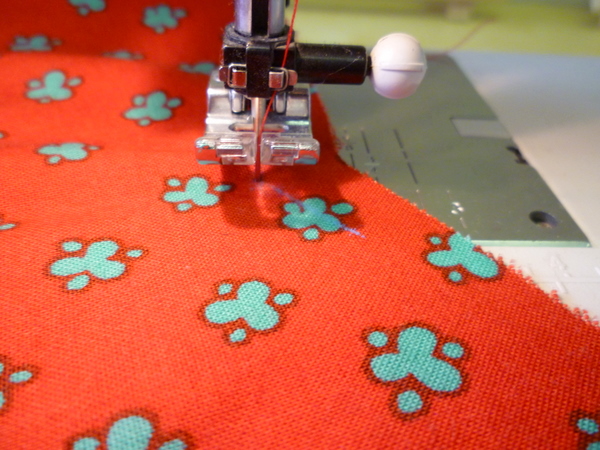 Pivot the fabric so the other half of the ‘V’ marking is in a straight line in front of your needle.
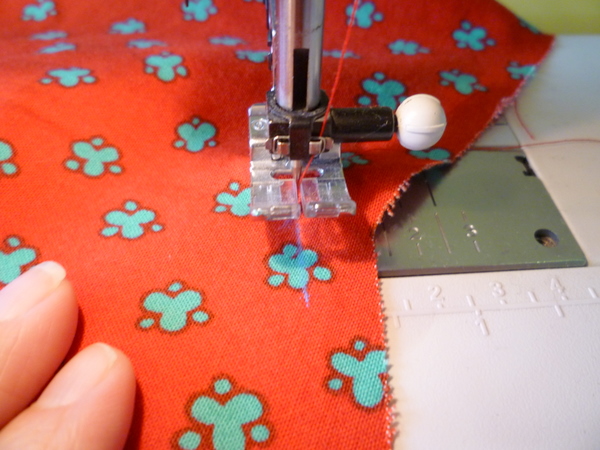 Put your presser foot down, and stitch to the end of the chalk marking. Don’t worry if your stitching runs a little bit longer than the marking, that’s all right!
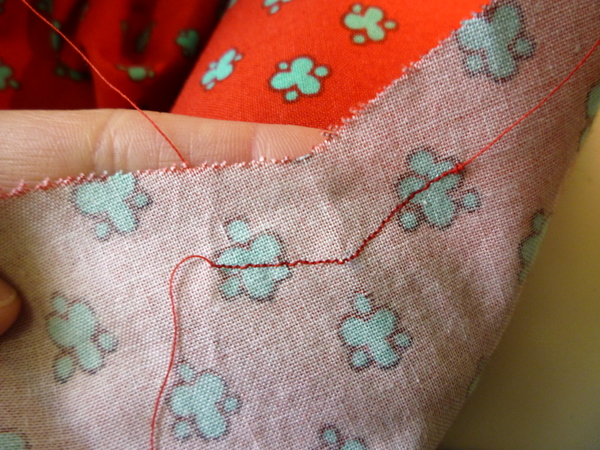
Here’s what it will look like:
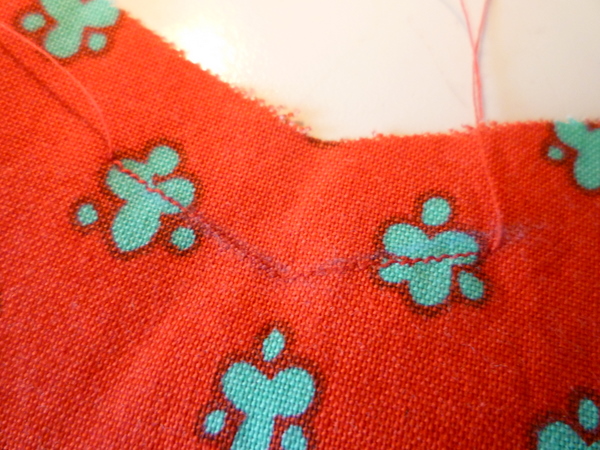 You can see it a lot better from the wrong side:
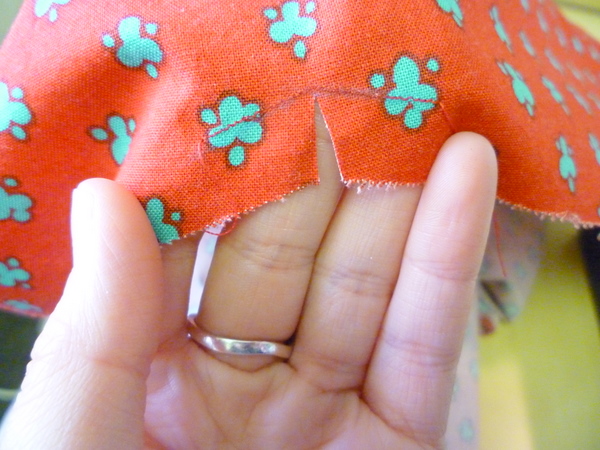
 Now you can clip to the centre of your ‘V’ with confidence, knowing the stitching will keep it from spreading!
 Any questions on doing the reinforcing stitching? Let me know!

Thanks! I think during the week shorter post are fine but on a Friday a longer post is better since we all have the weekend to work on our sewing!
I can’t wait for you to explain how to attach the waistband because I’m kind of stuck! ;)
I agree with Julie: I appreciate the shorter posts during the week and would like a longer one on Friday if you can swing it since most of my sewing time is on the weekends. I’m a bit behind so I’m going to use this weekend to catch up. Thanks for the thorough instructions!
Nice tip! I’m actually glad the sew-along is not so fast, since I’m currently superbusy and haven’t even cut the interfacing yet (I didn’t make a muslin either, since the sirkt is fitted at the waist only and I’m an exact size 0 in your chart _ I hope it’s OK!), but I understand those asking for a more substantial post on friday.
By the way, I realized my zipper is actually an invisible one, do you think I should change that? I prefer the look of invisible zippers, but I hope it won’t interfere with my lining!
The smaller and longer posts are good, either way. I’m actually “waiting breathlessly” for the next posts! I’m stuck at the step where you attach the facing/zipper piece to the center back. I’ll wait until you post on that. I like the level of detail you are providing in all your posts. It’s very helpful, and I’m learning a lot about the finishing details I can use in other projects, too. Thanks!
i prefer the small posts. you can focus on one thing and learn a little bit each day…it sticks in my mind better than trying to learn a lot all at once :)
I love all these little details. I’m learning so much from you. I will be making up the skirt when the sew-a-long posts have finished so that I can go at my own pace and take everything in as and when you post. Little posts are fine for me and I agree that they are easier to reference for later. If the steps are very small you could post two in one go.
Little posts are fab. I’m loving the straightforward clarity you have in all your posts. I’ll be wondering what something looks like and then I scroll down and there it is. A pin sharp close up of exactly what i wanted to see. Thank you! (are you psychic or something, lol!)
Pxxx
@portia: Yes! You figured out my secret. (No, just kidding, I *wish* I was psychic – think of how much more prepared I could be!)
Thanks for the feedback on the little posts! I’ll try to do little posts, more often if possible. I really wanted to whip up about three more little posts for posting over the weekend, but I always overestimate how much there is to do! Don’t worry, next week will be a super-productive sewing week. It’s probably skirt-weather for everyone! (Although, rainy again here…)
I love the regular little posts! I can only sew in snatches of time so it is perfect for me :)
This is a great post! One question though, do you backstitch at the beginning & ending of this step?
Thanks!
@Kat: Hi Kat! Nope, no need to backstitch. The tiny little stitches stay in easily and won’t unravel!
@Jane Elise: Great! I like doing it this way, I can put a lot more photos in for each sewing step so it’s super clear and easy to follow. I’m glad you like it!
Hi, I have a question- is the stitching meant to be on the seam line? Or is it within the seam allowance? How far in should it be? :) Thanks! (I hope I haven’t missed this detail somewhere in the post)
@Jo: Hi Jo! The reinforcing stitching should fall about 1/2″ (1.2mm) from the raw edge. It’s just barely inside the seam allowance, so it won’t show when you sew the seam. Good question!
Thank you SO much for this. The costume I’m sewing for my granddaughter included the instruction to do reinforcement stitching which I had never heard of, and the instructions on the pattern itself were sketchy and assumes you already know what you are doing (which I don’t!) LOL! I love the step-by-step photos, really makes it “foolproof”!