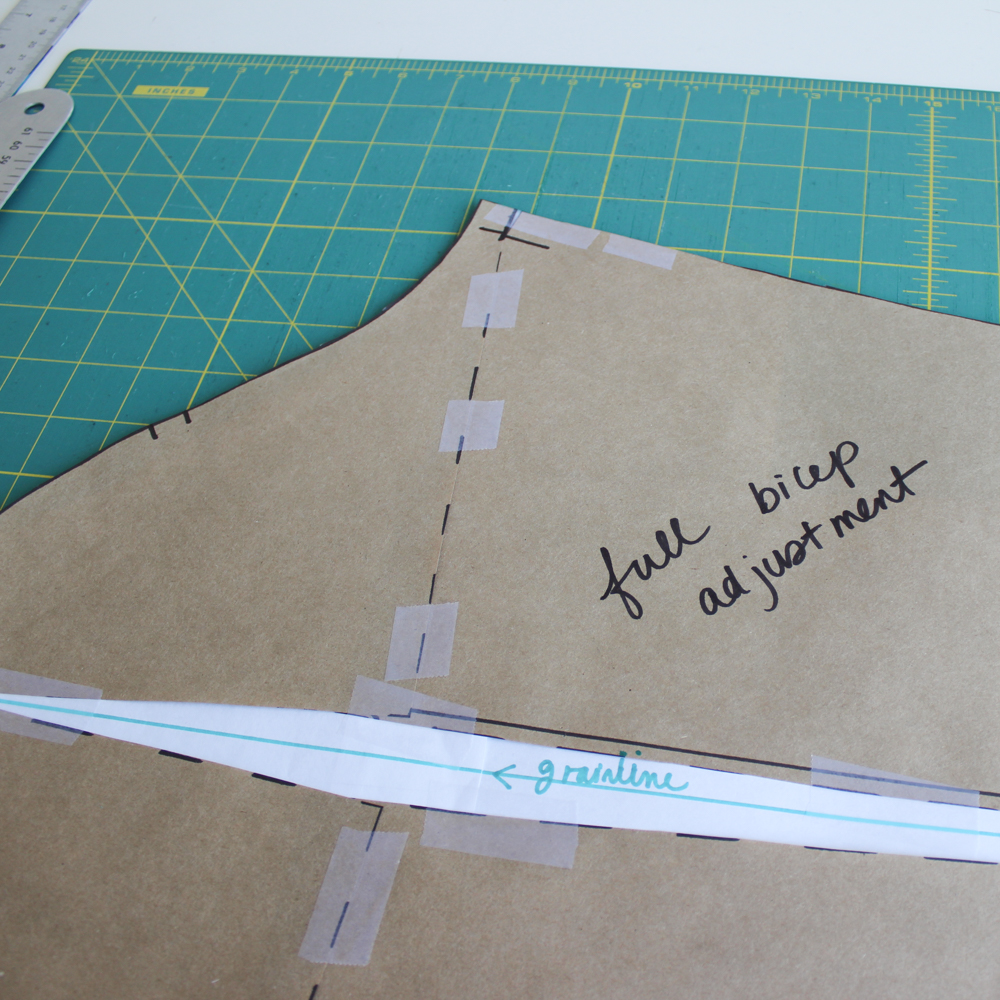
Here’s a great pattern adjustment to have in your arsenal: the full bicep adjustment. Also known as a full arm adjustment. If your sleeve fits snugly, this is how you can adjust the width. The method that I’m showing below is from the excellent book Fit For Real People (highly recommended!).
I’m starting with the Granville shirt sleeve here, but you can do this adjustment on pretty much any one piece sleeve.
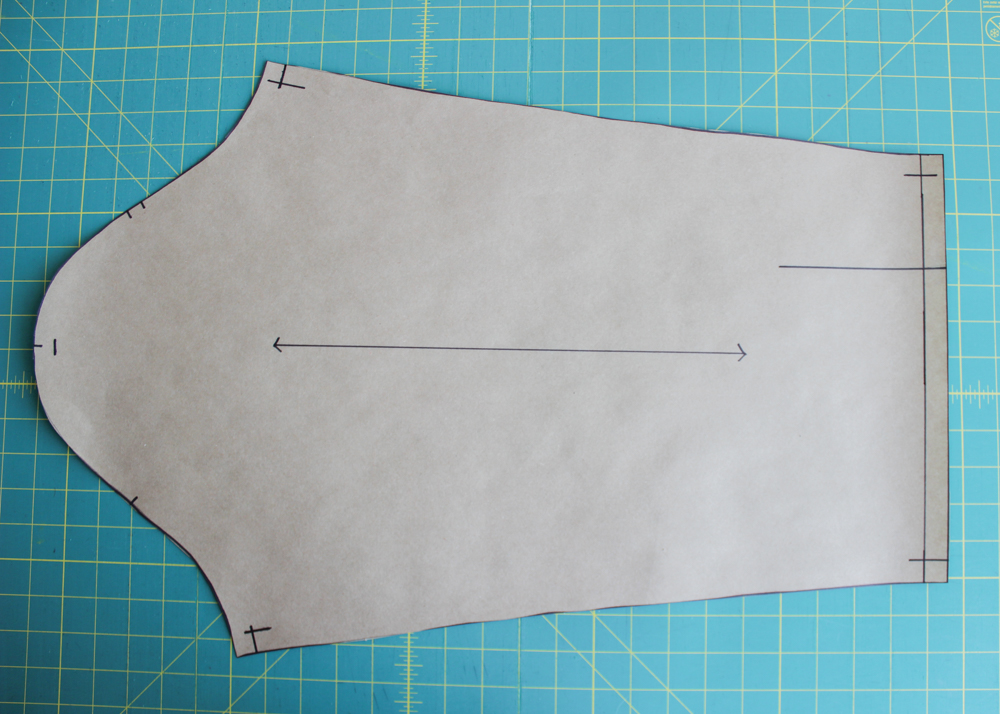
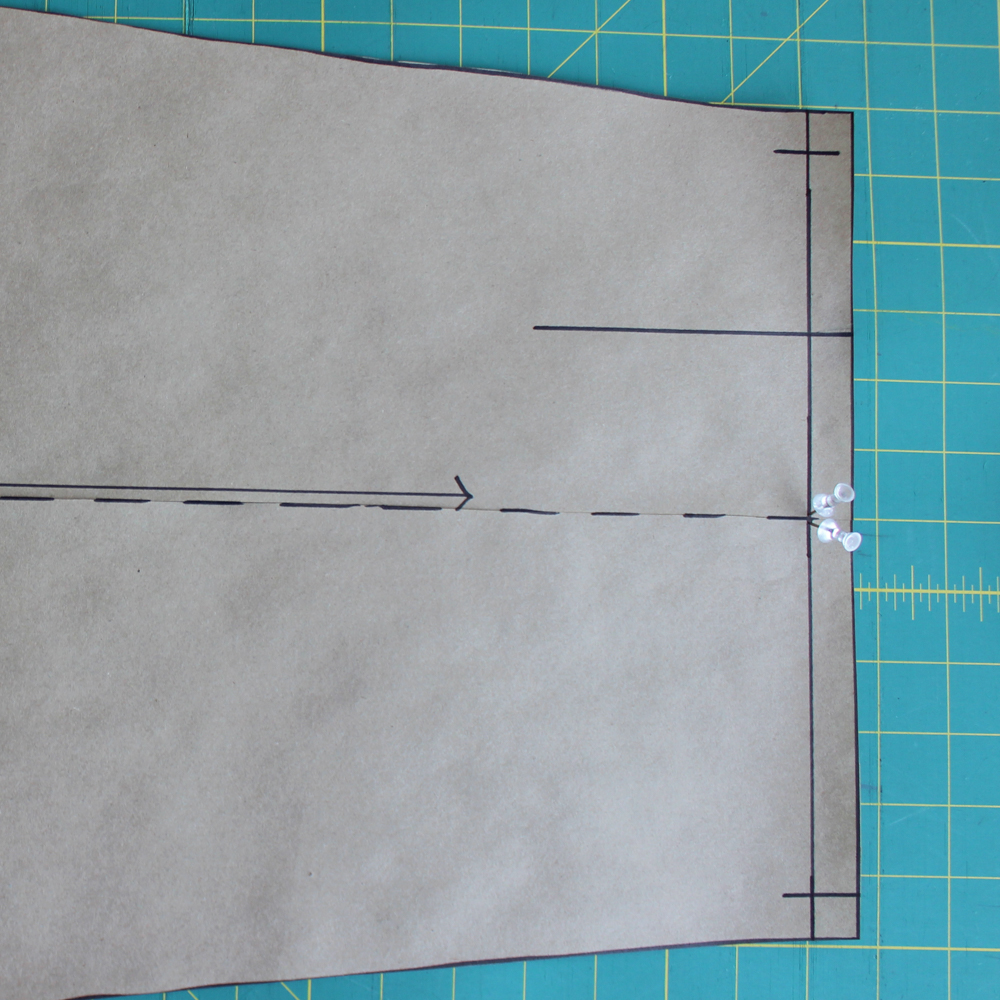
Begin by tracing your sleeve, along with markings like notches and grainline. Trace your seamlines where they intersect as I did above. For the Granville shirt, this is 5/8″ (1.5cm) from the edge.
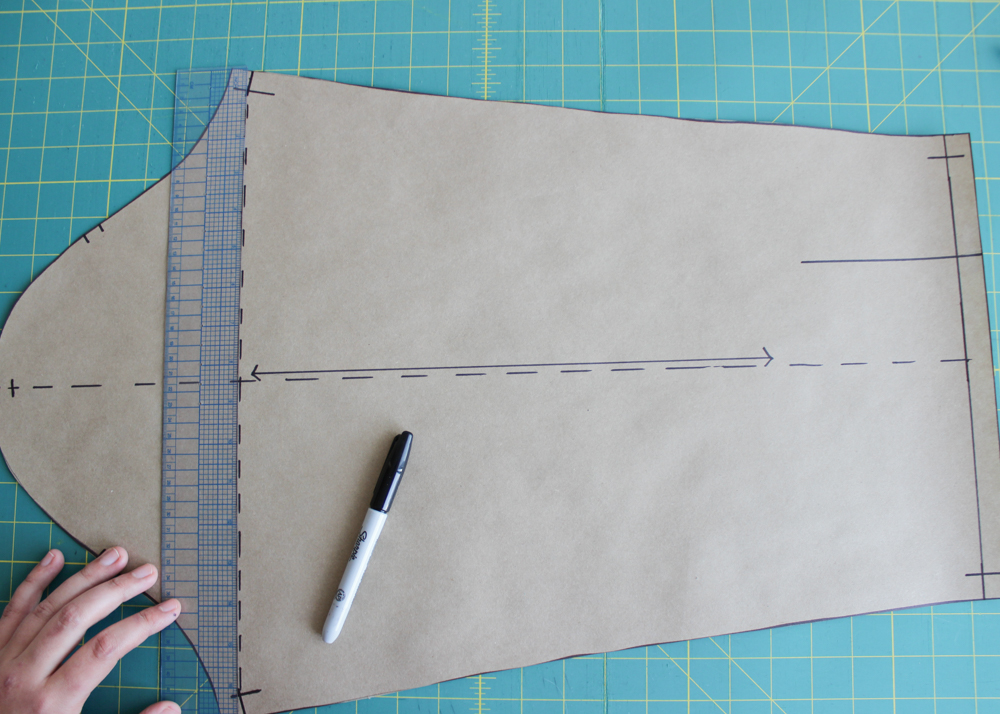
Next trace in your slash lines. One line will run along the center of the sleeve, parallel to the grainline. The second slash line will run across the bicep, connecting your underarm seam intersections.
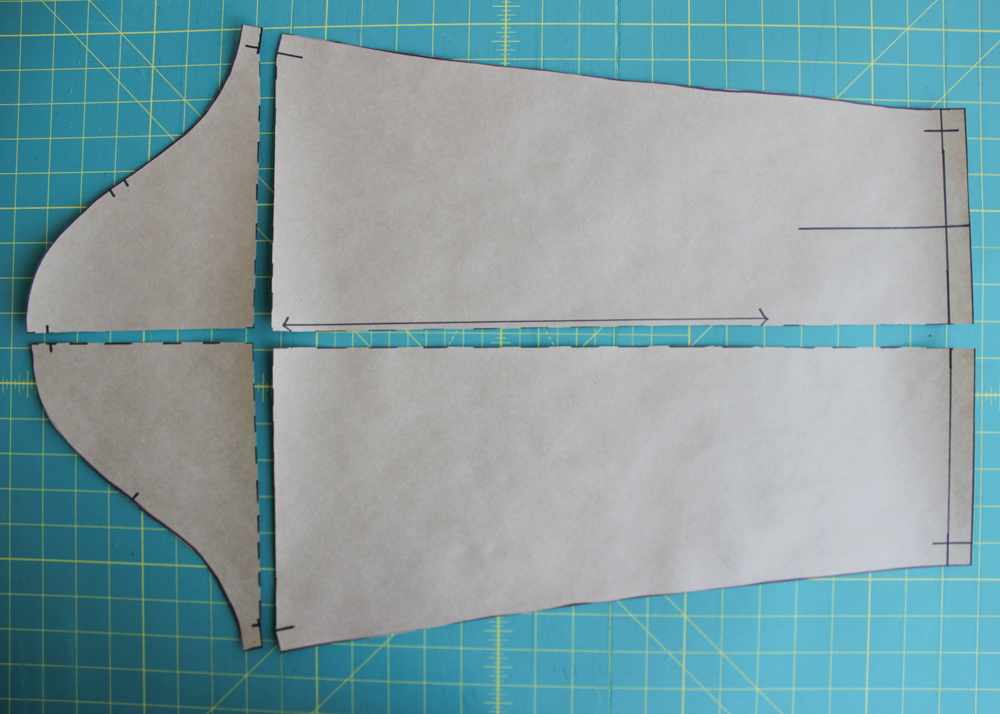
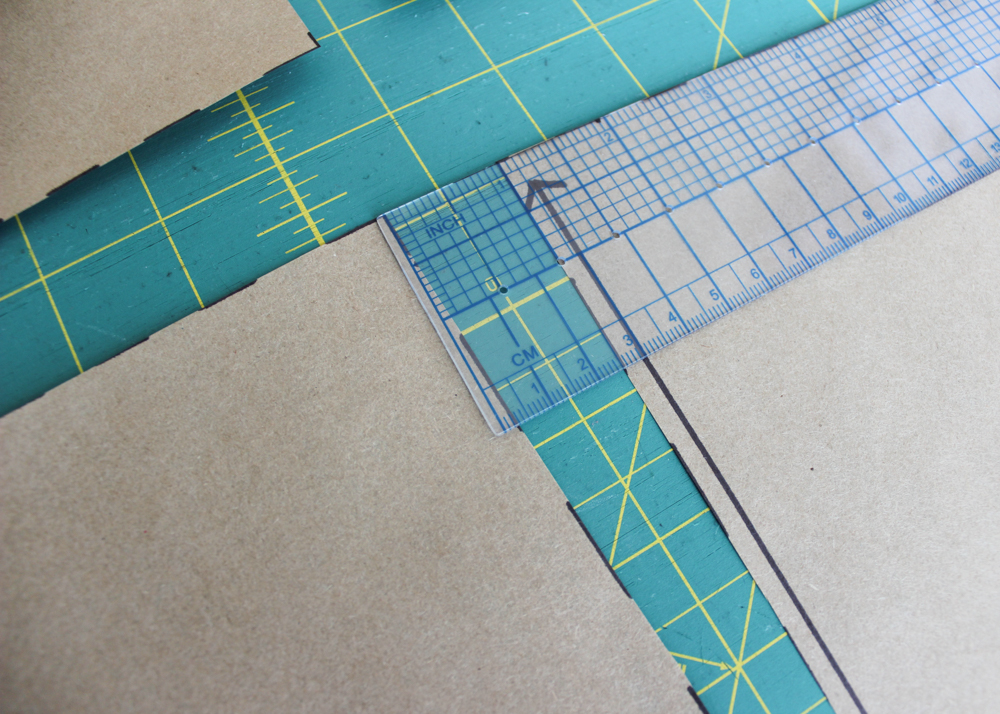
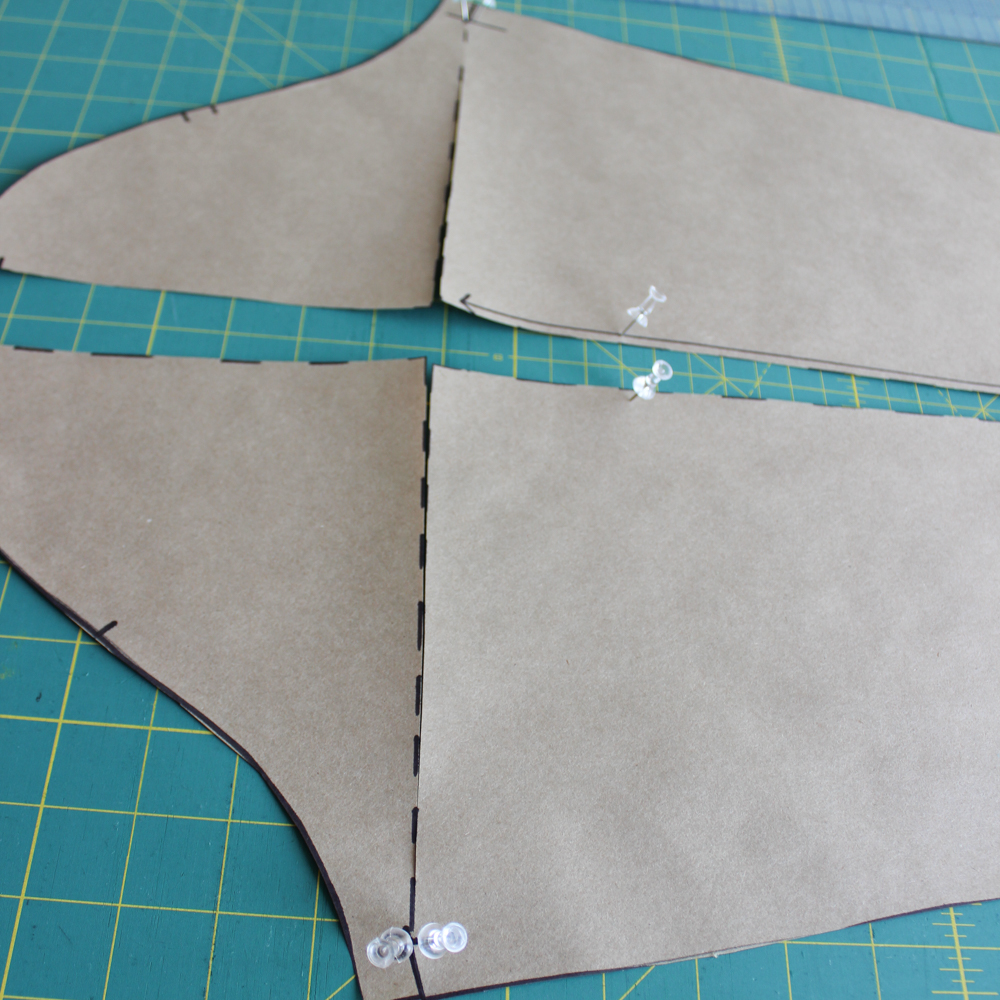
Now we need to cut along these slash lines. We will be pivoting from the seam allowance line (not the paper edge). I like to cut straight through and use pins on a pinnable surface to hinge and pivot my paper. I find this much easier than leaving a millimeter of paper uncut to create a hinge, which always seems to rip on me anyways.
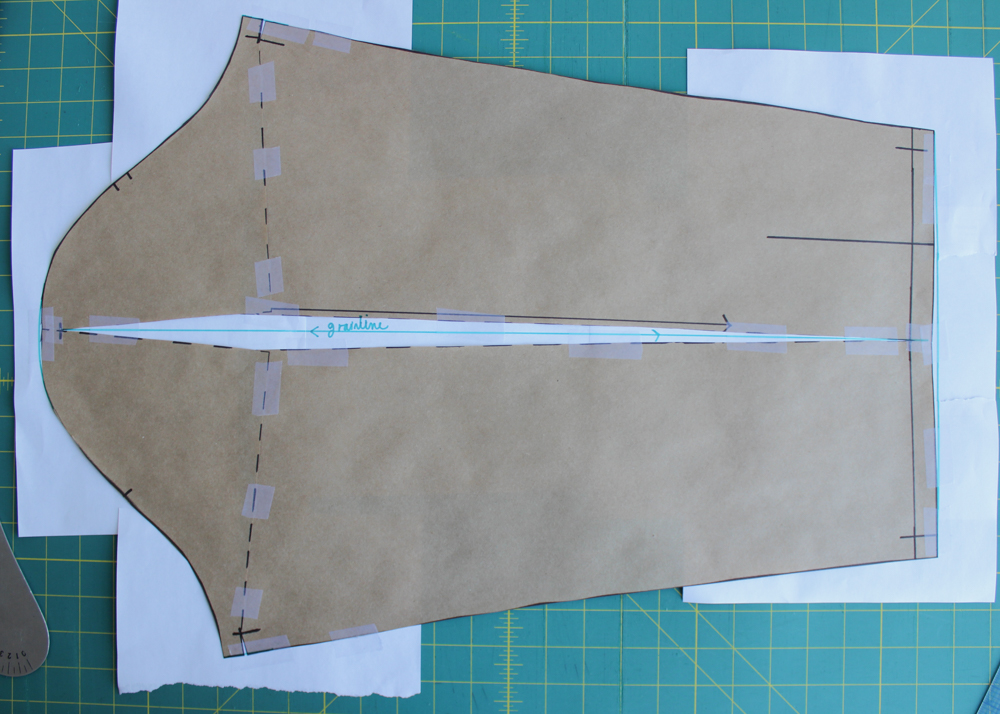
Pin at the bottom edge of your sleeve as shown, right at your seam allowance line. This will create the “hinge” that we need.
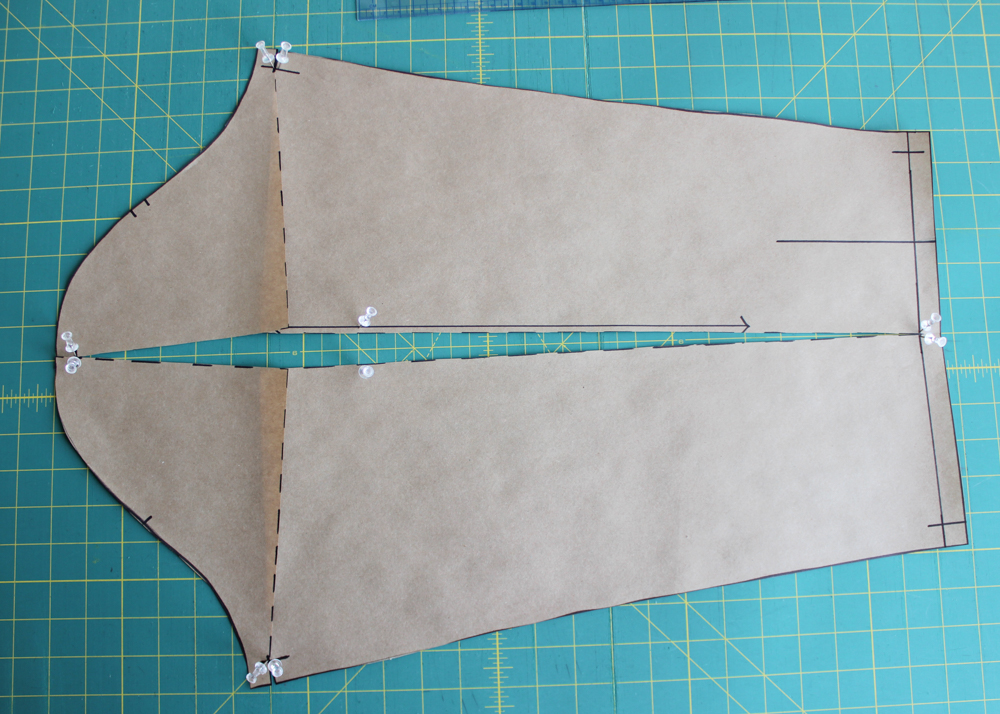
Spread the sleeve apart in a V shape in the amount of extra ease you require. For a woven sleeve, 1.5-2″ (3.8-5cm) of ease should be enough. you can measure your bicep (with your arm bent) and then measure the original sleeve pattern at the bicep to see how much you should add.
After you’ve spread in the amount you need, pin the bottom portion of the sleeve in place so that it doesn’t move.
Next, anchor your sleeve with pins at the underarm seam allowance, as shown above.
Finally, pivot and pin down the sleeve cap so that the top center seam allowance intersection lines up. If that sounds confusing, check out the left side of the photo above.
You can also see above that our hinge/anchor points are at the top and bottom seam allowance line, and the underarm seam allowance intersections.
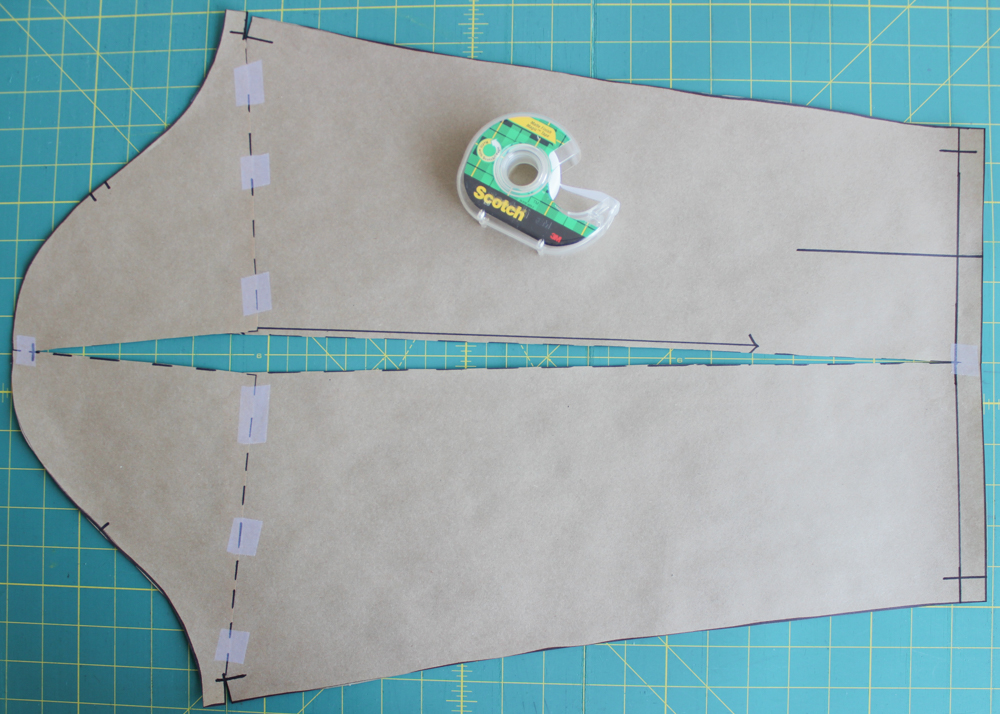
When you’re happy with how everything lines up, you can tape your pattern piece in place.
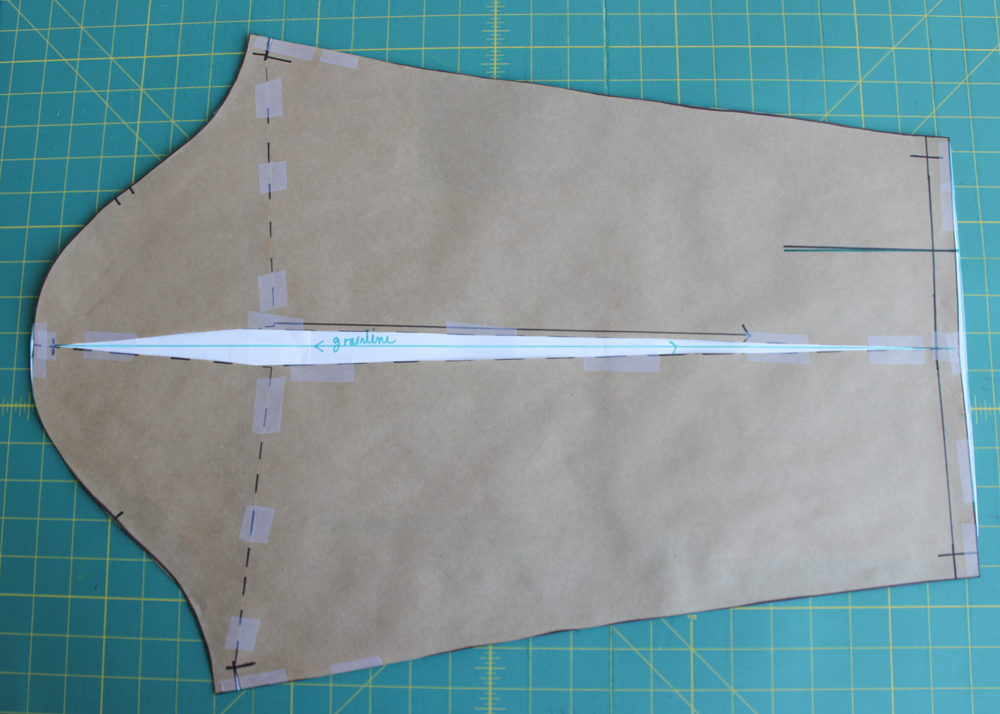
Slip paper behind your pattern piece to fill in the gap in the center, and tape in place. Now you need to true up (redraw) the sleeve cap*, bottom edge and underarm corners. Be sure to redraw your grainline too.
*See comments for some interesting sleeve cap discussion!
Here’s the final piece all trimmed. If you’re going to have a sleeve placket, you’ll also want to redraw your placket slash line so that it’s parallel to the new grainline, as I show above in green.
And that’s it! We’re all finished with our full bicep adjustment.

Great tutorial! How do you deal with the fact that the bicep expansion also shortens the sleeve cap? Does that require another adjustment?
Hi Stephani, great question! They did not mention this fact in Fit for Real People but I totally agree, the sleeve cap is shortened with this adjustment. I think it makes sense to lay the original piece overtop of the adjusted one, and retrace the sleeve cap. I tried this with my piece and it raises the sleeve cap by about 1/2″. I will add a note above about this! Thanks for pointing this out :)
Um – sorry to correct you both, but I’ve seen this adjustment explained many times, and sometimes use it myself. The whole point of this adjustment is that your sleeve cap sewmline length does not change at all, whereas if you raise it, it will, and you will end up with more ease. This is why they did not mention it in fir for real people….. This is also the reason why you shouldn’t use this method to widen by more than around an inch, if I remember right, as it will lower the sleeve cap too much. There are other methods for adjusting biceps by more than an inch. I remember a recent article in Threads which dealt with that particular adjustment….
Also, if you wish he rest of the sleeve not to change shape, you can chop off the lower part of the sleeve and tape that down, and then redraw your side seam lines to wherever you chopped off – that way the bottom shape and perhaps any elbow darts remain as they were, and it leaves your grainline in place for ease of reference.
Interesting! Thanks for the explanation Francesca.
Good points. Even though I know this to be true, I have added sleeve cap height back into a pattern after making this adjustment. Guess what? I have puffy sleeves now :)
And I will be un-making that adjustment!
Yes, but sleeve cap seamline length is not what I was asking about. I was asking about the sleeve cap HEIGHT, which is completely different. The sleeve cap height is the length from the sleeve’s shoulder point/notch to the bicep line. That gets shortened in the typical bicep increase slash-and-spread adjustment.
I’ve never even thought of using thumbtacks in the self-healing mat when making adjustments. You just blew my mind!! Can’t wait to try it, this is going to make life so much easier. Thanks!
Takes a bit of force to get them in but it’s a good method :)
What a lovely clear explanation, and great photos. Thanks for sharing :)
Great tutorial!! Presently, I have been researching about sleeve fit so this tutorial was great timing. I, too, like Stephani, wonder about the shortened sleeve cap height.
Hi Tina! See my reply above to Stephani :)
Thanks! Great tutorial!
Thanks so much for posting this, I’ve seen written instructions but couldn’t picture it! Your pictures helped it all make sense!
The Sew News Robson Trench Sewalong had a different technique – yours widens the length of the sleeve and theirs widens the cap – what is the difference between the two
http://www.sewnews.com/blogs/sewing/2014/12/08/robson-coat-sew-along-week-2/
The Sew News sewalong technique addresses a different problem and a different part of the sleeve than this full bicep adjustment.
Theirs lengthens the sleeve cap’s seamline (and also lengthens the sleeve cap height) for more vertical ease and to allow some additional fullness at the seamline so that area doesn’t look flat coming out of the armscye. It’s essentially a length adjustment.
Whereas the full bicep adjustment is a width change for those who have full upper arms and need more room in the sleeve’s biceps area.
Genius!
This is very helpful! I ALWAYS have a problem with fit in the bicep area! The shirt will fit fine everywhere but there, no matter what I do. I am now going to look for that book!
This is a great tutorial, with excellent photos! Thanks Caroline :)
I have been really active, lots of muscle around the shoulder area, as well as the upper arm. I live to have a raised and gathered sleeve head, then my arm can move freely without any restriction, lengthening the life of the garment hugely, but it still looks feminine. It’s important to consider style, as well as fit.