 Well hello there sew-alongers! Today is our last day of the sew-along (sad face). We’ll be doing some hand sewing and hopefully after this our dresses and blouses will be ready to wear! If you need to catch up, here’s a recap:
Yaletown Sew-Along: Fabric Suggestions, Choosing a Size, and FAQ
Yaletown Sew-Along: FBA and SBA Tutorials and Tips
Yaletown Sew-Along: Cutting, Gathering Supplies
Yaletown Sew-Along #1: Preparing Bodice and Sewing Facing (Instruction Steps 1-4)
Yaletown Sew-Along #2: Finishing Facing, Sewing Bodice Side Seams (Instruction Steps 5-7)
Yaletown Sew-Along #3: Sewing Skirt / Lower Blouse (Instruction Steps 8-10)
Yaletown Sew-Along #4: Sewing Bodice to Skirt, Sewing Elastic Casing (Instruction Steps 11-13)
Yaletown Sew-Along #5: Sewing & Attaching Sleeves (Instruction Steps 14-17)
Yaletown Sew-Along #6: Hemming, Sewing Tie Belt (Instruction Steps 18-19)
Today: Thread Loops and Securing Neckline (Instruction Steps 20-21)
So today we’ll be sewing thread loops at the waist side seams, to hold our belt in place. We’ll also sew a mini thread loop and button at the neckline overlap. If you prefer, you can simply tack the neckline in place, but today I’ll be showing you the thread loop technique!
I am doing it on muslin with bright thread so it’s very clear for you. Of course for the purpose of the sew-along, you’ll be sewing the loops onto your garment itself. Ready? Let’s get started!
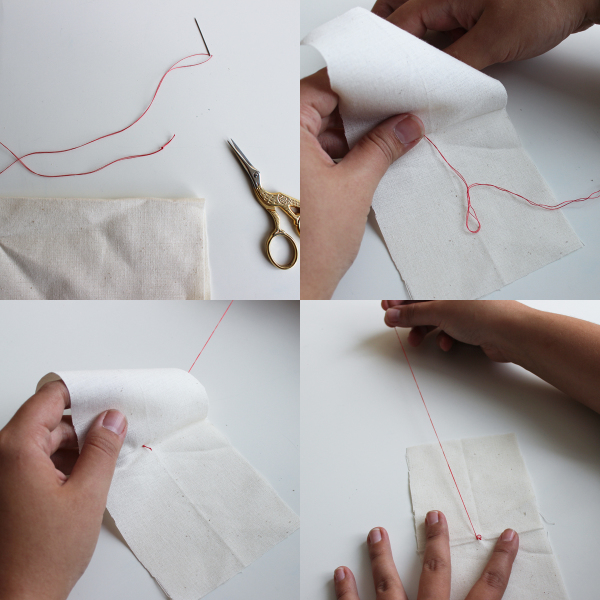
1) Start with a threaded needle. (Use thread that will match/blend in with your fabric!)
2) Insert the needle in the spot where you want your thread loop to be, in from the wrong side and out to the right side.
3) Pull it all the way to the right side.
4) Sew a couple of small stitches in place.
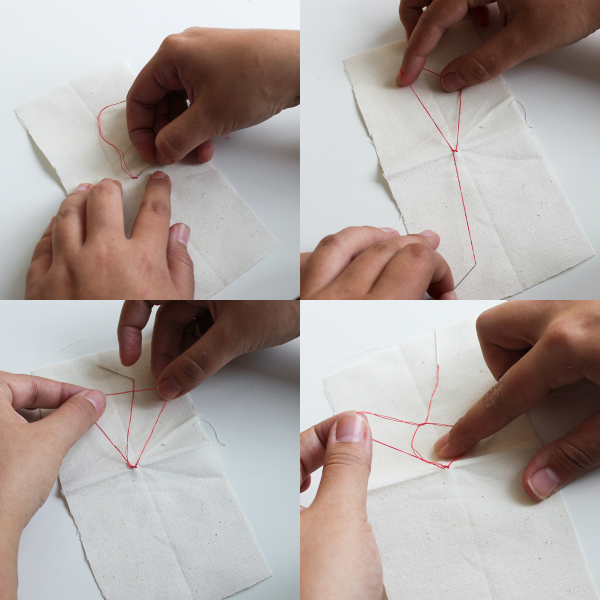 5) Take another stitch but don’t pull your thread all the way through.
6) You want to have a large loop of thread, and a straight thread, as pictured top right.
7) To start the chain stitch, lay your loop over the straight thread.
8) With your left hand, grab the straight thread and pull it through the loop.
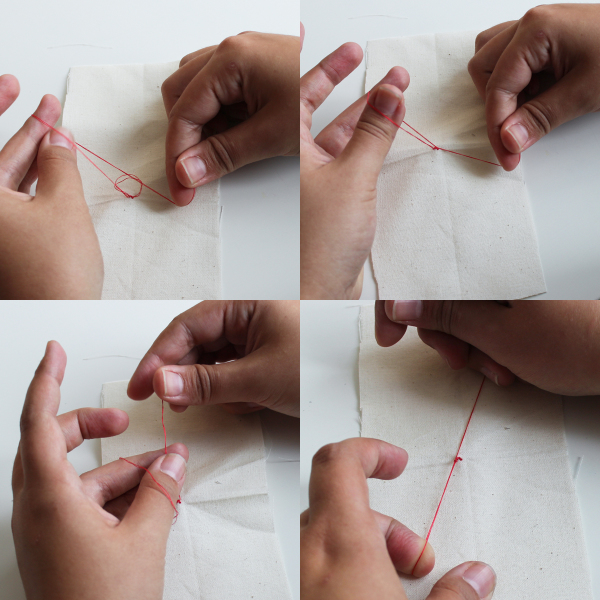 9) Working with both hands, pull your thread through and tighten the original loop around the base of the chain.
10) This will create a new loop which you can hold open with your left thumb and forefinger (or middle finger, whatever you’re comfortable with!)
11) Continue in the same way: Grab the straight thread with your left hand.
12) Pull it through to create a new loop and tighten the last loop around the base of the chain.
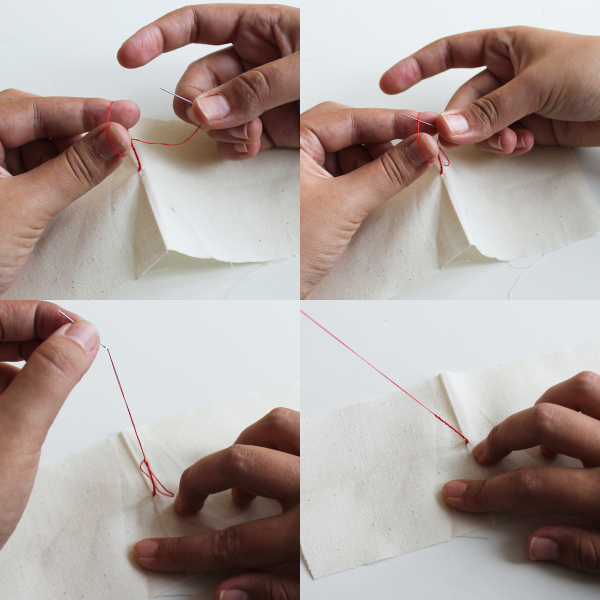 13) Continue this way until your chain is the loop is length you want it to be. For a button, half the loop will need to be a bit more than the diameter of your button, so that the button can fit through. For the belt loops, you can make it the width of the belt (times two, since it doubles over)! Time to tie a knot…
14-15-16) To tie your knot, just pass the needle through the loop and pull until taut.
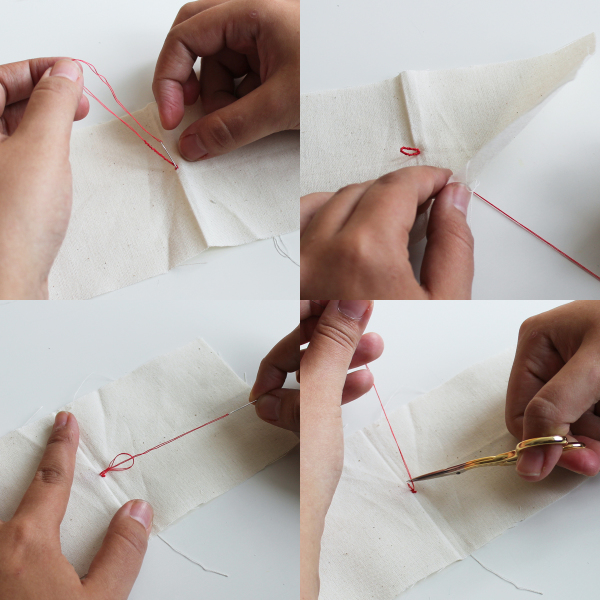 17) Insert your needle back through to the wrong side of your garment.
18) Pull it tight to form your loop.
19) Turn everything over (or inside out) and tie off your thread with a couple of slip stitches.
20) Cut the loose thread, and voila!
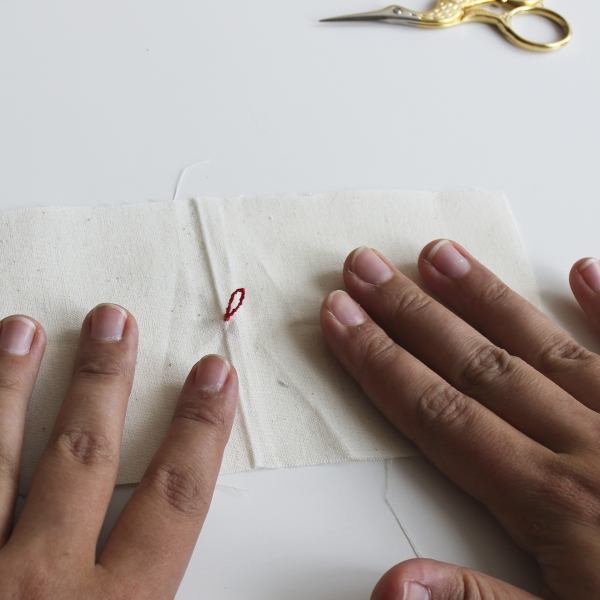 Here is what it looks like from the right side. This is a great technique to know – you can use it for button thread loops, belt thread loops, or as a simple bridge between a dress lining and shell to hold the lining in place at the hemline. So now that we know the technique, how to be apply it to the Yaletown in particular?
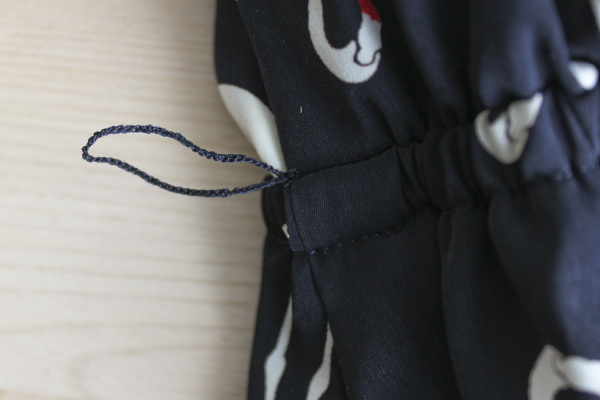 So your thread loops at the waistline will look like this. Super simple.
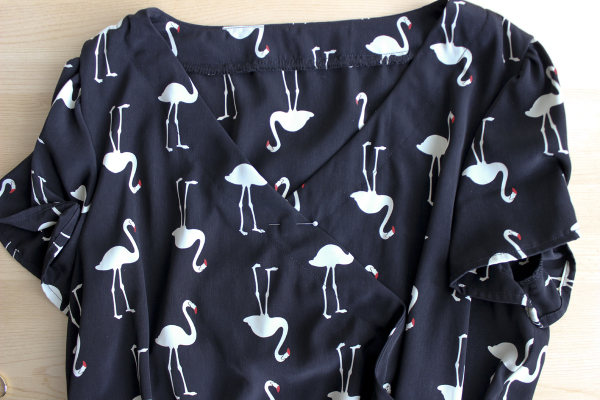 For the dress neckline, try on your garment and pin it closed to your preference. Where the edges intersect, sew a thread loop on the right overlap of the garment, and a small button on the left side.
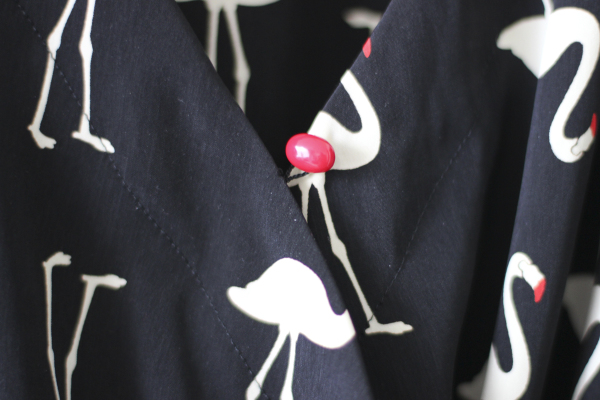 When it’s all done it will look like this! Place your button a bit higher than the loop, so that the loop ends up extending perpendicular to the edge. My button is a vintage red oval button I had in my stash – isn’t it unique? You could use whatever small button you’d like, even a self covered button would be lovely.
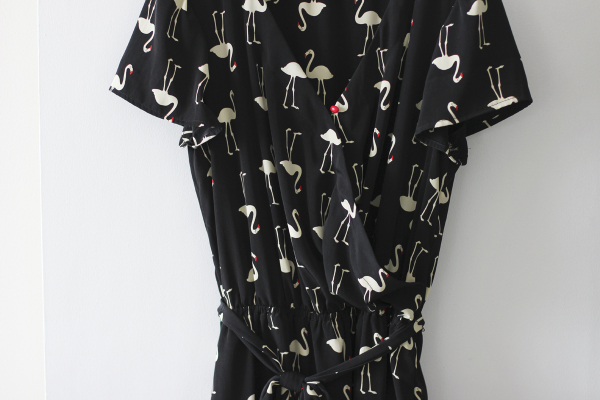 We have reached the finish line!
Thanks for following along everyone! I had a great time leading you through the Yaletown sew-along. Happy sewing!

Caroline, thanks so much for the thread loop tutorial. It’s really comprehensive and easy to understand with the detailed pictures. Can’t wait to use this technique for my next project.
Glad to be able to see the contrast thread clearly. Hehe
Keep up the great work!
Catherine, Malaysia
Awesome tutorial! I’m a big fan of thread chain loops as well!
Thank-you for the very informative tutorial. I have learned much from this sew along and enjoyed watching the creation of your lovely dress.
Agreed! That thread loop tutorial is awesome! I always seen those on RTW garments and thought it would be nice to learn!
Hi Caroline! Thanks for the fun and informative sew-along, I really enjoyed taking part!
Here’s my Yaletown Dress – I made a sleeveless version since my print is pretty busy, and it makes it easier to wear a cardigan :)
http://onelastpress.blogspot.co.uk/2014/10/a-fun-crazy-print-yaletown-dress.html
Very interesting!
You could also use a crochet hook to make it less fiddly, once you have your first loop. Just make sure to pull the thread really tight. It’s nice and quick too.
Wonderful sewalong – I loved your tips and tricks! I just finished my blouse version:
http://dressingtherole.wordpress.com/2014/10/07/new-city-new-pattern/