Today I’m cutting my striped knit fabric for the Renfrew Top. Remember how we lined up the ribbed lines along the fold of the fabric to ensure our solid-coloured knit fabric was on grain? We’ll do something completely different to line up our stripes today. (This is a long post but it’s full of good stuff, I promise!)
One important thing to determine is whether your stripes are printed on top of the fabric, or if they’re knit into the fabric. How do you know? If your fabric was knit using two (or more) different colours of yarn, the stripes will be visible on both the right side and the wrong side of the fabric. If you stretch the fabric, the stripes stretch too. Most nice-quality knit fabrics that are striped will have stripes created by knitting with two colours of yarn.
However if your fabric is only one colour on the wrong side, with stripes only showing on the surface of the right side, and if you stretch the fabric the stripes crack like paint, then your stripes are printed on. (Or if you can feel the texture of the striped part, and it feels different from the non-striped part.) Your fabric started as a solid colour when it was knit, and the stripes were added later on. In this case, you’ll want to check if the stripes are printed straight on grain, or if the stripes are slightly off-grain. A good-quality fabric will have the print aligned with the grain so you don’t have to choose whether the grain is straight or the stripes are straight! (Although if I were to find my stripes were printed slightly crookedly, I’d probably still opt to have the stripes run straight and let the grain be off.. but I wouldn’t really be happy with either.)
Short story: your best bet is to pick stripes that are knit into the fabric!
Now, the cutting. Instead of lining up the ribbed lines, which are hard to see, we’ll be lining up the stripes. We can do this, because they’re knit into the fabric. They have to be on grain, it’s impossible for them not to be. So if we line up the stripes to be straight with each other, and our pieces have perfectly straight horizontal stripes, then our pieces cut on the fold will be perfectly on grain!
This makes sense when you can visualize it:
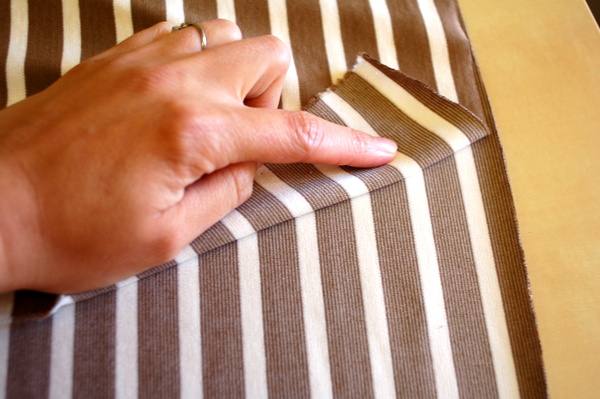
We’ll line up the stripes, from top layer to bottom layer. Every couple of inches, place a pin through one stripe,
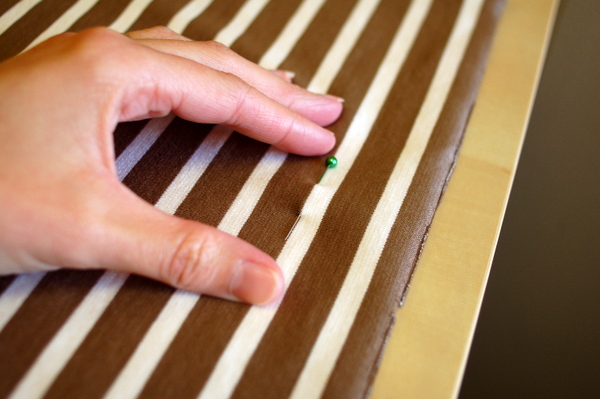
and turn it over to see if the stripes are still aligned through both layers. Yes? Good!
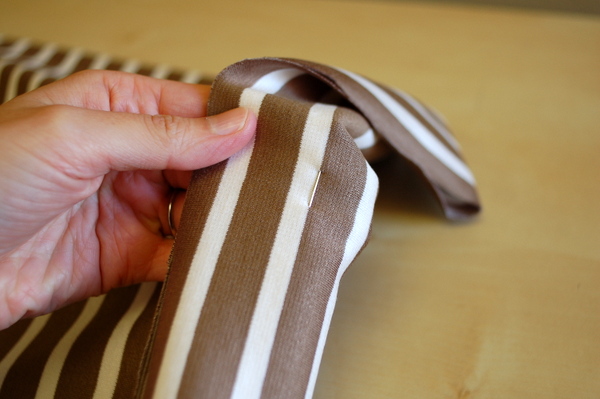
(If not, slide over one layer of fabric and re-pin until they are properly lined up.)
I’m going to pin every six inches or so, to keep the stripes lined up. Once this is all done I’ll start placing the pattern pieces.
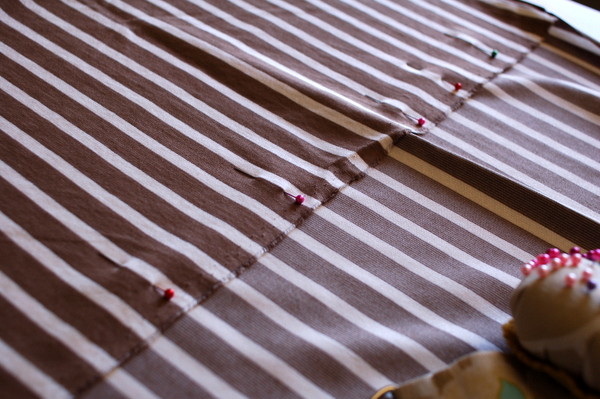
When you get too far from the edge to check the back side easily, try this. Pin through both layers,
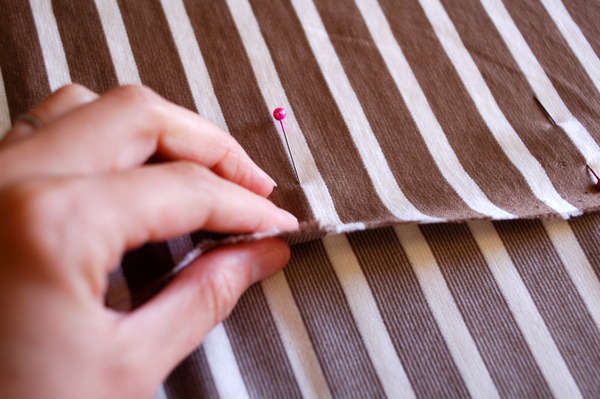
and lift up the fabric edge to see if the pin went through the bottom layer in the right place. If not, slide the lower layer of fabric until it’s lined up.
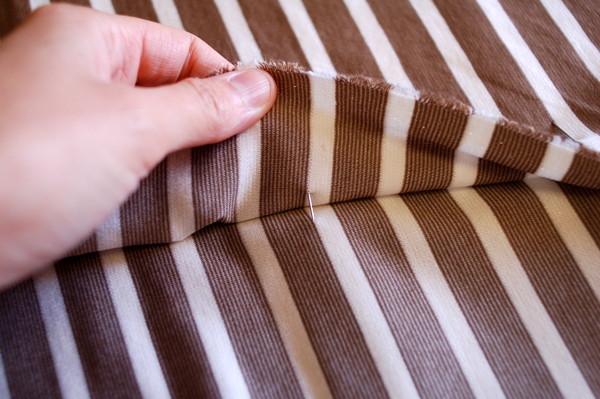
Now, when we place the pattern pieces, we’ll want to think about how the stripes will line up from piece to piece. We’ll also consider the stripe direction.
Stripe matching: lining up the stripes along the sideseams or underarm seams. (This photo shows how the stripes are matched from back to front.)
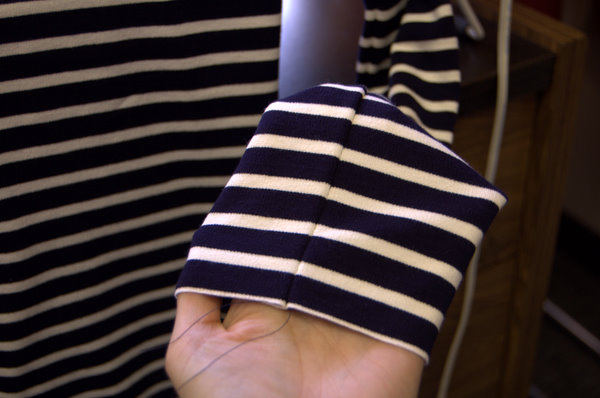
Stripe direction: deciding which way we want the stripes to go on the waistband or neckband. (This photo shows how I chose to place the stripe on the neckband, lining up the stripe with the long edge of the band piece.)
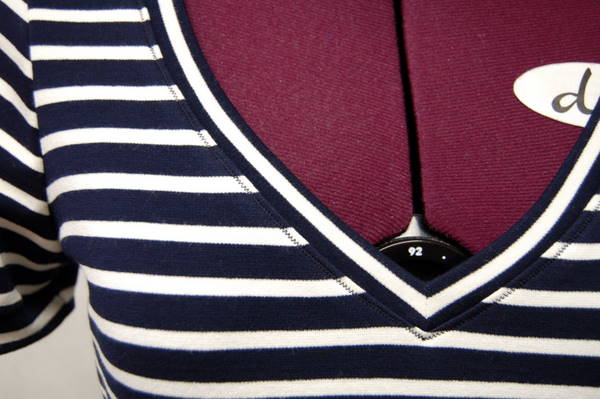
I like the stripe placement on my navy sample top, so I’m going to do the same thing on the new Renfrew top. This one’s going to be a V-neck with long sleeves. (Or perhaps three-quarter sleeves.. but not short. It’s too cold already!)
First, I’m pinning the back pattern piece in place. I’m only going to worry about matching the side seam here. The bottom corner of the side seam is placed on the lower edge of a white stripe.
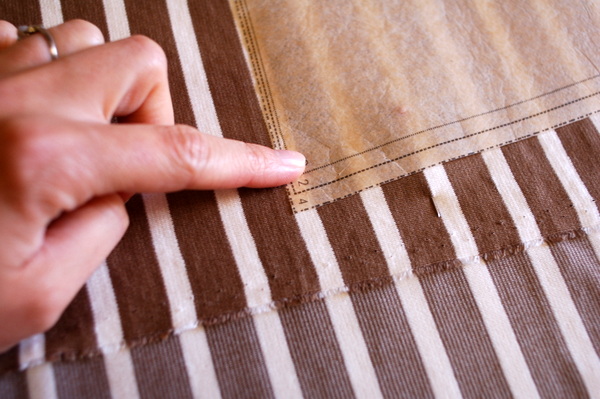
I know that if I pin my lower corner of the front side seam on the same white line, the sideseam will line up! (For your fabric, it can be any colour of stripe and any section of the stripe pattern. It just has to be consistent from front to back!)
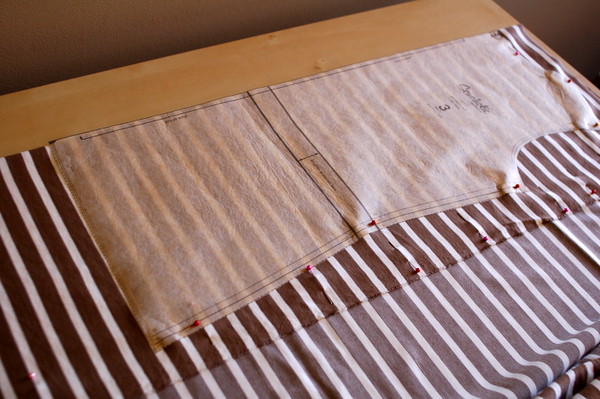
Next, I’ll pin my front piece in place, following the same lower corner sideseam placement. And if we check the armpit, we’ll see that the top of the side seam lines up in the same place, on both the front and back! (Trying to not go too heavy on the photos here, but you can see the top ends up at the top of a white stripe on the front armpit here, and also on the back in the previous photo.)
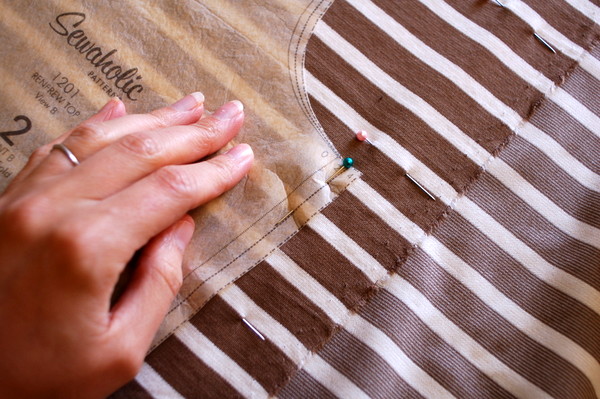
Why did I pick the bottom as my matching point? Because I care more about the lower side seam matching and less about the armpit matching. Most of the time my arms are going to be down, so you won’t see the armpit if it’s off, but you will notice if the waist stripes are off.
Next, we’ll cut. If you feel confident about the pinning job through the stripes, go ahead and cut! (If you are being extra cautious, follow these next steps instead.)
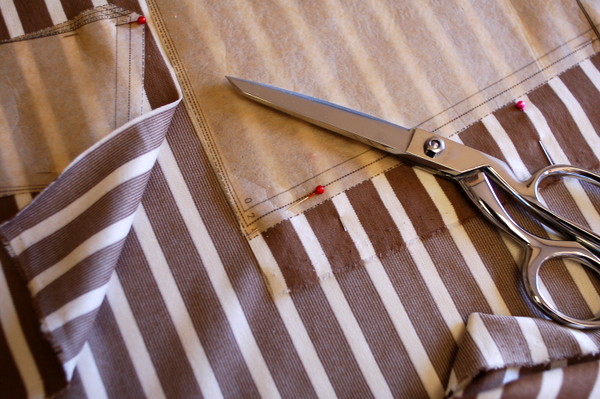
Cut along the cutting line of the pattern piece, through the top layer only. Remove the pattern tissue, and re-align the cut edge with the stripes.
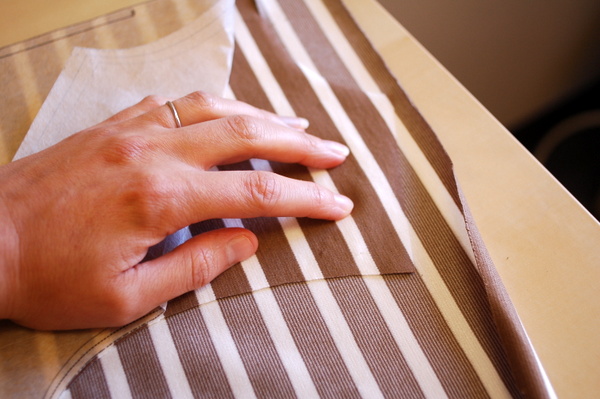
Now cut out the lower layer of the fabric, using the cut edge as a guide.
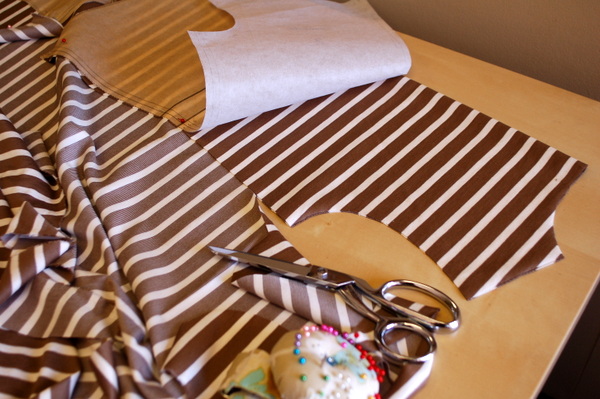
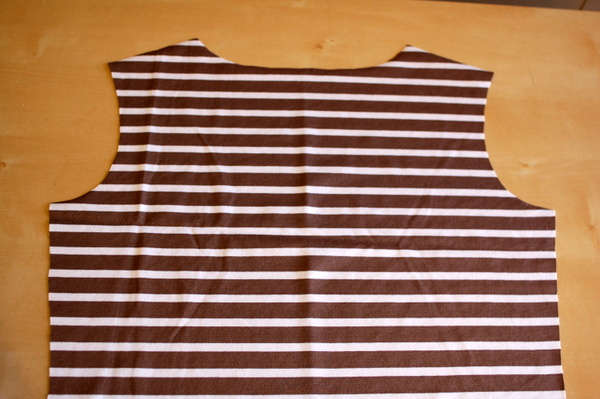
And our piece is perfectly symmetrical! (I swear, the cutting is way harder than the sewing. It gets easier after this!)
The sleeve side seam will match if we cut it completely on-grain, with symmetrical stripes running across the sleeve.
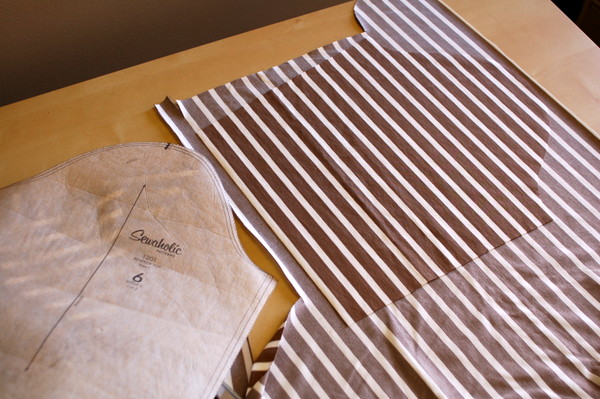
Last thing to consider is stripe placement on the bands. Do you like the stripes running lengthwise, like my sample? Do you want them to go the other way, short crosswise stripes? (Do you want to avoid striped bands altogether and choose a coordinating solid knit for solid bands?)
For the bands, it’s best to cut them with the fabric single-layer, and line up the cut line along a stripe.
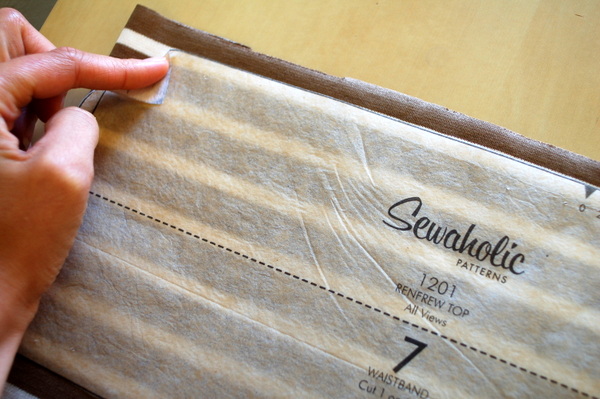
Once I’ve started cutting, I tend to take the tissue off and focus only on cutting straight along the stripe line. I’ll replace the tissue to cut the other side, but at least I know I’m staying on the stripe as I cut.
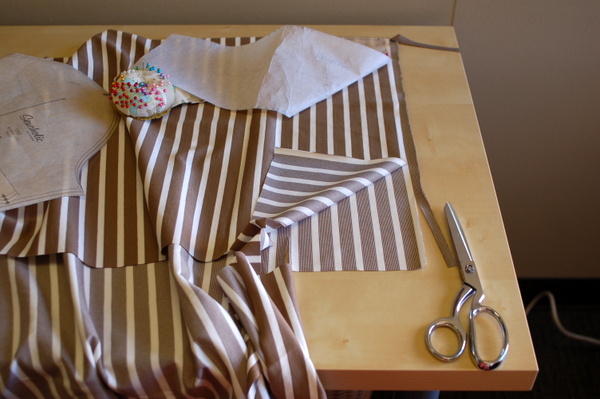
Replace the tissue and snip notches.
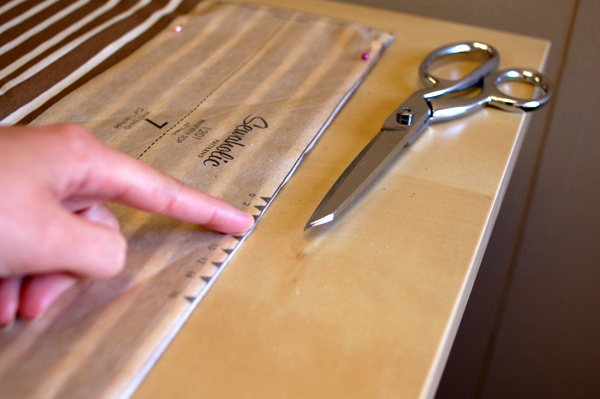
This is the best way to ensure your band has a nice, straight stripe running around the neckline. Think about which stripe you want on the fold, or in the centre of the band. On my sample I centred the white stripe along the band, with navy on either side. Depending on the width of your stripes, you might want a different look. It’s up to you!
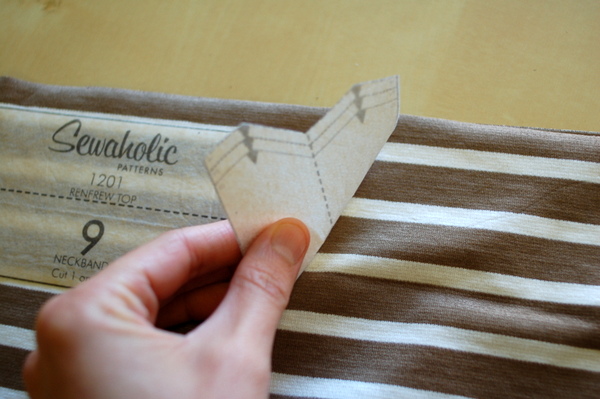
Use the fold line marked on the pattern piece as a guide. This is going to be the folded edge of the neckband that touches your skin. I’m going to have taupe on the fold, one white striped line down the middle of the band.
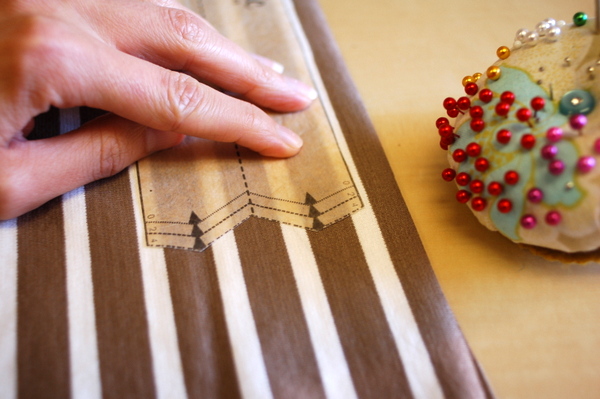
If you have a hard time visualizing the neckband stripe and what it will look like on the finished garment, why not cut two? Try placing different sections of the stripe in the middle, and sew up both bands to see which one will look better and which one will get attached on the final top.
Here are more blog posts about the Renfrew Top. (Get the pattern here.)
- Three Tips for Sewing Stripes
- What’s a Stable Knit Fabric?
- Cutting Knit Fabric: Making Sure Your Project is Cut On-Grain
- Thoughts on Cutting Knit Fabric
- Why Add Twill Tape to the Shoulders? Plus Possible Substitutions
- Sewing & Stabilizing the Shoulder Seams
- That Tricky Cowl Collar
Do you have any tips on cutting striped fabric to share? (Stripe-cutting disasters or cautionary tales?) Any great sources for buying striped fabric, online or at your local store?

Awesome post, Tasia! Thanks for all the info – stripes can be so intimidating :)
You’re welcome! I’m glad it was useful. Most of the work is in the cutting when you’re working with stripes. If the cutting is done carefully the sewing is easy!
Great post; thanks! One question though: how do you get the stripes on the sleeves to line up with the stripes on the bodice–do you just line up the edge/corner of the armscye/armpit with the corner of the bodice armscye/armpit? Thanks for any help!
Good question! I’d figure out at what point you want the stripes to line up – is it across the middle of the sleeve, as viewed from the front? That’s the most logical spot to me. Of course, I didn’t match my sleeves to my body at all, because often the stripes will only match at one stripe, and skew off above and below. (I hope that makes sense!)
But if you really wanted them to match – try matching about 2″ down from the sleeve cap/ shoulder point. Look at my non-matching sleeves in the Renfrew samples – http://www.sewaholicpatterns.com/product/1201-renfrew-top – and decide where you’d like the stripes to be lining up where they’re not. I would take your front piece, figure out where the dominant stripe is crossing into the armhole, and match that up against the sleeve piece. (Draw on the pattern piece if you have to, to mark the stripe placement.) Then I’d arrange my sleeve piece on the stripes accordingly.
I’ve sort of demonstrated that in the plaids matching post – http://sewaholic.net/matching-plaids-a-step-by-step-guide-on-plaid-matching/
Your fabric choice will make a difference here too – really wide or bold stripes will look funny if they’re not close to matching, small stripes will be totally fine if they’re off.
Hope this helps!
Thanks Tasia! The plaid matching post made sense (FYI, the middle few pictures didn’t load for me, but it might just be my computer/connection). Now I just need to try it!
Forgot to say – the armpit is probably the least accurate part to start matching, as the sleeve piece is cut to curve into the armpit at that point and doesn’t follow the stripe pattern at all there. Mid-sleeve is best!
In sewing class, I was taught that you can line up shoulders and bodice by matching the notches (that many patterns have): the notch that indicates “front” of a sleeve with the notch in the armhole.
If those two notches fall on a similar spot on the fabric, it should end up looking “right”, the lines my not really line up because of the angle they’re at, but when they line up at that spot, i’ts supposed to be “pleasing to the eye” :-)
At least that’s what my teacher claimed! :-)
Thank you for such a wonderful tutorial. I usually try to stay away from stripes, because of all the attention one has to take care…but the end results are wonderful! Worth the effort :)
m.
Thanks Tasia, for this information on cutting stripes. I am still having a hard time finding a striped fabric online since there are NO good fabric stores near me. I would like to find one from Telio, since you recommend them. I LOVE this brown stripe and would be tickled pink to find it or the dusty rose color. Have you seen either anywhere online? Or what fabric stores online sell Telio fabrics?
Hi Tina! I’ve seen the black/white, white/black and white/navy versions here at Hart’s Fabric – http://www.hartsfabric.com/saint-james-interlock-stripe-white-navy-61303.html
The taupe and pink versions I’ve also seen at Fabricana, in Richmond BC. They may do mail-order if you call the store! (Not sure if they still do that but I’ve heard they have done mail-orders in the past..) – http://www.fabricana.com/about_location.php
I know that Mood Fabrics and Hart’s Fabric sell Telio Fabrics, and also that in the original Telio post that they offered to respond to email inquiries from my readers if they wanted to find a particular fabric – if you have your heart set on the taupe stripe, try contacting them to see if they can locate some!
Thanks, Tasia. Once again you have been extremely helpful. I appreciate all your effort. I will send an email to Telio & see if they can help. I do really like the taupe stripe :)
I have been trying to locate where to buy some of this fabric, I live in Australia and where I live there are not many good fabric outlets so I would need to resort to purchasing it online. Your site is very inspiring and has given me the incentive update my wardrobe.
Hello Meryl, your question is so close to Tina’s that I’m going to copy-paste my answer here – I’m happy to hear you find my blog inspiring and you’re excited to update your wardrobe! It’s so much fun to make clothes you love to wear, there’s nothing like the thrill of being able to say ‘I made this myself!’
I’ve seen the black/white, white/black and white/navy versions here at Hart’s Fabric – http://www.hartsfabric.com/saint-james-interlock-stripe-white-navy-61303.html
The taupe and pink versions I’ve also seen at Fabricana, in Richmond BC. They may do mail-order if you call the store! (Not sure if they still do that but I’ve heard they have done mail-orders in the past..) – http://www.fabricana.com/about_location.php
I know that Mood Fabrics and Hart’s Fabric sell Telio Fabrics, and also that in the original Telio post that they offered to respond to email inquiries from my readers if they wanted to find a particular fabric – if you have your heart set on the taupe stripe, try contacting them to see if they can locate some!
Maybe a year or so too late, but we’ve just begun shipping small amounts of fabric to Australia (1-3 yards, depending on the fabric). Right now it’s running about $25 for the shipping, but that’s lower than it was before!
Great info post. I will be keeping this in mind next time I’m cutting stripe fabric.
thanks for posting this! this is going to come in very handy soon.
This might be slightly off topic, but I thought maybe someone one here can help me with a knits question: Can I substitute double knit fabric for normal knit and vice versa? Like if a pattern says “knit fabrics” (like the Renfrew), can I use either normal or double? Is there a huge sewing difference? Thanks!
Double-knits tend to be thicker and less stretchy. What happens in a true double-knit is that two layers of fabric are knitted and joined together permanently, so each layer is restricted in the amount it will stretch. A garment that’s designed to be super-close-fitting won’t work well in a double knit if it was designed for stretchier knits. Look for a ‘stretch guide’ on the back of your pattern, there will be a little ‘stretch from here to here’ guide and if your fabric can stretch from there to there, then it will likely work!
Hope this helps. Each knit fabric is going to be slightly different in terms of stretch and recovery, so your best bet is to guess and test, try making a sample garment in the exact fabric you plan to use first, or allow for adjusting when you sew the side seams, taking them in or letting them out as needed if your fabric is tighter or stretchier than expected.
I made a striped Renfrew recently! I totally fudged the stripes but it ended up working out! I will check this out next time I try the ol’ stripes :)
My fabric was annoying. The stripes were knitted into the fabric, but the fabric was all warped so they were crooked anyway. What a pain that was…
Also, I spent forever agonising about how to make the sleeves match, until I figured out you can’t really get them to match. What a waste of time, haha!
That’s such a nice sweater! I was about to cast on for a size 2 years for my daughter. Now I think that I may be able to finish hers before you publish this one, and I can start knitting that! I really like it :)