The back zippered pocket on the Pacific Leggings is one of the best features. Leggings and yoga pants rarely have pockets, and if they do it’s the small card-size pocket along the waistband edge. Not super useful, and definitely not secure.
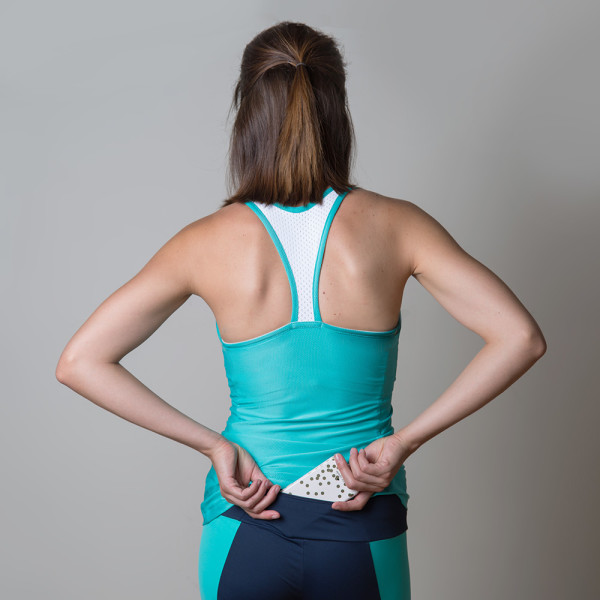
The Pacific Leggings are designed for practicality with a nice big back pocket. This pocket is large enough to hold a smartphone, even the big iPhone 6 and larger Android phones. It closes securely with a zipper so you can run, stretch and bend without giving your pocket a second thought. Who wants to worry about stuff falling out of their pockets while working out or running? Not me or you!
Today I’ll demonstrate how to sew the back zippered pocket. I decided to make a real pair of leggings using the navy fabric and neon red thread from the last tutorial post since I thought it looked cool.
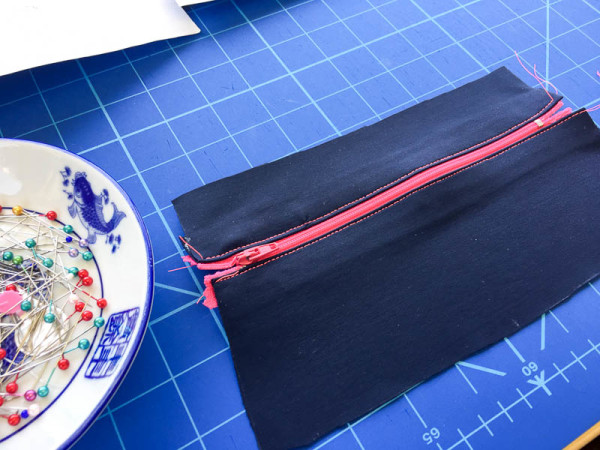
I also chose a hot pink zipper. Athletic wear is a great place to use bright contrast that you wouldn’t necessarily want in your everyday clothes. (Plus running shoes always seem to have bright and unusual colour combinations, so if you’re sewing for the actual gym, embrace the bold look!)
You’ll need:
- your waistband fabric pieces cut out and ready
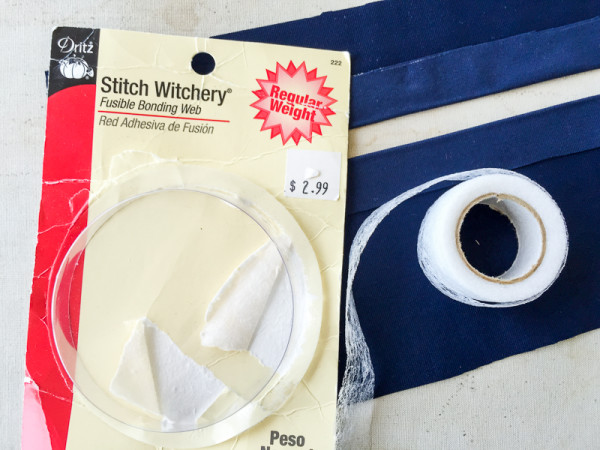
- fusible bonding web. The kind I used comes on a roll, 5/8″ (1.5cm) wide, called Stitch Witchery.
- Your zipper, shortened to fit the opening if necessary. You want to have 5/8″ (1.5cm) extra length on either side of the zipper when it’s inserted into the opening.
First, cut two pieces of fusible web the length of the zipper opening. Here’s what it looks like, with the packaging.
Fold under 5/8″ (1.5cm) along both edges of the pocket opening. Tuck the fusible web strip into the fold and press to ‘glue’ the seam allowance down.
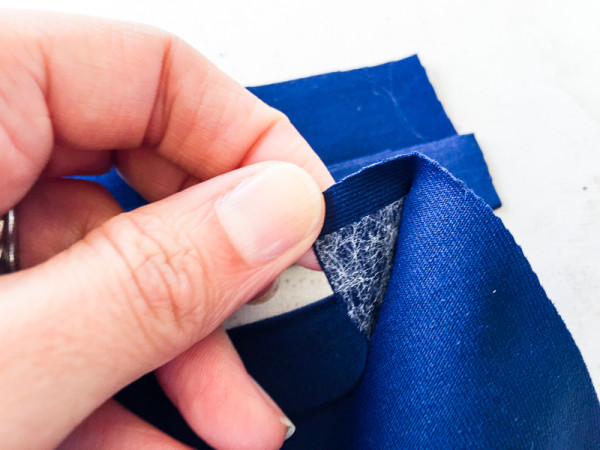
This step makes all the difference to sewing the zipper easily into stretch knit fabric. This is the most important thing to take from today’s tutorial post, if nothing else!
The fusible web restricts the stretch of the edge, making it easy to stitch the zipper in place. After all, you don’t need that edge to stretch since zipper tape doesn’t stretch. If you sew it normally, the stretch knit stretches and the zipper doesn’t, resulting in puckers and ripples. Even hand-basting it in place first doesn’t help enough to keep the edge flat. Trust me! I tried a few things and this approach gave the best results. Fusible web is the way to go.
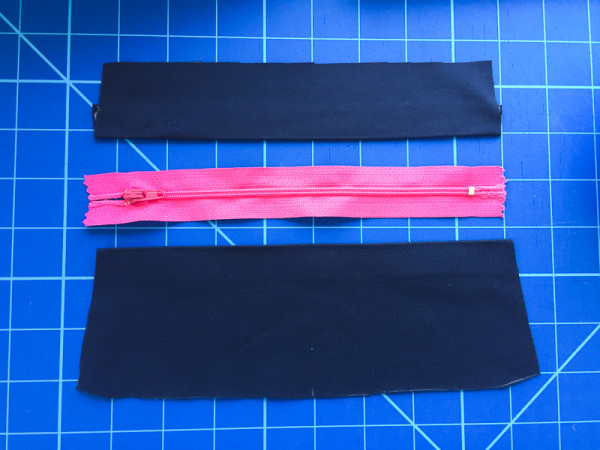
Line up your pieces as shown, with the zipper in between the two fabric pieces. The folded and glued-down edges of the fabric face the zipper. In the instructions, we tell you to place the zipper slider at the LEFT side. This is because the majority of people are right-handed, and so you’re likely to reach behind you with your right hand, grab the slider, and pull towards yourself to open the pocket. Smart eh? There’s a reason for everything!
Now if you’re left-handed and want to customize your pocket to match your handedness, flip it around! Place the slider on the RIGHT when the zipper is closed and then you can open the pocket easily using your left hand. (Reach behind yourself and try it out. What feels more natural? Ever had a pocket that you had to ‘push’ the zipper slider away from you to open, that’s the worst!)
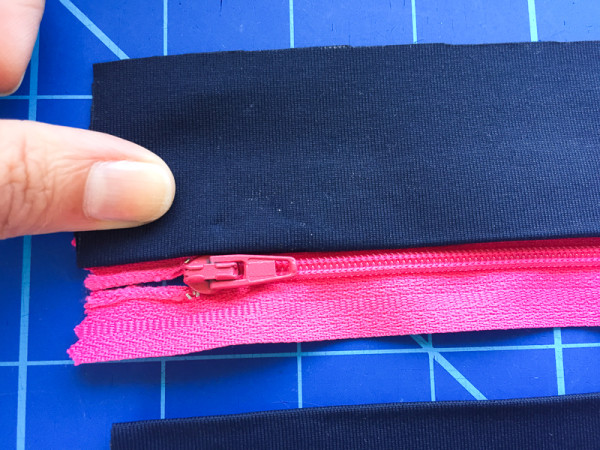
Once you’ve decided which way to place the zipper slider, pin or line up the top edge along the zipper. You want to get it fairly close to the teeth, but still with some space on either side of the teeth. Some zipper tape should be showing.
Mine are a little too close in this demo so I wanted to mention it. If you do sew them as close as I did, it’s OK but it means the side panels might be longer than the centre panel, and the seams will be off. You want about 1cm (3/8″) of zipper filling the space between the two fabric pieces.
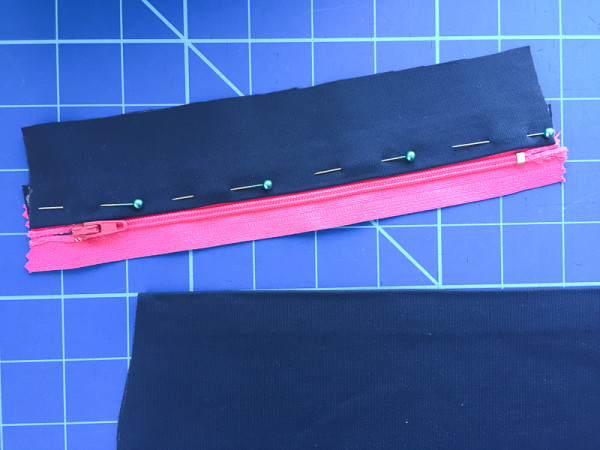
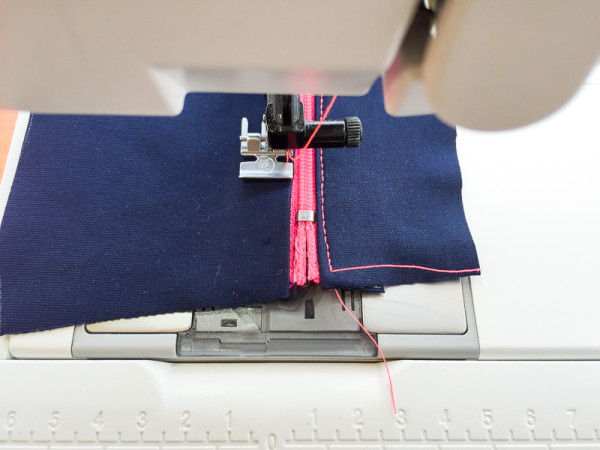
Using a zipper foot, sew close to the fold. Move the slider out of the way as you pass by, keeping the needle down if you lift the presser foot.
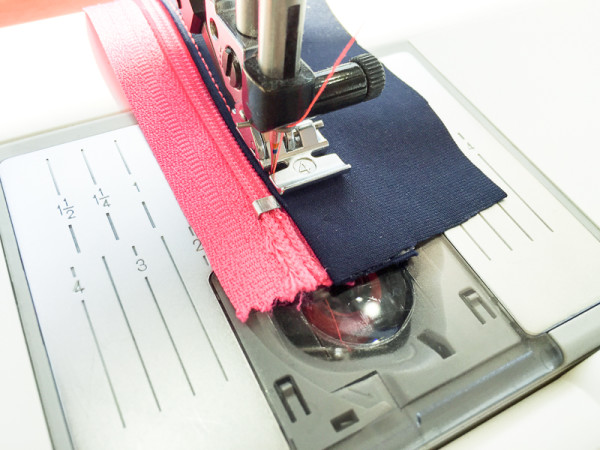
When you sew the other side of the zipper, sew the edgestitching in the same direction. This way if your fabric stretches at all, it’ll stretch the same way on both sides. I switched the zipper foot to the other side and sewed again from slider to zipper stop.
I’m pointing it out because once the zipper foot is on, I’m likely to turn my work and not switch the foot. In this case, you want to switch the foot.
Your zipper is now sewn between the two fabric pieces.
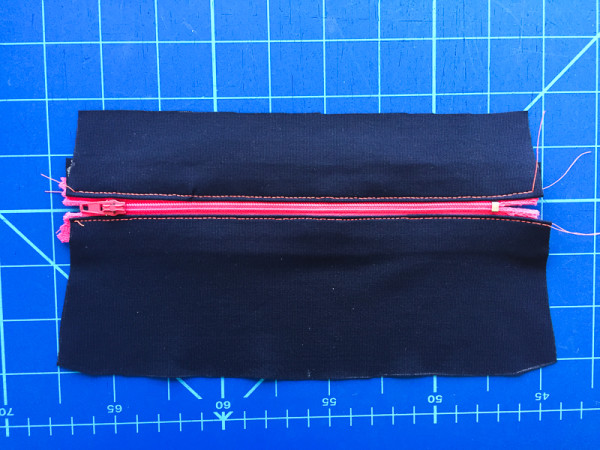
Sew the side waistband pieces to either side of the center zipper panel.
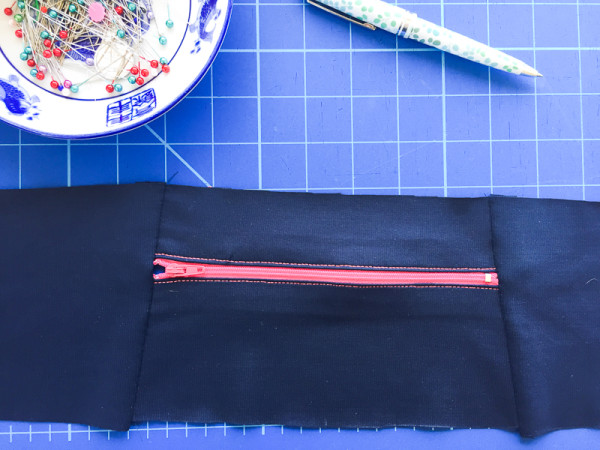
Continue with the Pacific Leggings sewing steps, right up until attaching the waistband to the pants. Before you do that, stitch in the ditch or topstitch along the centre panel lines.
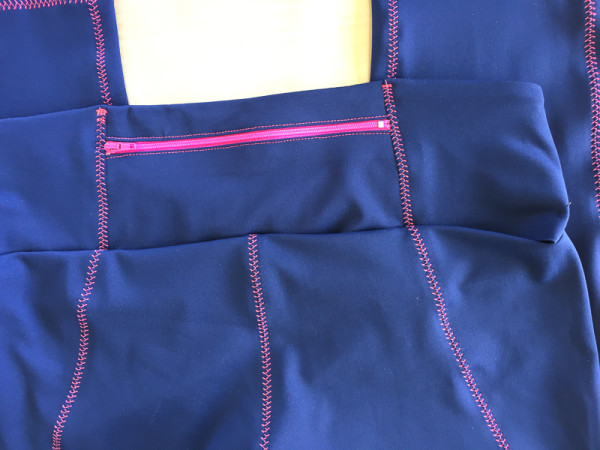
This is what separates the back pocket from the rest of the waistband. Otherwise, your pocket opening opens up to the entire waistband! Interesting to put your hand all the way around the waistband tunnel but not very useful in keeping the pocket’s contents in place.
I went ahead and finished the leggings after writing this tutorial. I’ll take proper photos, but look at how flattering they are! Here’s a photo of the back view. (For some reason it feels less awkward to post in black and white.)
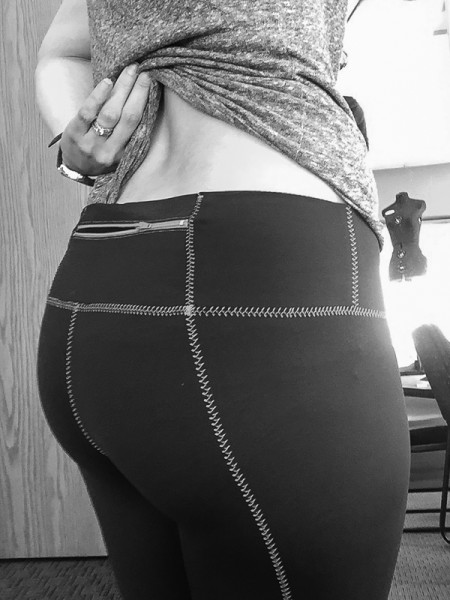
The thick nylon lycra smooths everything out, like shapewear, but in a visible garment. The seamlines accentuate curves in a good way, and if you wanted a more subtle look then I’d use contrast thread. I’m going to make a plain navy pair out of the remaining fabric and use matching thread.

It looks so easy to add in a zippered pocket. Thanks for the tutorial Tasia. And I do love the stitching….
Love the pattern and the stitching effect it a super idea
Looks awesome! Where’s a good place in Canada to buy a thick nylon lycra? And how many gsm do you consider to be thick?
I’d like to make a two color version, can you recommend fabric amounts for the two color version? Thanks for the zipper tutorial.
Brilliant! Gym pants without a pocket big enough for a phone are generally useless to me – this is perfect!
I recently made my first pair (blogged about them here: http://www.crozette.com/2015/11/homemade-running-tights-sewaholic.html)
This tutorial was super helpful. Would REALLY like a short tutorial about inserting the gusset, too. That part was tricky. I would have liked to do the whole thing on my serger because the zigzagged seams don’t lie as flat.