Not everyone likes pockets. Surprising, I know! I love pockets , but there are some instances where you might not want them in your sewing projects. If you’re using a very lightweight fabric, you might not want pockets in your garments, so you aren’t tempted to put heavy things in them and ruin your garment. Also, if you’re running out of fabric, eliminating pockets can often save a bit of yardage!
Today I’ll show you how to eliminate a slash front pocket. Here’s what a slash front pocket looks like:
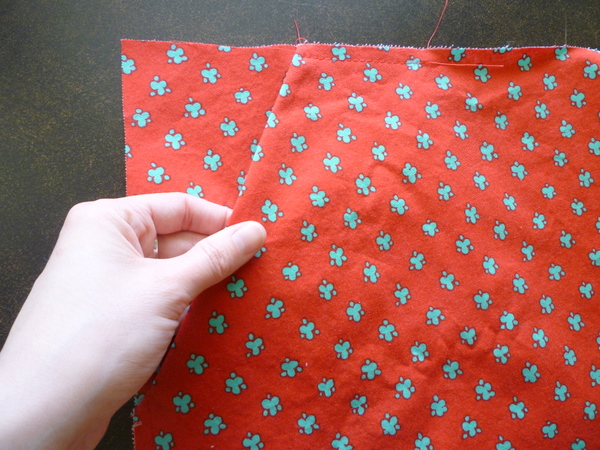 A slash front pocket has a slash for the pocket opening, so part of the front pattern piece is missing, and added to the back of the pocket. The section on the left, behind my hand, is actually attached to the pocket bag! The section on the right is the skirt front. All we’re going to do is add back in this missing slice, so our front is a full piece.
I’m demonstrating on the Crescent Skirt, but it’s not technically part of the Sew-Along. If you haven’t cut your skirt yet, you can use this tutorial to eliminate the pockets!
You can use this method to eliminate any slash front pocket on any pattern: skirts, trousers, shorts, dresses.
You’ll need:
- Pattern piece for the skirt front
- Pattern piece for the pocket bag
- Tape
- Tracing paper, pencil and scissors (to make your new pattern piece!)
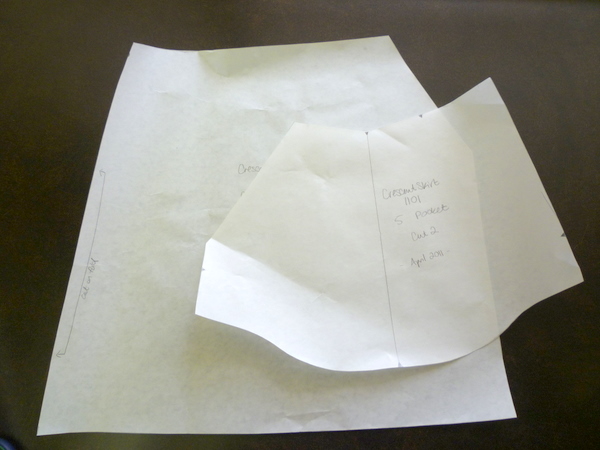 Note: some patterns may have TWO pieces to make the pocket bag. Our Crescent Skirt pattern has just one piece that’s folded to create both sides of the pocket bag. (See the fold-line drawn on the pattern piece?)
If you have two pieces, one will be smaller and one will be bigger. The smaller one will go on the inside (like the left side of our Crescent pocket bag) and the larger one is the one you want (like the right side of the Crescent pocket bag.) It should be pretty easy to tell which one to use – one will fill in the hollow of your skirt front and one will not!
First, lie the pocket bag on top of the skirt front, and line up the side notches.
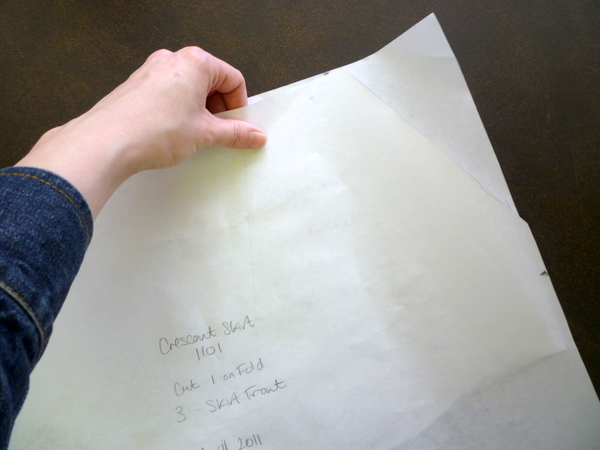 If you don’t have side notches on your pattern piece, look for other clues to help line up the sideseam. Maybe there are dots, circles, stitching lines? If there’s absolutely nothing, don’t worry! Do your best to line up the curve of the sideseam and fill in the slashed part where you think it should go.
Lift up the pocket piece, and match up the notches as shown: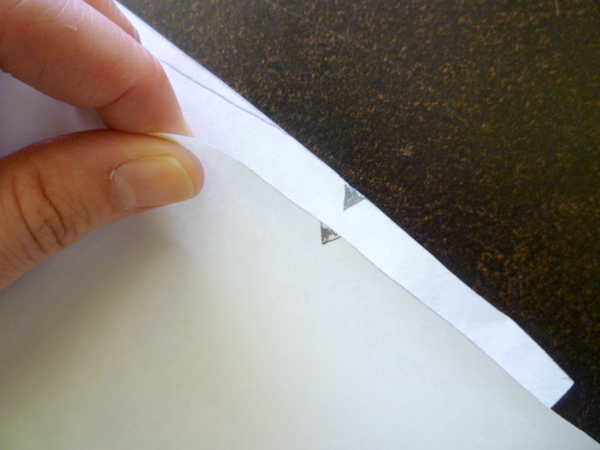
Hold this piece in place and line up the top edge of the pocket with the top edge of the skirt front, like in the photo below.
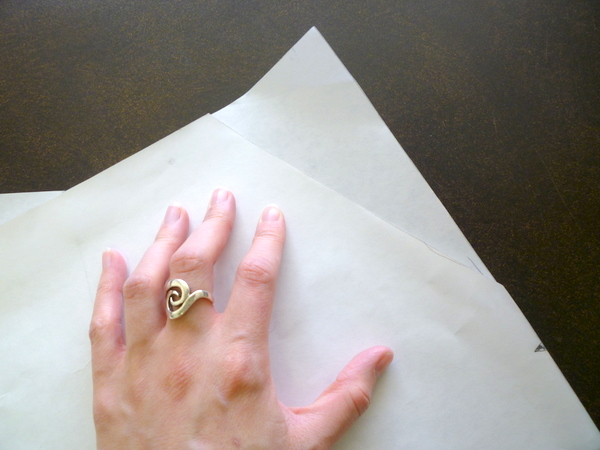 Sometimes, there’s extra room added to the pocket bags, so you can fit your hand in easier! In this case, you won’t be able to line up the top and side edges perfectly.
Make sure the top edge is lined up, and get the side as closely aligned as you can to fill in the gap on Skirt Front.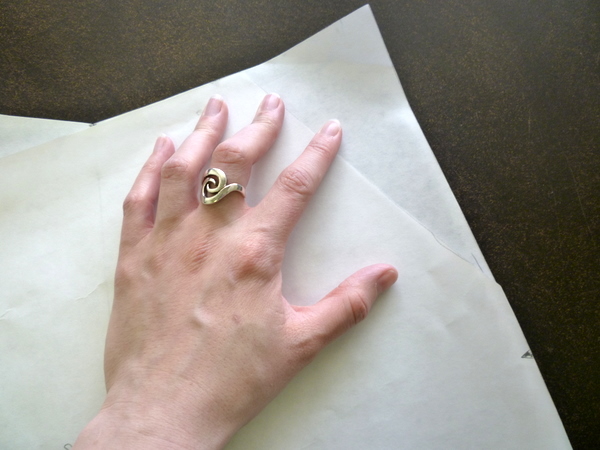 Tape this piece in place. You can either use this taped-together piece as a pattern piece, if this is a one-time thing and you don’t anticipate doing this more than once.
If you think you’ll always want to use this pattern without the pocket, I’d trace off a new Skirt Front piece and label it! (Ignore the little extension above the waistline there, just trace the Skirt Front with the filled-in section.)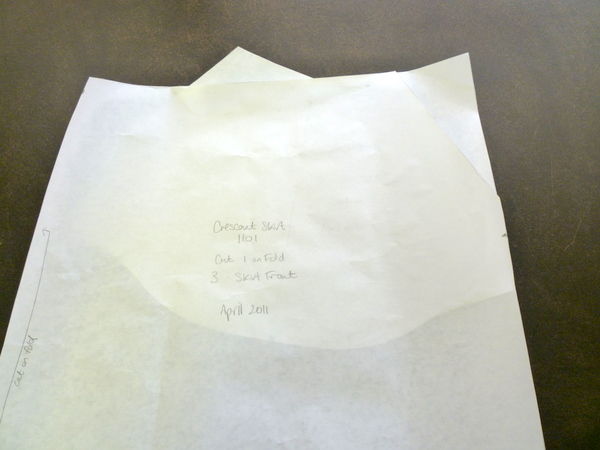 That’s it! Now you have a new Skirt Front with the pocket section filled in.
If you have a pair of pants with a slash front pocket, the same theory will work! Just replace ‘Skirt Front’ with ‘Pant Front’ and follow the same directions.
What do you think – pretty easy to do, right? Any questions, just ask!

I once had to eliminate pockets on a skirt because the pattern had what I considered to be a design flaw. The pocket bag angle just did not work. Never thought I would eliminate a pocket. Long story short. I didn’t wear the item much because it didn’t have pockets. I should have redrafted the pattern but I was in a hurry. However, I know many people who dislike pockets entirely. Your post will serve those people well. It’s all good.
Thank you very much, Tasia. This tutorial and the one on making the slash pocket is just what I needed. In fact all your tutorials have been most helpful. I’m in a hurry right now but will read this tutorial more carefully a little later.
Oh, I love the pockets, I would never get rid of them in this skirt! I tried to move ahead, but I got stuck at the step 18 and then discovered that my front wasteband facing is not as wide as the front, no idea how that happened. So I am redoing the facing. Do you think we’ll have a finished skirt for the 16th (as per schedule) or are we a bit behind?
Hee hee, I’m one of these weirdo anti-pocket people. In particular, I always eliminate side-seam pockets on skirt and dress patterns that have them. It wasn’t until I started reading sewing blogs that I realized I’m definitely in the minority on this point. Viva la pocket!
@Stacy: Welcome back! :) Yup, I love pockets if they’re well positioned. I don’t often like side-seam pockets if they bulge or don’t lie flat, that’s a pain!
@Judy: Great! Just shout if you need help when you get back to sewing. :)
@julia: Hey Julia! I answered your question in today’s post, we’re running about a week behind but we’ll have another Sew-Along update tomorrow, too! I’ll try to keep it moving along at a good speed. :)
@Corinne: Exactly! That’s the great part about sewing your own clothes, you can make them with the features you like, and eliminate the ones you don’t!
Thanks for the illustrations. They make it much easier to follow the instructions.
I’m definitely a no-pocket person. I’m also a seamstress and dislike the look of a skirt or trousers-but OK for jeans- with pockets filled. While we need to carry ID and some form of funds, it ruins the line of the skirt to put keys, cell, etc in. I do add a small flat pouch with hook and loop closure sewn the the inside of slacks waistband for my ID. If you do this, remember to check that the opening is long enough to pull out the ID/license/CC without having to undress. The nice policeman might wonder why you are removing your skirt. Cordially, Nehmah – who likes vintage. Why? When I was young in the 1940-50s, it wasn’t vintage, it was fashionable!