 Today’s all about View B. If you’re making the ruffled Pendrell Blouse, this post is for you! View A and C sew-alongers, take a break and relax. The next sewing post will be for ALL views: A, B, and C!
We’re going to gather both of our ruffles – the seam ruffle and the sleeve ruffle – and attach the seam ruffle to the front-and-back section we made in Sew-Along Post #9. (The sleeve ruffle gets attached later on, in case you’re wondering!) I’ll also show you how to stretch the ruffles to create a different look.
Need to catch up on previous Sew-Along posts? Here are the links:
- Pendrell Sew-Along #1: Prewashing your Fabric
- Pendrell Sew-Along #2: Measuring and Choosing Your Size
- Pendrell Sew-Along #3: Shortening the Blouse Length
- Pendrell Sew-Along #4: Altering The Hip and Waist
- Pendrell Sew-Along #5: Princess-Seam FBA (Full Bust Adjustment)
- Pendrell Sew-Along #6: Cutting Your Fabric
- Pendrell Sew-Along #7: Bonus Post! Cutting Scalloped-Edge Lace
- Pendrell Sew-Along #8: Underlining The Pendrell Blouse
- Pendrell Sew-Along #8.5: More on Underlining & Basting
- Pendrell Sew-Along #9: Sewing! Plus, Finishing Your Edges
- Pendrell Sew-Along #10: Constructing and Attaching the Draped Sleeve
First, grab your Sleeve Ruffle (4) and Seam Ruffle (5).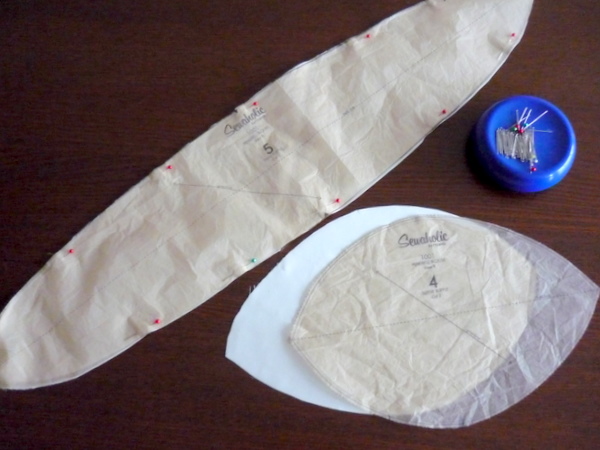
The process for gathering these pieces is exactly the same, so it doesn’t matter which ones you start with! I’ll follow the instruction sheet and start with the Sleeve Ruffle – the smaller, rounder piece.
Fold the Sleeve Ruffle in half, along the fold line, matching notches. I made a small snip at the fold line so it’s easy to fold along the line.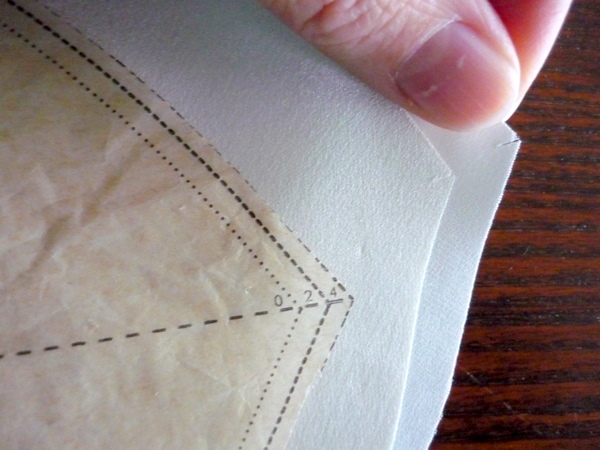
Fold along the fold line, matching notches. Pin at the top notch first, so that it’s aligned properly, and then pin all along the raw edges.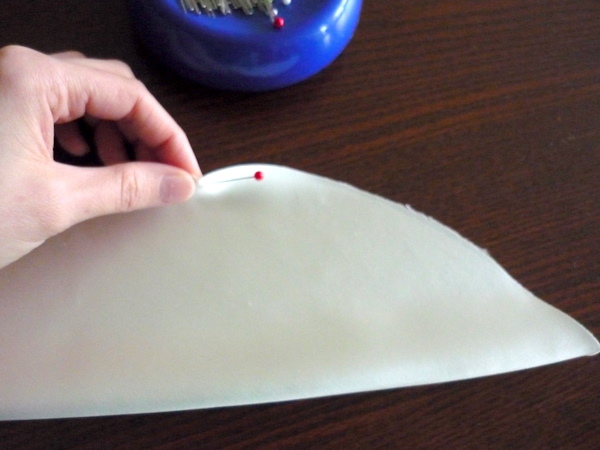
Then pin the edges together just above the fold line, as shown below: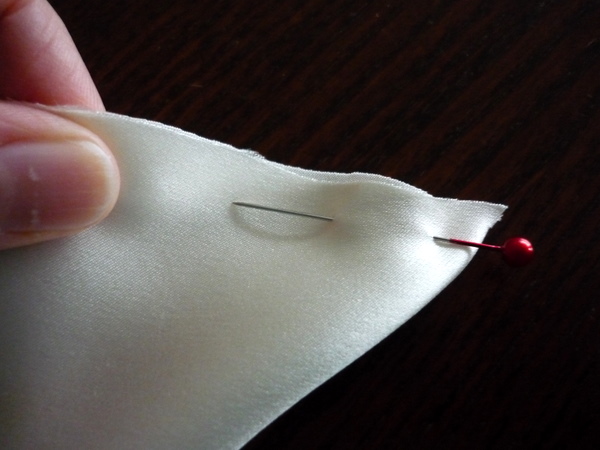
Now pin all along the raw edges. If you’re worried about pin marks on your fabric, keep the pins within the seam allowances, 5/8″ (1.5cm) from the edge.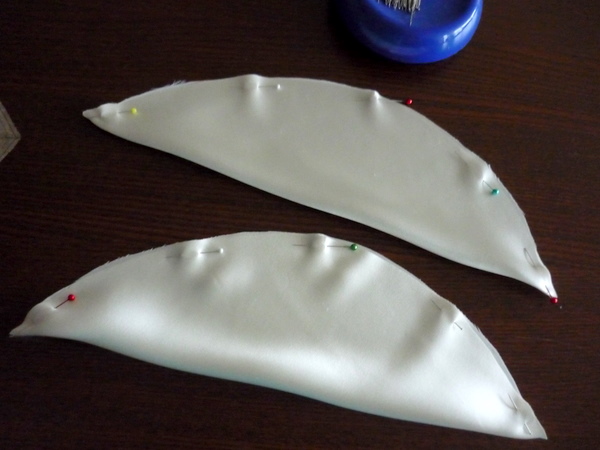
Baste along the raw edges of each piece. These basting lines are also going to be our gathering stitches, so leave long tails! We’re going to stitch two lines of basting stitches, and then pull them up to create gathers.
An easy way to sew gathers so they don’t show is to stitch the first line 1/2″ from the raw edge, and then stitch the second line halfway between this one and the raw edge. Here’s the first row of stitching: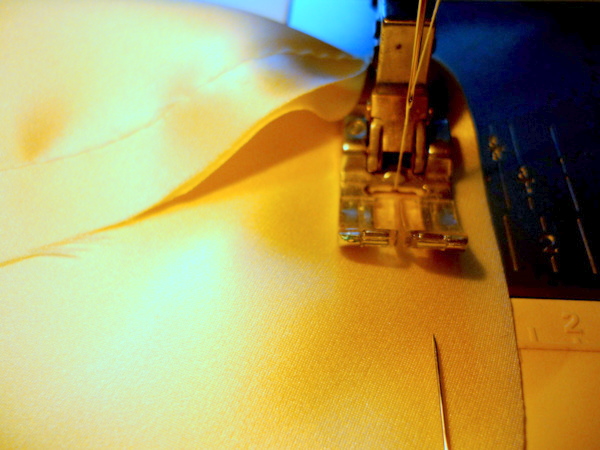
Here’s the second line of gathering stitches. I’m aiming to keep the stitch line half way between the first line, and the edge of the fabric.
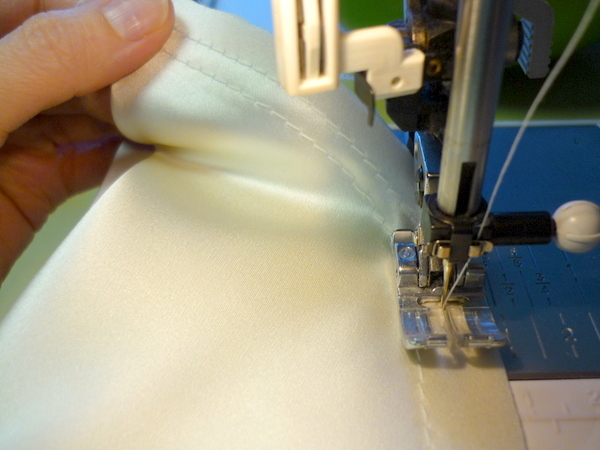
Repeat with the other Sleeve Ruffle piece.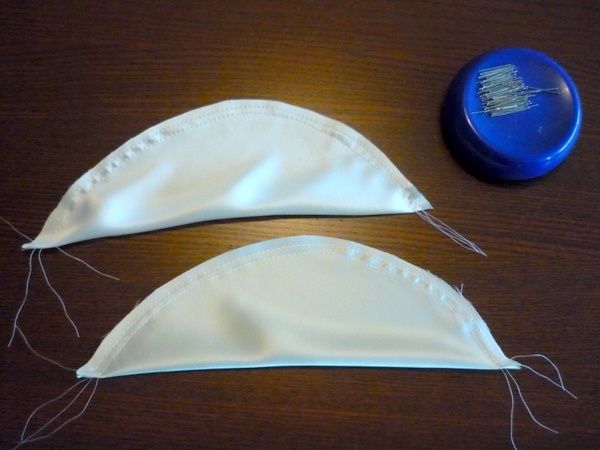
Gently pull on both of the bobbin threads to gather the edge.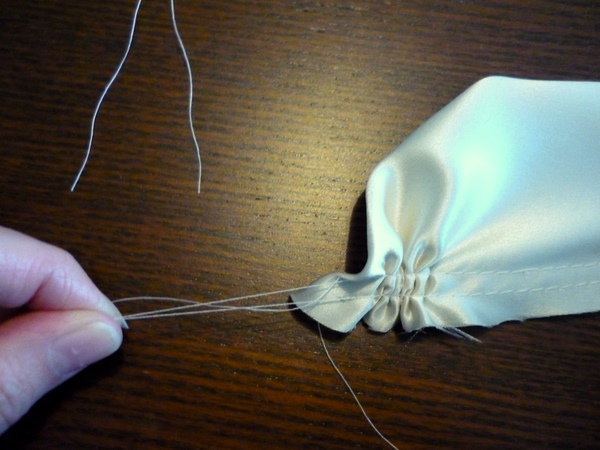
Before and after gathering: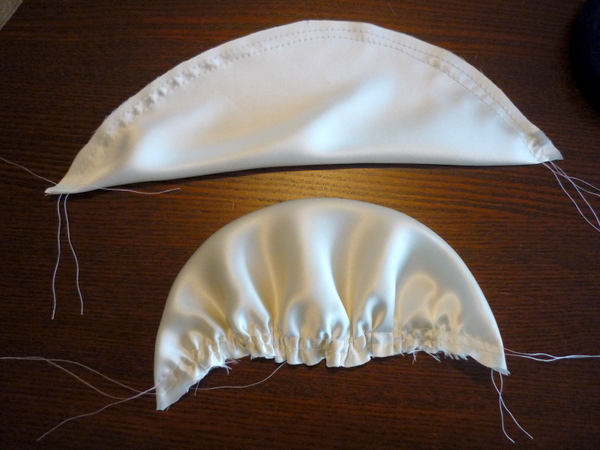
Set aside the gathered Sleeve Ruffle pieces, we’ll attach them to the blouse later on. Repeat the gathering steps with the Seam Ruffle pieces: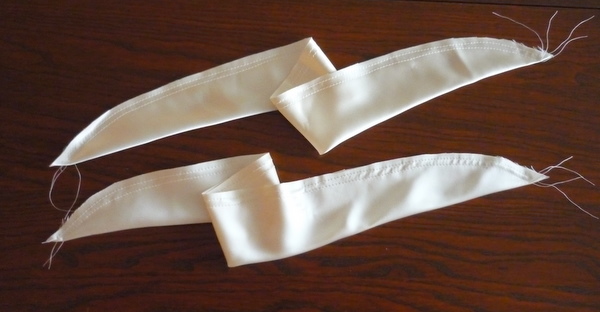
Now, here’s where you have creative freedom! I’ve marked where the gathers stop, according to my sample blouses. But you can stretch these ruffles out as long as you want! Simply loosen the gathers, and spread the seam ruffle further down the princess seam.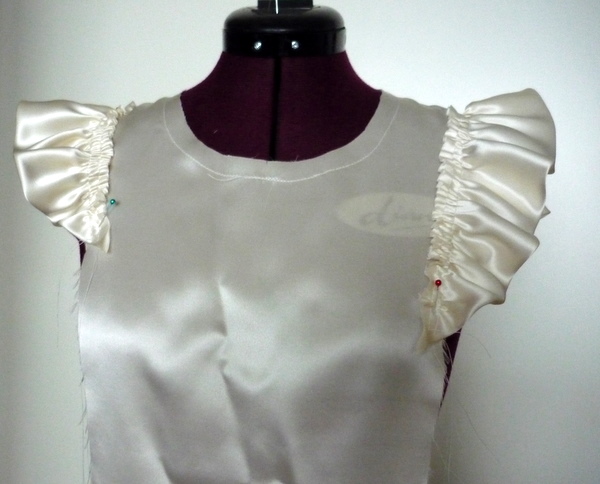
Play around, and experiment with different lengths of ruffles. Originally, I was going to leave these ruffles extending way farther down the body, but liked the look of the smaller, tighter ruffle best. It’s up to you!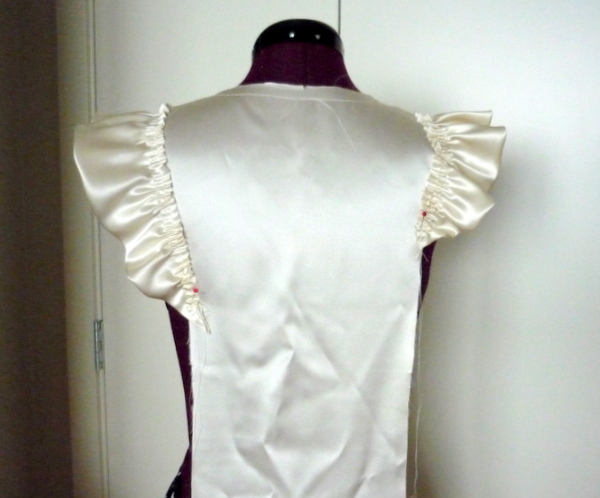
It’s easiest if you have a dress form to work with, but if not you can still test it out on yourself. Just be careful not to stretch out the neckline. The staystitching will help it keep its shape! Also, if your fabric is prone to fraying, then handle with care.
Once you’ve decided where you want the ruffles, let’s baste them to the front-back panel. It’s OK if you like them exactly where they’re designed to be! I wanted to give you suggestions and ideas to customize your blouse.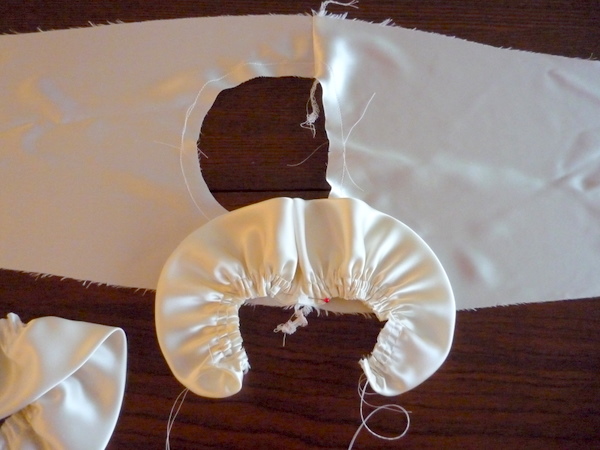
Pin the seam ruffle to the front-and-back panel, matching the notch to the shoulder seamline. Once this point is pinned, pin each end of the ruffle to its end point.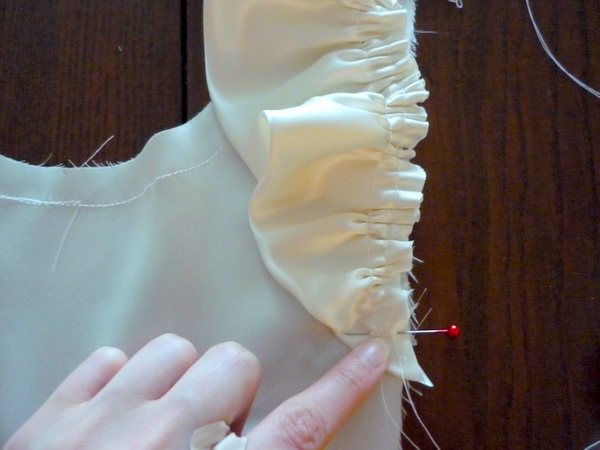
If you’re making the blouse exactly as designed, that point will be the circle markings. If you’re changing the seam ruffle length, be sure to make both sides of the blouse, left and right, the same length! Distribute the gathers evenly between end points, pulling up basting threads if the ruffle is too long, and releasing the gathers if the ruffle is too short.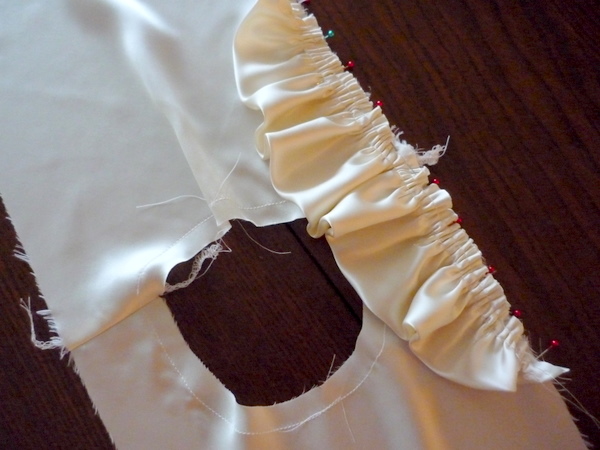
Baste seam ruffle to blouse front and back. I like to baste in between the two rows of gathering stitches, adjusting the gathers as I go so there aren’t any obvious tucks or un-gathered sections.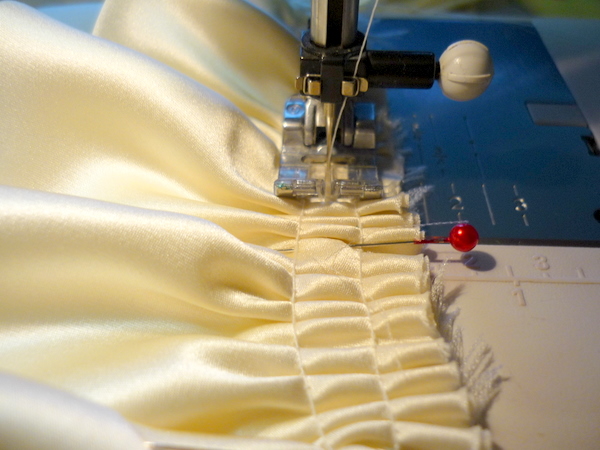
Repeat with the other side of the blouse. Here’s what it will look like, at the end of these steps: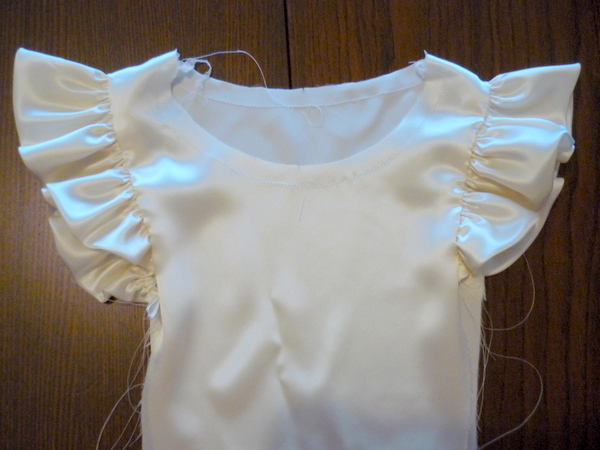
Here’s what it looks like so far, on Diana. It’s coming together and starting to look like a real blouse!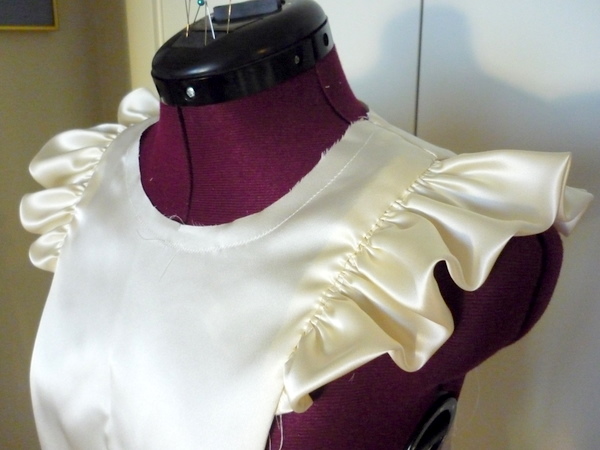
Any questions or tips to add to today’s post? Leave a comment below!

What’s the reason for seam ruffle and sleeve ruffle? Where does each go? I just see one in the pic
@Lisa: Hi Lisa! Ah, you’re right, I should have mentioned that one gets attached now, and one gets attached later. I find it easiest to do all the gathering at once, so I don’t have to keep changing the machine settings.. that’s why we gather both pieces, but only one is attached to our blouse in today’s sewing steps. Hope that makes sense! I’ll add some notes to the post so it’s clearer.
Hi Tasia, I’m not making the ruffled version, but I was wondering how to tell which of the threads is the bobbin thread and which is the top thread? Is there a simple giveaway to look for?
@Misty: Hi Misty! I often pull my gathering bobbin threads just a little bit as soon as I take it off the machine, so I can tell which is which. Or, I’ll keep the needle-side-up and bobbin-side-down when moving the piece around, so I know the bobbin threads are on the bottom of the piece.
Other than that, there’s no simple giveaway! Another trick is to tie the two bobbin threads together in a knot right away, so that you pull the knotted two threads to gather. (Like I did here:
http://sewaholic.net/gathering-an-edge-using-machine-stitches/)
It’s not critical to only pull bobbin threads, if you accidentally pull top threads instead, the gathering will still work. Hope this helps!
Hi Tasia,
Just a note that everything is 50% off at Dressew tomorrow. :)
Now’s my chance to get some fabric for the Pendrell.
@Cat: Oh awesome! Thanks for letting me know – 50% off already good prices is an excellent deal!
Just two questions– when I basted the seam ruffle to the blouse by basting in between the two gathering lines on the seam ruffle, I can see the 1/2 inch gathering line on the right side of my blouse. Is this normal? Will this gathering line be torn out later? Also, why is the seam ruffle “basted” to the blouse and not sewn on? Will it be sewn on later? Thanks.
I usually sew my basting stitches with contrasting colors, contrasting with the fabric so I don’t mix them up with the real stitches. And with a different color in the bobbin than on top, so I know which one to pull for gathering.
Hi again, now I am actually doing it, I am wondering which is the back and the front of the ruffle. They are not exactly the same shape at both ends, are they? One is “pointier” than the other.
Thanks in advance.
@julia: ok, just realized I am talking about the sleeve ruffle. But the questions is still valid, it’s just for later. :)
@auzzi: Hi! Don’t worry, the basting stitches are visible right now, but we’ll sew the seam for real, later on, and that will hide the basting stitches. (If any of them are visible still, you can remove them carefully once the seam is sewn.) And yes, we’ll sew the princess seam later on, which will secure the seam ruffle permanently. That’s why we’re just basting it in this step!
@julia: Hi Julia! There’s no real right and wrong side to the ruffle, when it gets gathered up and on the bias. So it doesn’t matter which faces the front and which faces the back. I’ll cover sewing on the sleeve ruffle either tomorrow or Friday!
New reader here! I’m not participating in this sew-along, but maybe you can provide suggestions for a problem I always have with gathering – or rather, with sewing gathered seams. I almost always end up sewing some of the surrounding fabric into the seam, and have to go back and tear it out, with much frustration. Maybe it’s because the gathered fabric always curls a bit around the edge, but there’s just always a bit that’s eager to jump out in front of the needle and get itself sewn in.
Any suggestions for avoiding this would be appreciated (although I’ll warn you I’m working on an antique machine, so there’s a limit to what I can accomplish).