 It’s here! Finally, today we get to start sewing. Are you pumped or what? Thanks for all of your patience through the pattern adjustment and preparation posts. While I’m sure they were greatly helpful to some of you, the rest of you have been itching to start stitching away. So let’s get to sewing!
Still catching up? Here are the first posts:
- Pendrell Sew-Along #1: Prewashing your Fabric
- Pendrell Sew-Along #2: Measuring and Choosing Your Size
- Pendrell Sew-Along #3: Shortening the Blouse Length
- Pendrell Sew-Along #4: Altering The Hip and Waist
- Pendrell Sew-Along #5: Princess-Seam FBA (Full Bust Adjustment)
- Pendrell Sew-Along #6: Cutting Your Fabric
- Pendrell Sew-Along #7: Bonus Post! Cutting Scalloped-Edge Lace
- Pendrell Sew-Along #8: Underlining The Pendrell Blouse
- Pendrell Sew-Along #8.5: More on Underlining & Basting
Let’s begin sewing! By now you have cut out your fabric, any underlining pieces if necessary, and are ready to sew. So let’s get started! I’ll be sewing View A today, the teal polyester version. I’ll show different versions depending on the steps we’re sewing – and how my photos turn out, if I’m sewing at night or during the day! Hopefully that’s not too confusing for you guys!
Pre-Sewing Steps:
- Choose matching thread
- Wind a bobbin in matching thread – I always fill my bobbin up completely!
- If you’re using a serger – change your serger thread to your closest matching thread colour
- Grab your tools: pins, scissors, tape measure
Let’s begin! Today, you’ll need your Front and Back, pieces 1 and 2.
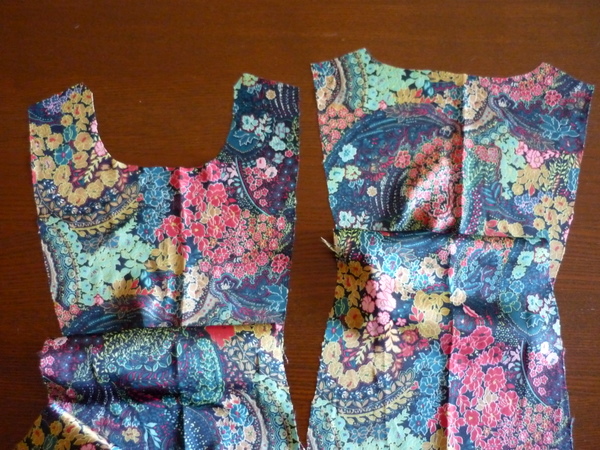
The first step is to staystitch your front and back neckline. Staystitching is a permanent row of stitching, used to stabilize the neckline. (Or waistline, or other area that might stretch out as we work with it.) Staystitching uses the same stitch length you would for stitching seams, on my machine the setting is 2.5 for regular stitching and 4 for basting.
So, we’ll staystitch both the front and back necklines! Start at the highest point, at the shoulder and work downwards, towards the centre.
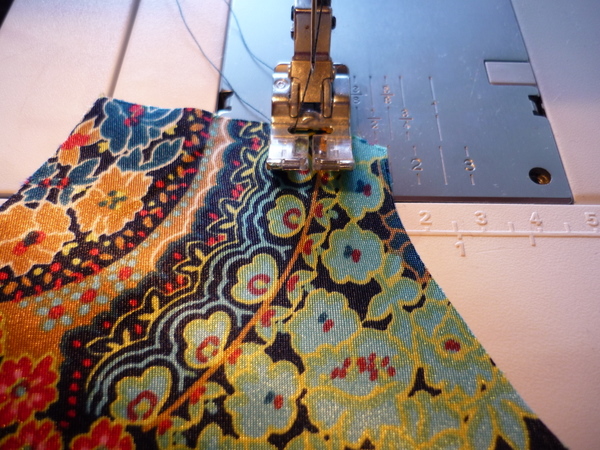
You want to staystitch just inside the seamline. Here’s a very close-up photo, showing how I’m stitching just inside the 1.5cm line.
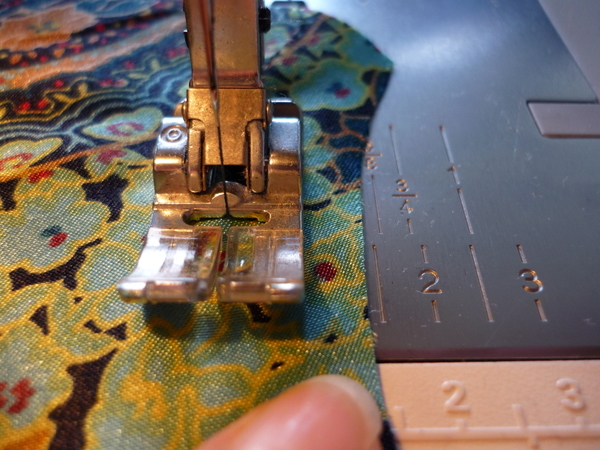 When you get just past the centre notch, stop your stitching. Stitch perhaps four or five stitches past centre, and then stop. Don’t backstitch at this point.
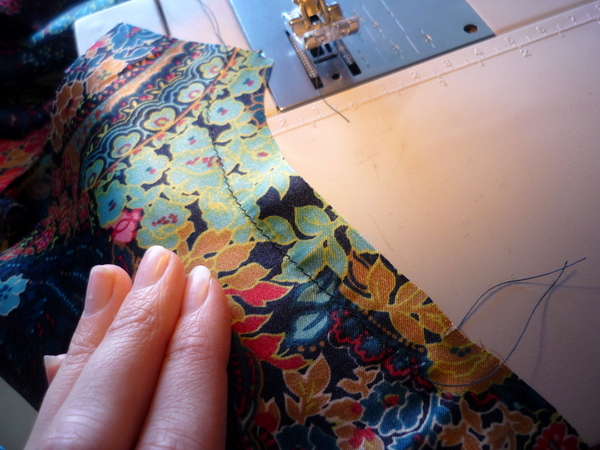
Now, turn your piece around so the wrong side is facing up. Starting from the shoulder again, staystitch to centre front. Overlap a few stitches at centre front, over the previous staystitching, and stop.
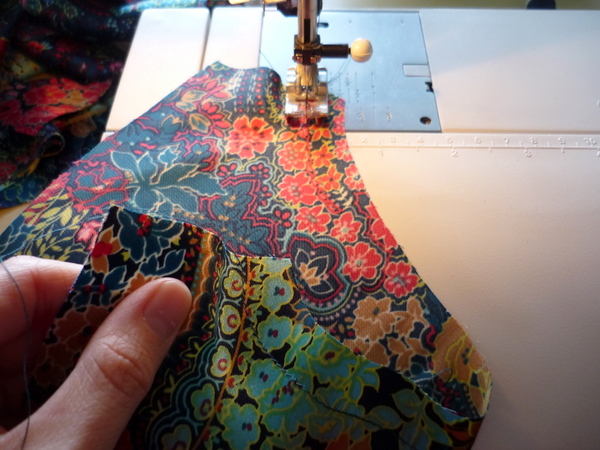 Here’s what your finished staystitching should look like:
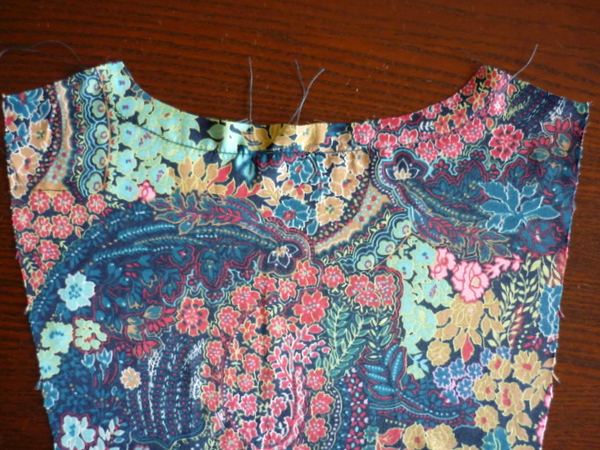 Repeat with the Front piece, staystitching from the shoulder down again, and then turning the piece over to stitch the other side.
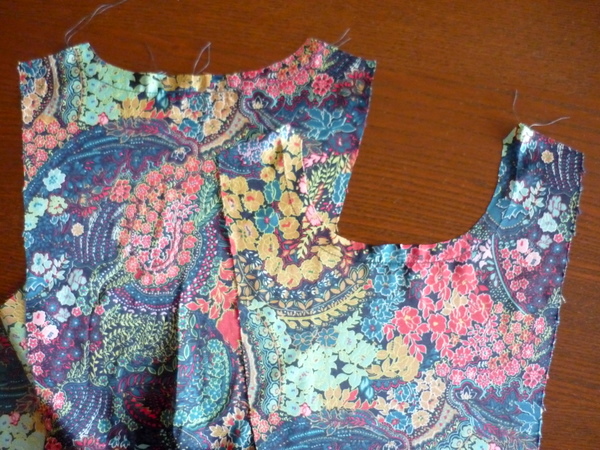
Once the staystitching is in, let’s keep going! The second step is to sew the front to the back at the shoulder seams.
Line up the front and back pieces, right sides together and wrong sides facing you. Pin along the shoulder seam, as shown:
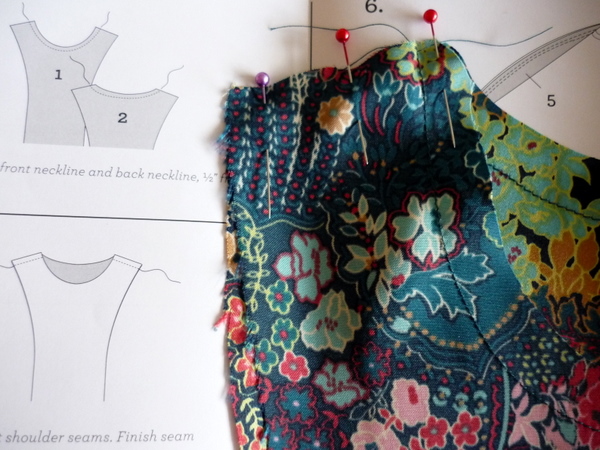 Repeat with the other shoulder seam, so they’re both pinned and ready to go.
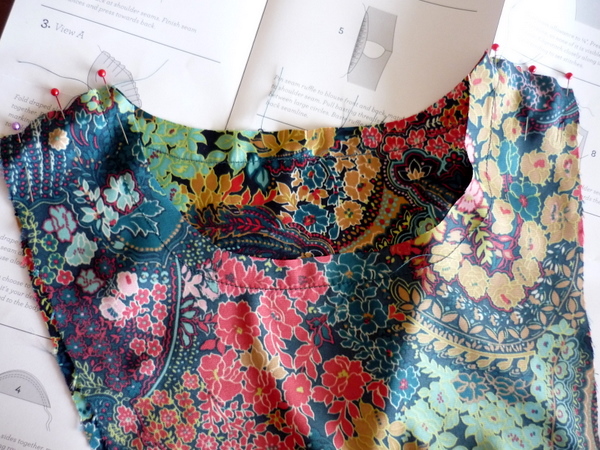
Stitch the shoulder seams, taking a 5/8″ seam allowance (1.5cm), and backstitching at both ends.
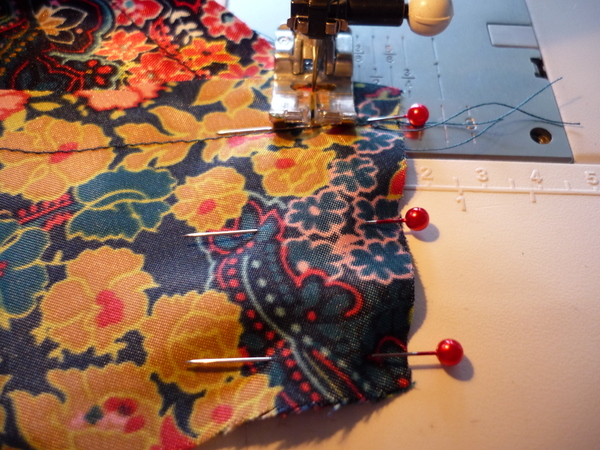
If your fabric is slippery like mine, be careful when backstitching! You might want to stitch in one place, instead of backstitching. Simply set the stitch length to zero when you start and finish the seams, and increase it back to 2.5 when stitching the actual seam.
Here are the shoulder seams, after stitching:
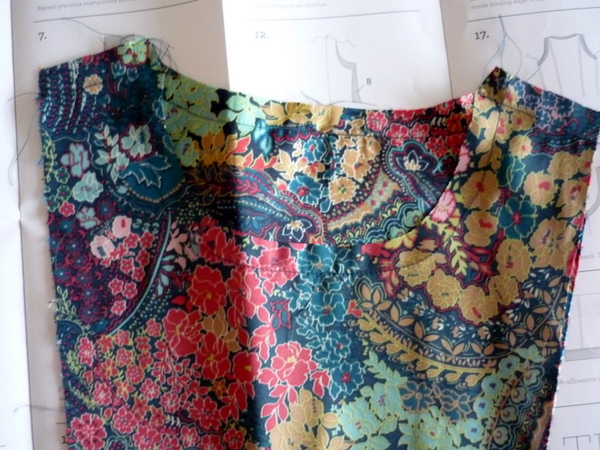 Next, finish the edges of the shoulder seams.
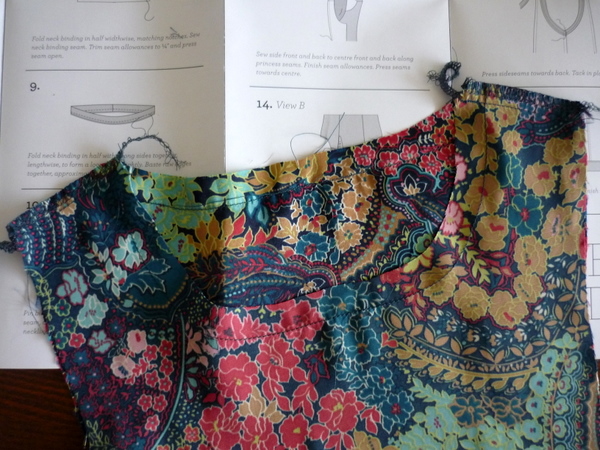
Since these are easy steps, let’s talk a bit about edge finishes. If you have a serger, lucky you! Finishing your edges will be fast and easy. If you don’t, there are a few choices you have to finish your edges.
Here are a few links to check out, though I’m sure there are more! (Let me know if you have a link to add to this list!)
- Finish Seam Edges Without A Serger (from Burdastyle)
- Seam Finished Simplified (from Sew, Mama, Sew)
As always, pipe in with your favourite edge finishes and techniques! I’ll be back with a post on the next few sewing steps.

I’m not doing the sew-along but I Know it’ll be very helpful when I get started on my own version (i got the pattern from Spool of Thread a couple weeks ago).
I just wanted to say, your fabric for this version is stunning ! I definitely want to find a similar colorful fabric for mine. This will be the start of me trying to add more pretty tops to my wardrobe…
I knew I would have stupid questions once the sewing actually begins: so 1. you don’t mention backstitching when staystitching the neckline, does this mean we shouldn’t? and 2. it looks like you finished both edges together on the serger, why not finish them seperately and press them open, or is this without importance?
Hi Tasia, thanks for this post. I have a general question about finishing the edges. When do you do it? Often times when making a dress, I will serge to late or too early. Once I tried to serge everything early and lost my markings. Then I serged too late after putting in a zipper and couldn’t. armholes can be tricky too, Is there a rule of thumb for this, just wondering? I wish I was sewing with you all, this sew along rocks.
This will be so helpful when I start to sew and thank you for your patience in answering all our questions. Here are mine if that’s ok:
1. I hope I read this right – you staystitch on both sides of the fabric working from the end to just past the centre, so 4 distinct lines of stitching (if you see what I mean) for each panel. (Haven’t heard of staystitching both sides so wanted to check). Is it sewn in halves so as not to stretch the fabric?
2. When joining you don’t sew right up to the end, the stitching line starts at 1.5 cm in at both sides.
3. Do you recommend that we trim the seam allowance before finishing the edge?
I don’t have a serger so I’ll zig zag. I use my overcast foot for zigzagging so I can line up the edge of the fabric. However I have broken a needle before doing this before as it sometimes hits the little metal bit!
Thanks again.
Hi Everyone! Here are the answers to your questions, don’t be shy about asking what you might thing are dumb questions. That’s what I’m here for!
@petite josette: Sweet! You bet, all of the sew-along posts will be here whenever you’re ready, plus all of the helpful comments and feedback! About finishing the edges, yes I did finish them together instead of pressing them open. If you prefer, you can finish them separately and press them open! It’s a habit of mine to serge seam allowances together just to make it faster and easier, and more like ready-to-wear. I hope that helps!
@gina: Finishing the edges all depends on the edge and the stage in the garment! For some garments, you could serge all of the edges before you start sewing, but it’s true you will lose your markings. I can’t think of a hard and fast rule as to when to finish your edges – except right before you’re about to make it hard to access the seam! For example – in today’s post, if we don’t finish the seam allowances now, they’ll be really hard to finish after we attach the sleeve drape or sleeve ruffle. However, technically we *could* have finished all of the seam allowances on the front and back piece, but not only would we lose our markings, we might shave off some of the seam allowances so our pattern wouldn’t be as accurate. (Does that make sense?) I try and wait for as long as I can to serge, but when I’m about to sew an intersecting seam on top, or attach a piece that will make it hard to serge, then I know I need to finish the seam allowances first. It takes practice, knowing the right time! And I’ll admit, I’ve made things the first time around where a section of seam allowance isn’t finished because it became enclosed and hard to get to.
@Sewingdina: Yes, you’re correct! 4 distinct lines of stitching. The reason you start from the top corner and work down, is so that the neckline doesn’t stretch more on one side. If you went all the way around the neckline, when you come back up the other side you’re likely to stretch the neck opening, unevenly. It’s only a minor difference but it helps to get in the habit of stay-stitching directionally!
When joining… Sorry I am a bit confused! Do you mean when the staystitching overlaps the previous stitching? If so, then yes you overlap the stitching a little, but it goes from fabric edge to fabric edge. If you mean on the shoulder seams, then the stitching does go from edge to edge, not 1.5cm in from the edge. (Let me know if I’m not understanding this right.)
Trimming the edge before finishing? That all depends on what method you’ll use to finish your edges. For serging, it trims as it sews, so no need to trim. If you’re going to zigzag, there are a couple different ways to do it:
1. Trim the seam allowances, and then zig-zag the edges. This might be hard to do if your fabric is slippery and frays!
2. Zigzag in the middle of the seam allowance and THEN trim the seam allowance close to the edge of the zigzagging.
3. Zigzag right along the raw edge, letting the zigzag stitch act like a serger and have the last ‘zag’ go off the edge. No need to trim if you stitch right along the edge!
I’d suggest testing a few options on scrap fabric, even just a 4″ square, to see what you like and what’s easiest to do in your machine. Hope this helps!
@julia: Hi Julia! No, you don’t need to backstitch when staystitching. Just start sewing! The staystitching will do its job without the need to backstitch.
That’s a very interesting point about the stay stitching, it makes perfect sense but I’ve never heard it before. Thanks!
@Rachel: Ah, isn’t is great to keep learning new things? I read it in a book, can’t remember which one of course, but I used to just staystitch all the way around my necklines and if one side stretched a little, I’d steam it back into place. This method really helps keep both sides even!
Hey Tasia, off topic but while I remember – a great topic for your sewtionary in the future would be one on knots – like when starting and finishing hand stitching etc.
Staying on Rachel’s off-topic: this link on tying a knot made me SO MUCH less reluctant to sew anything by hand. Apparently tying the knot was a really annoying roadblock.
http://heatherbailey.typepad.com/photos/my_favorite_knot/
Thanks very much for the helpful reply Tasia. With regard to my 2nd unclear question you guessed right the second time. Patterns I’ve used don’t really make this clear and I have always started 1.5cm in. Now I know!
@daiyami: Oooh GREAT knot tutorial! Now I want to try that out myself. Thanks for sharing!!
@Sewingdina: Oh good, glad I could help! Always sew from edges to edges, unless there’s a marking or instruction to start mid-way through the seamline. Which will usually be marked with circles and say something like ‘stitch from small circle and stop at large circle’.